

Setting up your Sessionboard site
Why use it
Section titled “Why use it”A Site gives submitters one branded address for everything they do with you: they sign in once, find the open programs and forms, and come back to track their entries, so you send a single link instead of one per form. For an organization that runs several events, the Site’s Events page turns the same address into a public list of those events, each linking to its own Site or registration page.
Where to find Sites
Section titled “Where to find Sites”Sites are the public-facing portals where submitters sign in, complete entries, and track them. Open Sites in your organization’s left sidebar.
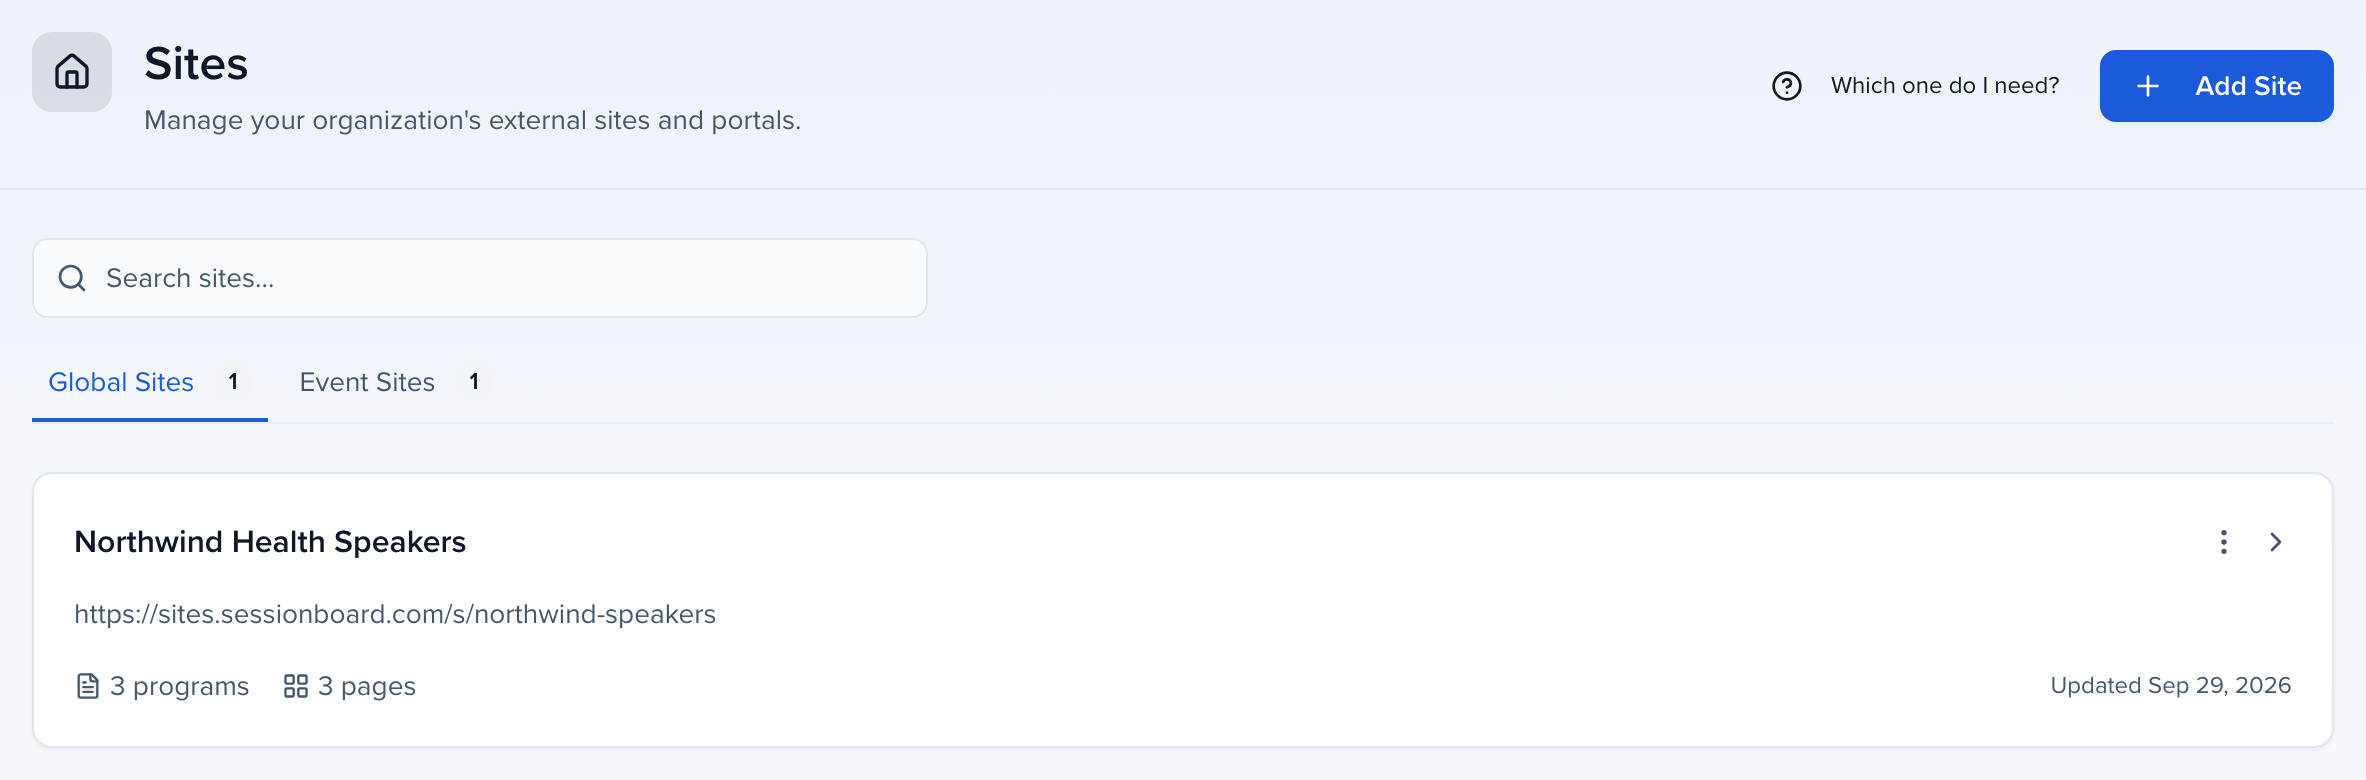
The page lists your organization’s sites in two tabs: Global Sites, which belong to the organization and can host awards programs and interest forms, and Event Sites, which belong to a single event. Each card shows the site’s URL, how many programs are published on it, how many pages it has, and when it was last updated. Which one do I need? opens a comparison of Sites, Embeds, Poster Galleries, and Content Galleries if you are not sure which surface fits.
Creating a new site
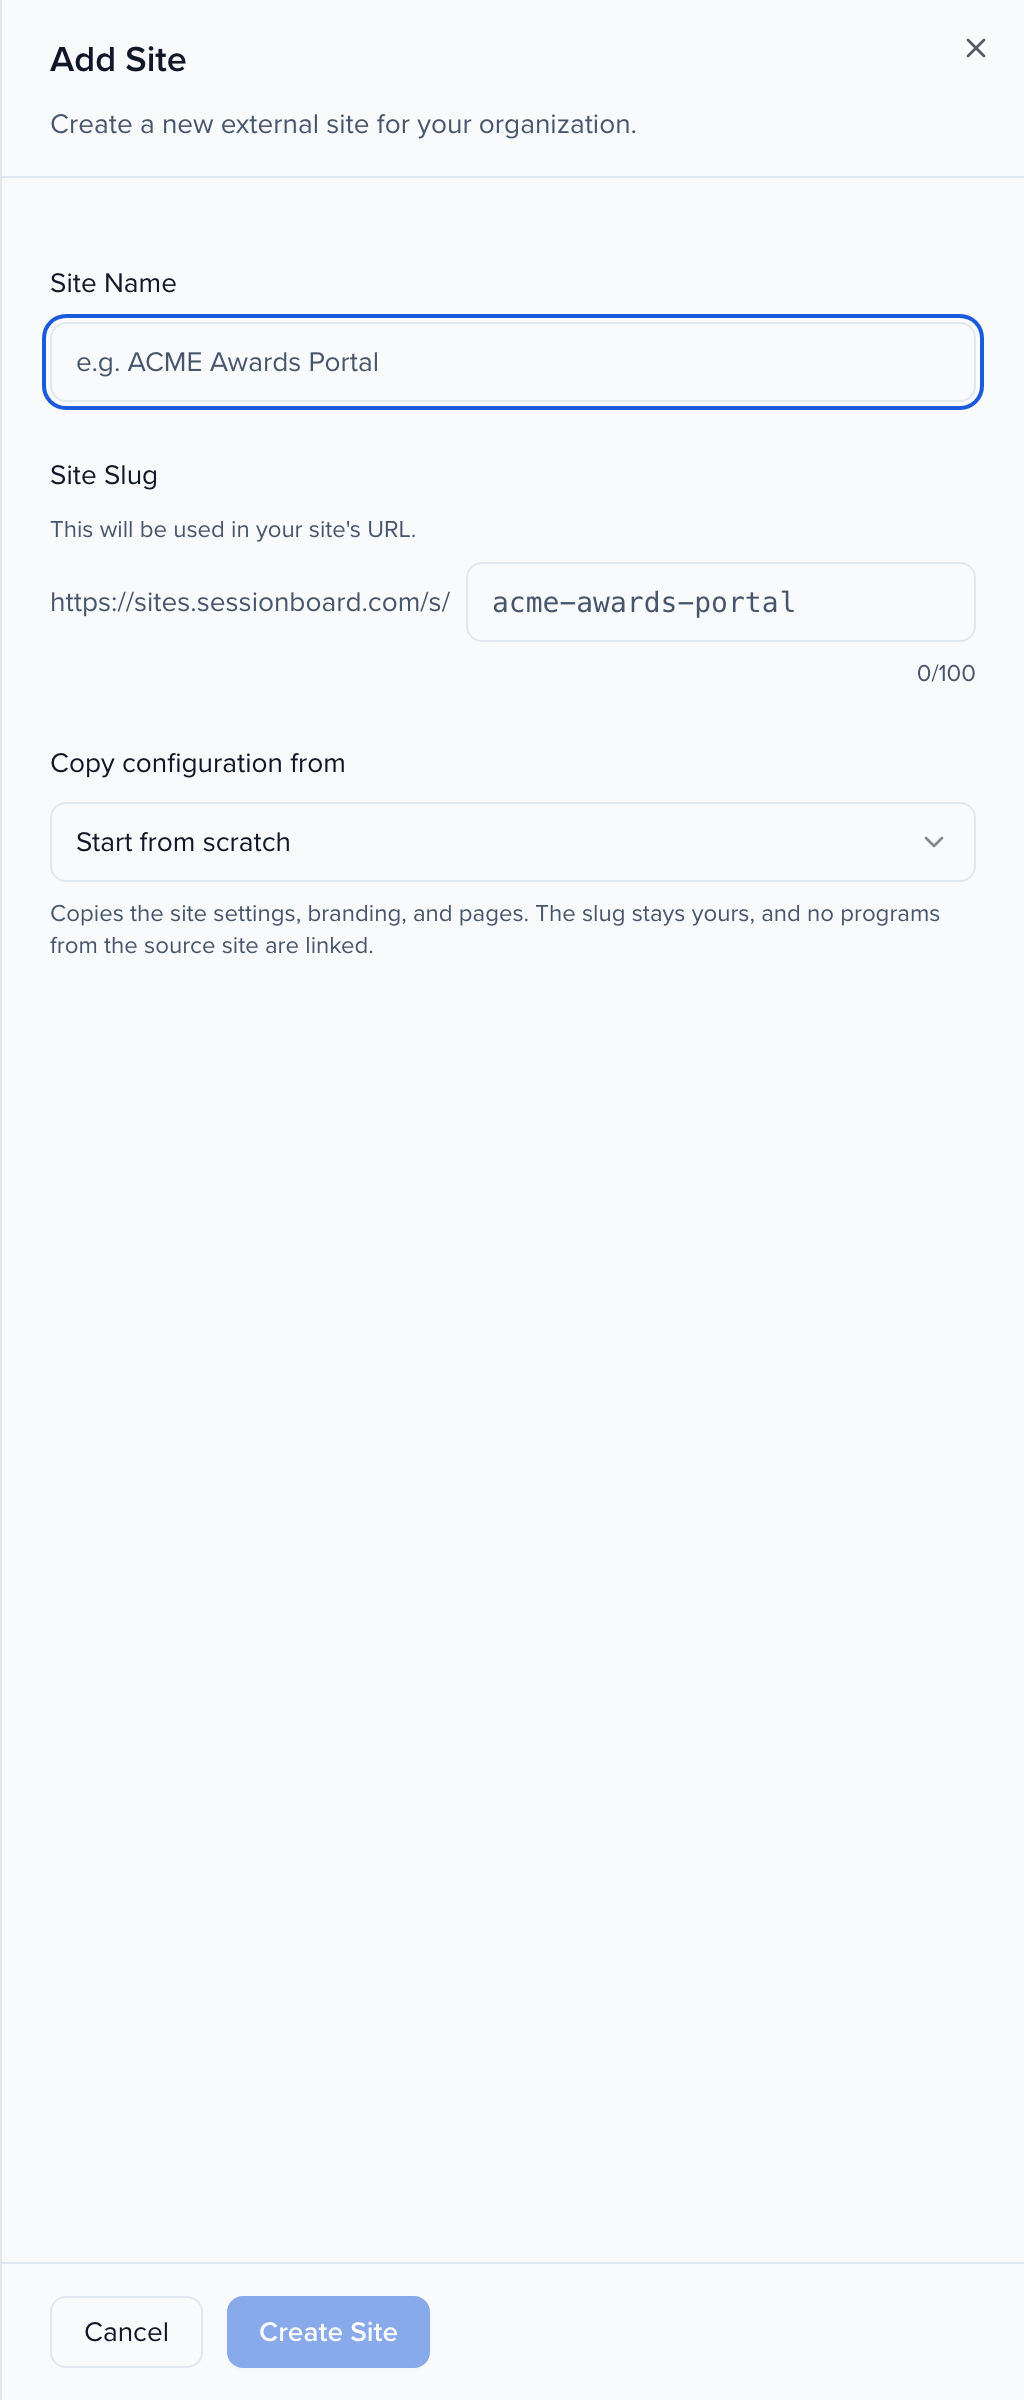
Section titled “Creating a new site”Click Add Site. Give the site a Site Name (an internal label, shown to your admin team only) and a Site Slug, the last part of its public URL: https://sites.sessionboard.com/s/your-slug. Slugs can be up to 100 characters; keep them short and easy to type, because they become the link you share.
When you already have a site you like, choose it under Copy configuration from. The copy brings over the site settings, branding, and pages — but not the slug, and not the programs published on the source site, so the new site starts empty and you link the right programs yourself. The source site is not changed.
Click Create Site to open the site’s overview.
The site overview
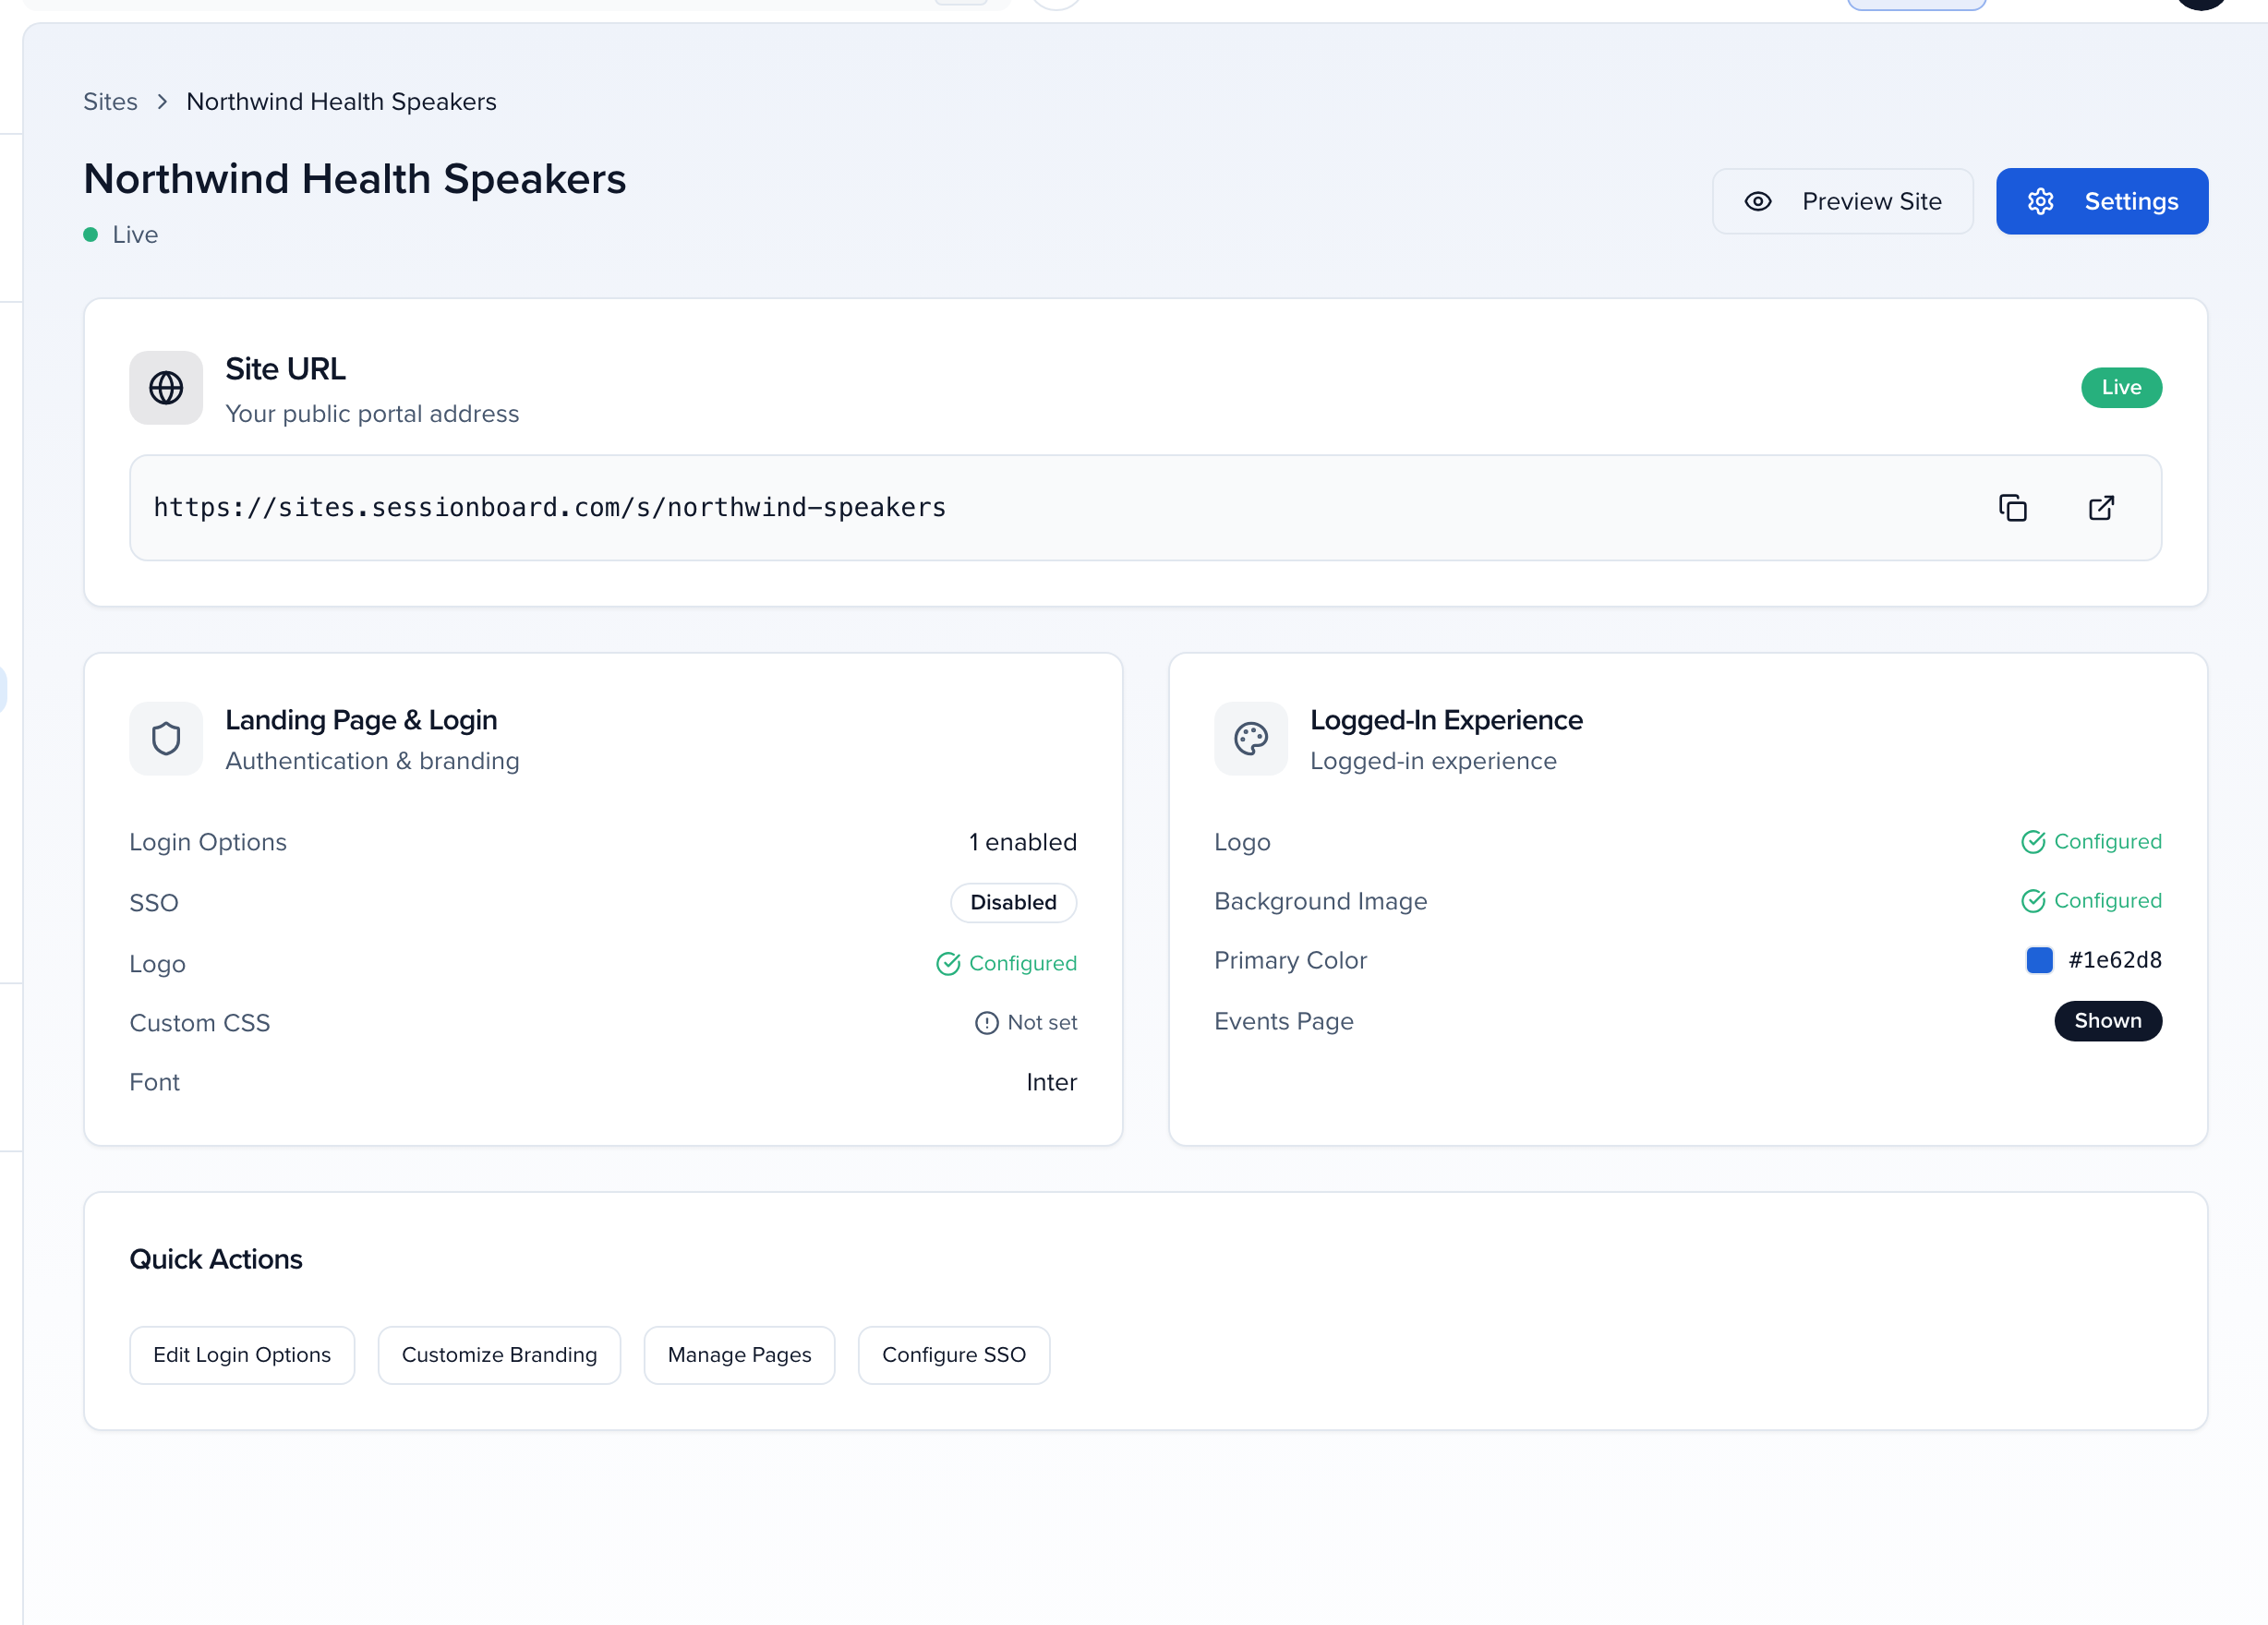
Section titled “The site overview”Each site has an overview page with its status, Preview Site and Settings buttons, and three cards: Site URL (with copy and open buttons), Landing Page & Login (login options, SSO, logo, custom CSS, font), and Logged-In Experience (portal logo, background image, primary color, and whether the Events page is shown). The Quick Actions row — Edit Login Options, Customize Branding, Manage Pages, Configure SSO — jumps to the matching part of the builder.
The Site builder
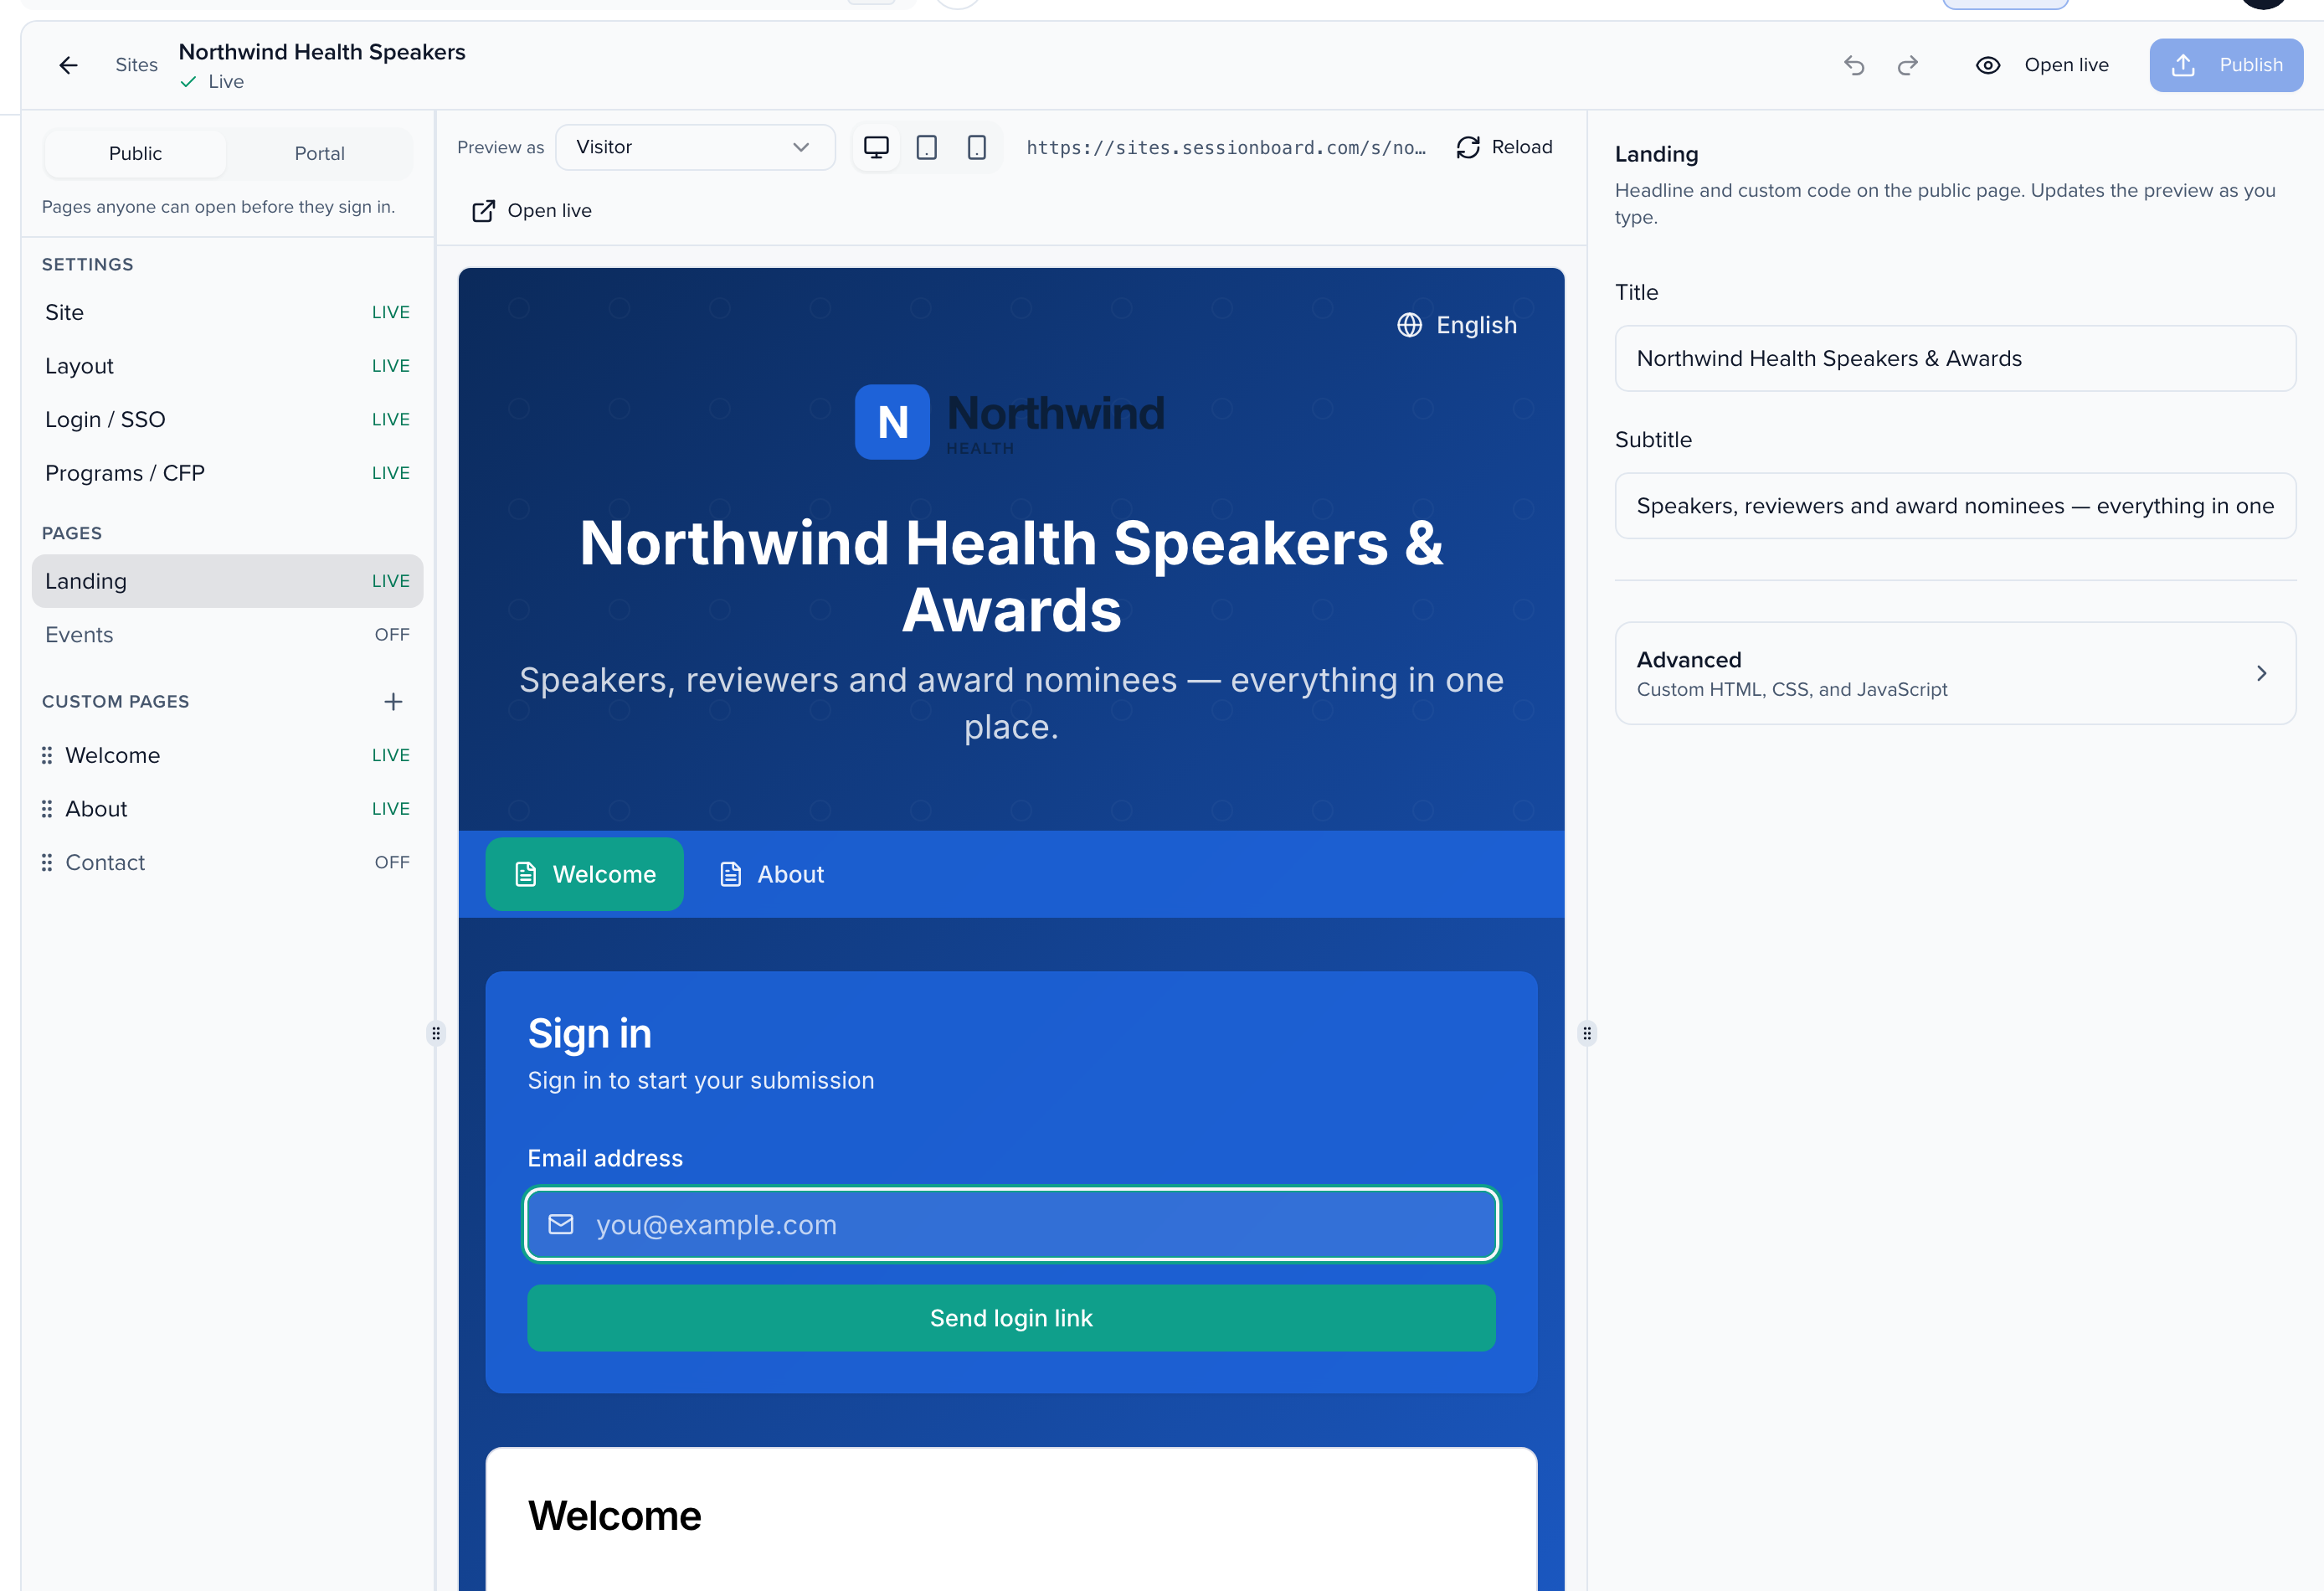
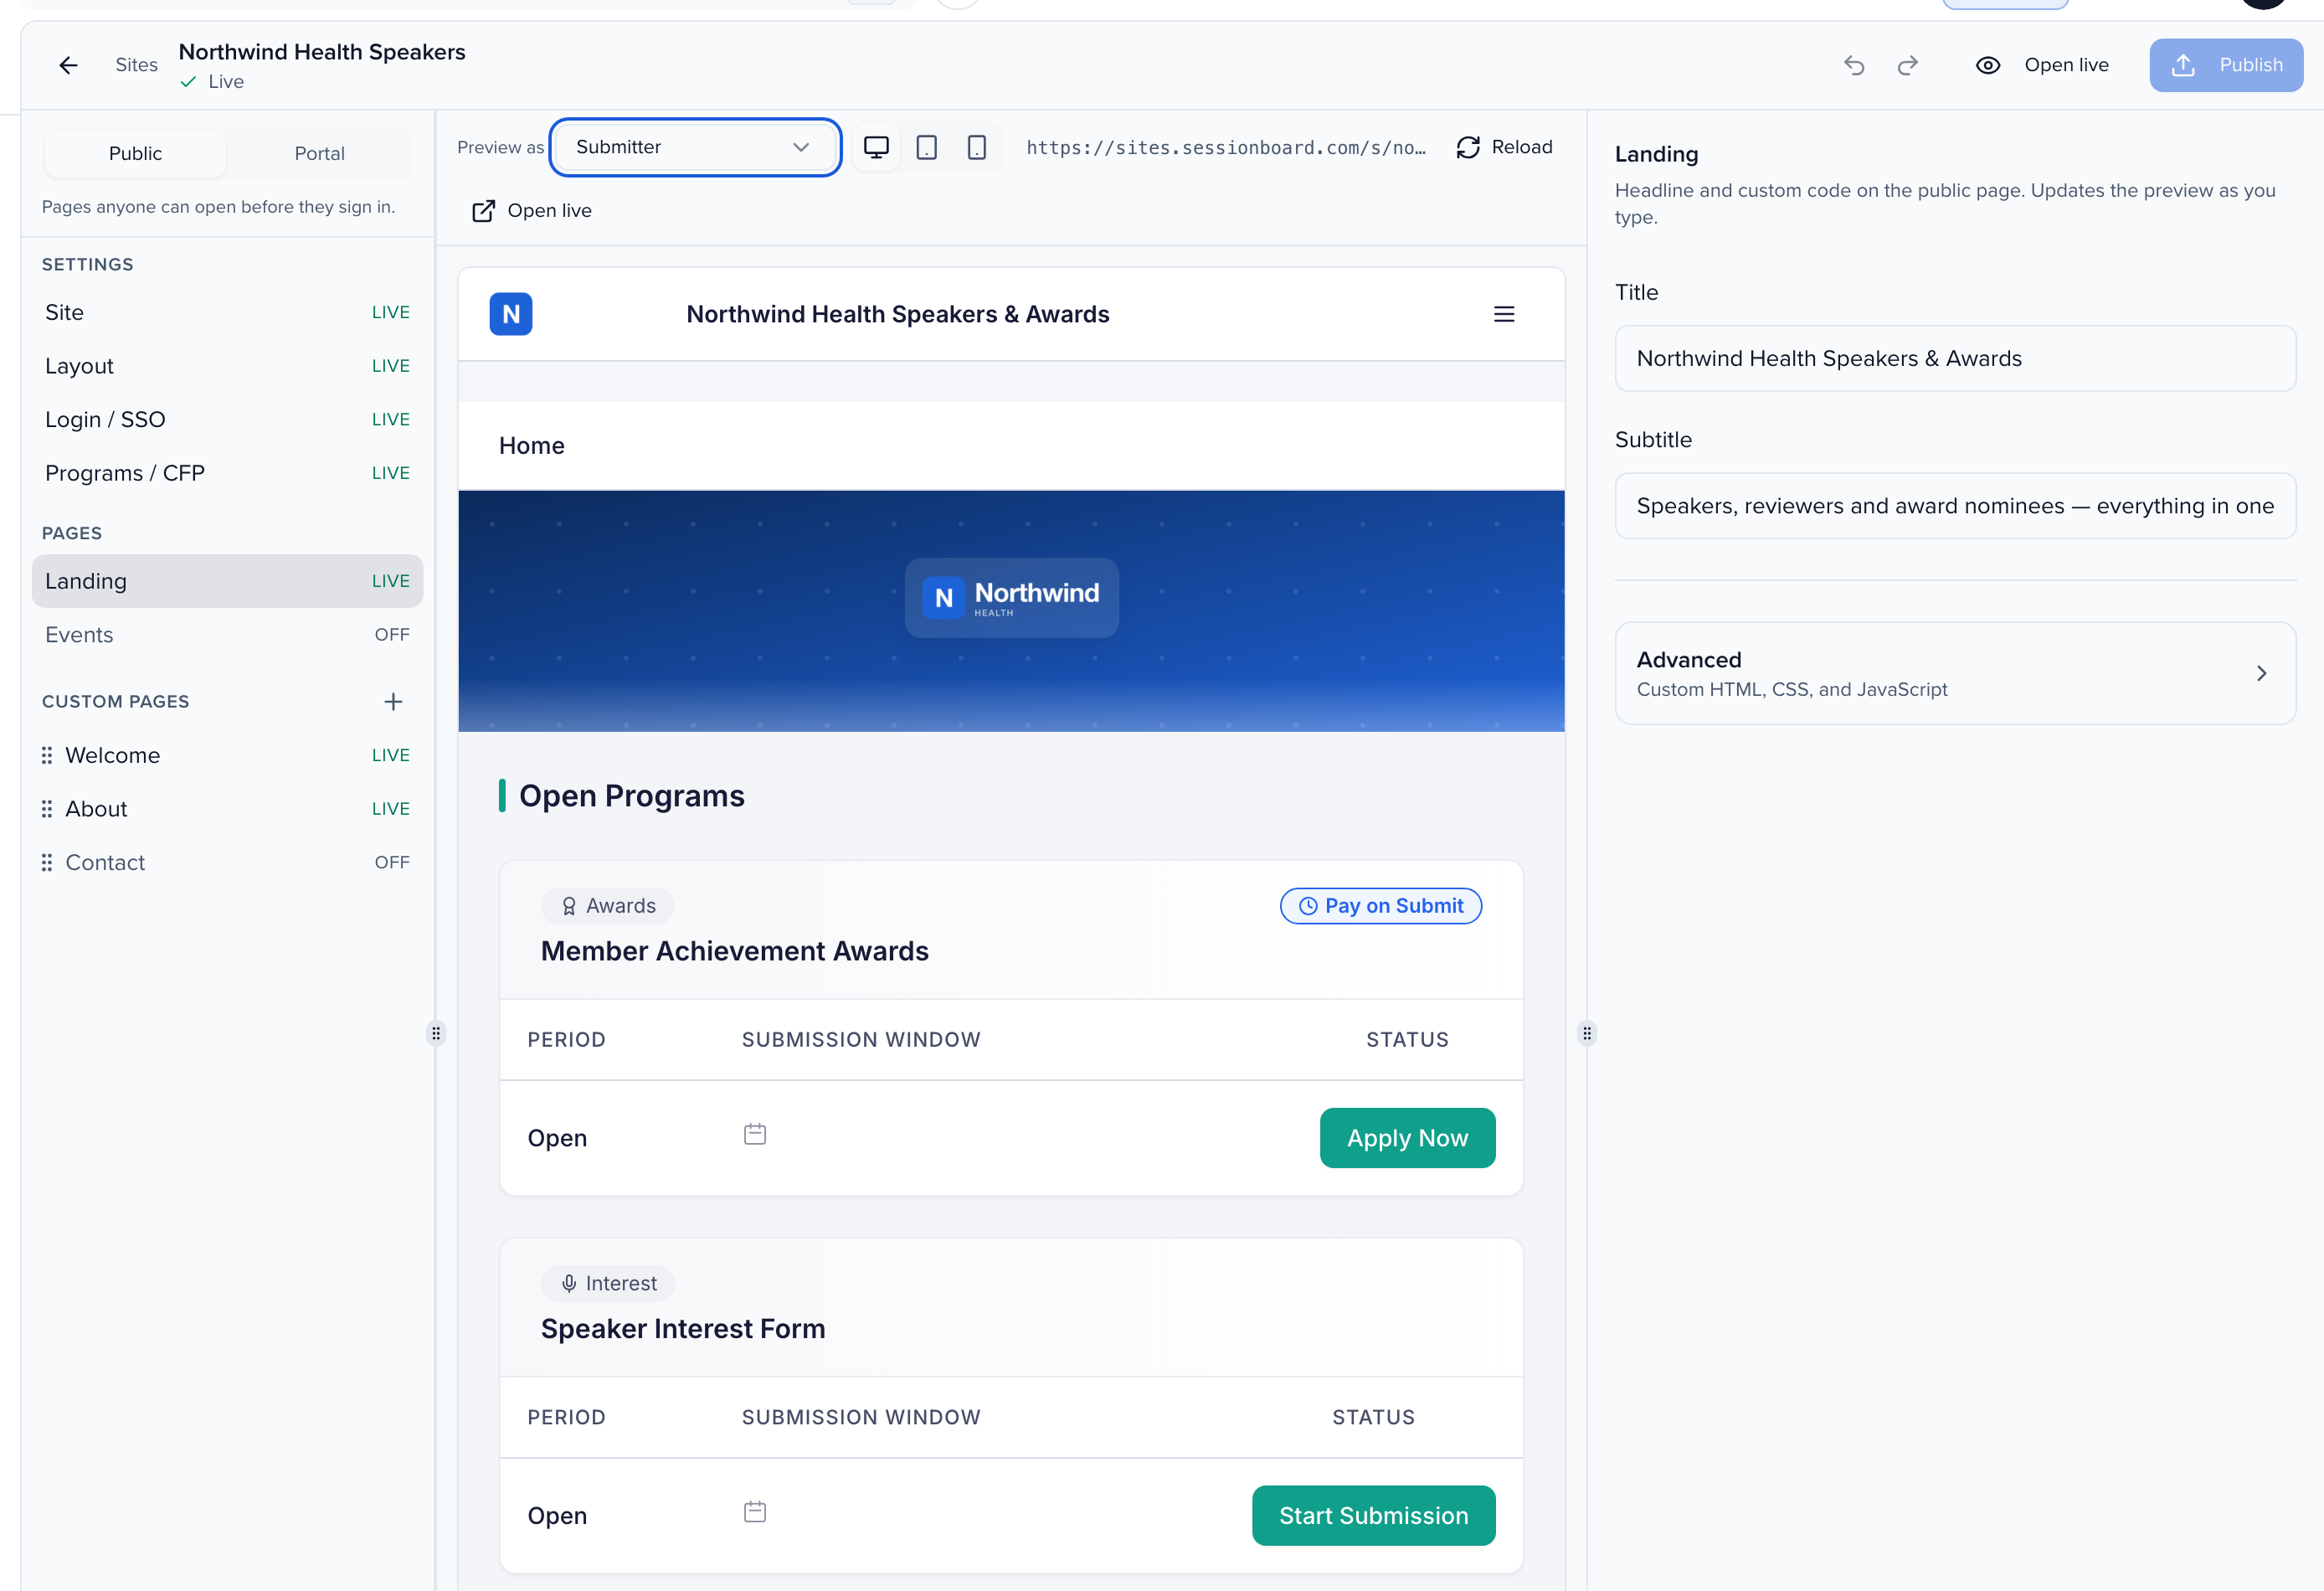
Section titled “The Site builder”Settings opens the Site builder: a sitemap on the left, a live preview in the middle, and an inspector on the right for whatever you select. Edits show up in the preview as you type; nothing reaches the public site until you click Publish. Open live opens the published site in a new tab, and the Preview as menu above the canvas switches the preview between Visitor, Submitter, Reviewer, and Speaker so you can check each experience.
The sitemap has two sides:
- Public — pages anyone can open before signing in. Under Settings: Site, Layout, Login / SSO, and Programs / CFP. Under Pages: Landing and Events. Custom pages are yours to add.
- Portal — the signed-in experience: Welcome, Home, Review workspace, Tasks, and My Profile.
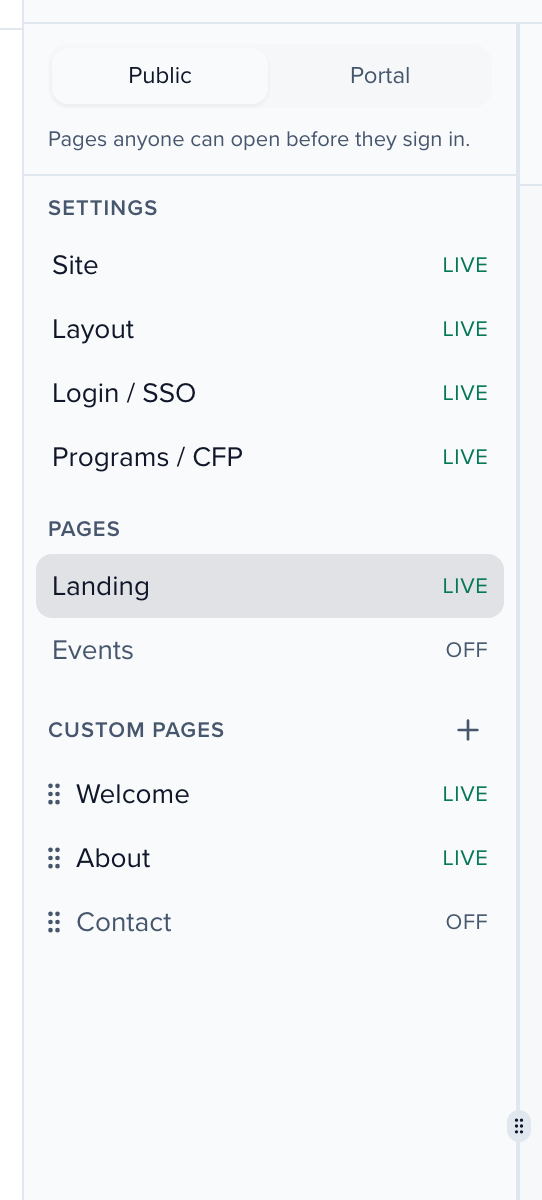
Each entry shows Live or Off. Off pages stay hidden from visitors while you draft them.
Site URL & branding
Section titled “Site URL & branding”Select Site in the sitemap. The inspector opens with a Ready to share checklist — branding, at least one live program, a login method, and an optional privacy notice — with a running count of what is done.
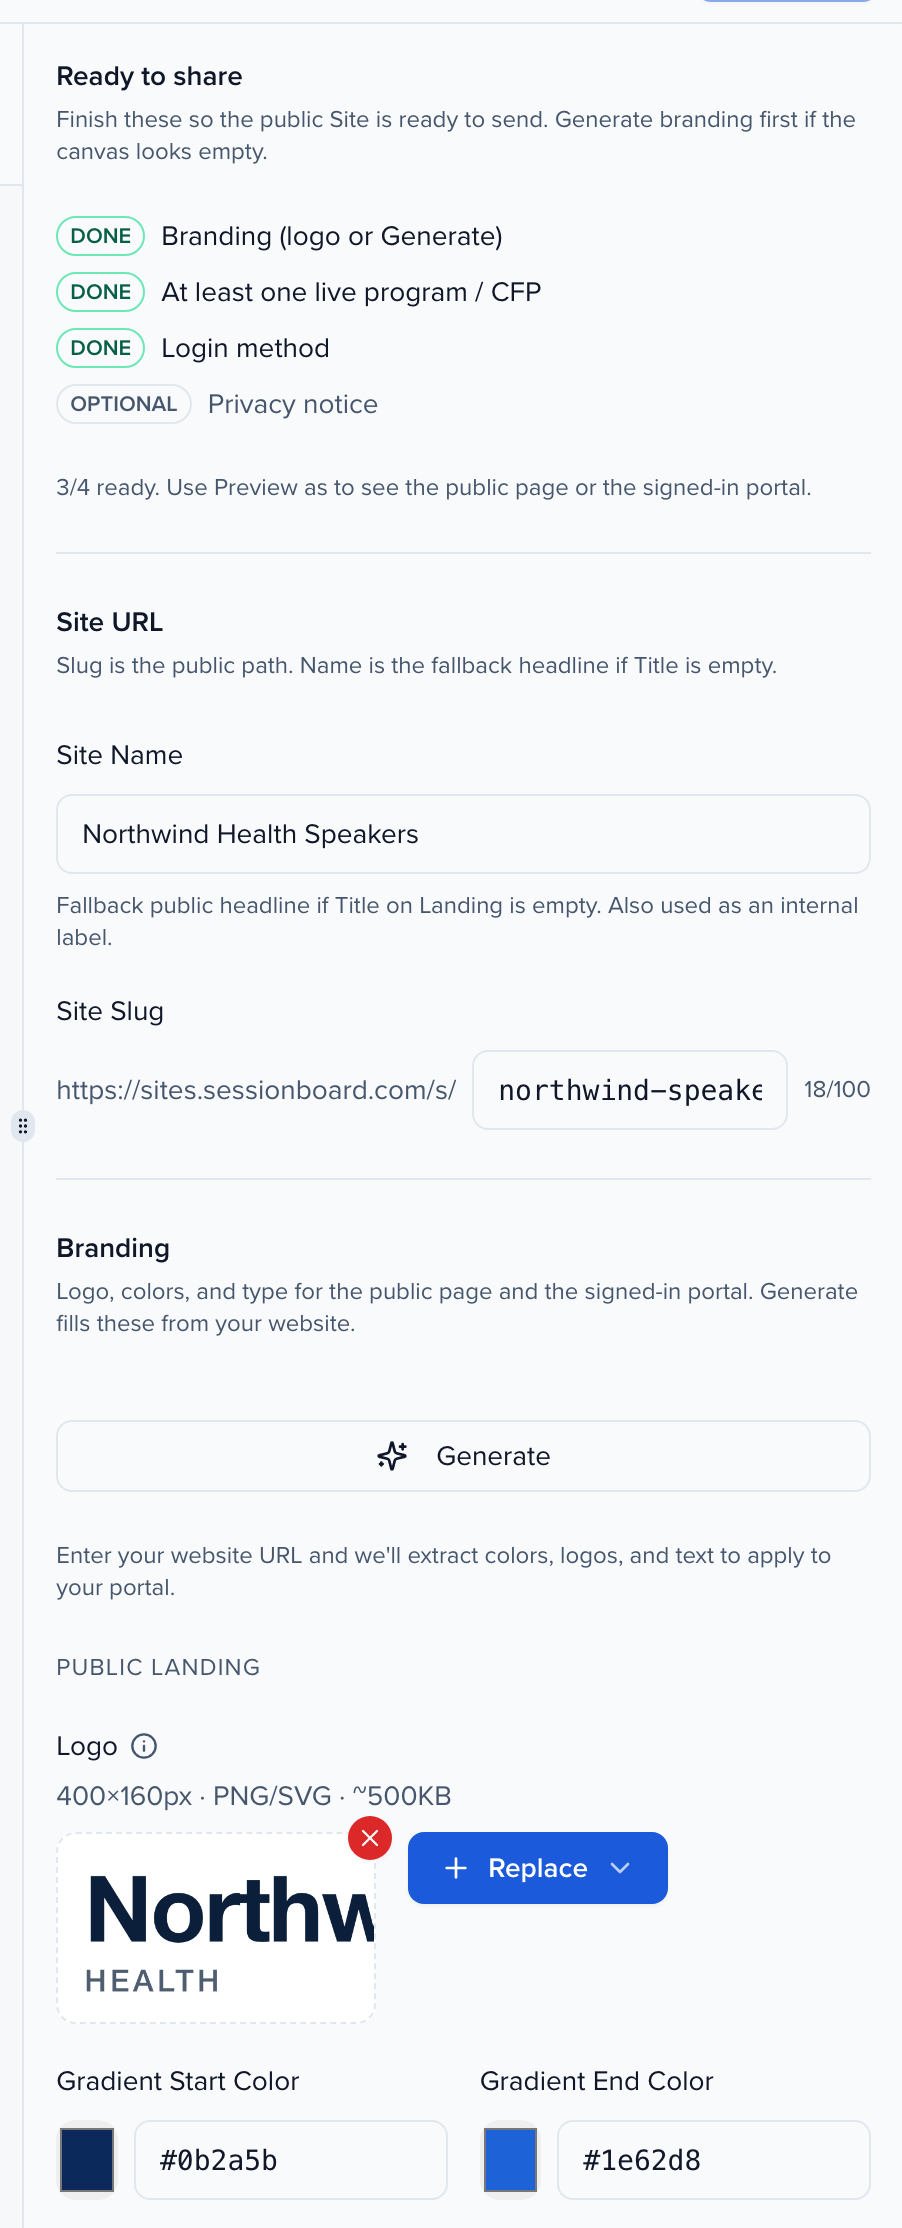
Site URL holds the Site Name and Site Slug from when you created the site; the name doubles as the public headline when the landing Title is empty.
Branding has two groups:
- Public landing — Logo (PNG or SVG, 400×160px, up to about 500KB), Favicon, Social share image, Gradient Start Color and Gradient End Color for the landing background, and Font Family (any Google Font, or the system fonts Arial and Georgia; the default is Inter). Arial and Georgia are already on every device, so the Site loads them without a font download.
- Signed-in portal — a separate Logo, an optional Background Image, Font Family, and Primary Color, Accent Color, and Text Color.
Every image field offers Upload and Copy from…, which picks an image already in your organization’s image library — so a logo or share card uploaded for one Site or event can be reused on another.
- Favicon is the icon in the browser tab and in bookmarks, on every page of the Site — landing, sign-in, portal, and public voting ballots. Use a square PNG or SVG, 256×256px or larger. Leave it empty and the Site’s logo is used instead.
- Social share image is the card shown when a link to the Site — the landing page, a program, a vote link — is pasted into Slack, LinkedIn, Teams, or iMessage. Use a 1200×630px JPG or PNG. Leave it empty and the preview falls back to the portal Background Image, then to the logo on a plain card.
Primary Color is used for section backgrounds such as the sign-in card, the content boxes and the portal navigation, Accent Color for buttons and links, and Text Color for the title, subtitle, and paragraph text drawn over those surfaces. Text Color is white until you set it. If it reads under 4.5:1 against your gradient or Primary Color, the Site shows white or dark text instead and the builder says so; the landing Title and Subtitle can each take their own color in the Site builder. Reviewers see the same colors on the reviewer site.
On the pages applicants fill in — apply, cart, checkout, confirmation, request forms and the reviewer home — buttons, radio buttons, checkboxes, switches and step markers take the Accent Color, so a white or very light Primary Color for the content boxes never hides them. Sessionboard picks the text and border shade on those controls so they stay readable against the page. A Site with no Accent Color keeps drawing its controls from Primary Color. Other signed-in pages, such as review scoring, My Profile and My Submissions, still use Primary Color for their controls.
Generate branding
Section titled “Generate branding”Instead of setting colors and logos by hand, click Generate, enter your organization’s website — a bare domain like example.com works — and Sessionboard extracts colors, logo, and text from it to fill the branding fields. Fine-tune afterward. If the site can’t be scanned (a typo in the domain, or a site that blocks automated requests), the dialog says what went wrong.
Landing page
Section titled “Landing page”Select Landing under Pages. Set the Title (the main heading on the public page) and Subtitle (shown beneath it) to say what your program is and invite people in.
Advanced holds custom HTML, CSS, and JavaScript for the public page. This is intended for developers: unscoped code can break styles and existing functionality, so use it only with developer help.
Login methods
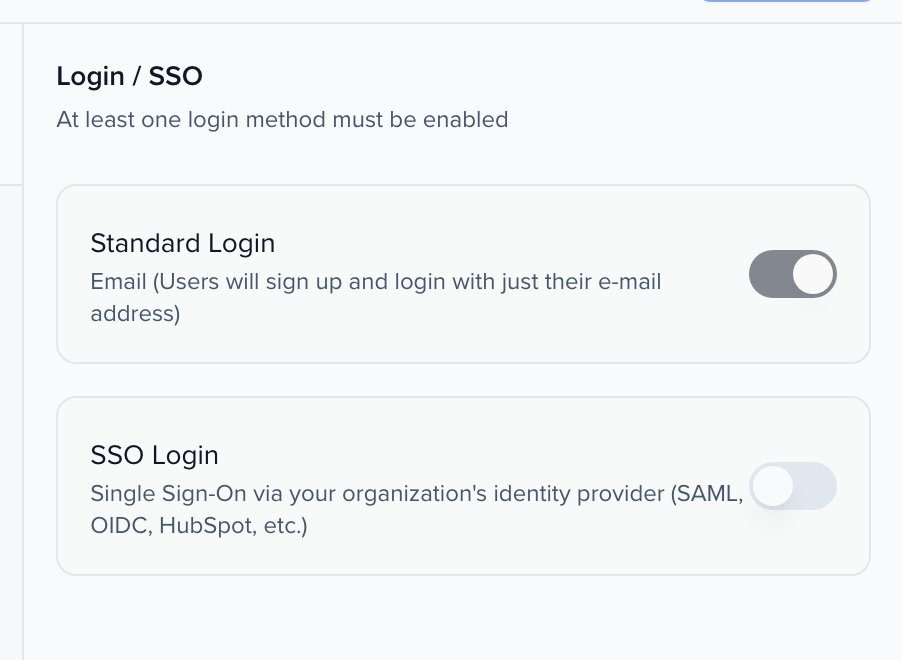
Section titled “Login methods”Select Login / SSO. At least one method must be on:
- Standard Login — Submitters enter their email address and receive a sign-in link (a magic link). The link is valid for 30 minutes; there is no password. This is on by default.
- SSO Login — Single Sign-On through your organization’s identity provider (SAML, OIDC, and others). Contact Sessionboard support to set SSO up for your organization.
Programs / CFP
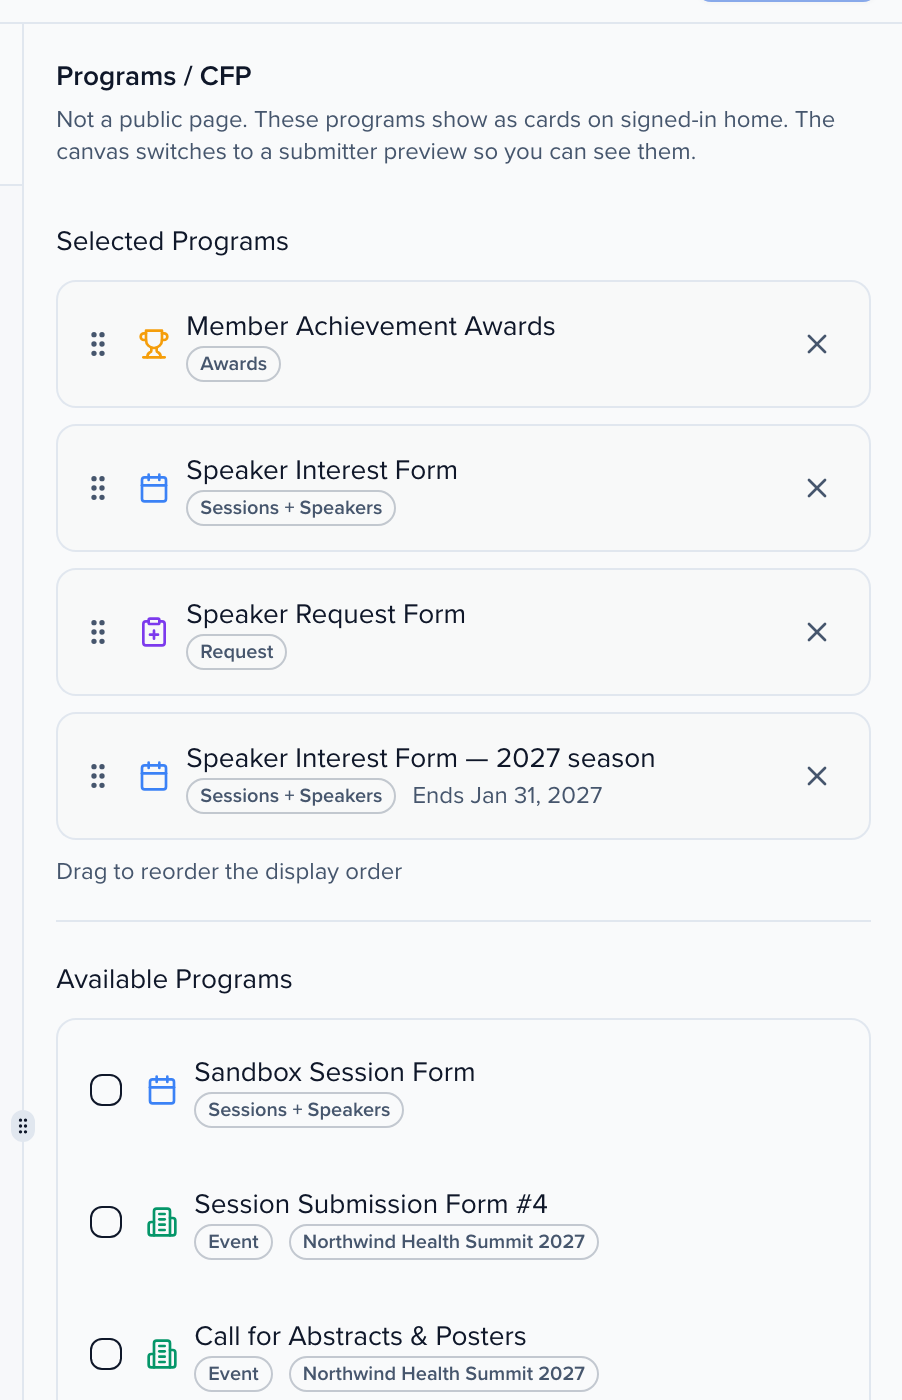
Section titled “Programs / CFP”Select Programs / CFP. This is not a public page: the programs you select here appear as cards on the signed-in home, and the preview switches to a submitter view so you can see them.
- Selected Programs lists what is published on this site, each with a type badge (Awards, Sessions + Speakers, Request, Event) and its end date when one is set. Drag to set the display order; click × to remove one.
- Available Programs lists everything else you can publish. Tick a program to add it.
The signed-in portal
Section titled “The signed-in portal”Switch the sitemap to Portal to configure what submitters see after they sign in.
Welcome
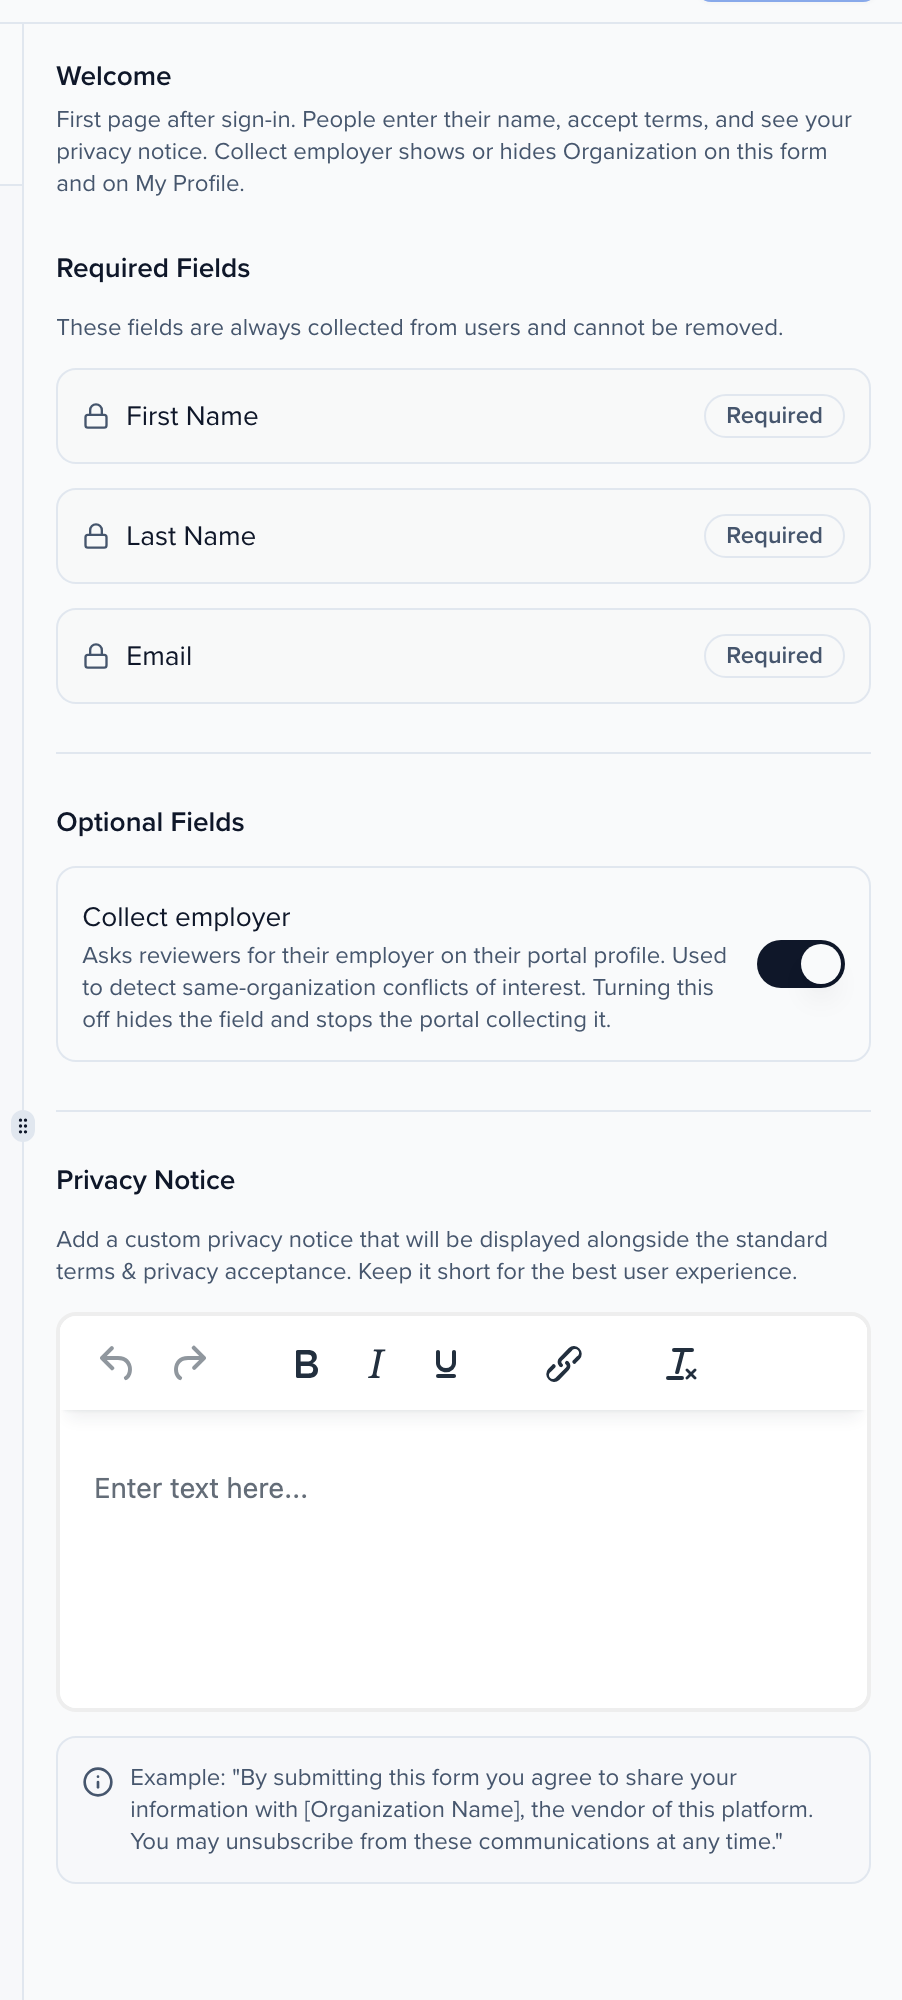
Section titled “Welcome”The Welcome page is the first-time registration screen. Required Fields are First Name, Last Name, and Email — fixed, and email is pre-filled from the sign-in link. Under Optional Fields, Collect employer adds an organization field. The Privacy Notice editor adds your own consent language alongside the standard terms and privacy acceptance; keep it concise.
Home is the portal’s landing page after sign-in. Give it a Title and a Description (rich text for instructions or announcements), then choose the Portal widgets:
- Sidebar — My Events, My Submissions, and My Contracts.
- Main panel — Notifications (cart, reviews, tasks) and My Reviews.
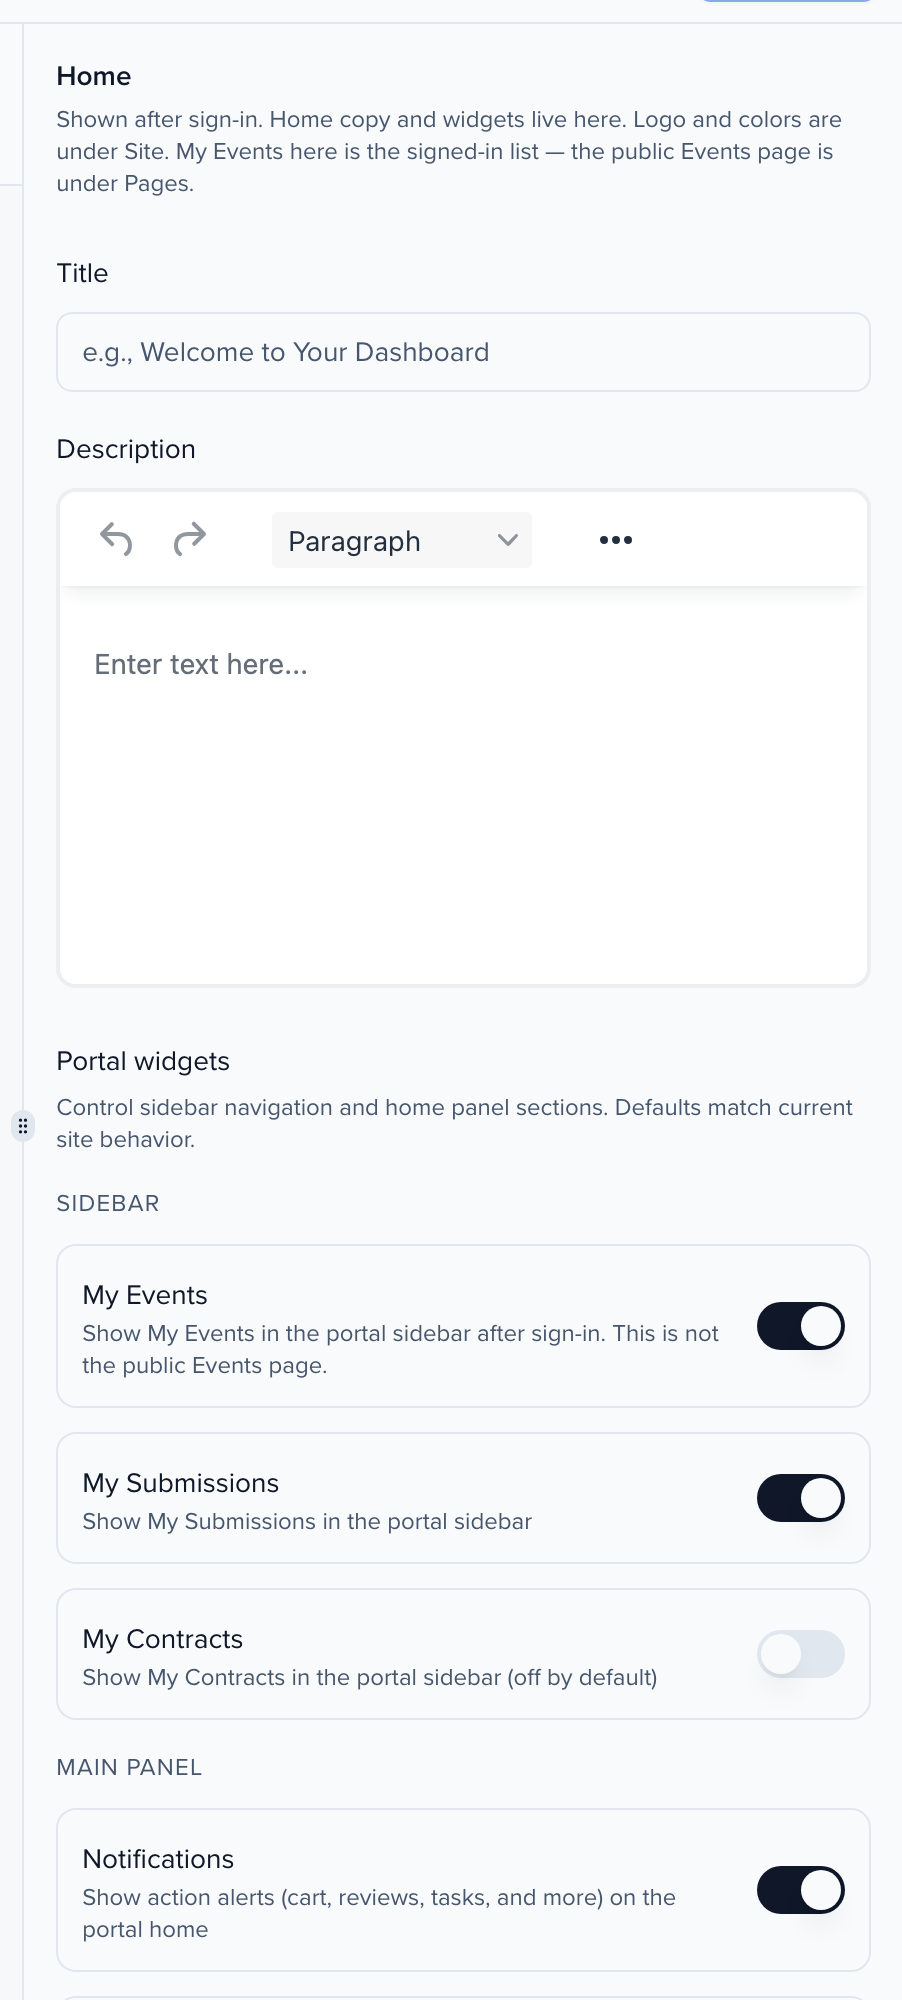
Turn on My Events when your organization uses Sessionboard for events as well as awards, so people can see the events they are part of from the same portal.
Events page
Section titled “Events page”Under Pages on the Public side, Events is a public list of your organization’s events, separate from the signed-in My Events item. Switch on Show Events page, then choose whether to filter by time window or hand-pick the events, and where each card links — the event’s Sessionboard Site or an external page. An event with no link still appears, showing its name and date. Publish, and the Events tab shows on your public site.
Custom pages
Section titled “Custom pages”Click + next to Custom pages to add content pages — FAQs, eligibility guidelines, sponsor information. Each has a title, a slug, and rich-text content, and shows as Live or Off in the sitemap. Live custom pages appear in the header navigation of the public landing page and in the signed-in portal. To show a page only to your reviewers or only to people who have submitted, set Who can see this page to Reviewers or Submitters; see Who can see this page.
Publishing
Section titled “Publishing”When the preview looks right, click Publish. Until then, your edits are a draft that only the builder shows. Use Open live to check the published site, and share the Site URL with submitters.
Use your own domain
Section titled “Use your own domain”A Site can be served at an address on your organization’s own domain, such as awards.yourassociation.org, instead of sites.sessionboard.com/s/your-slug. Sessionboard issues and renews the HTTPS certificate for you.
It takes two steps: connect the domain once in Settings > Domains, then choose it in the Site’s Domain setting. Sessionboard staff turn this on: ask your customer success manager to turn on Site Domains. After that, your admins do both steps themselves. No ticket is needed.
| Where the domain is connected | Which Sites can use it | Who can connect it |
|---|---|---|
| Your organization’s Settings > Domains | Every Site: Global Sites (including Awards Sites), Content Galleries, Learning Sites and every event’s Sites | Update on organization settings, with Site Domains on for the organization |
| An event’s Settings > Domains | Only that event’s Sites | Update on that event’s settings or on organization settings, with Site Domains on for the event |
To choose a domain for an event’s Site, you need Update on that event’s settings, and Site Domains on for whoever owns the domain. A domain serves one Site at a time.
If the Site signs people in with single sign-on, the address your identity provider sends them back to becomes https:// plus your domain, then /auth/sso-callback, the moment the domain is active. Add that redirect URI to your identity provider’s allow list before you add the DNS records, so sign-in keeps working.
Connect the domain
Open Settings > Domains (your organization’s, or the event’s) and enter the address under Domain in the Site domain section. Click Connect domain. Use a subdomain such as awards.yourassociation.org. A bare domain like yourassociation.org works only if your DNS host supports CNAME flattening (ALIAS or ANAME) at the root, and the page warns you when you enter one. The steps are in Site domain.
Add the DNS records
The domain opens with a CNAME record, and sometimes a TXT record, each with a copy button. Add them as new records at the DNS host for your domain. If you do not manage DNS yourself, use Copy instructions or Email to IT contact to send the records to whoever does, or Open in my email app to start that email yourself.
Choose it for the Site
On the Site’s overview, the Domain card lists the Site’s Sessionboard address and every domain it can use, each with its status and the Site that uses it, if any. Click the domain. If another Site uses it, confirm the move: that Site goes back to its Sessionboard address. Connect a new domain… opens Settings > Domains. The same Domain setting is in the Site builder’s top bar, on a Content Gallery’s Domain tab, in a Learning Site’s settings, and on an event page under Where it lives.
Wait for it to go live
The status moves from Waiting for DNS to Issuing certificate to Active. You can choose a domain before it is active: the Site stays on its Sessionboard address until then. New records can take up to an hour to appear.
Once the domain is Active, the Site answers at https:// plus your domain, and the old sites.sessionboard.com/s/your-slug address redirects there. Sign-in links, form links and share links use the new address from then on. To stop using the domain on this Site, choose Sessionboard address in its Domain setting: the domain stays connected for another Site. To remove it altogether, use Remove domain in Settings > Domains.
Public voting
Section titled “Public voting”When an awards round is set to Public voting, the ballot uses this same Site. Copy the link from the round (Copy link) and share it. Voters sign in with a magic link or SSO, then score submissions on that round’s scorecard. See Managing submissions, reviewers & rounds.
Pasting the vote URL into Slack, LinkedIn, or similar shows a branded preview of the round or the individual submission, using the Site’s Social share image when one is set. Search engines and AI assistants do not index these URLs.
What submitters see
Section titled “What submitters see”Landing page
Section titled “Landing page”Visitors see your branded landing page with the gradient, logo, title, and subtitle you configured, a Sign in card where they enter their email to receive a login link, and your live custom pages in the navigation.
First-time registration
Section titled “First-time registration”The first time someone opens their sign-in link, the Welcome screen asks for the required fields (email pre-filled and locked) and the terms and privacy acceptance, plus your privacy notice if you added one. After that they land on the portal home.
Signed-in portal
Section titled “Signed-in portal”The portal home shows your title and description, then Open Programs — one card per published program with its submission window, status, and a button to start an entry (labeled with your program’s action label, such as Apply Now or Nominate). The sidebar carries the widgets you switched on, so submitters can return to My Submissions to continue a draft or check the status of a completed entry, and reviewers see their queue under My Reviews.
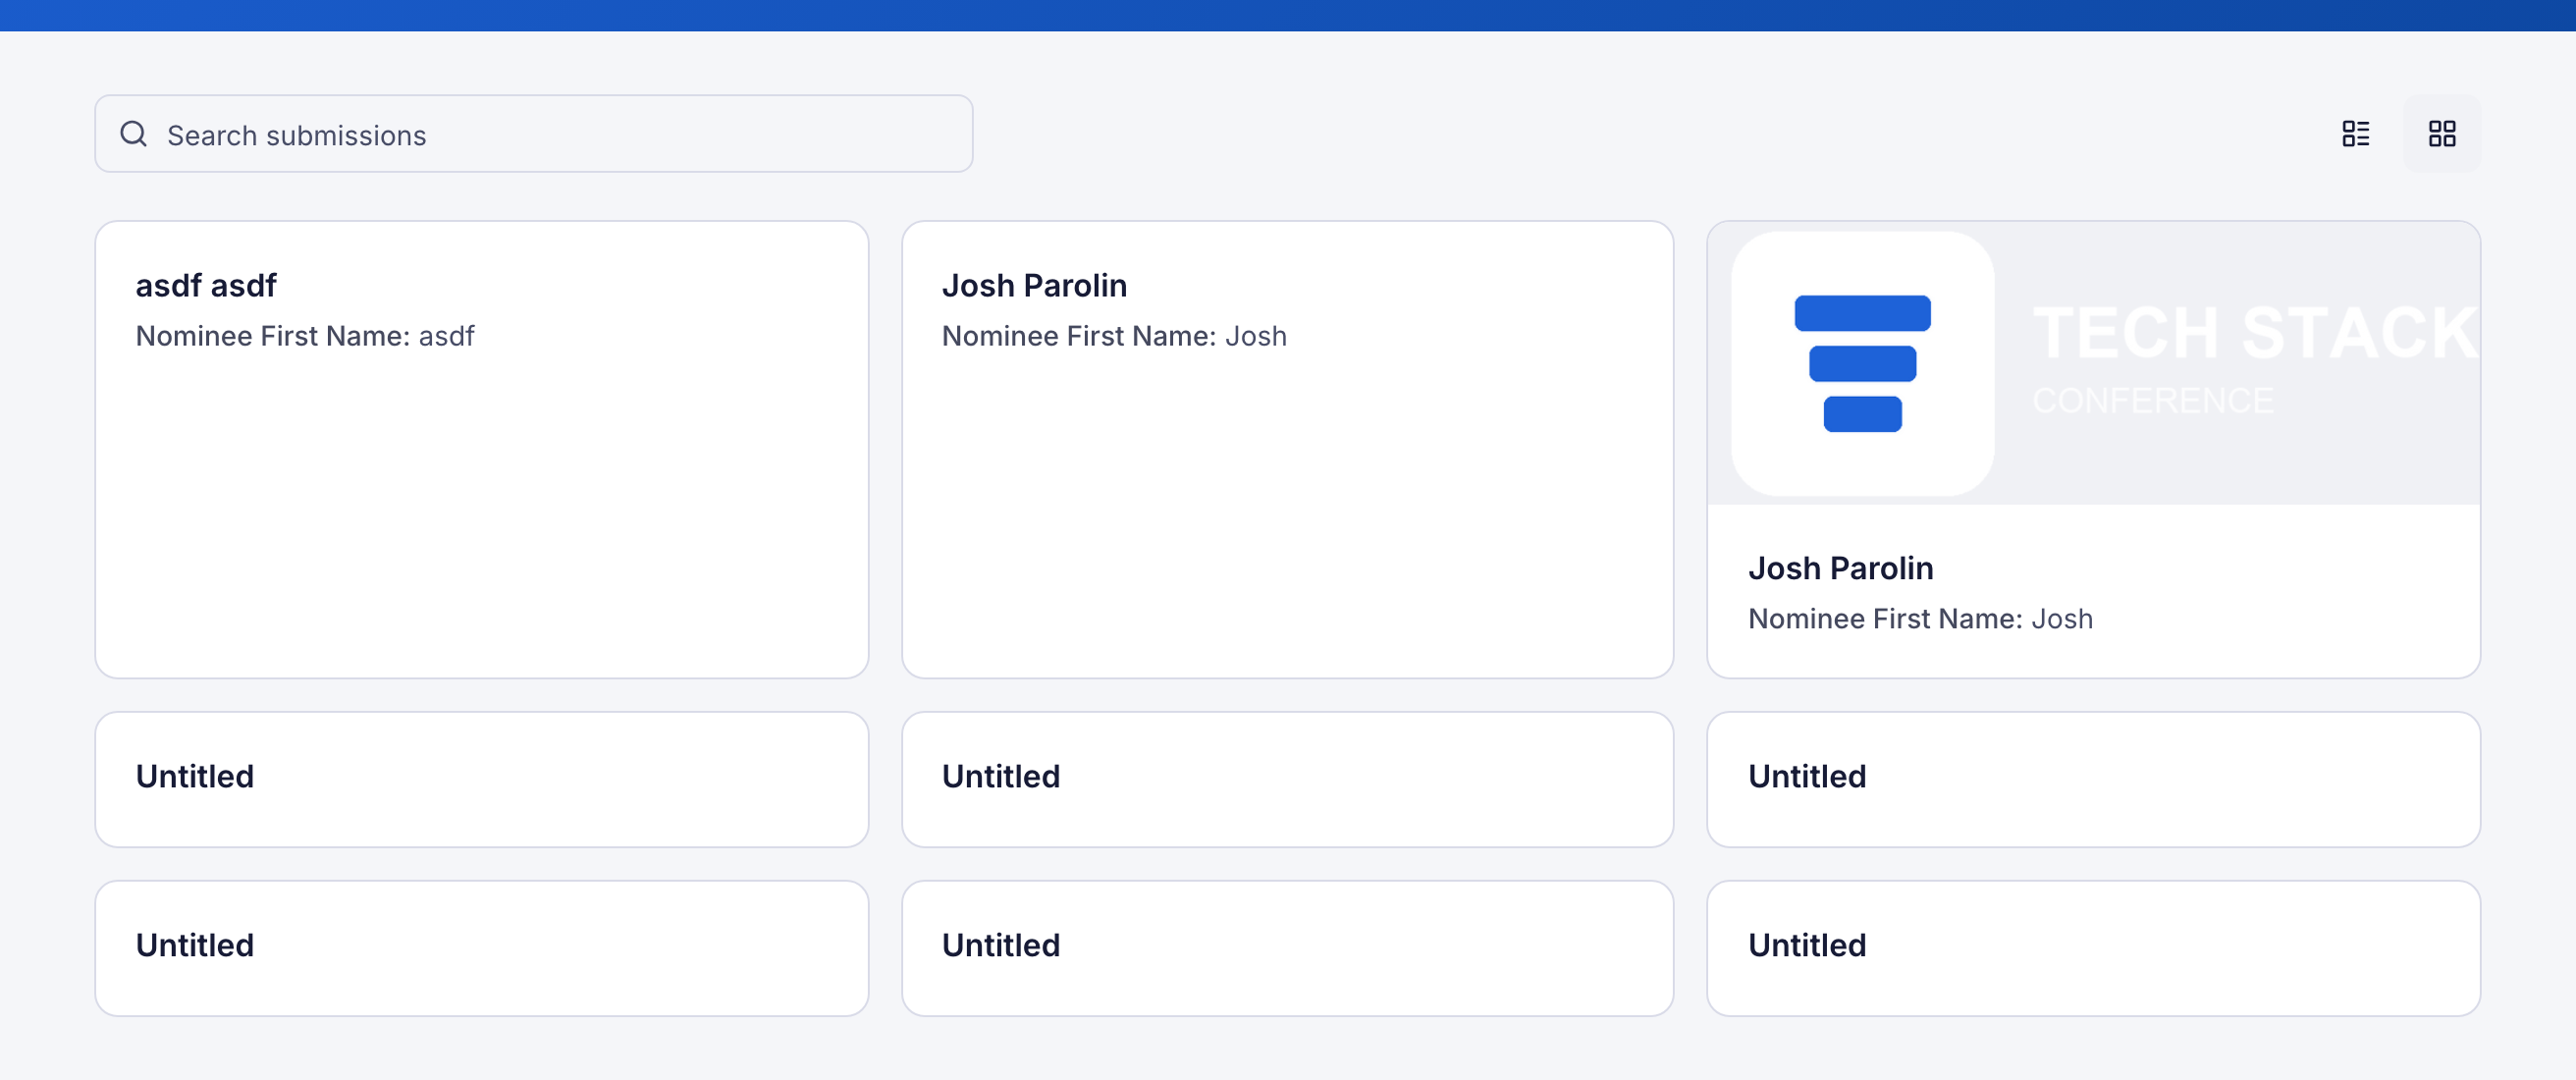
Because one portal can host awards programs and interest forms together, all of a person’s submissions appear in the same list.
Next steps
Section titled “Next steps”- Getting started with awards — The setup wizard and program lifecycle.
- Awards notifications & email templates — The automated emails your submitters receive, including the Submission Confirmation that links back to the portal.
- Managing submissions, reviewers & rounds — Once entries start arriving through your site, manage the review lifecycle.
- Awards pricing, payments & invoices — Configure fees and payment collection if your programs charge.
- Speaker CRM: interest forms — Publish interest forms on the same site alongside your awards programs.