

Create applications
Applications can be customized to collect any information you want to store with the person. Examples of use cases are:
- Request to Speak Application
- Awards Application
- Pitch Competition Application
Once submitted, applications can be updated individually or in bulk. You can approve or deny applicants and communicate with them directly from the platform using custom email templates.
Video transcript
Under Program you have Applications. An application is a form about a person: who they are, and whether they should take part. That is different from a submission form, which is about a proposal, a session or an abstract with a title that gets accepted, scheduled and published. Applications give you a status per applicant instead, and everyone who applies lands in your contacts.
Teams reach for Applications when the decision is about the person before any session exists. A request to speak at an event with no call for papers. Sponsor and exhibitor applications. Scholarship intake. Volunteer, reviewer and committee recruitment. Mentor programs, like this one. If you are collecting proposals, use a submission form. Nominations with judges and scoring rounds belong in Awards. And details from people you have already accepted, headshots, agreements, travel, go through portal forms and tasks. Review plans run on sessions, not applications, so you review these from their status queues.
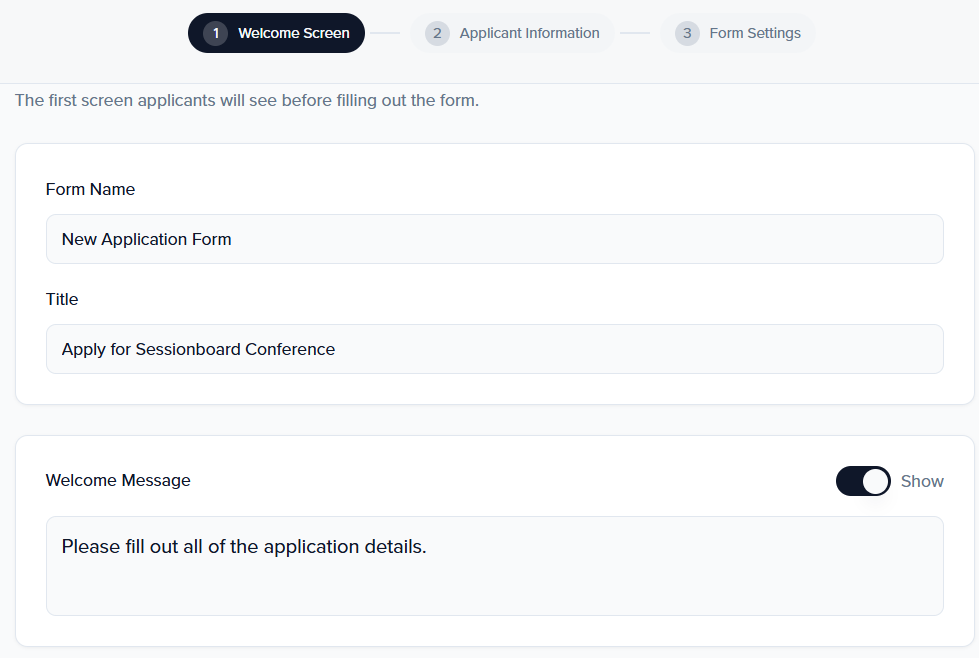
Create Form starts a new one. I will open the mentor program form instead, from its card menu. The editor has three pages. Welcome Screen is what applicants see before the questions: a form name for your team, the title applicants see, and a welcome message you can switch on or off.
Applicant Information is the form itself. First name, last name and email are always collected. Below them are the additional fields, every one a contact field, so answers save straight onto the person’s record. Add Field brings in any other contact field, and each one has its own Required switch. This form asks for a mentoring focus as well.
Form Settings is where the form closes and who hears about it. A close date stops new applications after that moment. Match submissions to existing contacts by email updates the person you already have instead of creating a duplicate. Default status for new submissions puts every application in a queue from the start, or leave it unassigned until you review. Then the admins to notify, and the confirmation email applicants get, which includes a link back to their application.
Copy Link and View Form are at the top of the editor and on the form’s card. This is what an applicant sees: the welcome, a sign-in, then the questions. When they finish they land in the event portal, and they can come back any time to view or edit what they sent.
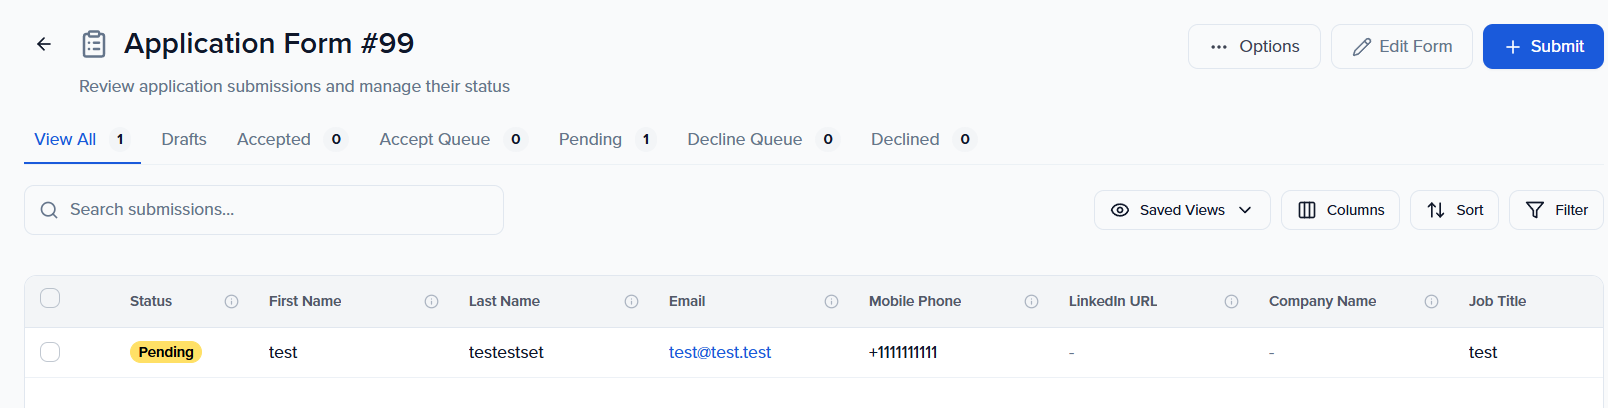
Click the form’s card to review. Across the top are the status queues: Accepted, Accept Queue, Pending, Decline Queue, Declined, and Drafts for applications started but not sent. Each tab shows its count, so Pending is your to-do list. The table has the contact columns and your application questions side by side, and Columns, Sort and Filter work the way they do everywhere else.
To move one application, click its Status cell and pick the queue. The row’s Edit button opens the person’s full contact profile, with everything else you know about them. For a batch, select the rows. Send Emails writes to the applicants from right here, so an acceptance or a decline goes out with a template. Options exports the table as CSV or XLSX.
That is Applications: a form about the person, a queue per decision, and applicants who are already contacts when you say yes. For the session side, the submission form and abstracts have their own videos, and the Awards video covers nominations with judging. Back on the Applications page, the card shows each form’s open or closed state and how many are still pending.
When to use Applications
Section titled “When to use Applications”An application is a form about a person: who they are and whether they should take part. A submission form is about a proposal: a session, abstract or poster with a title that can be accepted, scheduled and published. Pick the form by what you are collecting.
| You are collecting | Use |
|---|---|
| A proposal for a session, abstract or poster | A submission form |
| A request to speak, mentor, volunteer, review, join a committee or exhibit, where you decide on the person before any session exists | An application |
| A nomination into categories with judges, scoring rubrics and rounds | Awards |
| Details from people you have already accepted, such as headshots, bios, agreements or travel | A portal form or task |
| Interest from potential speakers before you open a call, across events | An interest form |
The application programs organizers run most often are a request-to-speak form for events without a call for papers, sponsor and exhibitor applications, awards and scholarship intake, volunteer and committee recruitment, and mentor programs. Applicants land in your contacts, so everyone you accept can be added to a session, a portal or a campaign without re-entering their details.
Two limits to plan around: review plans run on sessions and submissions, not applications, so review applications from their status queues; and applications are managed inside Sessionboard, with no integration or API. For the full comparison across every form type, see Which form should I use?
How To Create An Application
Section titled “How To Create An Application”-
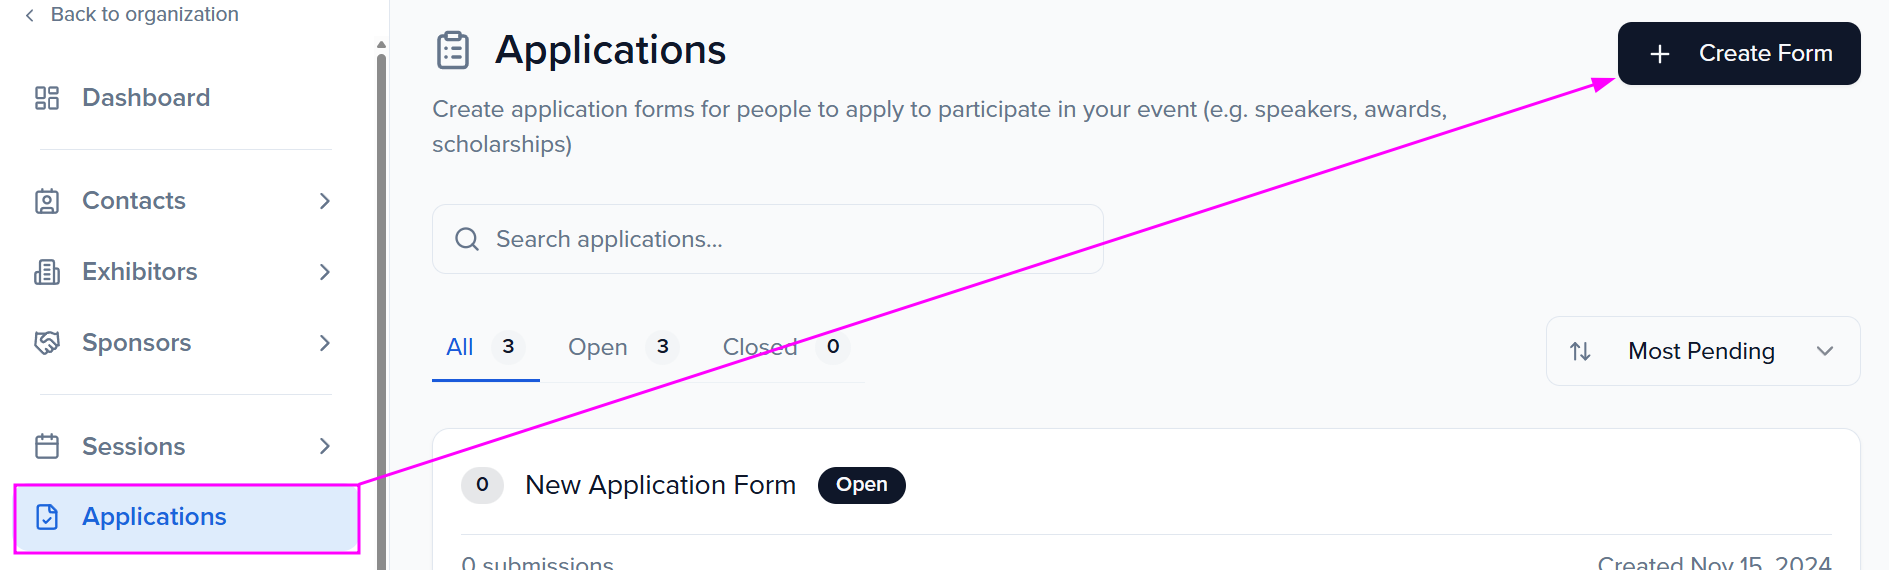
Navigate to the Applications module and select the “Create Form” button.
-
Configure your application form by editing the Welcome Screen, Applicant Information, and Form Settings pages. Applicant Information always collects first name, last name and email; add any other contact field with Add Field. Form Settings holds the close date, Match submissions to existing contacts by email, the Default status for new submissions, which admins to notify, and the confirmation email.
Conditional Logic/Question Rules
Use question rules (conditional logic) to create customizable forms that adjust based on the answers that your users provide to various questions. This allows you to use one form to intake multiple different types of application submissions.
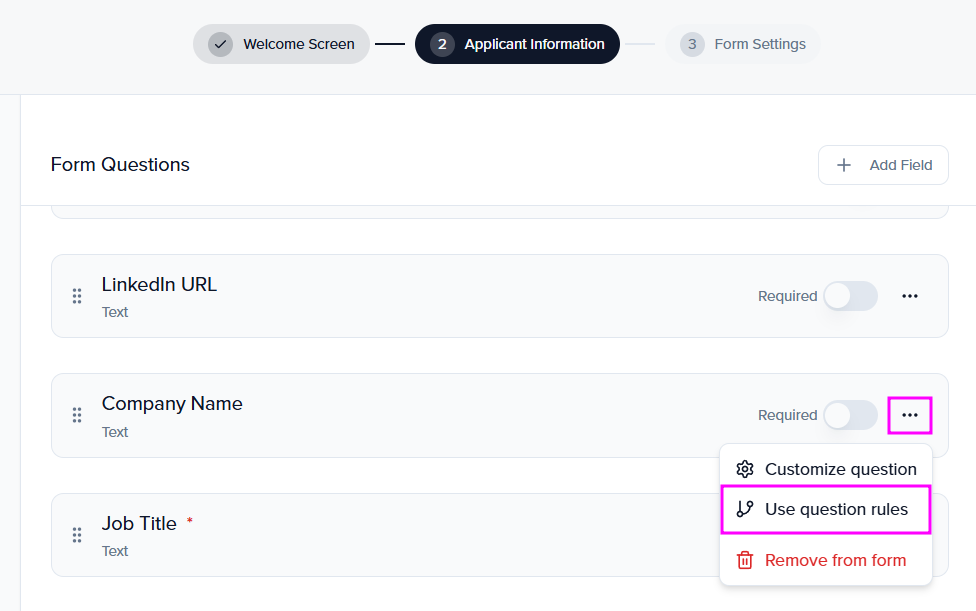
Question rules can only be used on the following field types:
- Textbox
- Dropdown
- Number
Question rules only hide or show questions. To write other field values when the application is saved, use an Assignment Field Rule.
Share the application form
Section titled “Share the application form”When it is time to start accepting applications, email the application link or include it on your website. This link can be found using the instructions below.
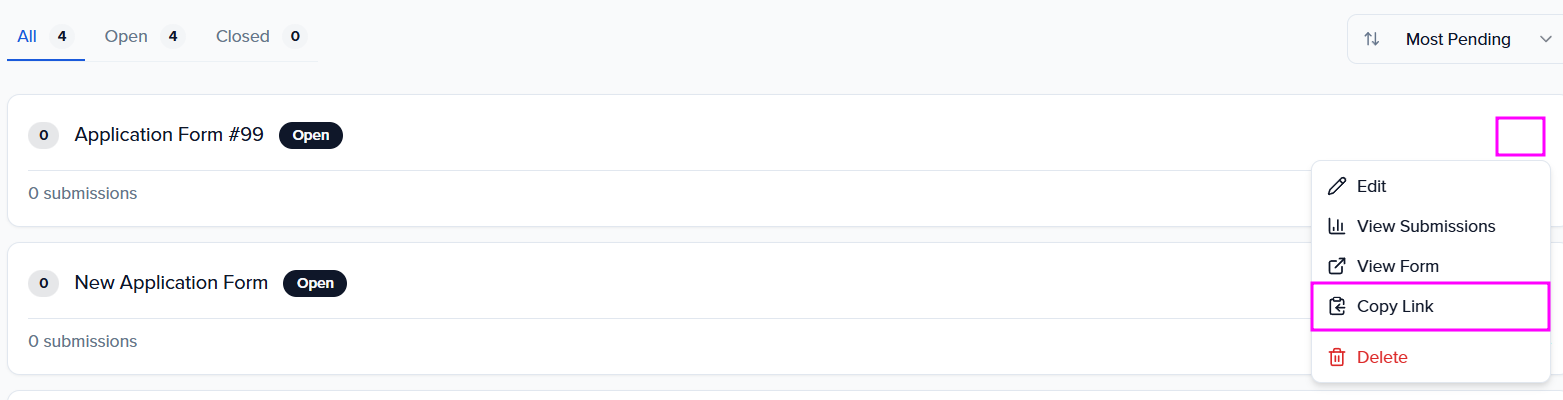
Navigate to the Applications module, open the menu on the application form’s card and select Copy Link; it copies the application form URL to share with your event community. View Form opens the form as an applicant sees it, and the same two buttons sit at the top of the form editor.
Once an applicant completes the form, they will be redirected to the event portal. Applicants can log back into their portal at any time to view or edit their application.
View application submissions
Section titled “View application submissions”-
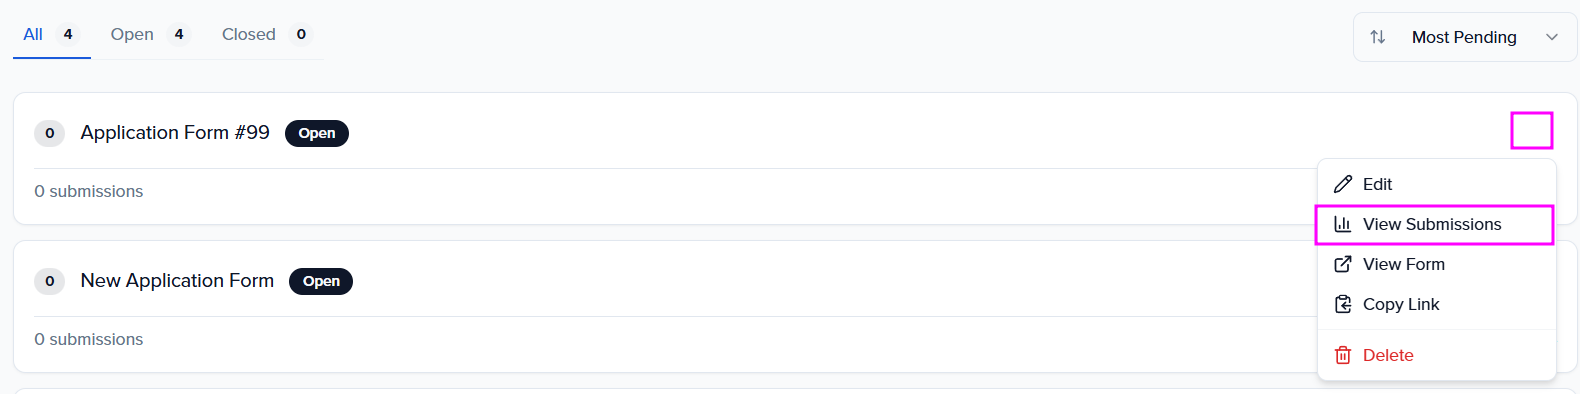
Within the Applications module, click your application form’s card, or open its menu and select View Submissions.
-
You will have access to a dashboard where you will be able to review all applications received and update their status. The tabs across the top are the status queues: Accepted, Accept Queue, Pending, Decline Queue and Declined, plus Drafts for applications started but not submitted. Click a Status cell to move one application; select several rows to Send Emails to the applicants from the table. Options exports the table as CSV or XLSX. New applications arrive with no status unless the form sets one: in the form editor, Default status for new submissions starts every application from that form in the status you choose. Leave it on No status (default) to keep applications unassigned until you review them.
Frequently Asked Questions
Section titled “Frequently Asked Questions”- Do applicants have access to the portal?
- Yes, applicants will be directed to the portal once they have completed filling out their application.
- Can I use an integration or open API with applications?
- No — applications are managed inside Sessionboard.
- Can I create a review plan for applications?
- No. Review plans run on sessions and submissions; review applications from the applications dashboard.