

Create documents
Document creation lives in the Print module (previously called Documents) and allows you to create personalized documents using data from your event speakers, sessions, sponsors, and exhibitors. This feature streamlines the process of producing standardized documents, saving your team valuable time and ensuring consistency.
Why use it
Section titled “Why use it”One template produces a finished document for every session, speaker, sponsor or participant, filled in from the data already in your event, so you are not copying names and titles into Word by hand. Certificates go one step further: each participant can download their own from their session in the Portal, so you stop emailing them one by one and nobody has to ask for a lost copy.
Example Documents You Can Create:
Section titled “Example Documents You Can Create:”- Sessions
- Session Outline
- Session Run of Show
- Speakers
- Speaker Bio & Headshot Summary
- Speaker Welcome Packet
- Sponsors
- Sponsor Benefit Summaries
- Onsite Contact List
- Sponsor Welcome Packet
- Exhibitors
- Exhibitor Benefit Summaries
- Onsite Contact List
- Exhibitor Welcome Packet
How to Create a Document
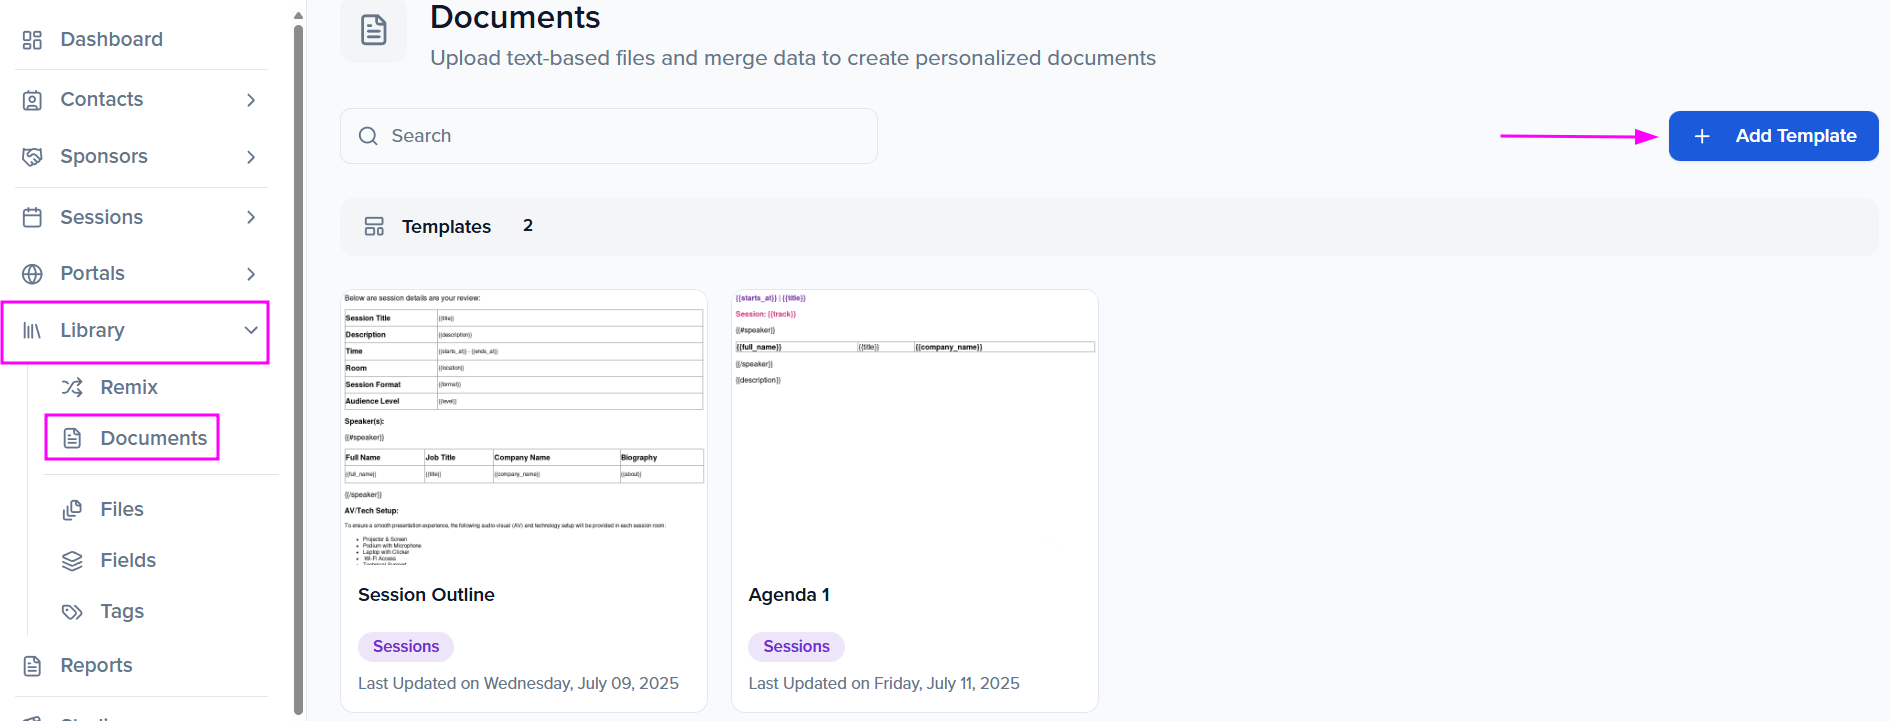
Section titled “How to Create a Document”From your left-hand menu, access the Library module to open the dropdown, and select Documents. Tap the + Add Template button on the right-hand side to start a new document.
Within the pop-up module, provide the following details for your document. Select the Save & Next button to progress to the next page once complete.
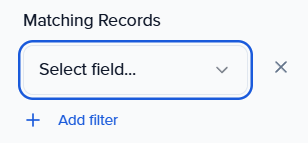
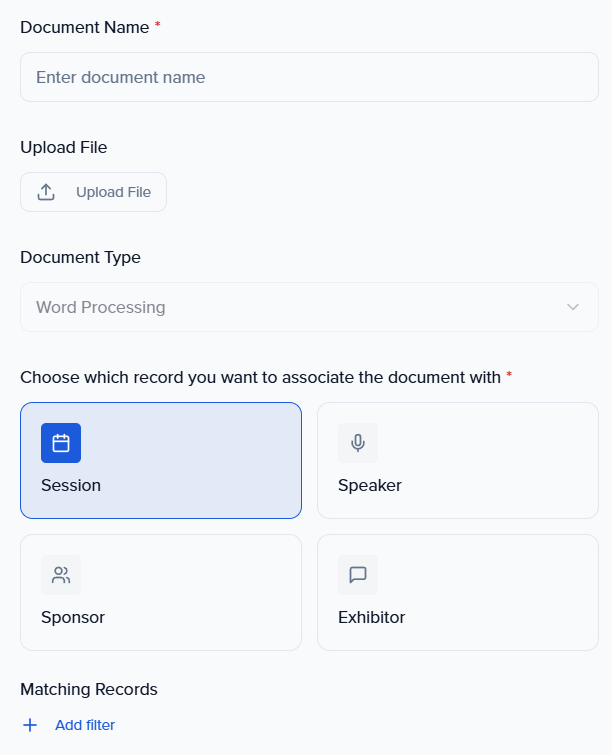
| Document Name (Required) Upload File (You are not required to upload a pre-existing file to edit) NOTE: If you upload a document by mistake and need to select a new one, exit out of the pop-up module and reselect + Create Document Document Type (Word Processing — documents are built as Word files.) Choose which record you want to associate the document with: Session, Speaker, Sponsor, or Exhibitor This will be the base record; however, you will have the ability to include related fields for other modules (i.e. include related fields for speakers within a session document) Filter Records: Apply a filter to control what records (i.e., speakers, sessions, sponsors, or exhibitors) the document will include |
|---|
Document Editor
Section titled “Document Editor”The Document Editor in Sessionboard allows event teams to quickly generate personalized documents by inserting merge fields that dynamically pull in session, speaker, sponsor, and exhibitor information.
These merge fields can be used to automatically populate details such as names, titles, session times, locations, bios, and more, saving time and ensuring accuracy across communications. If there is no data for a record, the record will not be skipped.
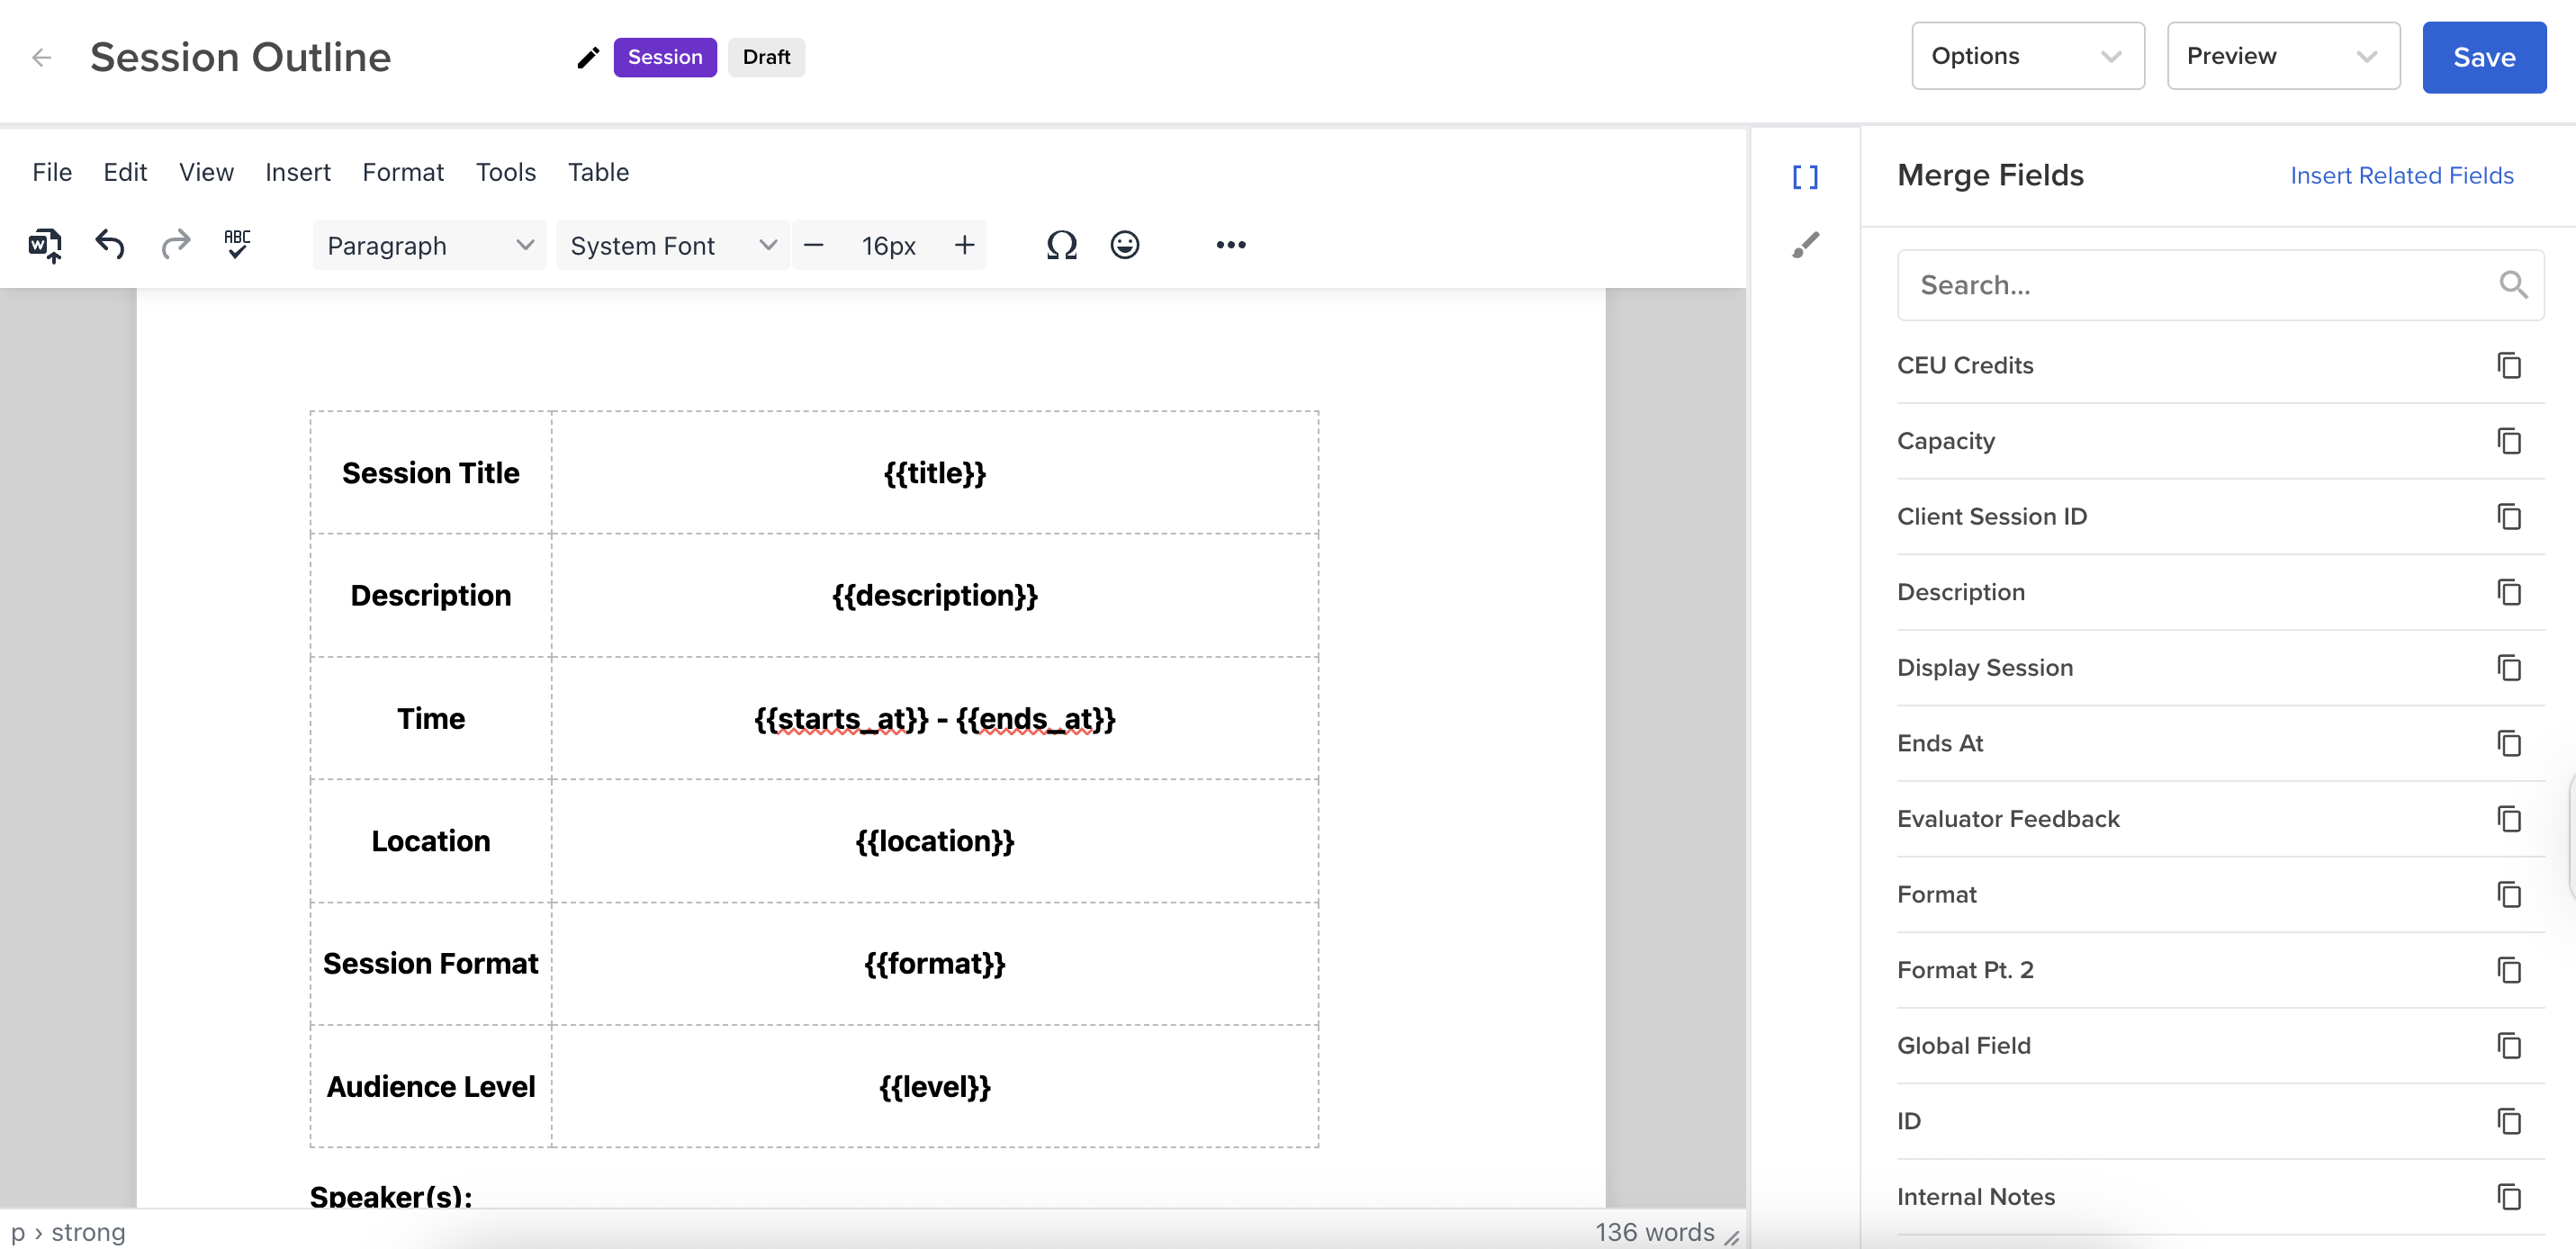
❗️IMPORTANT NOTE❗️: Ensure to save your document before previewing it so that you do not lose the edits you have made.

Include Related Fields
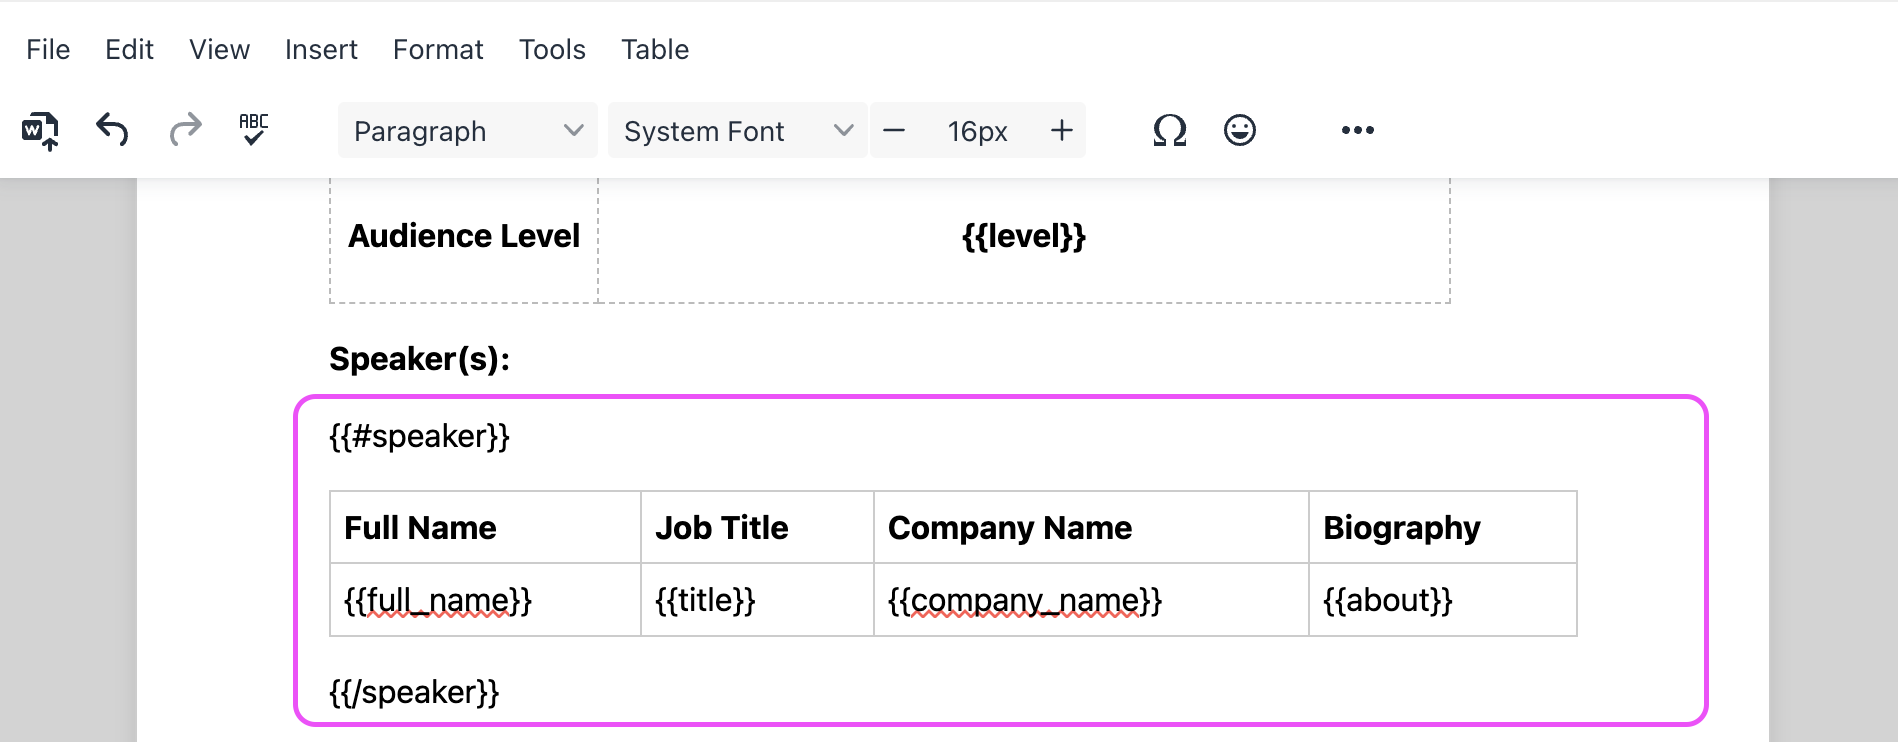
Section titled “Include Related Fields”To include related entries (e.g., speaker name, job title, company, and biography), users can insert a Related Fields Table, which will generate a structured table of linked data.

Related fields will be inserted as a table view within your document.
Adding a header and footer to your document
Section titled “Adding a header and footer to your document”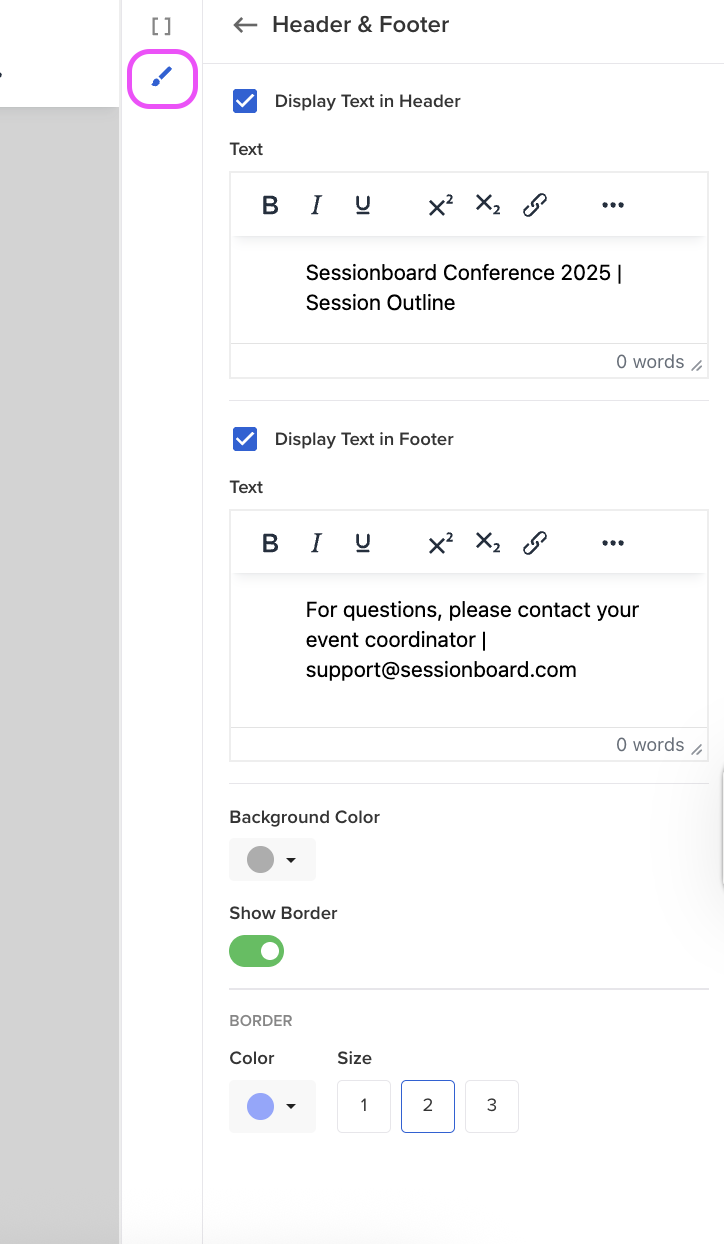
| In the Document Editor, you can easily insert a header and footer to create a polished, professional look for your document. Simply click the paintbrush icon on the left side of your screen. From there, you can add text or an image that should appear consistently across every page. Headers and footers help reinforce branding and ensure key details are always visible. NOTE: Headers & Footers will not appear in the preview document but will be included within the exported file. |
|---|
The Options menu
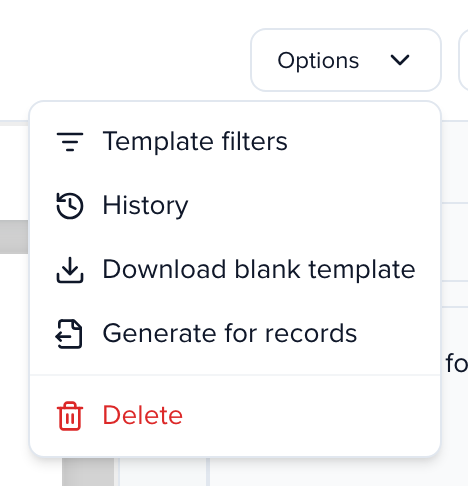
Section titled “The Options menu”The Options menu at the top of the template editor separates the two ways to get a file out of a template:
- Download blank template — downloads the template itself, with merge fields unresolved. Use this for a copy of the layout, not for finished documents.
- Generate for records — saves the template and opens the publish flow, where you pick the records to bind. This is the action that produces finished documents with merge fields filled in.
Publish (export) your document
Section titled “Publish (export) your document”Once you have completed editing your document and you are ready to export, select the blue Save & Next button at the top right-hand corner of your screen to export your created document.

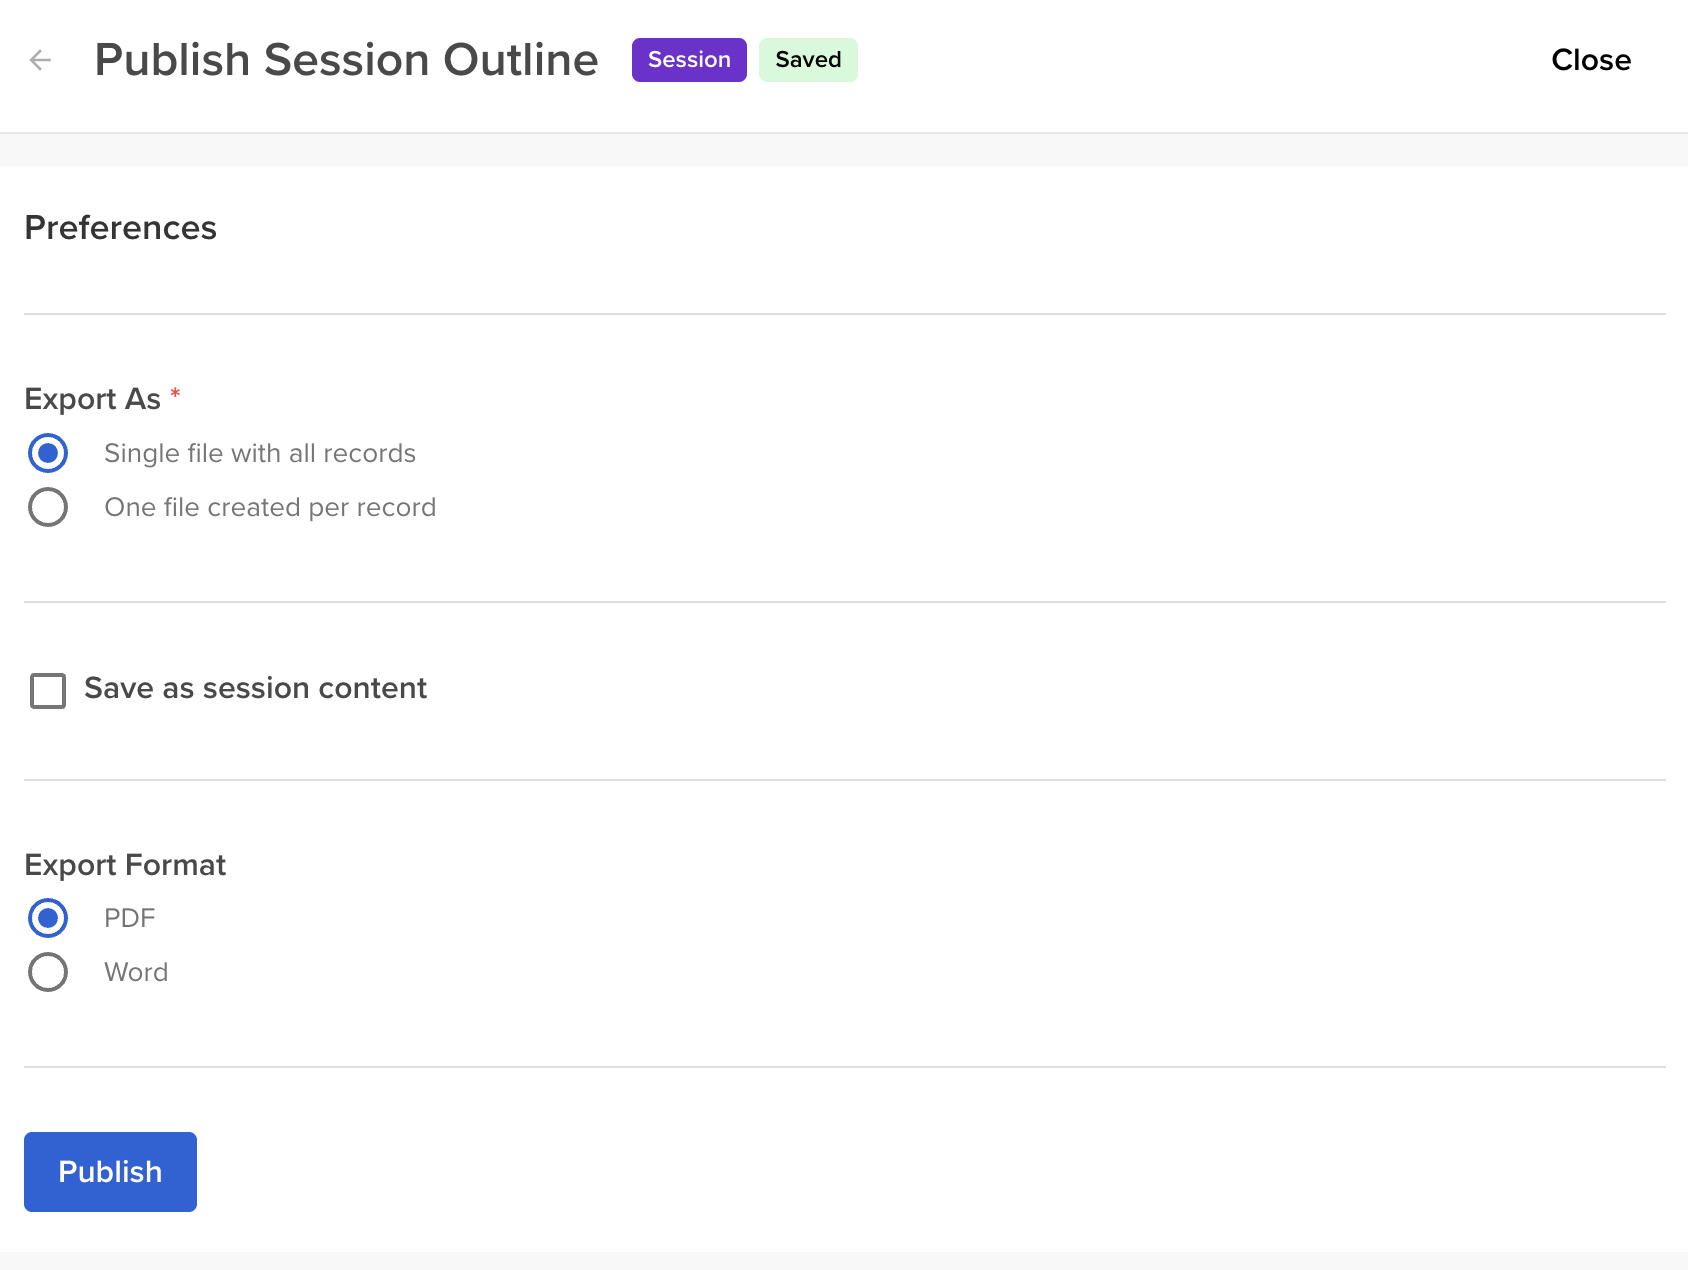
| The Preferences page will allow you to set your export preferences. Checking the box Save as session content will attach the document as a file to each associated session record. When you are ready to export the document, select the blue Publish button at the bottom of the screen. |
|---|
Share certificates with participants in the Portal
Section titled “Share certificates with participants in the Portal”Certificates made from a Session role template, such as the certificate starters in Print, can be downloaded by each participant from the speaker Portal instead of being emailed one by one.
- Open the certificate template and choose Options → Generate for records.
- Under Export as keep One file per record, and under Format choose PDF.
- Check Visible in Portal and choose Publish.
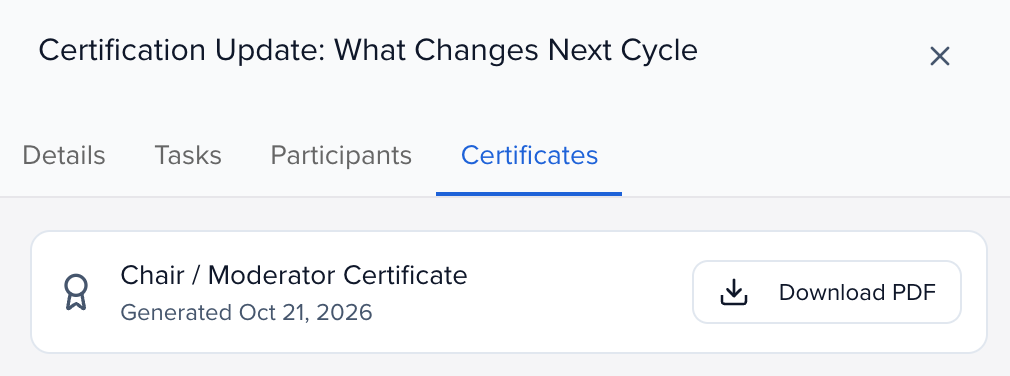
Each participant now sees a Certificates tab on their session in the Portal, with the certificate’s name, the date it was generated and Download PDF. The tab only appears for a participant who has a visible certificate on that session, and a participant only ever sees their own.
Manage certificates after publishing
Section titled “Manage certificates after publishing”Options → Certificates lists every certificate the template has generated: the participant and their role, the session, and when it was generated. From the list you can:
- Turn Visible in Portal on or off for one certificate, without generating it again. The change shows the next time the participant opens or refreshes the session.
- Download a certificate.
- Delete a certificate. It disappears from the Portal at once; publishing the template again creates a new one.
Publishing the template again replaces each certificate’s file, so the Portal always offers the latest version. A certificate that is already visible stays visible even if you publish again without checking Visible in Portal.