

Speaker CRM: set-up & best practices
This guide applies only to organizations that have the Speaker CRM enabled.
What the Speaker CRM adds
Section titled “What the Speaker CRM adds”The Speaker CRM is the organization level of Sessionboard. Every contact from every event lives in one directory under CRM > Contacts, with the events they took part in, the emails they were sent, and every standard and custom field on their record. From there you filter, save segments, add people to a new event, and run the Pipeline and Interest Forms that feed it.
Four steps get a new CRM ready to use. Do them in this order — the fields have to exist before the import can map to them, and the import has to land before segments have anything to match.
1. Invite your team
Section titled “1. Invite your team”Everyone who should work in the organization needs an organization-level invitation; an event-level invitation only opens that event.
Open Settings > Team, click Add, and choose Invite User. Enter the person’s Email, First Name and Last Name, then decide how far their access goes:
- Active User — off, and the person cannot sign in to the platform or a portal.
- Organization Access — on, and the person can open the organization: the directory, segments, Pipeline, reports and settings. Pick the role that answers What type of user is this?
- Events — the events they can manage. Each one gives them the Admin User role on that event; change it on the event’s Event Team page afterwards if they need less.
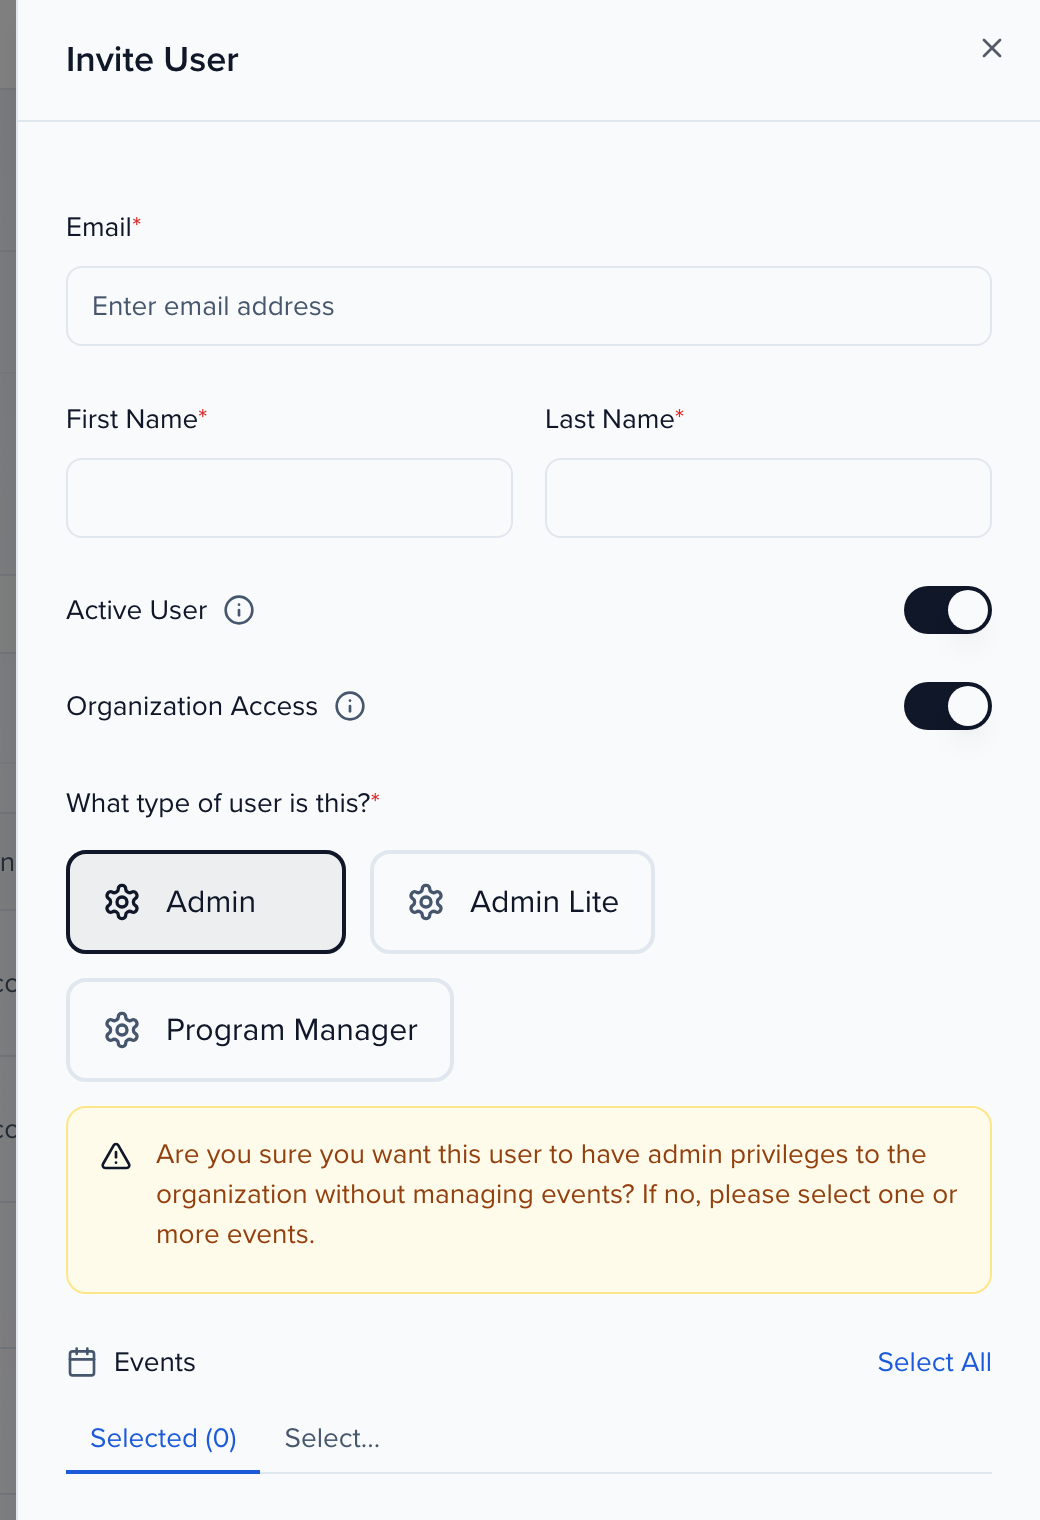
Think about who needs the organization and who only needs an event:
- Leadership — dashboards and reports across events, so organization access.
- Marketing — segments and campaigns, so organization access.
- Content and program teams — usually one or two events each, so event access only.
- IT — integrations and single sign-on live under organization Settings.
Details and the invitation email: Inviting organization team members.
2. Create the contact fields you will need
Section titled “2. Create the contact fields you will need”Custom fields hold whatever you track about a person beyond the standard record — previous events, a speaker tier, whether they are internal or external. A field created at the organization level is a Global Field: it exists on every event, so the same answer follows the contact from one event to the next.
Open Settings > Library > Fields. On the Contact tab the standard fields are grouped as Profile, Communication and Attribute; the Custom tab holds the ones your team added. Click Add Field and complete:
- Name — up to 255 characters.
- Field Type — dropdown, text, number, date, checkbox, file, and so on.
- Field Description — an internal note so the rest of the team uses the field the same way.
- Field Level — locked to Global Field here; only global fields can be created at the organization level.
- Contains Personal Data — masks the field in AI queries and shared reports.
More on field types and where fields appear: Speaker CRM: creating fields.
3. Import your existing contacts
Section titled “3. Import your existing contacts”With the fields in place, bring in the contacts you already have so the CRM starts full instead of empty.
Add your custom fields to the view
On the contacts table, open Columns and turn on every custom field you want to fill. The import template is built from the columns in your current view.
Generate the template
Click Options > Import, then Generate Template. Match your spreadsheet’s headers to the template, or paste your data into it.
Import
Click Options > Import > Upload File and follow the three steps — header row, column mapping, then validation. Every contact needs a unique email address; a row whose email already exists updates that contact instead of creating a duplicate when Update record if already exists is true.
Before you upload:
- Remove duplicates — one row per email address.
- Standardize formats — phone numbers with a country code (
+1 (303) 555-0199), fullhttps://URLs, dates asYYYY-MM-DD. - Fill required fields — First Name, Last Name and Email on every row.
- Map every column — create the custom field first if your old system has a column with nowhere to go.
After the import, open a few records and check that the values landed in the right fields before you build segments on them.
The complete file rules (row limit, multi-select separators, file and currency columns) are in Importing data.
4. Build your first segments
Section titled “4. Build your first segments”A segment is a saved subset of the directory. Use it to email one group, to review who spoke last year, or to hand a shortlist to a program committee.
Filter the directory
On CRM > Contacts, click Filter. The facets are grouped — Demographics, Relevance, Company, History & Connections, sessions and your custom fields — and each value shows how many contacts match. Choosing values from different facets narrows the list (AND); choosing several values in one facet widens it (OR). Click Done.
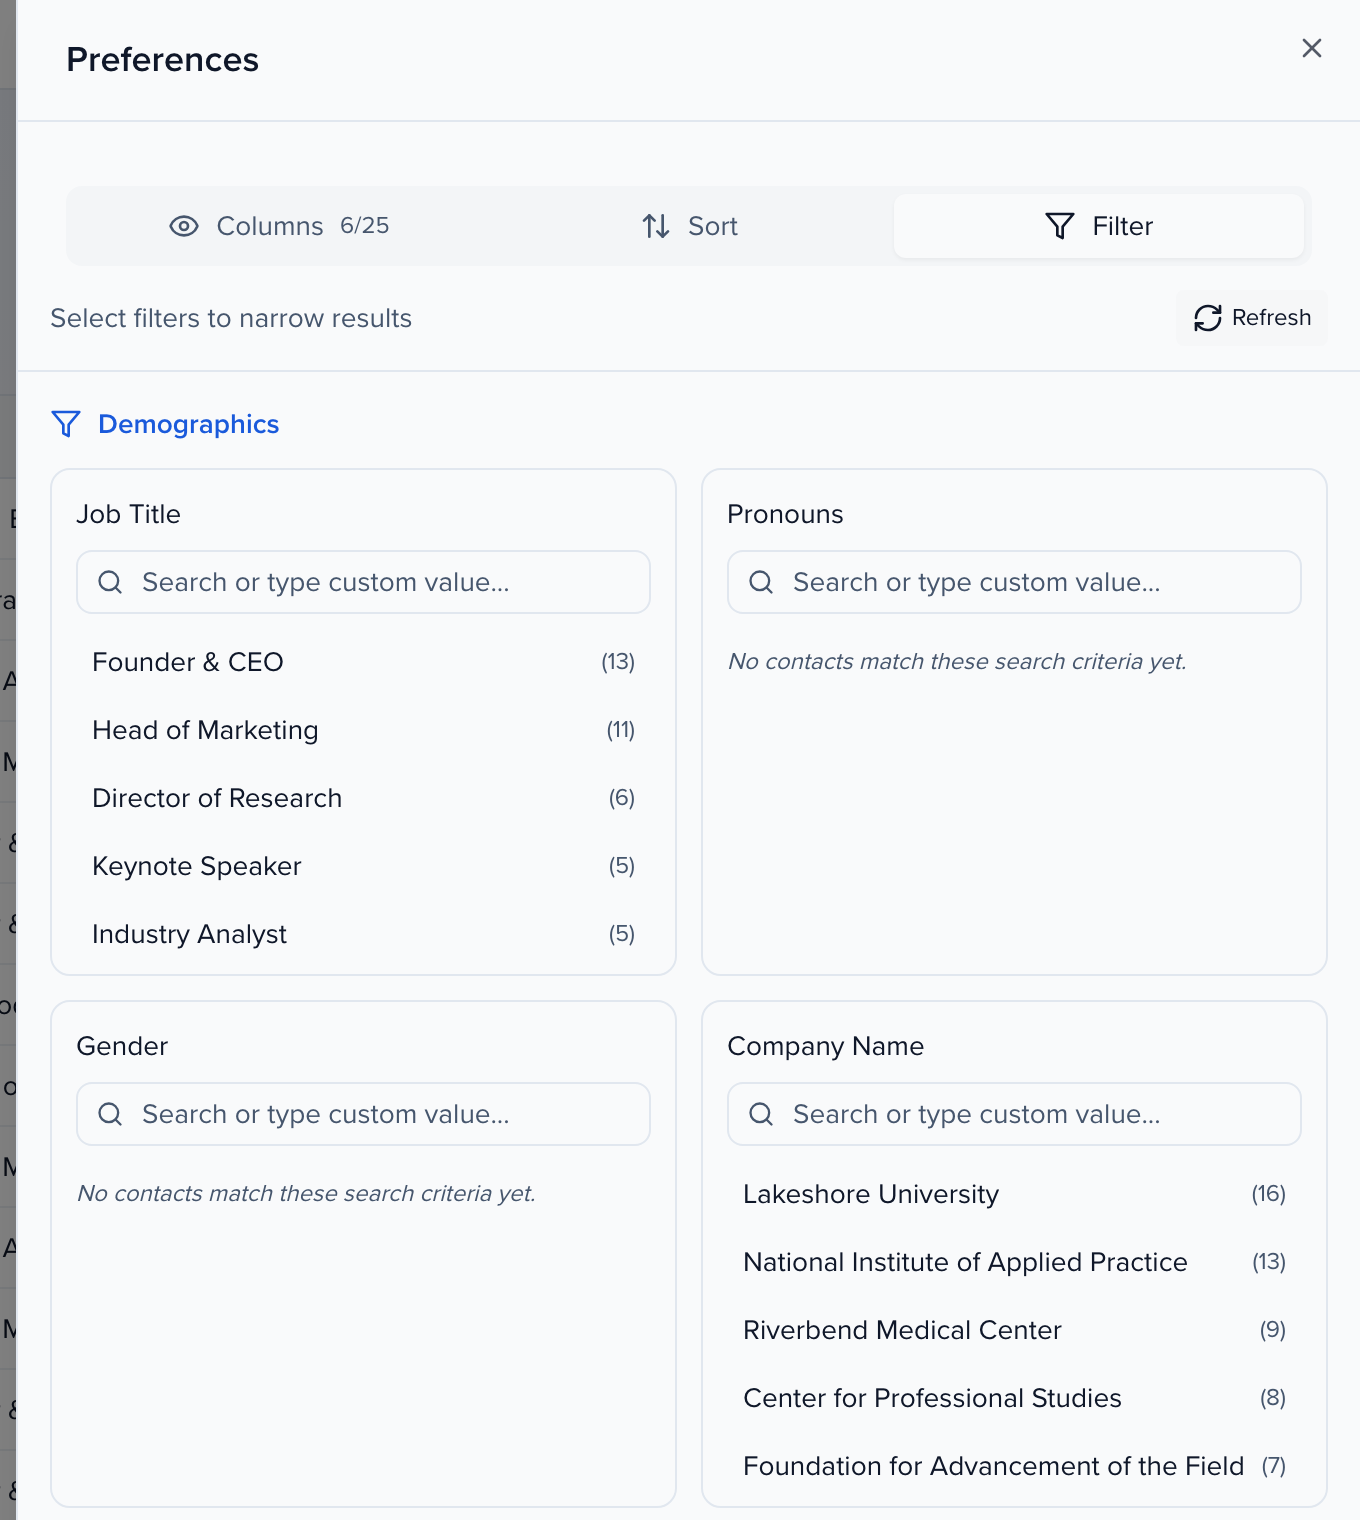
Save Segment
The toolbar now shows the active filter count, Clear all and Save Segment. Click Save Segment, name it, and choose the kind of list:
- Save Dynamic Segment — keeps matching the filters, so new contacts join it automatically.
- Save Curated List — freezes the contacts that match right now; you add and remove people yourself.
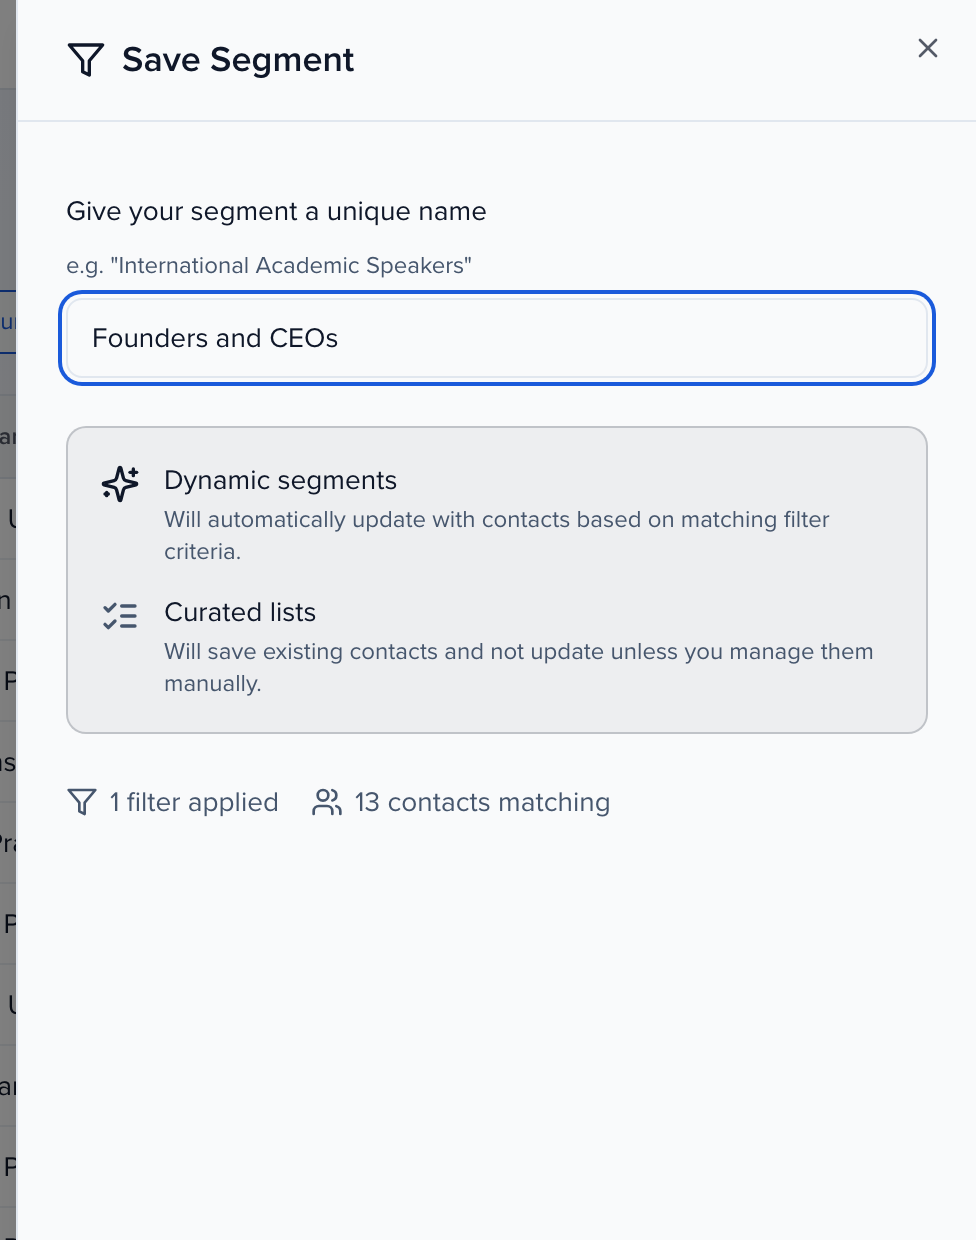
Segments you have saved are listed under CRM > Segments. Managing them — opening, editing, duplicating, adding a contact to a curated list — is covered in Speaker CRM: segments.
Segments that tend to earn their keep:
- Last year’s keynote speakers (curated) — the people you want to invite back first.
- Spoke at any event (dynamic) — an “Events” filter that grows as programs are published.
- Members who have also spoken (dynamic) — a membership dropdown plus the Events filter.