

Print agendas & program books
Print turns the sessions, speakers and sponsors already in your event into printable booklets — a full program book, a day-at-a-glance grid, a speaker bio book, a sponsor guide. You pick a starter, the editor fills it from your event data, and you fine-tune the structure, branding and layout before exporting a PDF or sharing a link.
Video transcript
Everything in this event, the sessions, the speakers, the sponsors, eventually has to end up on paper. A program book at registration, a day-at-a-glance grid on the wall, certificates for your moderators. Print, under Program, builds those from the data you already have. Each card here is a booklet or a certificate for this event, showing what it prints from. The legacy badge marks the older per-record documents, one merged file per session or person, which still work and still open from here.
Add, then Add Template. Create a booklet gives you five ways in, and the gallery is the quick one. Nine starters, an agenda program book, a conference brochure, a detailed agenda, a schedule grid, a daily sheet, a speaker bio book, an awards program, a session handout and a sponsor guide. Pick one and the editor opens with your event already merged in. The page counts are estimates from your own data.
The other tabs. From scratch is a cover and one blank page. Import Word takes a dot docx you already have, headings, paragraphs, lists and tables become editable blocks, and the booklet takes its name from the first heading. AI prompt, you describe the booklet and it picks the best starter and applies your title. And Legacy is the older document flow, one merged file per session or person.
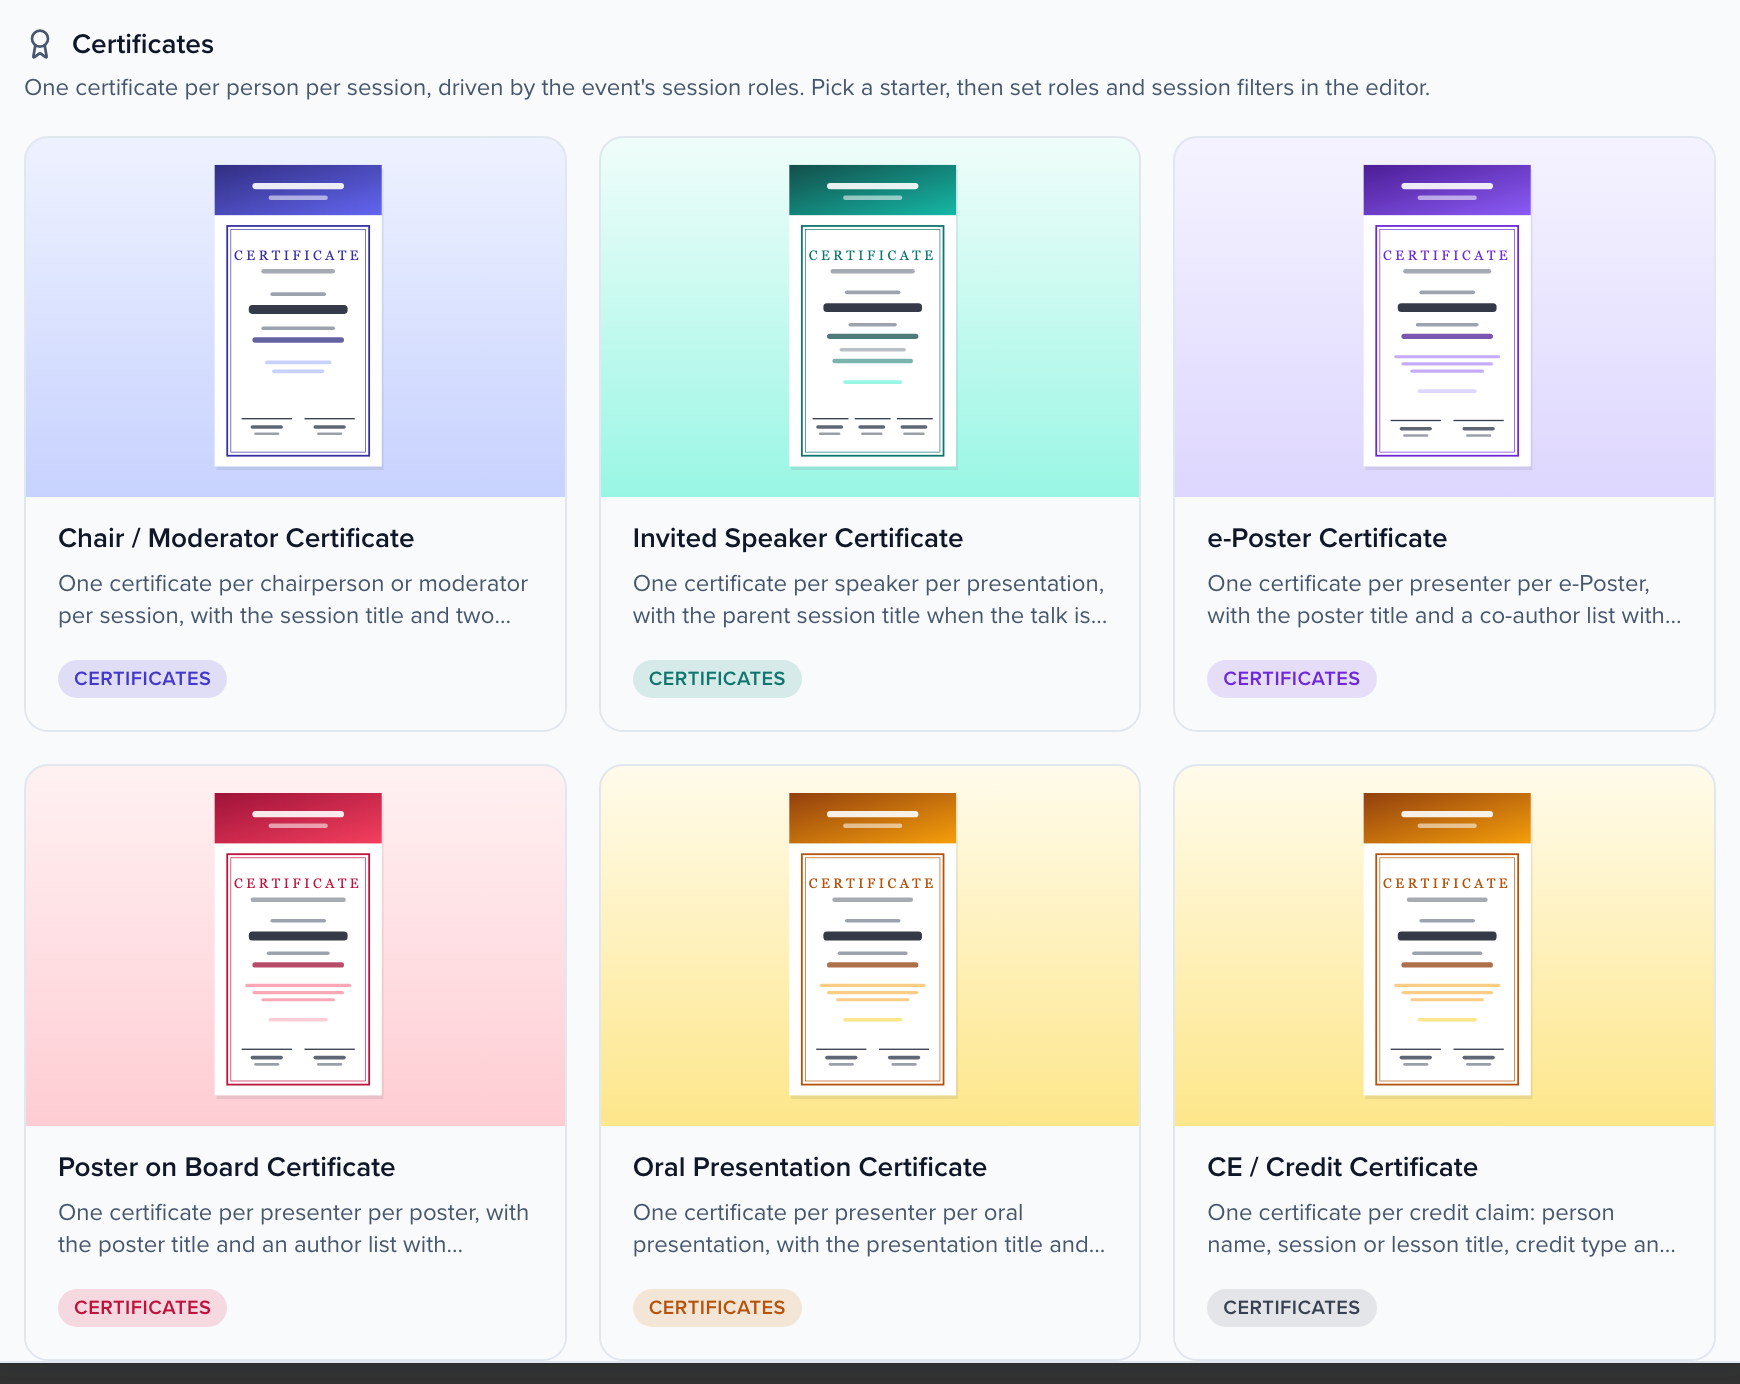
Below the booklets, certificates. Chair and moderator, invited speaker, e-poster, poster on board, oral presentation, and CE credit. Each one prints a certificate per person per session, driven by the roles on your sessions, so if a moderator chairs three panels they get three. These use the legacy document editor with its merge fields, and Copy from, back in the Add menu, pulls a booklet in from another event in your organization, so next year starts from this year’s program.
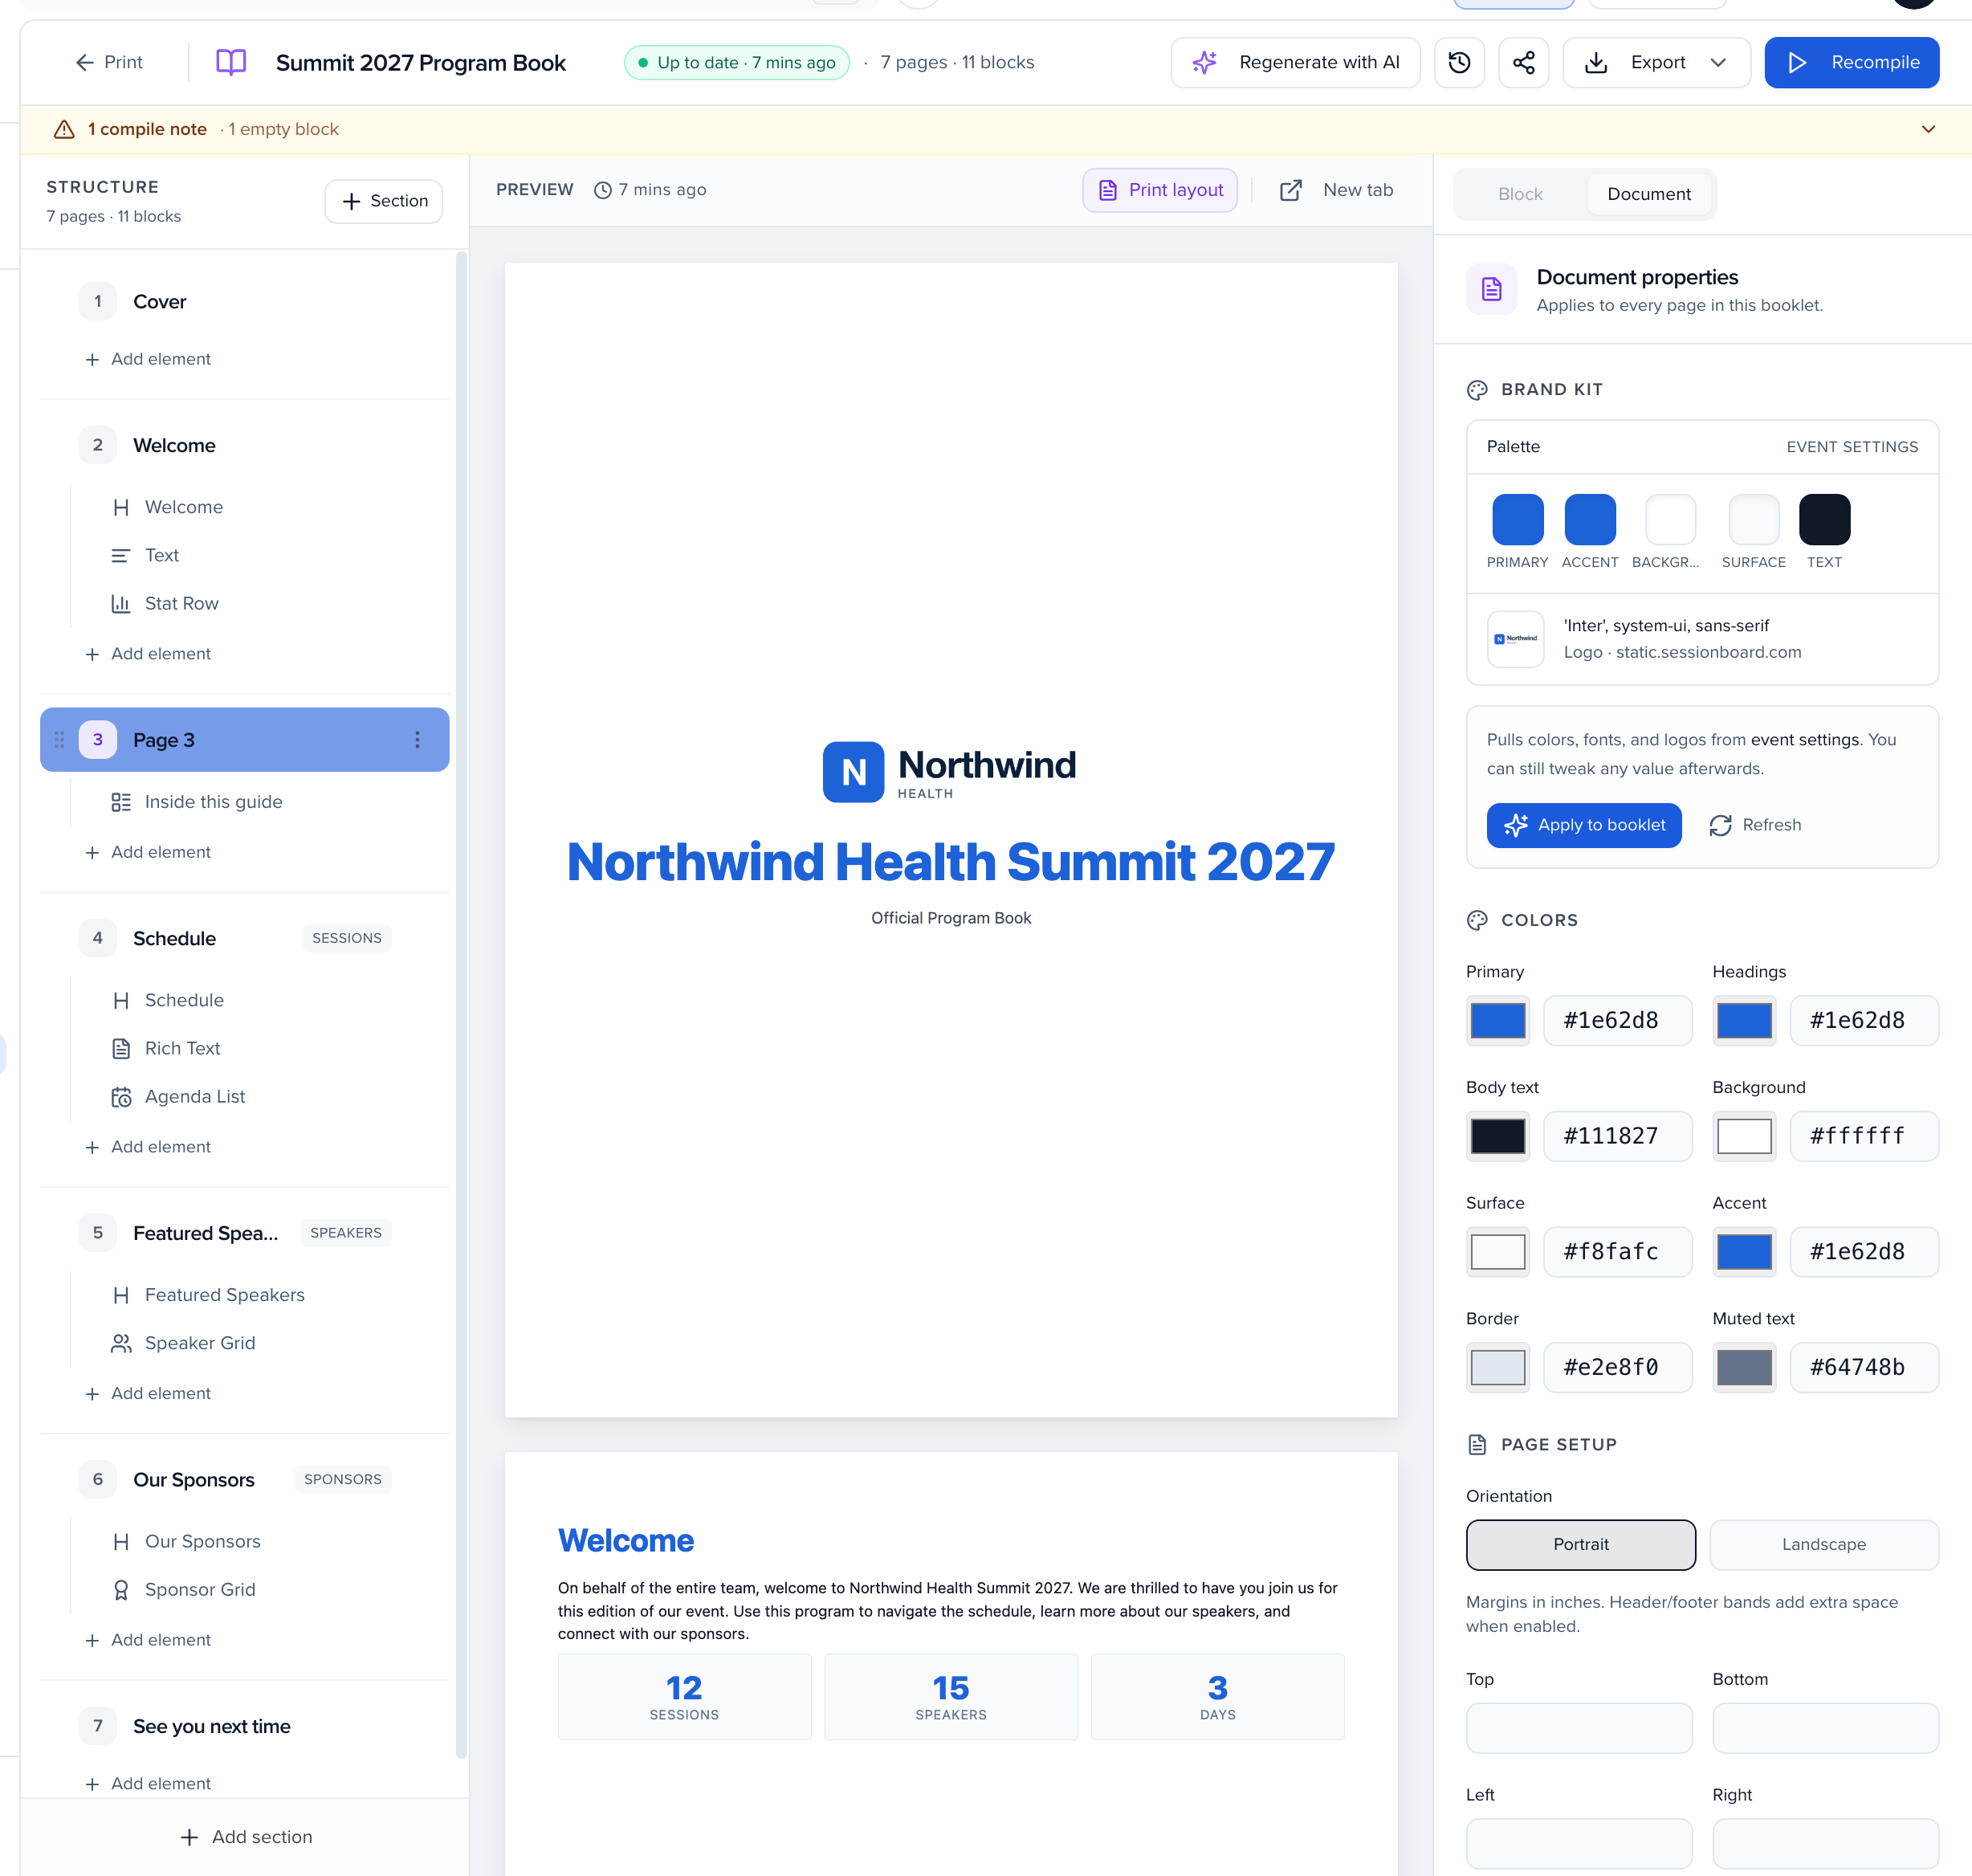
Open the program book. Three panels. Structure on the left, the compiled preview in the middle, and the inspector on the right. Along the top, the title, a status chip, up to date, with the page and block count, and a yellow bar with compile notes, here one block printed nothing. Every change saves itself and queues a recompile, so the preview catches up a few seconds after you edit.
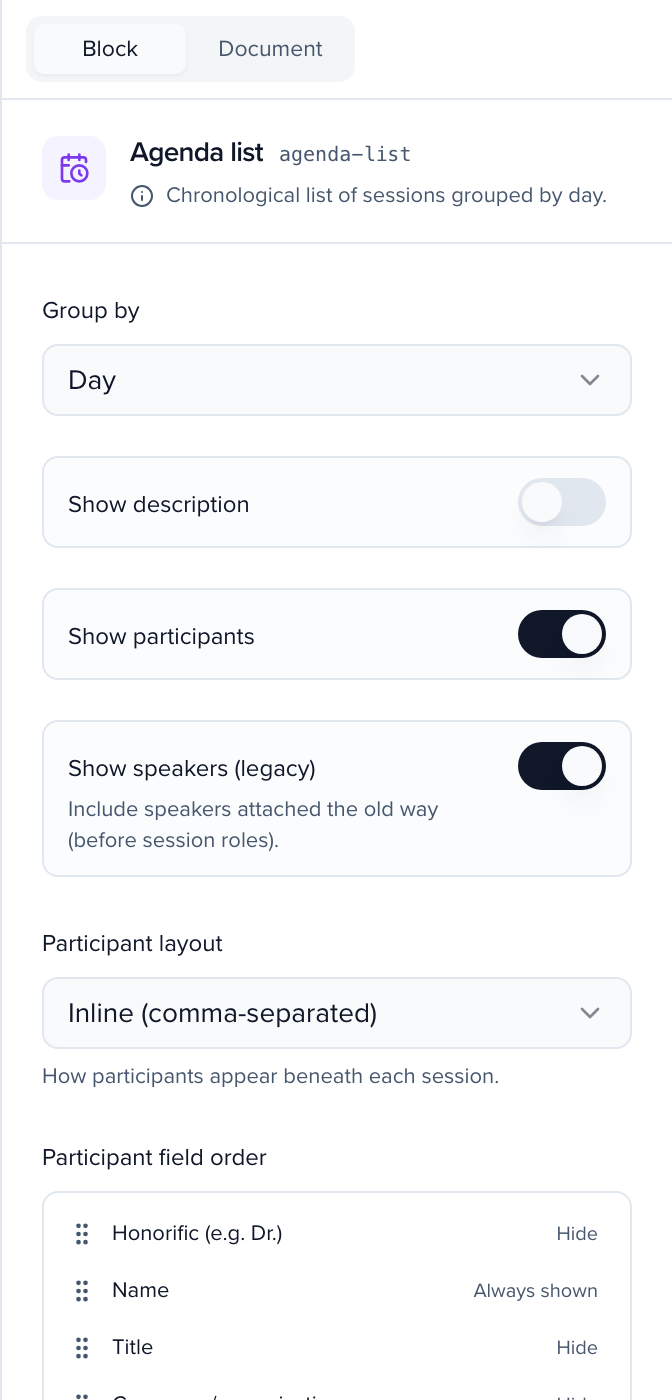
Sections are the chapters of the book, cover, welcome, schedule, featured speakers, sponsors. Drag to reorder, click to select. Inside a section, blocks. Click the agenda list and the inspector switches to that block. Group by day or by track, show descriptions, participant layout, the field order for names, headshots on or off, and which roles appear. That’s what makes the book live, an agenda list prints whatever sessions match at compile time, not a copy you pasted in.
Add element opens the picker. Text, a heading, rich text, a stat row. Data blocks, agenda list, agenda calendar, schedule grid, speaker grid, sponsor grid, awards list, table of contents. Media, an image or a QR code, handy for the feedback survey. And layout, columns, a grid, dividers, spacers. Add a sponsor grid to the last page and it fills from your sponsor tiers.
The Document tab is every page at once. Brand kit at the top shows the palette, font and logo it found in your event settings, apply to booklet copies them in, refresh re-reads them after you change the event’s branding, and you can still override anything underneath. Colors, primary, headings, body, background, surface, accent. Page setup, portrait or landscape and the margins in inches. Typography, a system font, a Google font, or a file you upload. And header and footer bands that print on every page except covers.
The preview scrolls continuously by default. Print layout switches to one card per sheet, which is exactly what the PDF will be, so you see the page breaks before the printer does. New tab opens the compiled book full size on its own.
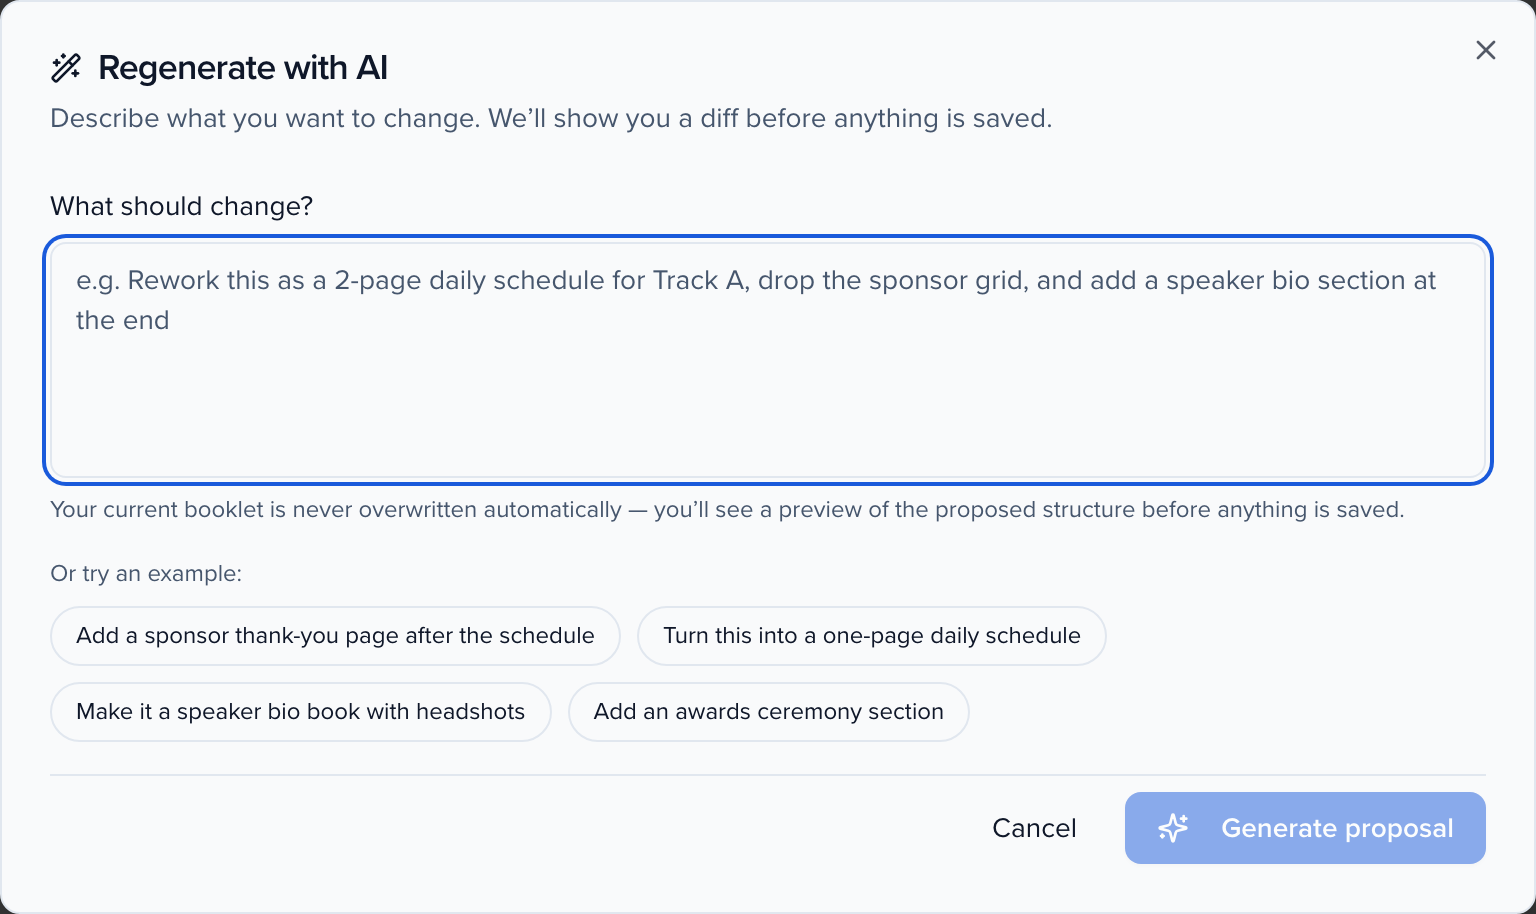
Regenerate with AI is for the bigger edits. Add a sponsor thank-you page after the schedule, shorten the speaker bios. Generate proposal shows you a diff of what would change, and nothing is written until you apply it. Discard leaves the book as it was. We’ll leave it here.
Every edit is a revision. Revision history lists them, you can preview any earlier version and restore it, and restoring is itself a new revision, so there’s no way to lose work from here.
When the book is right, Export. PDF builds in the background, so you can keep editing; you get a notification when the file’s ready. Markdown gives you the text as a file, and Copy as Markdown puts the same text on your clipboard for a notes tool or an assistant. Export always uses the latest compile, so if the chip says up to date, the PDF matches what you’re looking at.
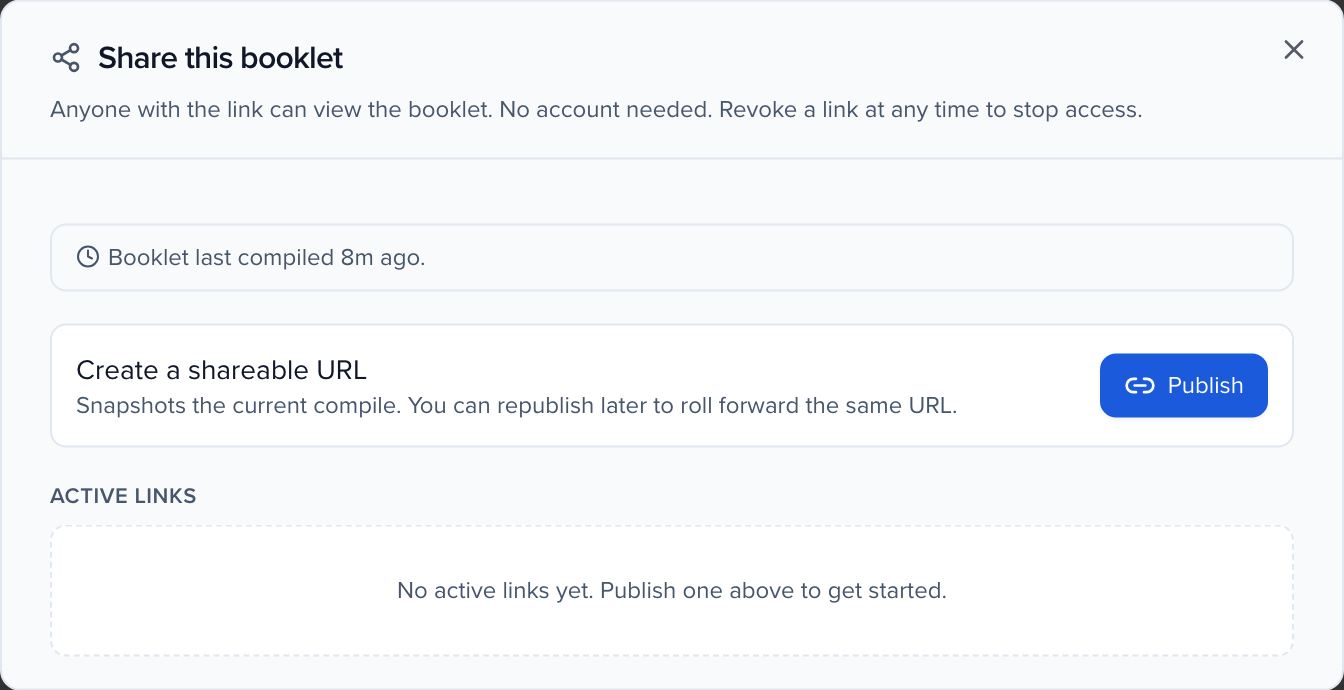
Share, then Publish, gives you a public link anyone can open, no account needed. Worth knowing, it’s a snapshot. People keep seeing that version as your program changes, until you click Republish, same address, new content. Revoke turns it off. We won’t publish the fixture.
And keeping it current is the whole point. Change a session, a speaker, a sponsor anywhere in the event, then come back and Recompile. The chip goes to compiling and back to up to date, the compile notes tell you if anything printed empty, and then you export a fresh PDF or republish the link.
So that’s Print. Starters or your own Word file in, sections and live data blocks, brand kit and page setup, a PDF or a shared link out, and Recompile whenever the program moves. The Help Center has this under Marketing, Print agendas and program books, and the older per-record documents and certificates under Documents, Create documents.
Before you begin
Section titled “Before you begin”Make sure your event has:
- Accepted sessions with dates, times and rooms
- Accepted speakers, ideally with headshots and bios
- Sponsors and their tiers, if the booklet includes a sponsor page
- Event branding — the editor pulls your logo, colors and fonts from your event settings
You need Reports › Read to open Print, Content › Create to add a booklet and Content › Update to edit one.
Open Print
Section titled “Open Print”Open your event and go to Program → Print. Every booklet and certificate already created for this event is listed as a card. Each card shows the record type it prints (Sessions, Session role) and a Legacy badge on older Word-based templates.
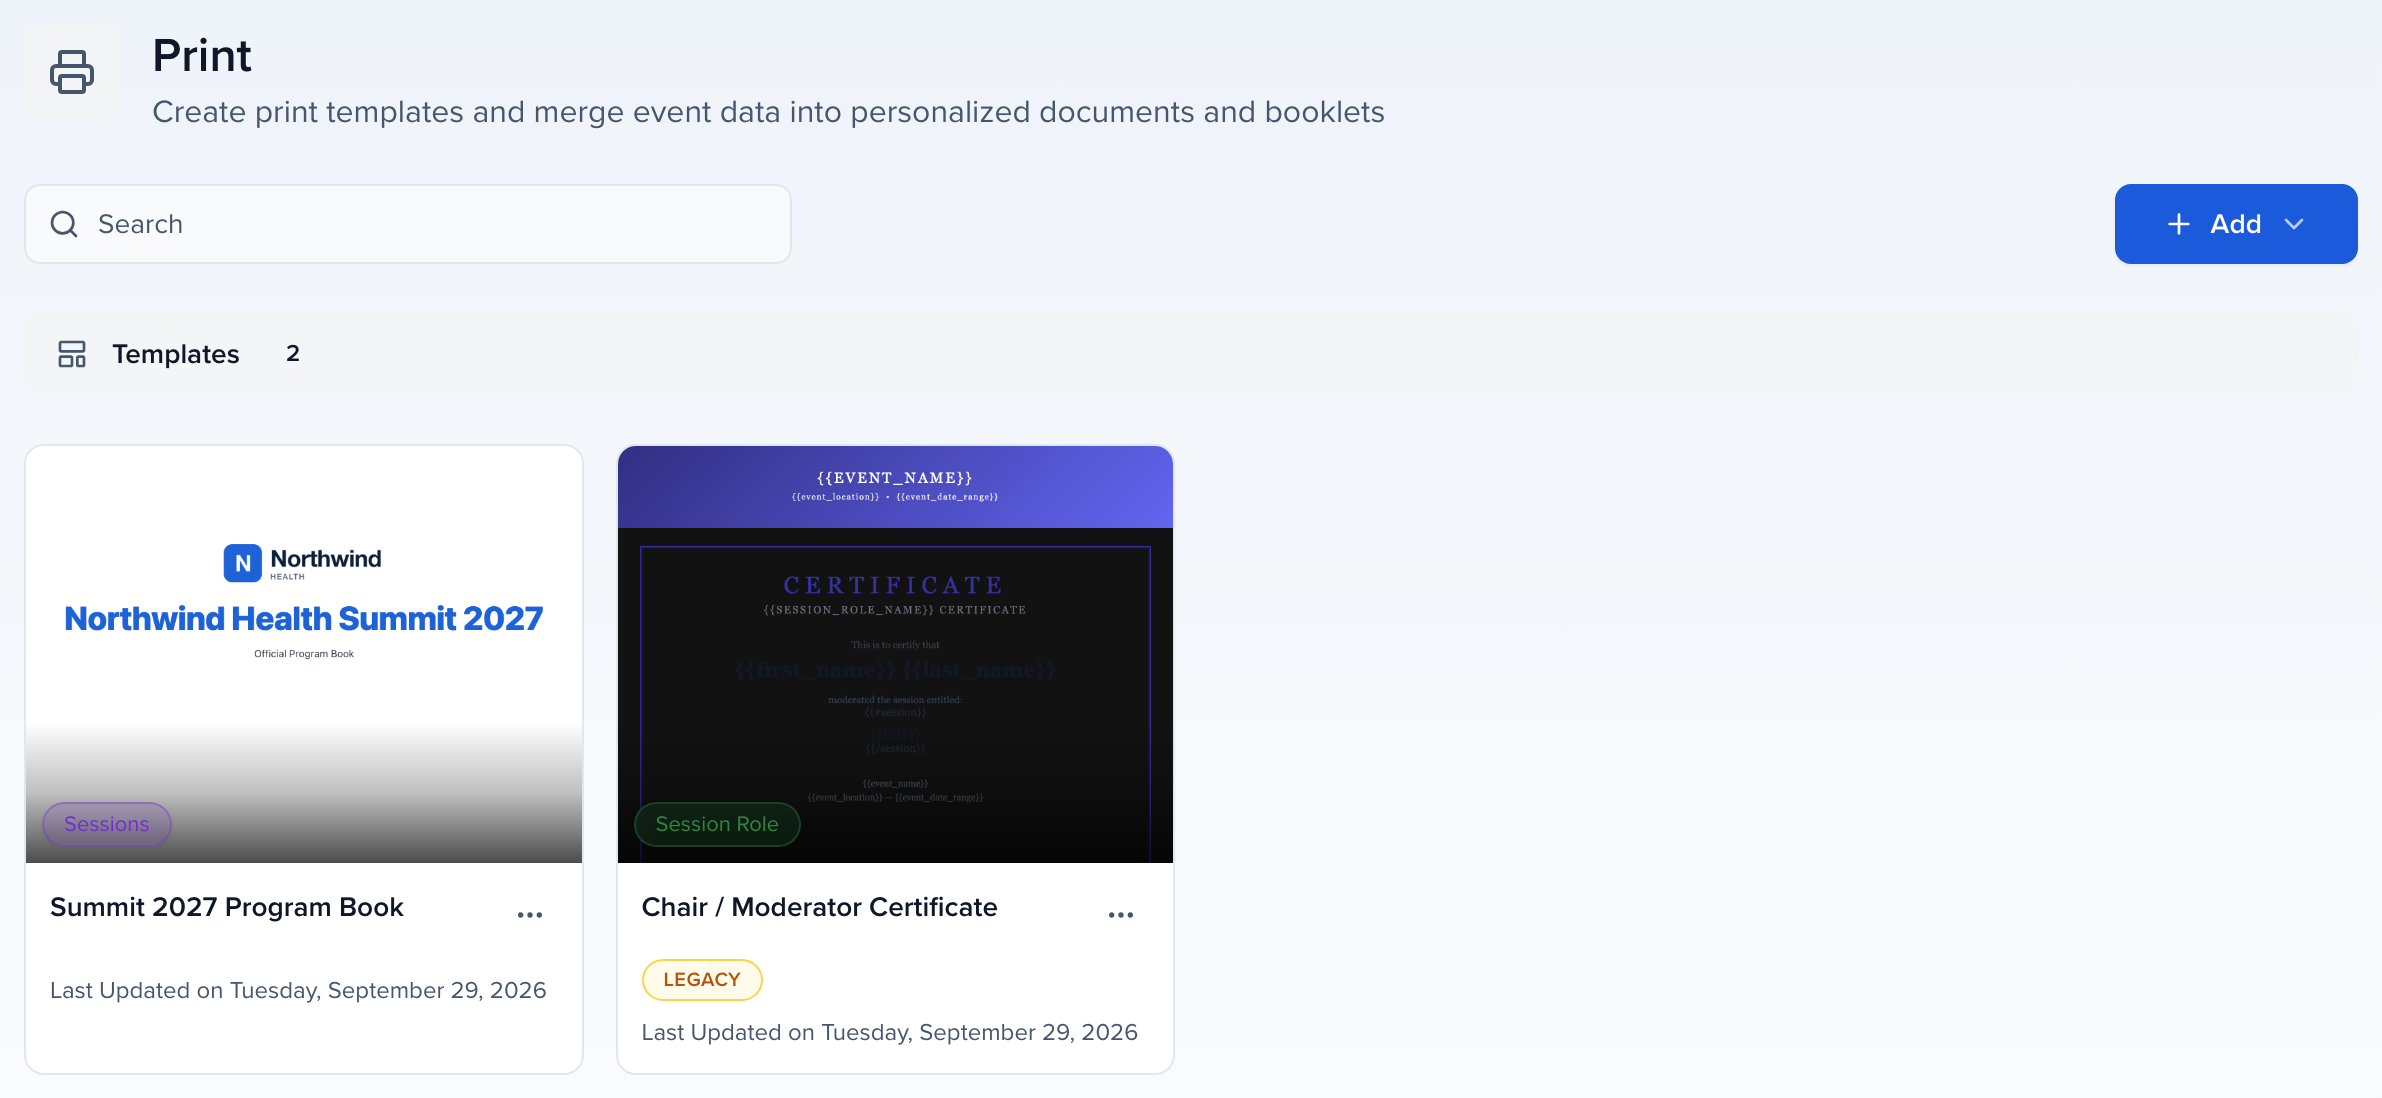
Use the ⋯ menu on a card to Edit, open Settings, Duplicate or Delete it.
Print or export the room and schedule grid
Section titled “Print or export the room and schedule grid”To print the agenda as a grid — one column per room or track, times down the side — create a booklet from the Schedule Grid (At-a-Glance) starter for a day-at-a-glance grid, or from Daily Schedule Sheet for one printable page per day that you can filter to a track. Then use Export → PDF to download it or print it. See Create a booklet and Export.
Create a booklet
Section titled “Create a booklet”Click Add → Add Template. The Create a booklet dialog gives you five ways to start:
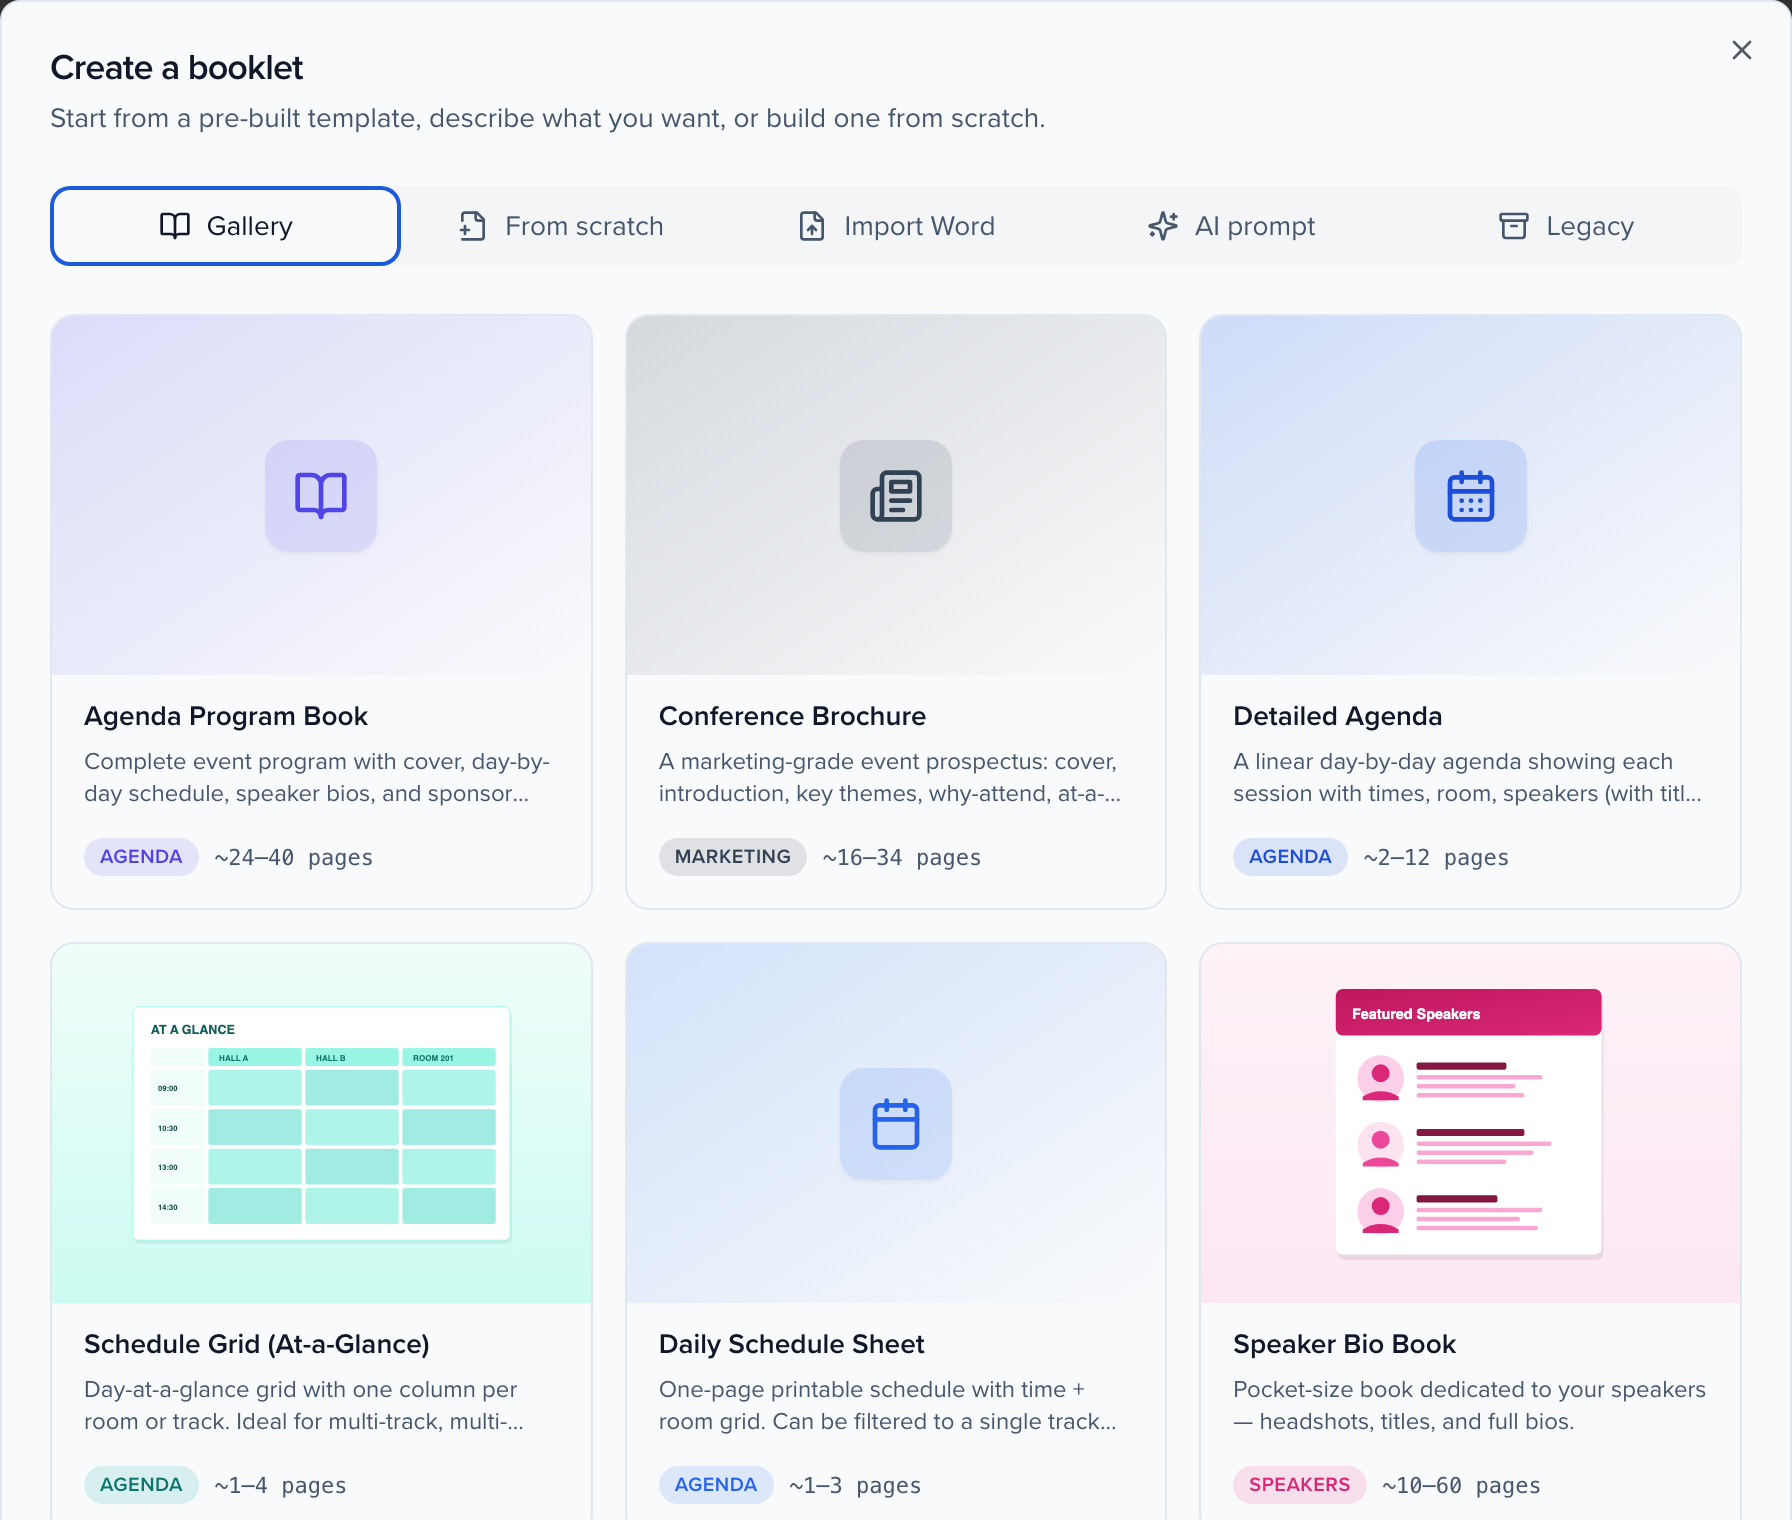
| Tab | Use it when |
|---|---|
| Gallery | You want a pre-built booklet. Pick a starter and the editor opens with your event data already merged in. |
| From scratch | You want an empty booklet — a cover and one blank page — and will add elements yourself. |
| Import Word | You have an existing program in a .docx file. Headings, paragraphs, lists and tables become editable blocks, and the booklet takes its name from the first heading. |
| AI prompt | You would rather describe the booklet. Sessionboard picks the best starter, applies your title and opens the editor. |
| Legacy | You need the older per-record document flow — one merged Word or rich-text document per session or person. See Create documents. |
Gallery starters
Section titled “Gallery starters”| Starter | What it builds | Typical length |
|---|---|---|
| Agenda Program Book | Complete program: cover, welcome, day-by-day schedule, speaker bios, sponsors | ~24–40 pages |
| Conference Brochure | Marketing-grade prospectus: introduction, key themes, at-a-glance schedule | ~16–34 pages |
| Detailed Agenda | Linear day-by-day agenda with times, rooms and speakers | ~2–12 pages |
| Schedule Grid (At-a-Glance) | Day-at-a-glance grid with one column per room or track | ~1–4 pages |
| Daily Schedule Sheet | One printable page per day, time × room, filterable to a track | ~1–3 pages |
| Speaker Bio Book | Pocket book of headshots, titles and full bios | ~10–60 pages |
| Awards Program | Ceremony booklet — categories, nominees and winners | ~12–28 pages |
| Session Handout | One-page flyer for a single session | ~1 page |
| Sponsor Guide | Tier-by-tier sponsor showcase | ~6–18 pages |
Page counts are estimates; the real number depends on how many sessions, speakers and sponsors your event has.
Certificates
Section titled “Certificates”Below the booklet gallery, the Certificates section holds per-person starters: Chair / Moderator Certificate, Invited Speaker Certificate, ePoster Certificate, Poster on Board Certificate, Oral Presentation Certificate and CE / Credit Certificate. Each prints one certificate per person per session, driven by your session roles (the CE / Credit certificate takes its signatories from your organization’s credit settings). Certificates use the legacy document editor — see Create documents for merge fields, filters and printing, and Share certificates with participants in the Portal to let each participant download their own.
The booklet editor
Section titled “The booklet editor”The editor has three panels: Structure on the left, the Preview in the middle and an inspector on the right. Every change saves automatically and queues a recompile, so the preview catches up a few seconds after you edit.
Top bar
Section titled “Top bar”- Title — click the booklet name to rename it.
- Status chip — Not compiled yet, Compiling…, Compile failed, or Up to date with the time of the last compile, page count and block count. A yellow bar underneath lists compile notes, such as an empty block that printed nothing.
- Regenerate with AI, Revision history, Share and Export — covered below.
- Recompile — rebuilds the booklet from current event data. Use it after you edit sessions or speakers elsewhere in the event.
Structure
Section titled “Structure”Sections are the chapters of your booklet (Cover, Welcome, Schedule, Featured Speakers, Our Sponsors, …). Drag the handle to reorder a section, click it to select it, and use Add section at the bottom to append a new one. Inside a section, click a block to select it or Add element to insert one.
Add element opens the Add to booklet dialog:
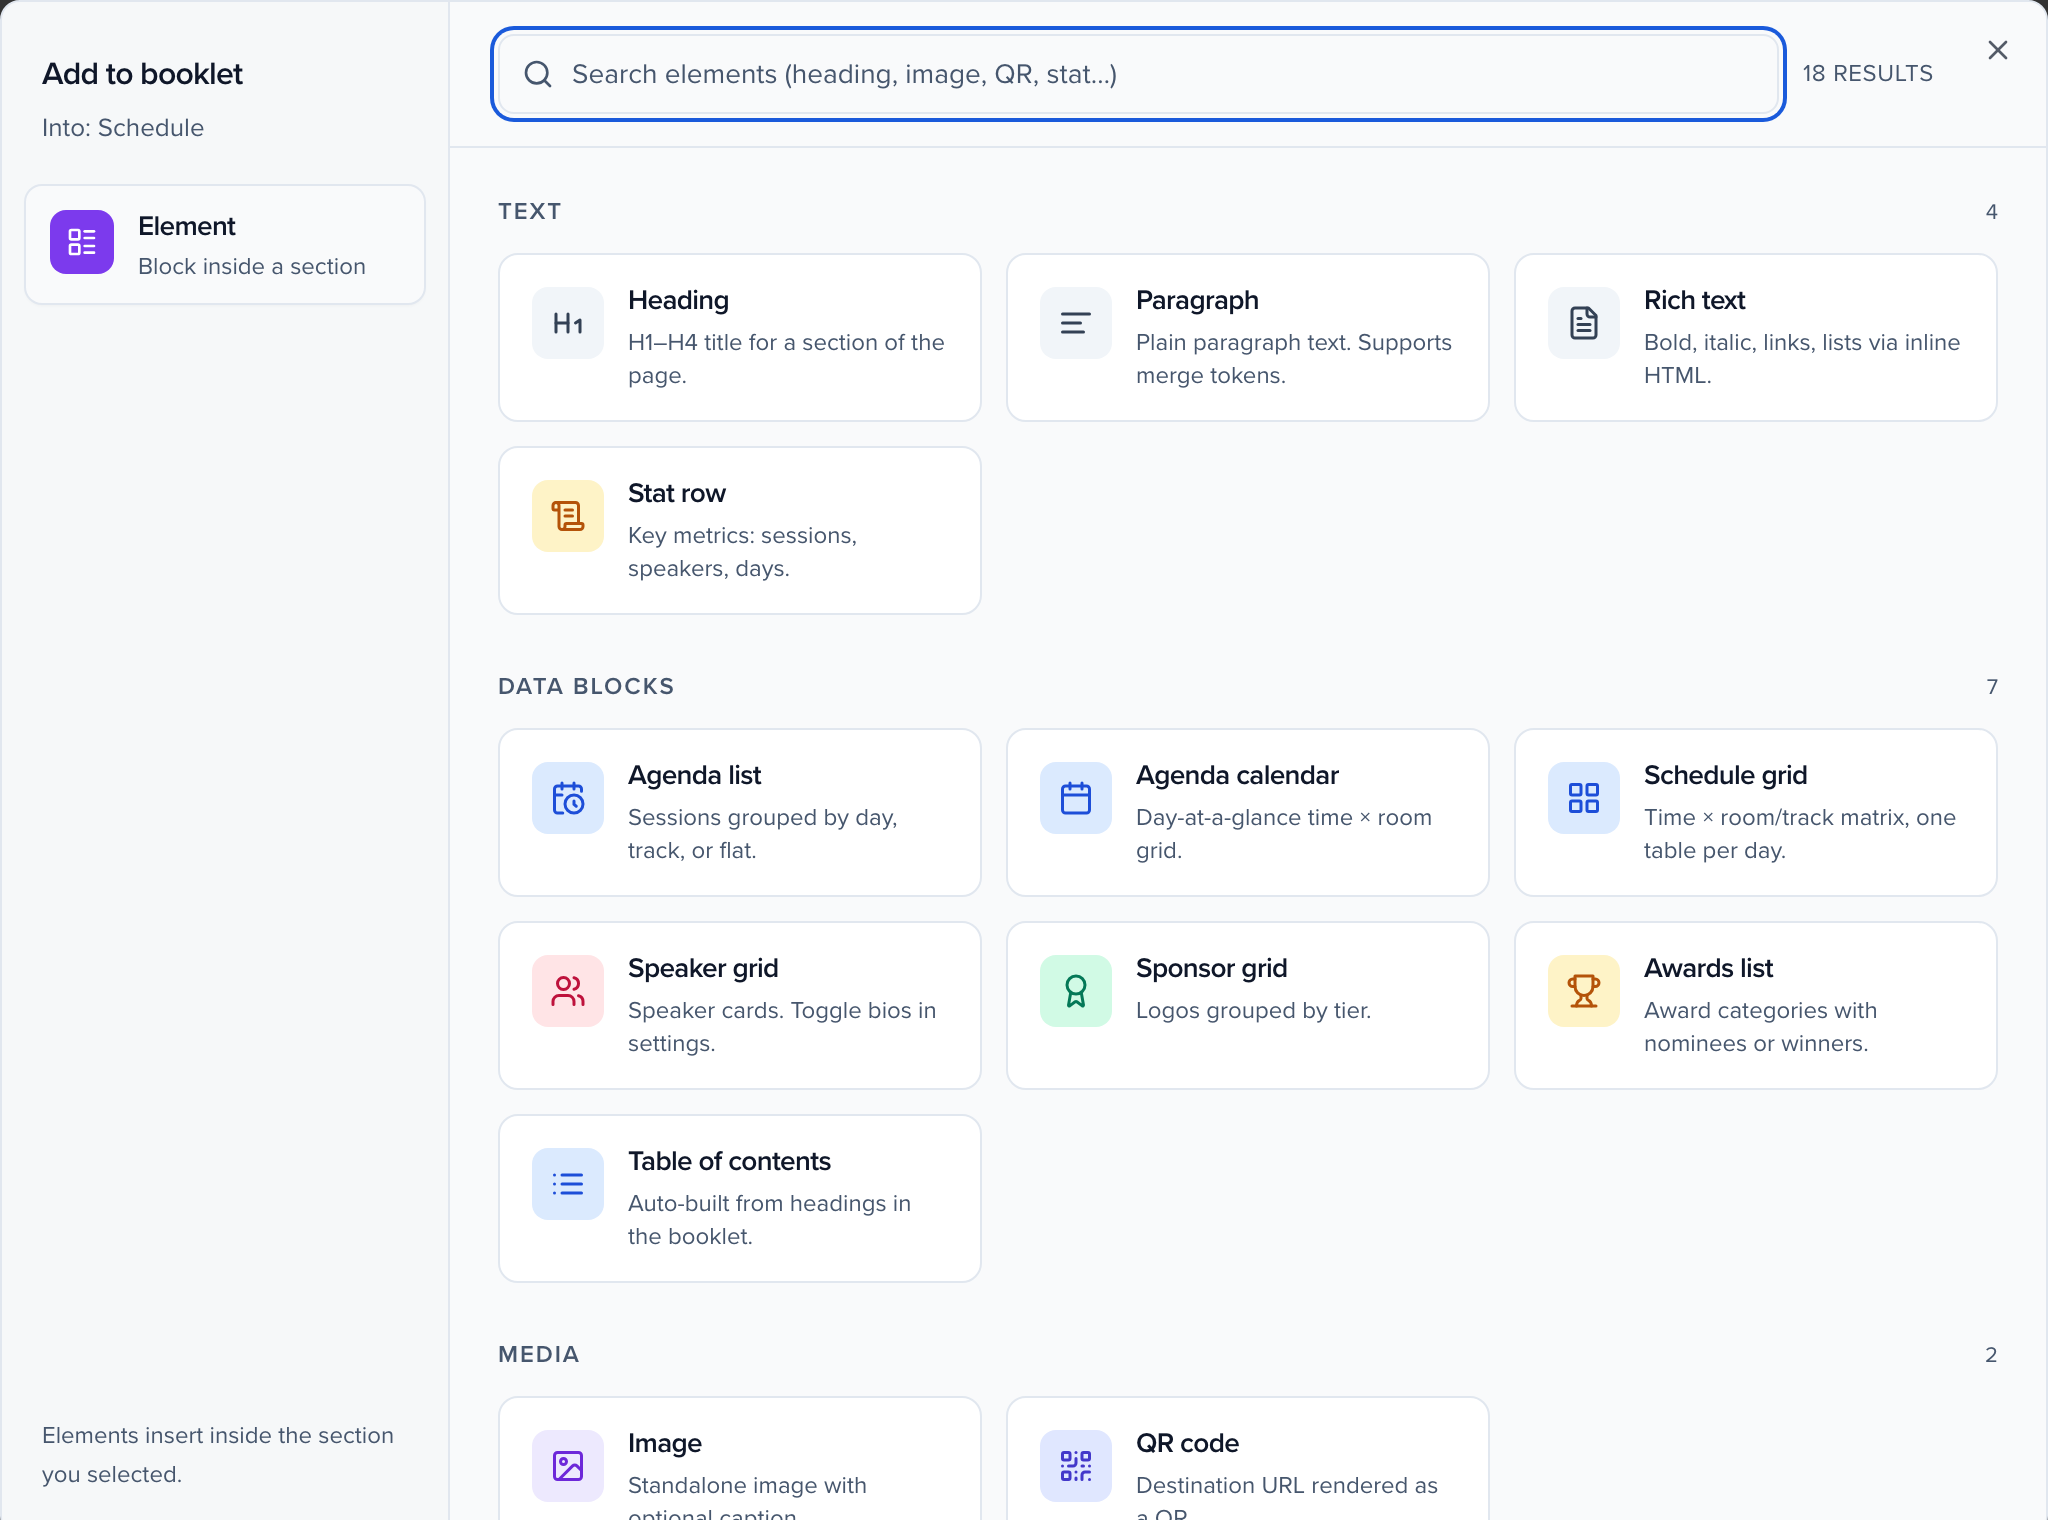
| Group | Elements |
|---|---|
| Text | Heading, Rich text, Stat row |
| Data blocks | Agenda list, Agenda calendar, Schedule grid, Speaker grid, Sponsor grid, Awards list, Table of contents |
| Media | Image, QR code |
| Layout | Section, Columns, Grid, Divider, Spacer |
Data blocks are what make the booklet live: an Agenda list prints whatever sessions match its filters at compile time, so adding a session to the event and clicking Recompile updates every booklet that lists it.
Block inspector
Section titled “Block inspector”Select a block and the right panel switches to the Block tab with that block’s options. For an Agenda list you can group by day or track, show descriptions, choose a participant layout and field order (honorific, name, title, company), toggle headshots, pick which participant roles appear and add contact fields.
Document properties
Section titled “Document properties”The Document tab applies to every page:
- Brand kit — shows the palette, font and logo resolved from your event’s branding. Apply to booklet copies them into the booklet’s colors and typography; Refresh re-reads them after you change the event’s branding. You can still override any value afterwards.
- Colors — Primary, Headings, Body text, Background, Surface, Accent, Border and Muted text.
- Page setup — portrait or landscape, and margins in inches.
- Typography — a system font, a Google font, or an uploaded font file.
- Header and Footer — bands that print at the top and bottom of every page except covers.
Preview
Section titled “Preview”Toggle Print layout to switch between continuous scrolling and one card per printed sheet, which is the layout your PDF will have. New tab opens the compiled booklet full-size in its own browser tab.
Regenerate with AI
Section titled “Regenerate with AI”Describe the change you want — “add a sponsor thank-you page after the schedule”, “make the speaker bios shorter” — and click Generate proposal. The editor shows a diff of what would change; Apply changes writes it to the booklet and Discard leaves it untouched. A proposal never overwrites your booklet on its own.
Revision history
Section titled “Revision history”Every edit is saved as a revision. Open Revision history to preview any earlier version and Restore it; restoring creates a new revision, so nothing is lost.
Export
Section titled “Export”Export offers three formats:
- PDF — print-ready, formatted pages. The PDF is built in the background, whatever the size of the book, and Sessionboard notifies you when the file is ready; you can keep editing meanwhile.
- Markdown (.md) — the text of the booklet as a file.
- Copy as Markdown — the same text on your clipboard, ready to paste into a notes tool or an AI assistant.
Export always uses the latest compile. If the status chip says Up to date, the PDF matches the preview; recompile first if you have changed event data since.
Share a link
Section titled “Share a link”Share → Publish creates a public URL that anyone can open without a Sessionboard account.
Keep the booklet current
Section titled “Keep the booklet current”- Edit sessions, speakers or sponsors anywhere in the event as usual.
- Open the booklet and click Recompile, or edit any block — edits recompile automatically.
- Check the compile notes bar for empty blocks.
- Export a fresh PDF, or Republish the shared link.
Do I need a Brand Kit from Marketing? No. The booklet’s Brand kit section reads your event’s own branding — event settings, or your portal appearance and organization defaults when the event has none. Marketing Brand Kits drive Advocacy assets and the event site.
Can I edit the compiled PDF? Edit the booklet instead — the PDF is generated from it. Every block, color and margin is editable in the inspector, and Import Word lets you bring in text you already have.
Why is a section blank in the PDF? A data block with no matching records prints nothing and raises a compile note. Check the block’s filters, and that the sessions or speakers it expects are accepted in the event.
Where did the older document templates go? They are still on the Print page with a Legacy badge, and the Legacy tab of the Create a booklet dialog makes new ones. See Create documents.