Cvent
Through Sessionboard’s integration with Cvent, event admins can easily send information for their sessions and speakers that were collected in Sessionboard to Cvent:
Why use it
Section titled “Why use it”If Cvent is where your attendees register and see the program, this integration sends the sessions and speakers you manage in Sessionboard to your Cvent event, so nobody has to type the agenda in twice. With continuous sync on, changes reach Cvent about every 30 minutes. You decide whether moderators and chairpersons go across as speakers, and whether sessions and speakers you remove in Sessionboard are removed from Cvent too.
Integration Set Up
Section titled “Integration Set Up”First, complete the following steps to get set up in Cvent and Sessionboard:
-
Create a Machine to Machine Application that supports Client ID and Client Secret. You can do this in the Cvent developer portal: https://developers.cvent.com/docs
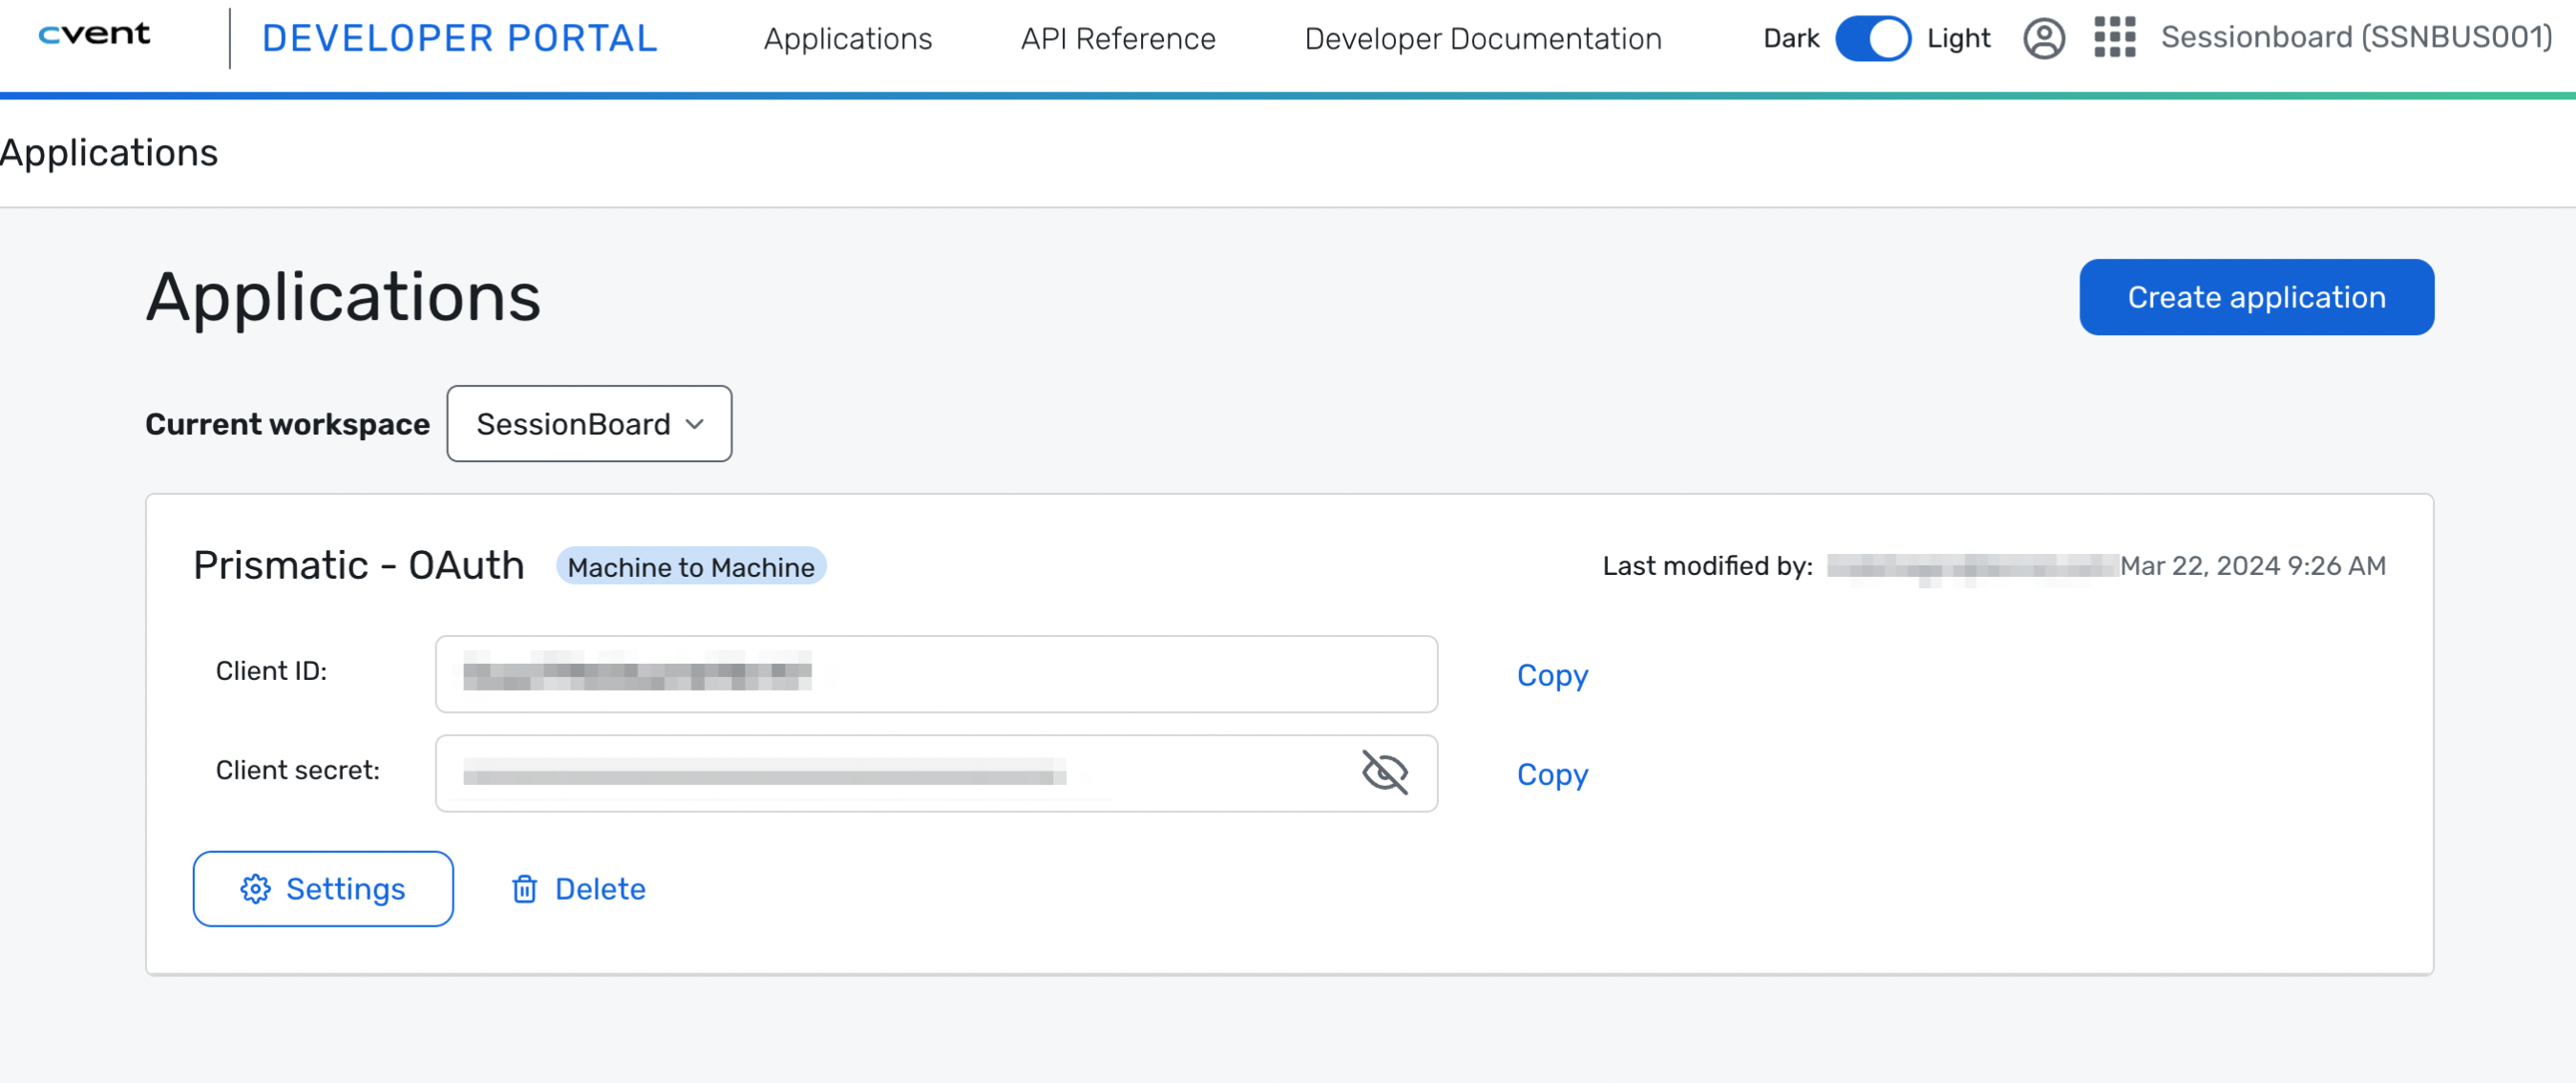
Access to Cvent’s developer tools and API applications is controlled inside your Cvent account, not by Sessionboard. If you can’t find where to create the application, ask your Cvent account administrator to give your Cvent user that access. Your Cvent account manager can tell you who your administrator is.
You will need to give the application you create permission to the following scopes:
-
event/sessions:read
-
event/sessions:write
-
event/sessions:delete
-
event/custom-fields:read
-
event/program-items:delete
-
event/program-items:read
-
event/program-items:write
-
-
event/speakers:write
-
event/speakers:read
- event/speaker-categories:write
- event/speaker-categories:read
-
event/events:read
- event/contacts:write
- event/session-categories:read
- event/session-categories:write
- bulk/bulk-jobs:write
- bulk/bulk-jobs:read
- file/file:write
-
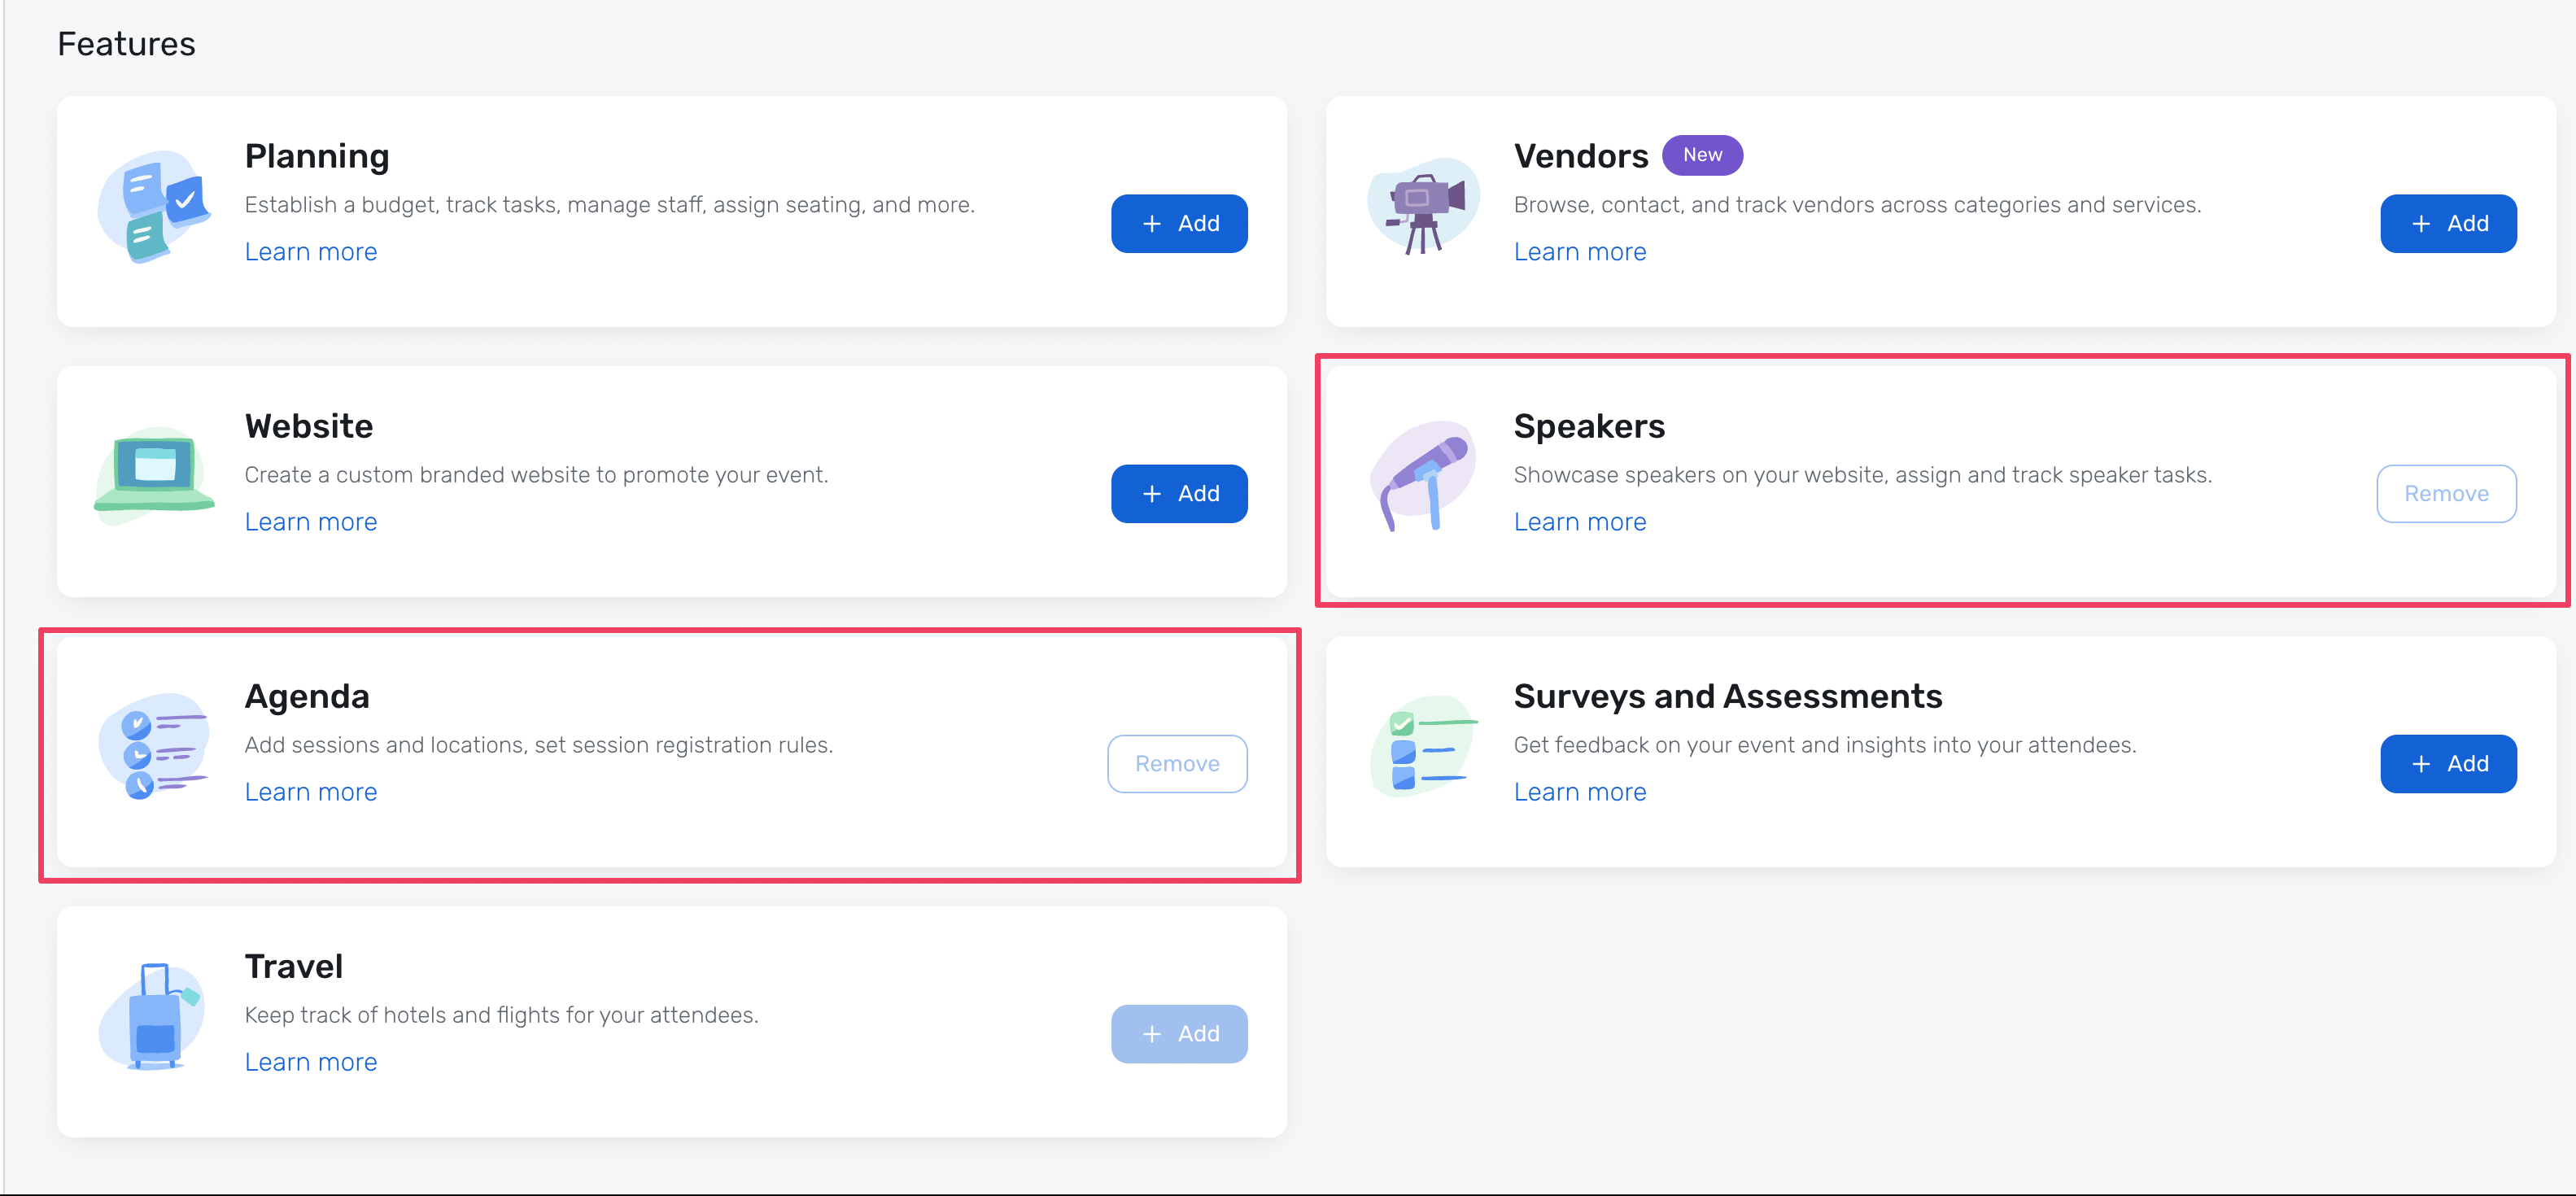
In your Cvent event, you need to enable the features: “Agenda” and “Speakers”
-
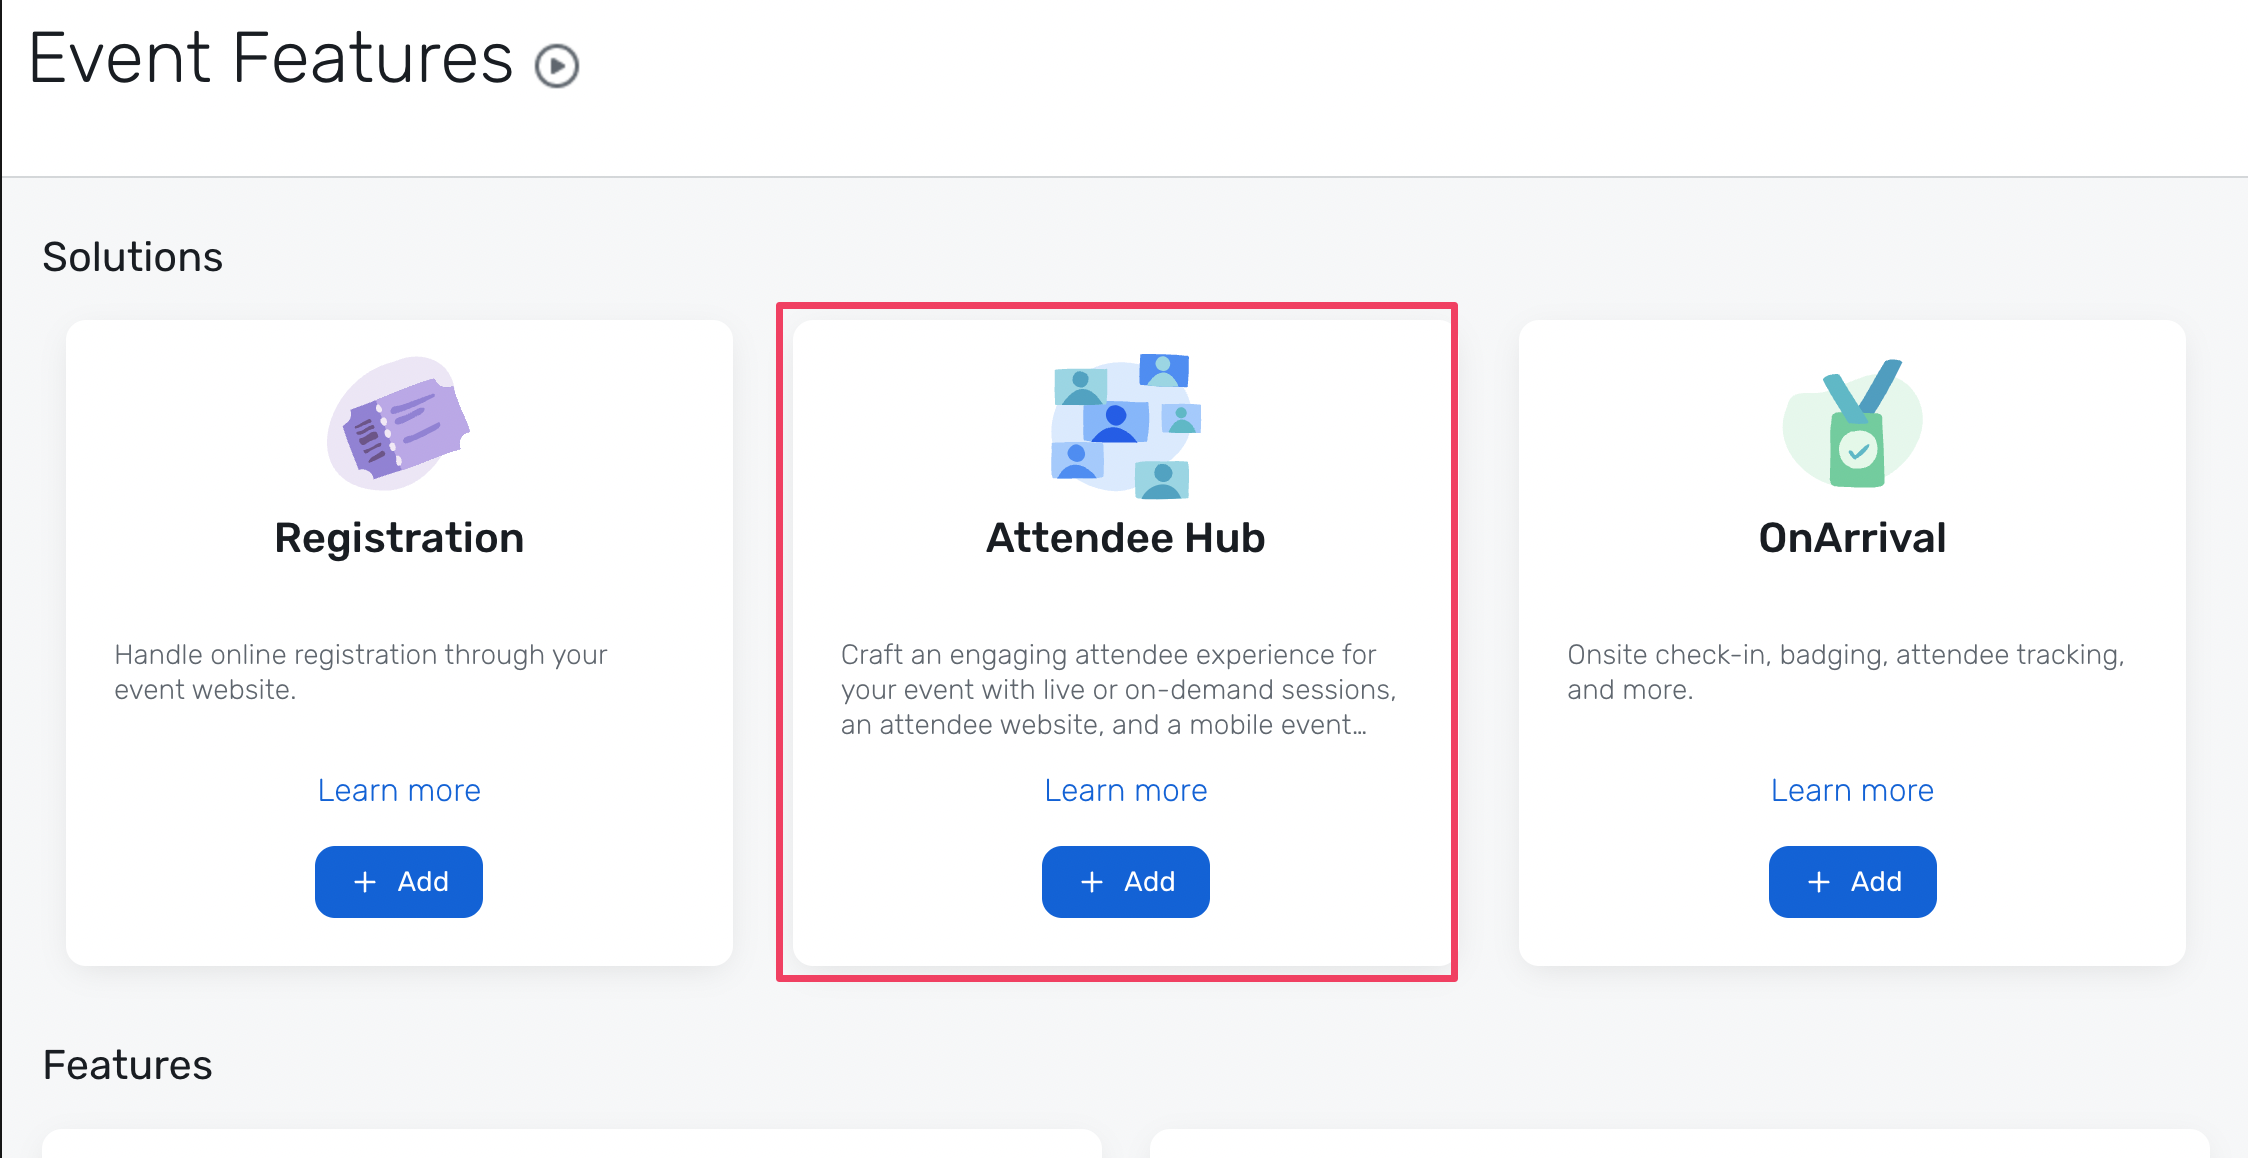
If you would like to sync associated Session Content to Cvent, you will also need to enable the “Attendee Hub”.
-
Connect Integration
Section titled “Connect Integration”Integrations are connected on the organization level in Sessionboard.
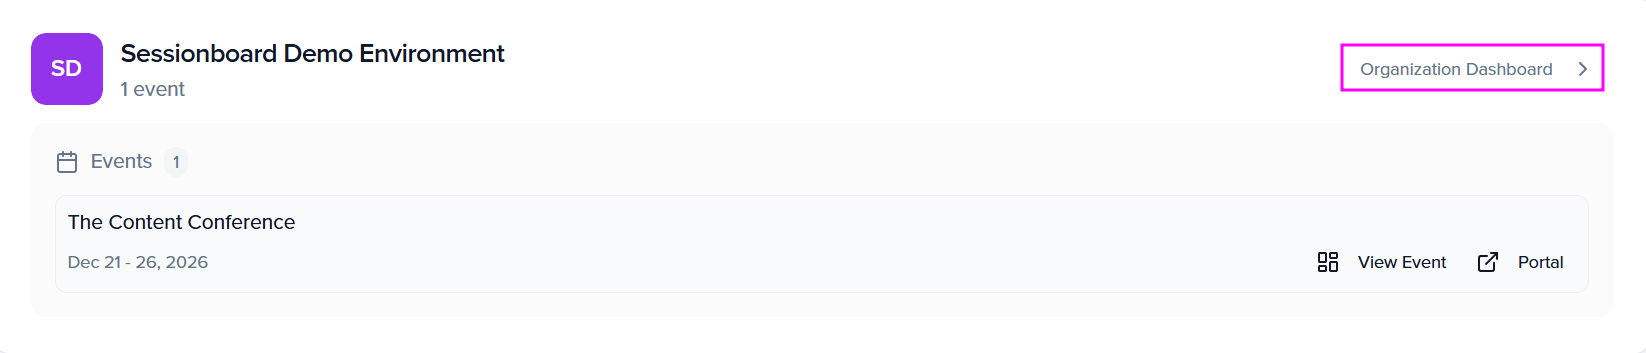
After logging in, click “Organization Dashboard” to access your event’s organization:
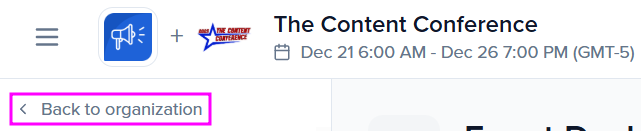
Or, from your event, you can click Back to organization:
Select the ‘Settings’ module to locate ‘Integrations’.
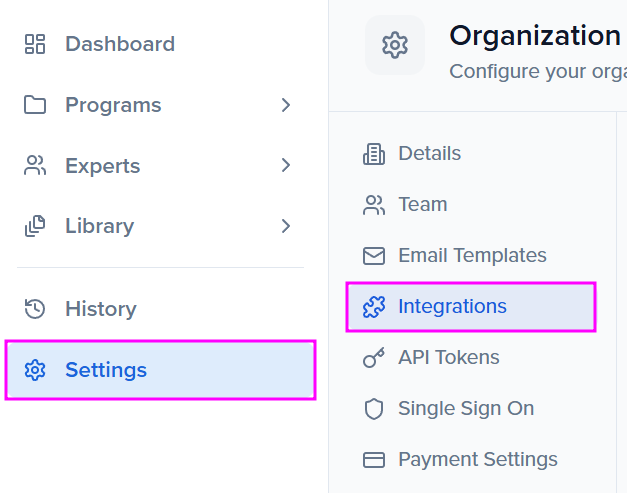
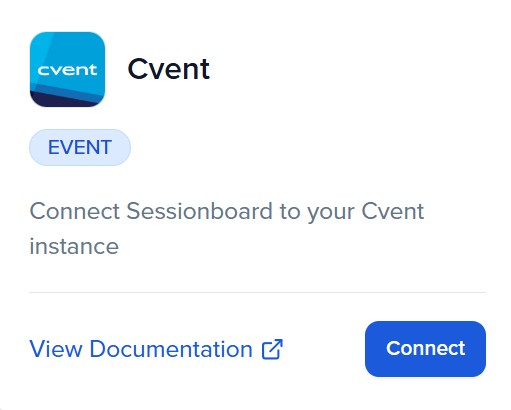
There, you can connect new or manage existing integrations. To connect a new integration, click the “Connect” button below the integration.
For Cvent, enter the Client ID, Client Secret and Cvent endpoint that your Cvent instance is using:
- North America —
https://api-platform.cvent.com - Europe —
https://api-platform-eur.cvent.com
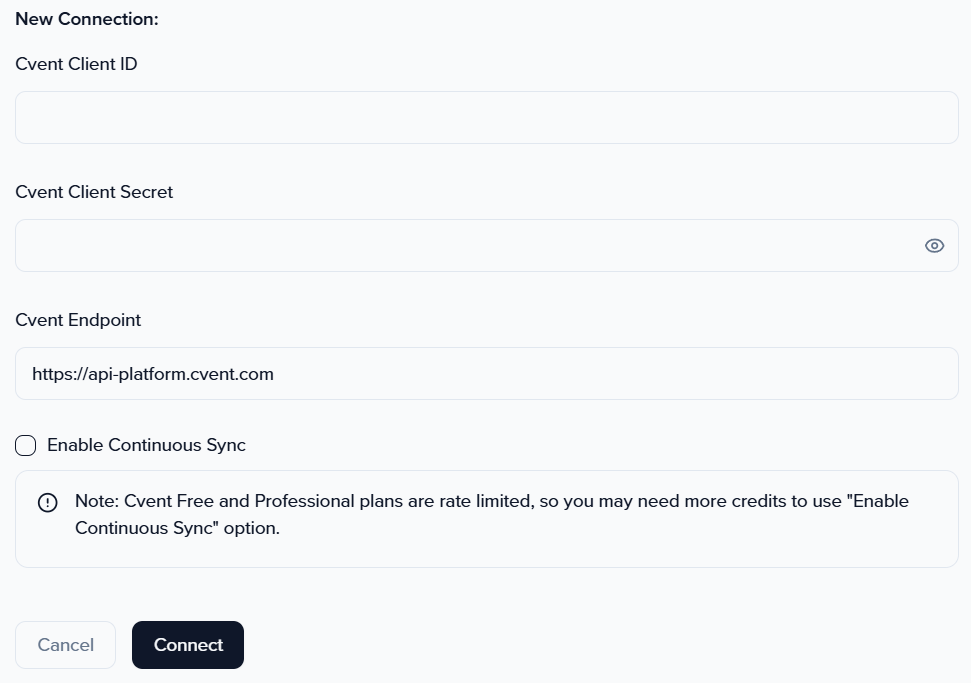
The connection belongs to your organization, not to one event. A new event can reuse the existing connection as long as its Cvent event belongs to the same Cvent account — just add a mapping for it. You only need a new Client ID and Client Secret when the Cvent event lives in a different Cvent account, which you add with Add New Connection.
Map Events
Section titled “Map Events”Once the integration is connected, a window will appear prompting you to map your Cvent events with Sessionboard ones. Select the Sessionboard Event from the dropdown list, then choose the Cvent Event in the right-hand dropdown.
Click “Add Mapping” to complete the mapping process.
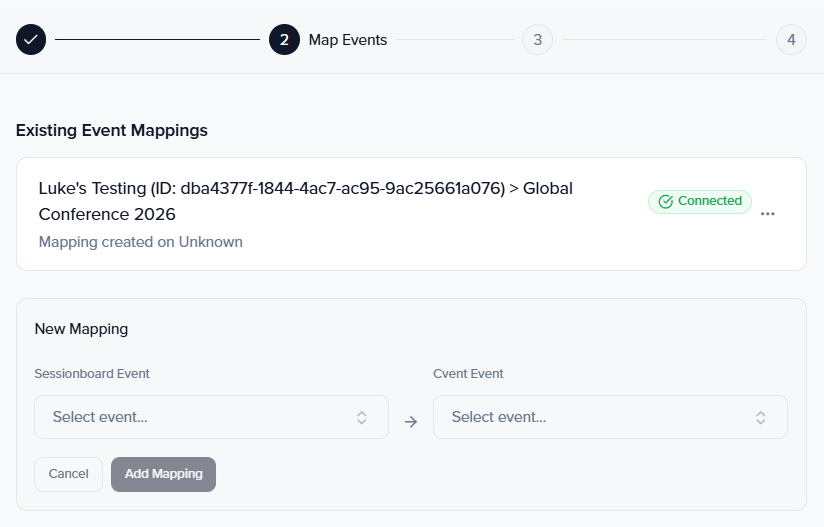
The Cvent event picker lists every event the connection’s credentials can see, by name and Cvent ID. Check the ID before you click Add Mapping — similar event names from different years are easy to mix up.
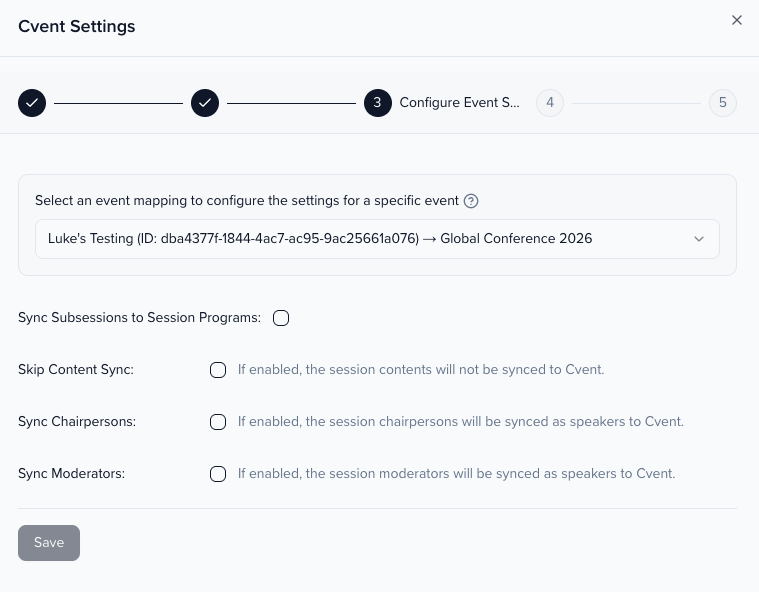
Once your event is connected, you’ll have access to these event-specific settings:
-
Sync Subsessions to Session Programs — Syncs subsessions of accepted sessions to the Cvent Programs feature.
-
Skip Content Sync — Allows you to collect session content files without syncing them to Cvent.
-
Sync Moderators — Syncs your Moderators to your Cvent speakers list.
-
Sync Chairpersons — Syncs your Chairpersons to your Cvent speakers list.
-
Sync Speakers with Sessions — On by default. Turn it off to manage speakers only in Cvent; Sessionboard then leaves them untouched.
-
Remove Deleted Sessions — Deletes sessions from Cvent when they are deleted in Sessionboard or their status changes from accepted.
-
Remove Deleted Speakers — Deletes speakers from Cvent when they are deleted or no longer belong to any accepted session in the event.
Mapping Session Fields
Section titled “Mapping Session Fields”Once your events have been connected, your next window will allow you to map your designated session fields. Within the dropdown, be sure you have selected the correct event that you wish to map the session fields for.
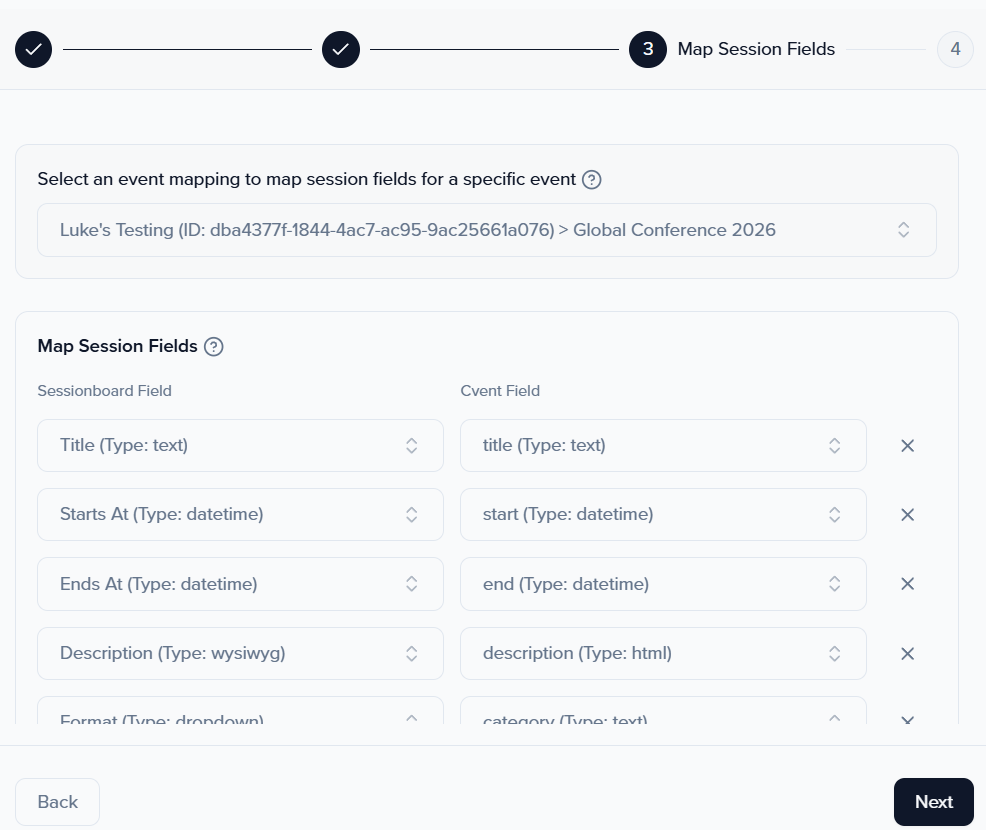
The default fields will populate within the session field mapper. You will be able to map additional fields by selecting “Add Field Mapping”. You will then be able to select the Sessionboard field and the destination field in Cvent that you wish to be mapped to.
Any Cvent session field that isn’t in the default list only receives a value once you add a row for it. Besides your Cvent custom session fields, these standard Cvent session fields can be mapped:
| Cvent field | What it holds |
|---|---|
capacity, capacityUnlimited | In-person capacity, or unlimited in-person capacity |
capacityVirtual, virtualCapacityUnlimited | Virtual capacity, or unlimited virtual capacity |
enableWaitlist, waitlistCapacity, enableWaitlistVirtual, waitlistCapacityVirtual | Waitlist settings |
openForRegistration, openForAttendeeHub | Whether the session is open for registration and shown in Attendee Hub |
displayOnAgenda, featured, includedSession | Agenda display flags |
automaticallyOpensOn, automaticallyClosesOn | Registration open and close dates |
code, group, presentationType, dataTagCode, relevance | Other session details |
The pickers show each field’s type, so pair matching types: map a number field to capacity and the other integer fields, a checkbox field to yes/no flags such as openForRegistration and openForAttendeeHub, and a date field to the date fields. Every field you map must already exist in Sessionboard — create it first under Settings > Library — and Cvent custom fields must exist in the Cvent event. Cvent custom fields are matched by name, so if you rename one in Cvent, map it again.
Mapping Speaker Fields
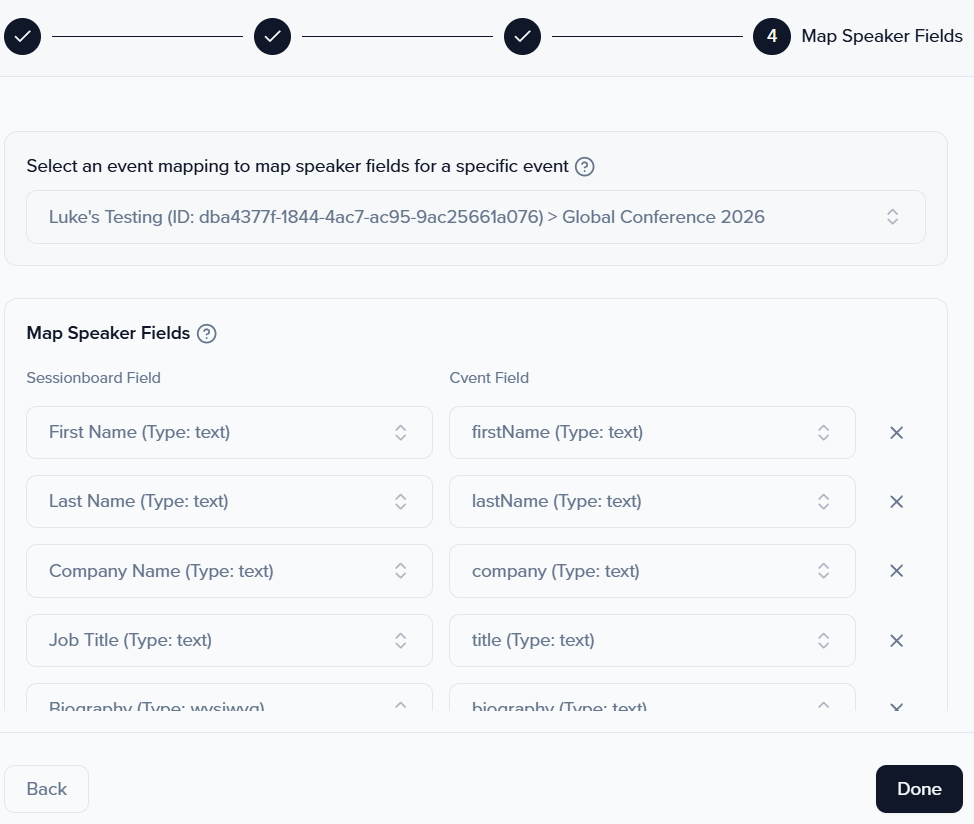
Section titled “Mapping Speaker Fields”Once your session fields are mapped, you will then be prompted to map your speaker fields.
The default fields will populate within the speaker field mapper. You will be able to map additional fields by selecting “Add Field Mapping”. You will then be able to select the Sessionboard field and the destination field in Cvent that you wish to be mapped to.
Field Mapping
Section titled “Field Mapping”By default, Sessionboard maps the following fields into Cvent (items in Bold are required):
Sessions
-
Title*
-
Starts At*
-
Ends At*
-
Description — see Description formatting in Cvent
-
Location
Speakers
-
First Name*
-
Last Name*
-
Email*
-
Company
-
Job Title
-
Biography
-
Headshot (Max 2MB 300x300 recommended)
Description formatting in Cvent
Section titled “Description formatting in Cvent”Sessionboard sends the session description to Cvent as the HTML stored by the description editor, exactly as it is — nothing is added, removed or cleaned up on the way. What you see in Cvent depends on how Cvent displays that HTML:
- Cvent’s description editor supports Bold, Italics, Underline, Strikethrough, Subscript, Superscript, Text color, Fill color, left, center and right alignment, Bulleted lists, Numbered lists, Indent, Outdent, and Links. Other formatting may not display as expected.
- Every paragraph is sent as its own block, including empty ones. Blank lines you add for spacing can show up as extra space in Cvent, so remove them rather than pressing Enter twice.
- Text pasted from Word, a web page or another editor can carry hidden formatting into the HTML. Paste as plain text, then apply formatting with the editor’s own toolbar.
- The markup counts toward any length limit Cvent applies to the description, so a description with heavy formatting can be rejected even when its visible text looks short enough. If a session fails for its description length, shorten it or simplify its formatting, then sync it again.
- An export or a report that shows the raw field shows the HTML tags. That is the stored formatting, not an error.
How to Sync Data
Section titled “How to Sync Data”After working with your Sales Engineer representative to connect your Cvent integration with your Sessionboard event(s), you’ll be able to begin syncing your session and speaker details.
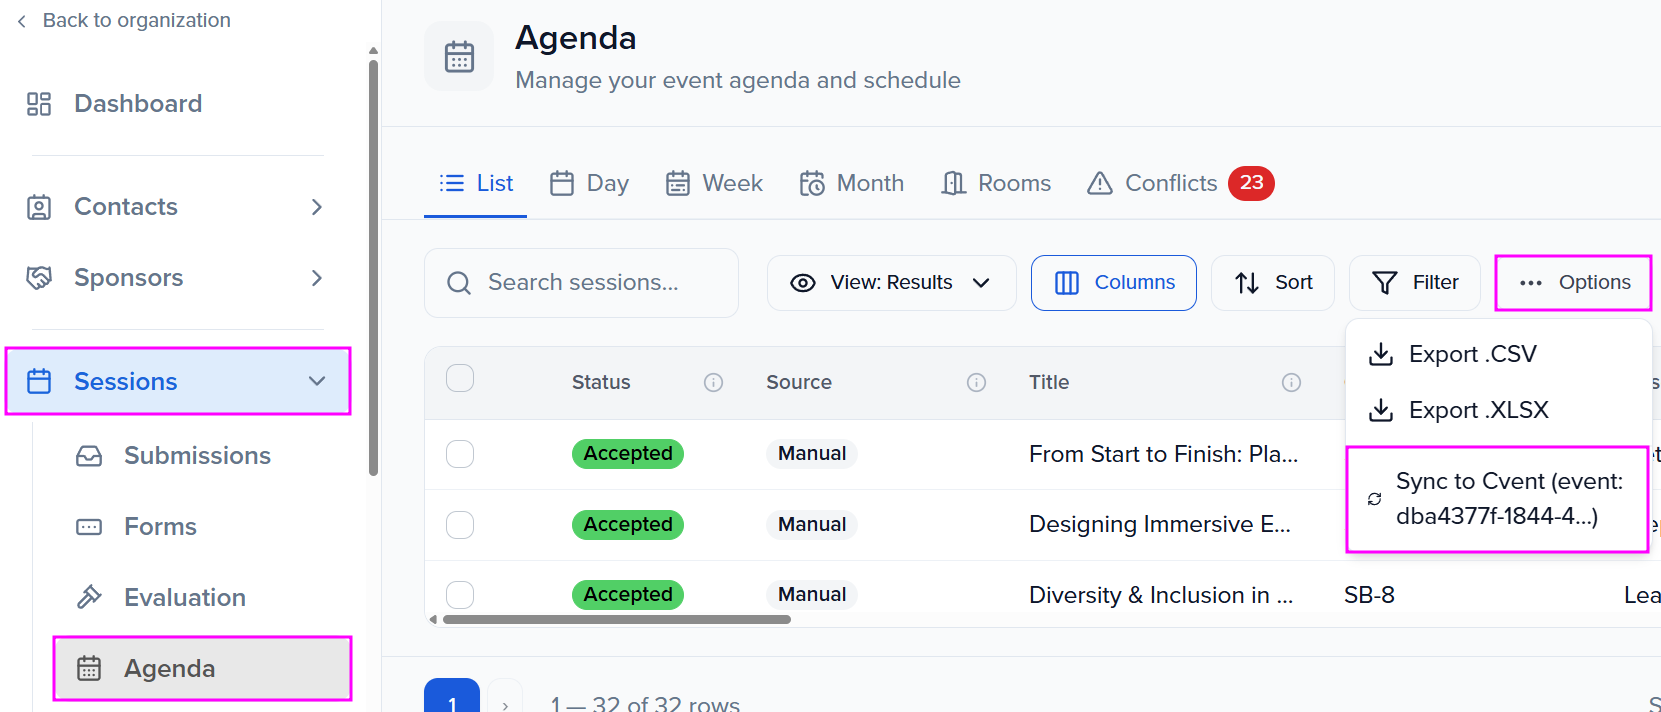
To sync manually, go to Program > Collect & Review > Agenda, click Options, and then click Sync to Cvent (event: …). The ID in the menu item is the Cvent event the sync writes to, so check it before you start.
With Enable Continuous Sync turned on for the connection, Sessionboard also checks every 30 minutes for sessions that changed since the last successful sync and pushes the event again. Continuous sync starts after the event’s first successful sync, so run one manual sync after mapping. With continuous sync off, changes reach Cvent only when someone syncs.
The sync runs in the background. Its progress and result are in History > Integrations > Sync History: each run shows the external event it wrote to, a Sync ID, its status, error count, start and end time, and duration. Click the results link on a row to see counts and the error summary. How long a sync takes depends on the number of sessions, speakers and files, and on your Cvent API plan — Sessionboard paces its requests to your Cvent account’s rate limit, so lower-tier accounts sync more slowly. If your account’s daily API quota runs out, the sync stops and the history shows when the quota resets.
What happens when data is synced?
During a sync, the following workflow takes place:
-
Sessions
-
New sessions that Sessionboard is syncing to Cvent are created
- Note: Sessionboard only knows about the sessions that it has already synced. So, be mindful if you’re also adding sessions directly to Cvent and know that Sessionboard will not automatically detect them.
-
Sessions that Sessionboard has already synced are updated
-
Only sessions in the future will sync. We will not be able to sync any sessions that have passed
-
-
Speakers
-
Sessionboard attempts to find a Speaker in your Cvent Event by the same email address.
- If it finds one, it will use the found Speaker (and respective Cvent contact record)
-
If no matching Speaker is found by email address, it will create a new Speaker record in your Cvent event
- Cvent automatically creates a Contact record for the speaker in your Cvent Address Book
-
The updates are then performed against the Speaker record
-
-
Sessions <> Speakers
-
Speakers are attached to Sessions. Sessionboard does not send a speaker order, so set the display order of a session’s speakers in Cvent.
-
If a speaker has been removed in Sessionboard for a session, that speaker will be removed from the synced session in Cvent
-
-
Content
-
To sync content that is attached to your sessions to Cvent, you will need to ensure the “Attendee Hub” module is enabled in Event.
-
Cvent allows the following file types to be synced over:
- ai, bmp, doc, docx, eml, eps, gif, ics, jpeg, msg, otf, ost, pdf, png, ppt, pptx, tif, tiff, ttf, txt, woff, woff2, xls, xlsx
-
Cvent allows for files less than or equal to 10MB to be synced over
-
To ensure efficient syncing of your content, please refrain from any spaces within your file naming conventions
-
-
Locations
-
Sessionboard Locations are created in Cvent as Locations
- Sessions are associated with the proper Location based on the session’s relationship with a Location in Sessionboard
-
-
Subsessions > Programs
- Title, Description, Speakers and Files will all sync for your Subsessions to Programs
- The Order and duration of programs are controlled within the Cvent platform
- Title, Description, Speakers and Files will all sync for your Subsessions to Programs
Syncing only speakers
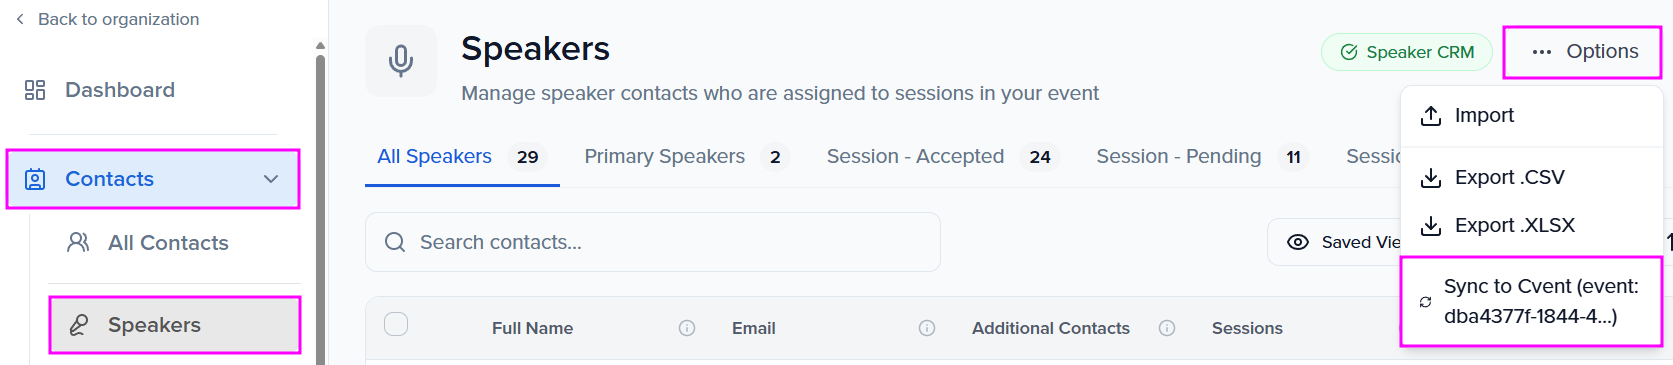
Section titled “Syncing only speakers”Alternatively, if you wish to just sync speakers to Cvent, go to CRM > People > Speakers and click Options > Sync to Cvent (event: …), or select speakers and click More. This will sync only your speakers and no session details. Please note that if you later sync from the Agenda, this will associate the speakers with their respective sessions in Cvent.
Resync Behavior
Section titled “Resync Behavior”On resync, new sessions and speakers that have been added to the agenda in Sessionboard will be sent to Cvent. Any updates that are made to previously synced fields (such as correcting a speaker’s title or changing a session time) will also be applied.
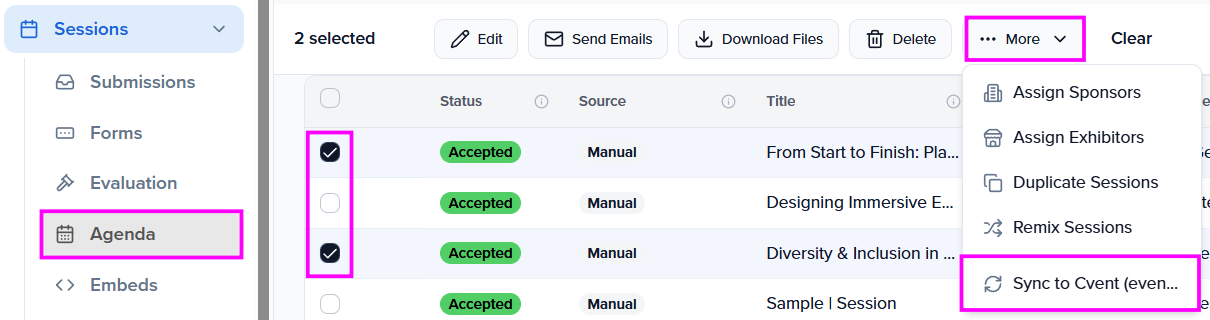
In addition to syncing all sessions and their speakers, you have the ability to choose individual sessions to sync. Go to Program > Collect & Review > Agenda, select the sessions you wish to sync, then click More > Sync to Cvent (event: …).
Frequently asked questions
Section titled “Frequently asked questions”What data is synced over?
You decide what is mapped where on the Map Session Fields and Map Speaker Fields steps. Standard and custom Sessionboard fields can be mapped to Cvent standard and custom fields on Cvent Contact, Speaker, and Session records. A field with no mapping row is not sent.
Does deleting a session or speaker in Sessionboard delete it from Cvent?
Only if Remove Deleted Sessions or Remove Deleted Speakers is turned on in the event settings. With both off, delete the record in Cvent yourself.
I changed a session, but Cvent still shows the old value
Cvent only changes when a sync runs. Edits in Sessionboard are not sent the moment you save.
- To push one session now, go to Program > Collect & Review > Agenda, select the session, and click More > Sync to Cvent (event: …).
- To have changes go out on their own, turn on Enable Continuous Sync on the Cvent connection. Changed sessions are then pushed within about 30 minutes, once the event has had one successful sync.
- Check the run in History > Integrations > Sync History. If it shows errors, open the results to see which records failed and why.
The sync completed, but nothing appears in Cvent
The sync most likely wrote to a different Cvent event than the one you are looking at — for example last year’s event, or an event mapped before the new one was created in Cvent.
- On the Agenda, open Options and read the ID in Sync to Cvent (event: …), or check the External Event column in History > Integrations > Sync History.
- Compare it with the event ID in Cvent.
- If it is wrong, open the Cvent integration’s Map Events step, add a mapping to the correct Cvent event, and sync again. Sessions already created in the wrong Cvent event stay there until you delete them in Cvent.
How do I send session capacity to Cvent?
Map it — capacity isn’t in the default mapping.
- Make sure the capacity is stored in a number field on your sessions.
- On Map Session Fields, click Add Field Mapping, choose that field on the left, and choose
capacityon the right for in-person capacity (orcapacityVirtualfor virtual). - Save, then sync. If the session’s matching unlimited flag (
capacityUnlimited) is mapped and checked, Cvent receives unlimited capacity instead of the number.
Why don't Open for Registration or Open for Attendee Hub match what I set in Cvent?
Once openForRegistration or openForAttendeeHub is mapped, the Sessionboard checkbox decides the value on every sync. A checked box sends yes; an unchecked or empty box sends no, and replaces whatever was set in Cvent.
- Map each flag to a Sessionboard checkbox field on Map Session Fields.
- Check the box on every session that should be open, then sync.
- For Attendee Hub, make sure the Attendee Hub feature is enabled on the Cvent event.
Cvent session fields you don’t map keep the value they already have in Cvent.
Do I need new Cvent credentials for a new event?
Not if the new Cvent event is in the same Cvent account. The connection is set up once for your organization; add a mapping for the new event on Map Events and map its fields. You only need a new Client ID and Client Secret when the Cvent event belongs to a different Cvent account. Enter them yourself in the connection form — never send them by email.
Why does a session's speaker order differ in Cvent?
Sessionboard attaches each speaker to the session but does not send an order. Set the speaker display order in Cvent.
How do tracks, formats and tags reach Cvent?
A Cvent session has one session category. By default, Sessionboard sends the session’s Format as that category. To send the session’s Track or Level instead, change the Sessionboard field on the category row in Map Session Fields. Sessionboard uses the Cvent session category with the same name, and creates it in Cvent if it doesn’t exist yet.
Tags aren’t in the default mapping, so they aren’t sent until you add a row for them.
- On Map Session Fields, click Add Field Mapping and choose your Tags field on the left.
- On the right, choose a Cvent custom session field. A text field receives the tag names separated by commas. A multiple-choice field receives each tag as a choice, so every tag name has to match one of that field’s choices in Cvent exactly.
- Save, then sync.
Integration Support
Section titled “Integration Support”If you are experiencing problems with syncing (i.e. error messages or data not appearing in Cvent), email support@sessionboard.com with the following information:
-
Event Name
-
Session name(s)
- fields not appearing
-
Speaker name(s)
- fields not appearing
-
Image of any errors received when syncing (if applicable)
-
The Sync ID of the run from History > Integrations > Sync History (if applicable)
Example Email: