

Getting started with awards
Video transcript
Awards. This is the part of Sessionboard that runs a nominations program, from the form people fill in, through judging, to the winners. It lives at the organization level, not inside an event, because an awards program usually spans your whole membership and often runs every year. Awards in the sidebar opens this hub. Programs, all submissions across programs, all reviewers, and invoices if you charge a fee. New program starts the setup wizard, which is what we’ll walk through.
The wizard walks through the setup in order, and you can come back to any part of it later. It opens on identity and nomenclature. The program’s name, a short description, a logo, and then the words. Some programs call these nominations, some call them entries or applications. Some have judges, some have reviewers. Whatever you pick here is what submitters and reviewers see everywhere, in the portal, in emails, on the site.
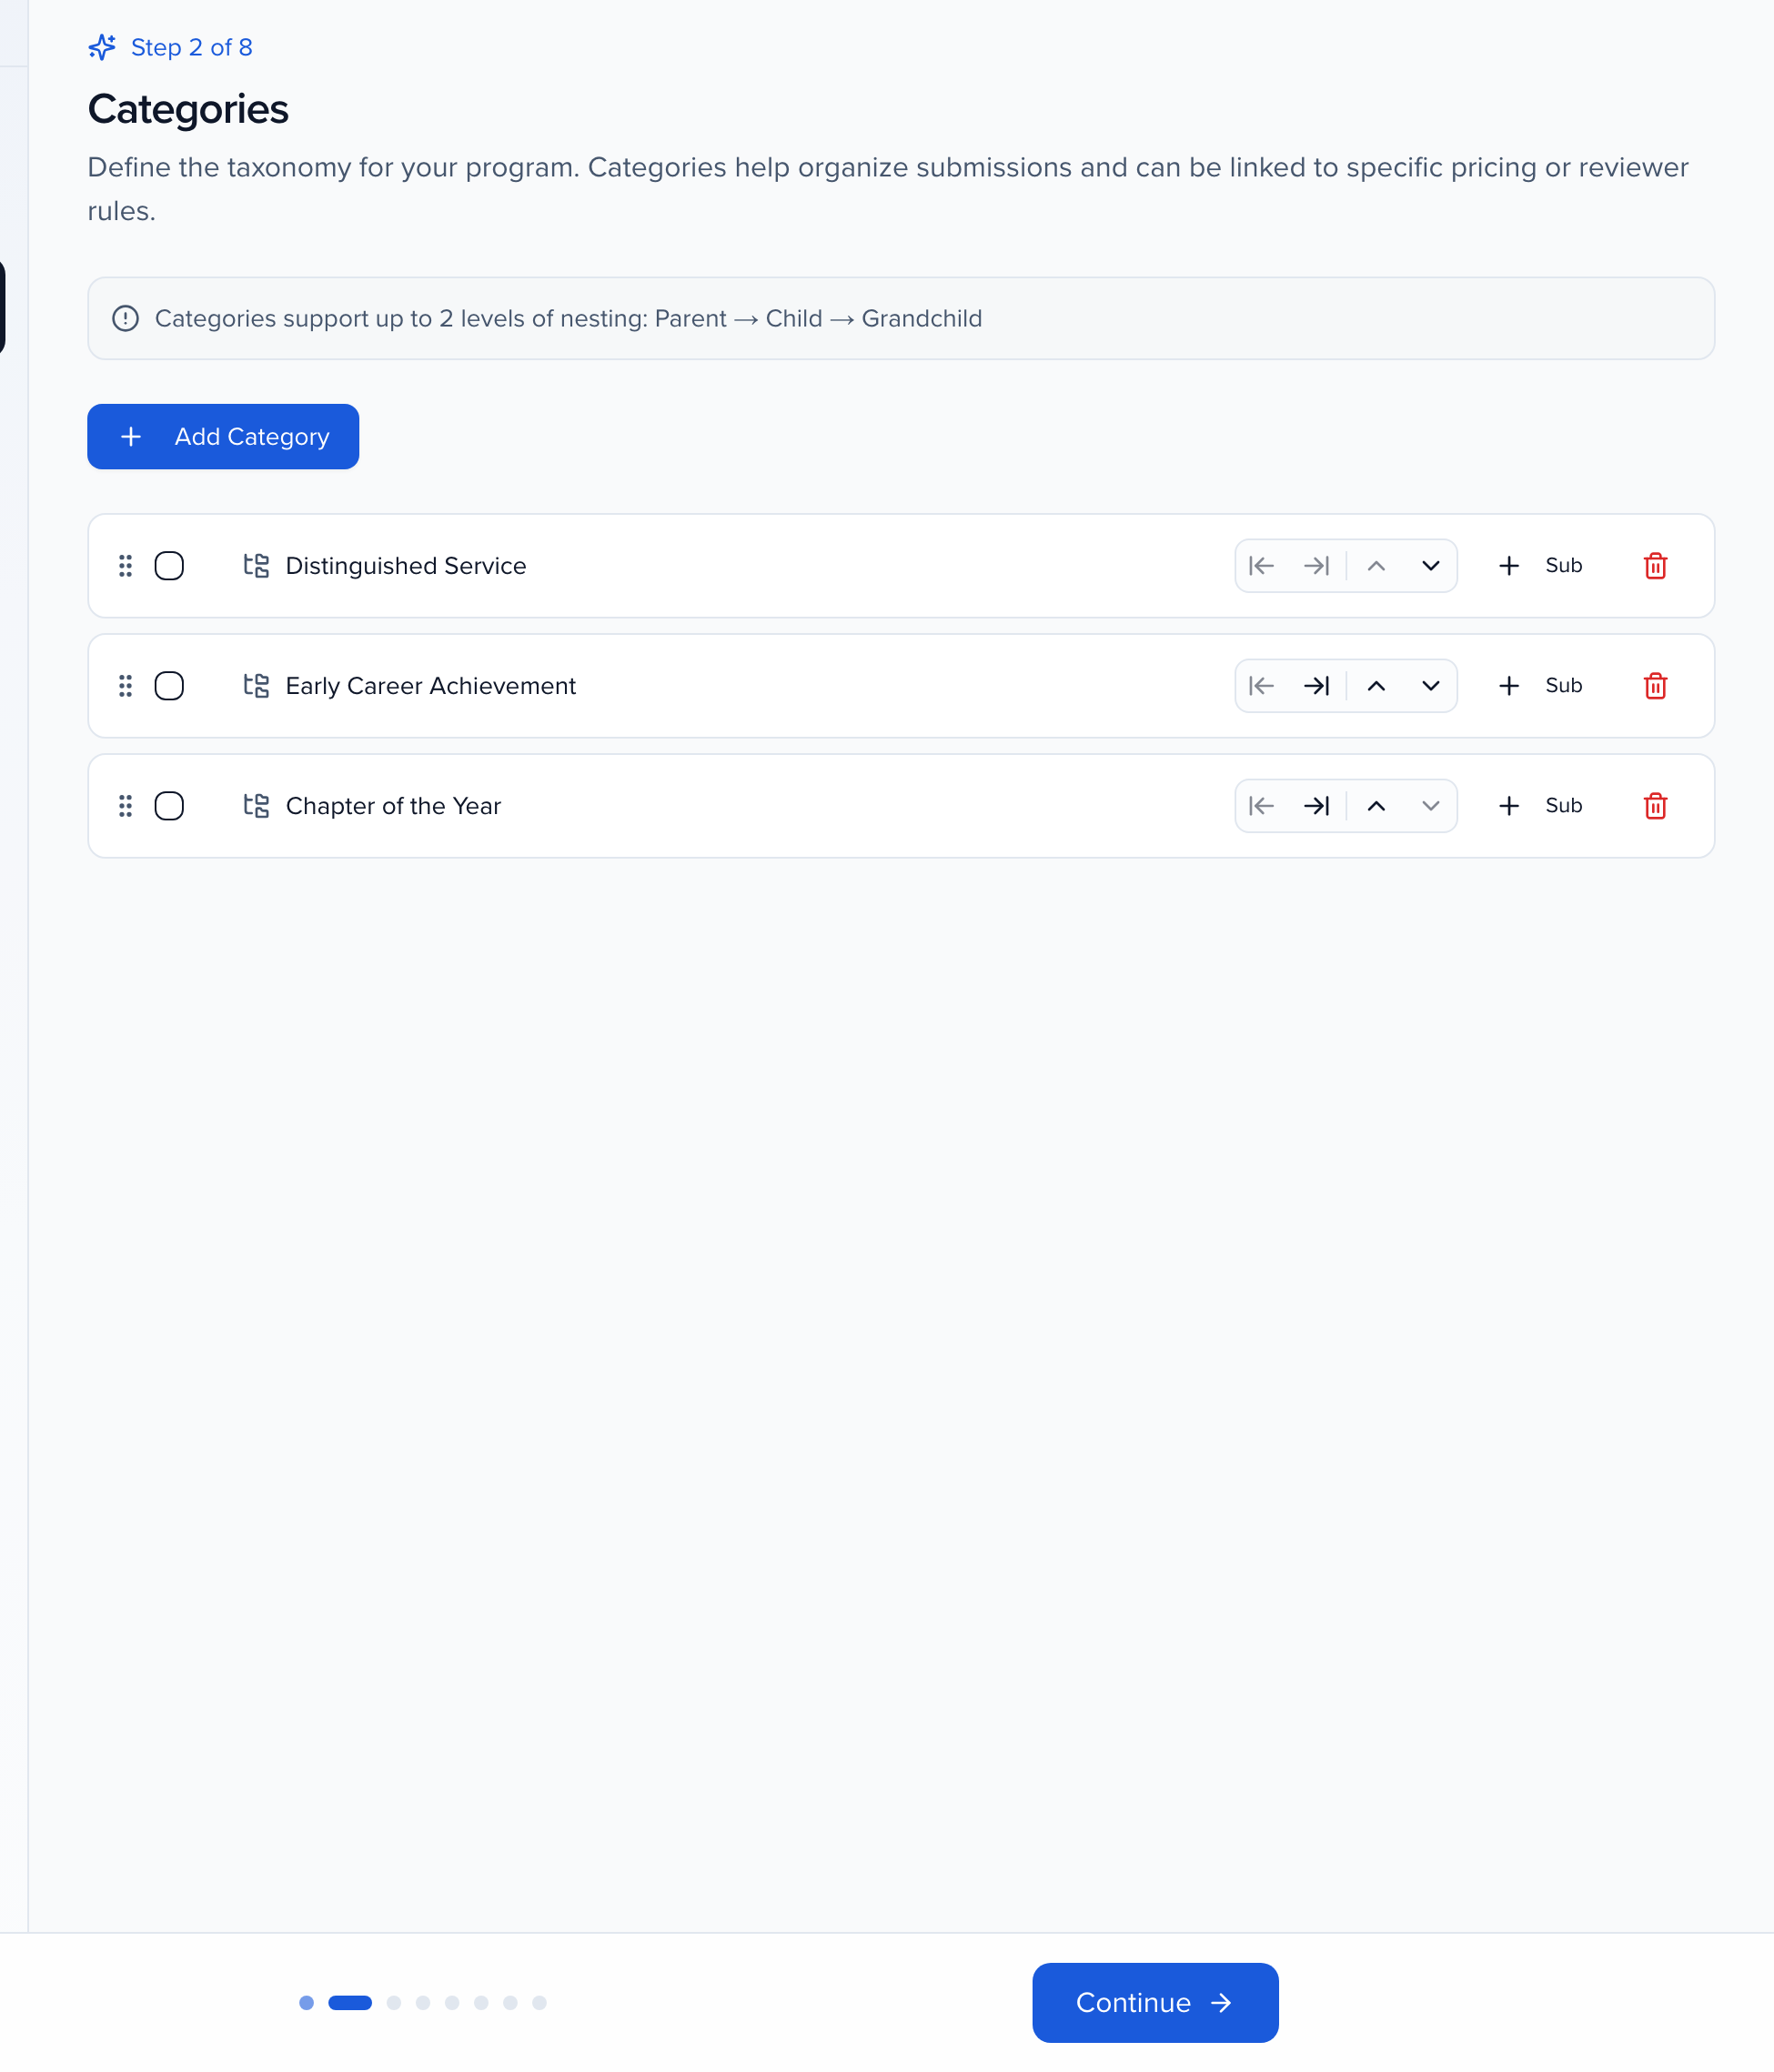
Categories come next. These are the awards themselves, distinguished service, early career achievement, chapter of the year. A submitter picks one first, and everything downstream can key off that choice, which fields they see, which reviewers get it, and which winner tags apply. Add as many as you need, and drag to order them the way they’ll appear on the form.
Then the form builder, and it’s worth slowing down here. The form is organized into sections, each with a title and an intro. Submitter information is who’s nominating. Nomination details is who they’re nominating and why. Inside a section, required fields come first, then additional fields, each with its own required switch. Add field gives you the field types, short and long text, dropdowns, file upload, dates, signature. And quick add on the right is a library of ready-made fields organized by section, so a nominee headshot or supporting documents is one click.
Three more things on this step. The rules tab sets combined limits across several fields, so the whole nomination statement can’t run past, say, fifteen hundred words even if it’s split over three questions. The success page tab is what an applicant reads after they submit, in place of the default what’s next list. And preview opens the form exactly as a nominee will see it on your site, category picker first, then the sections. Check it here before anyone else does.
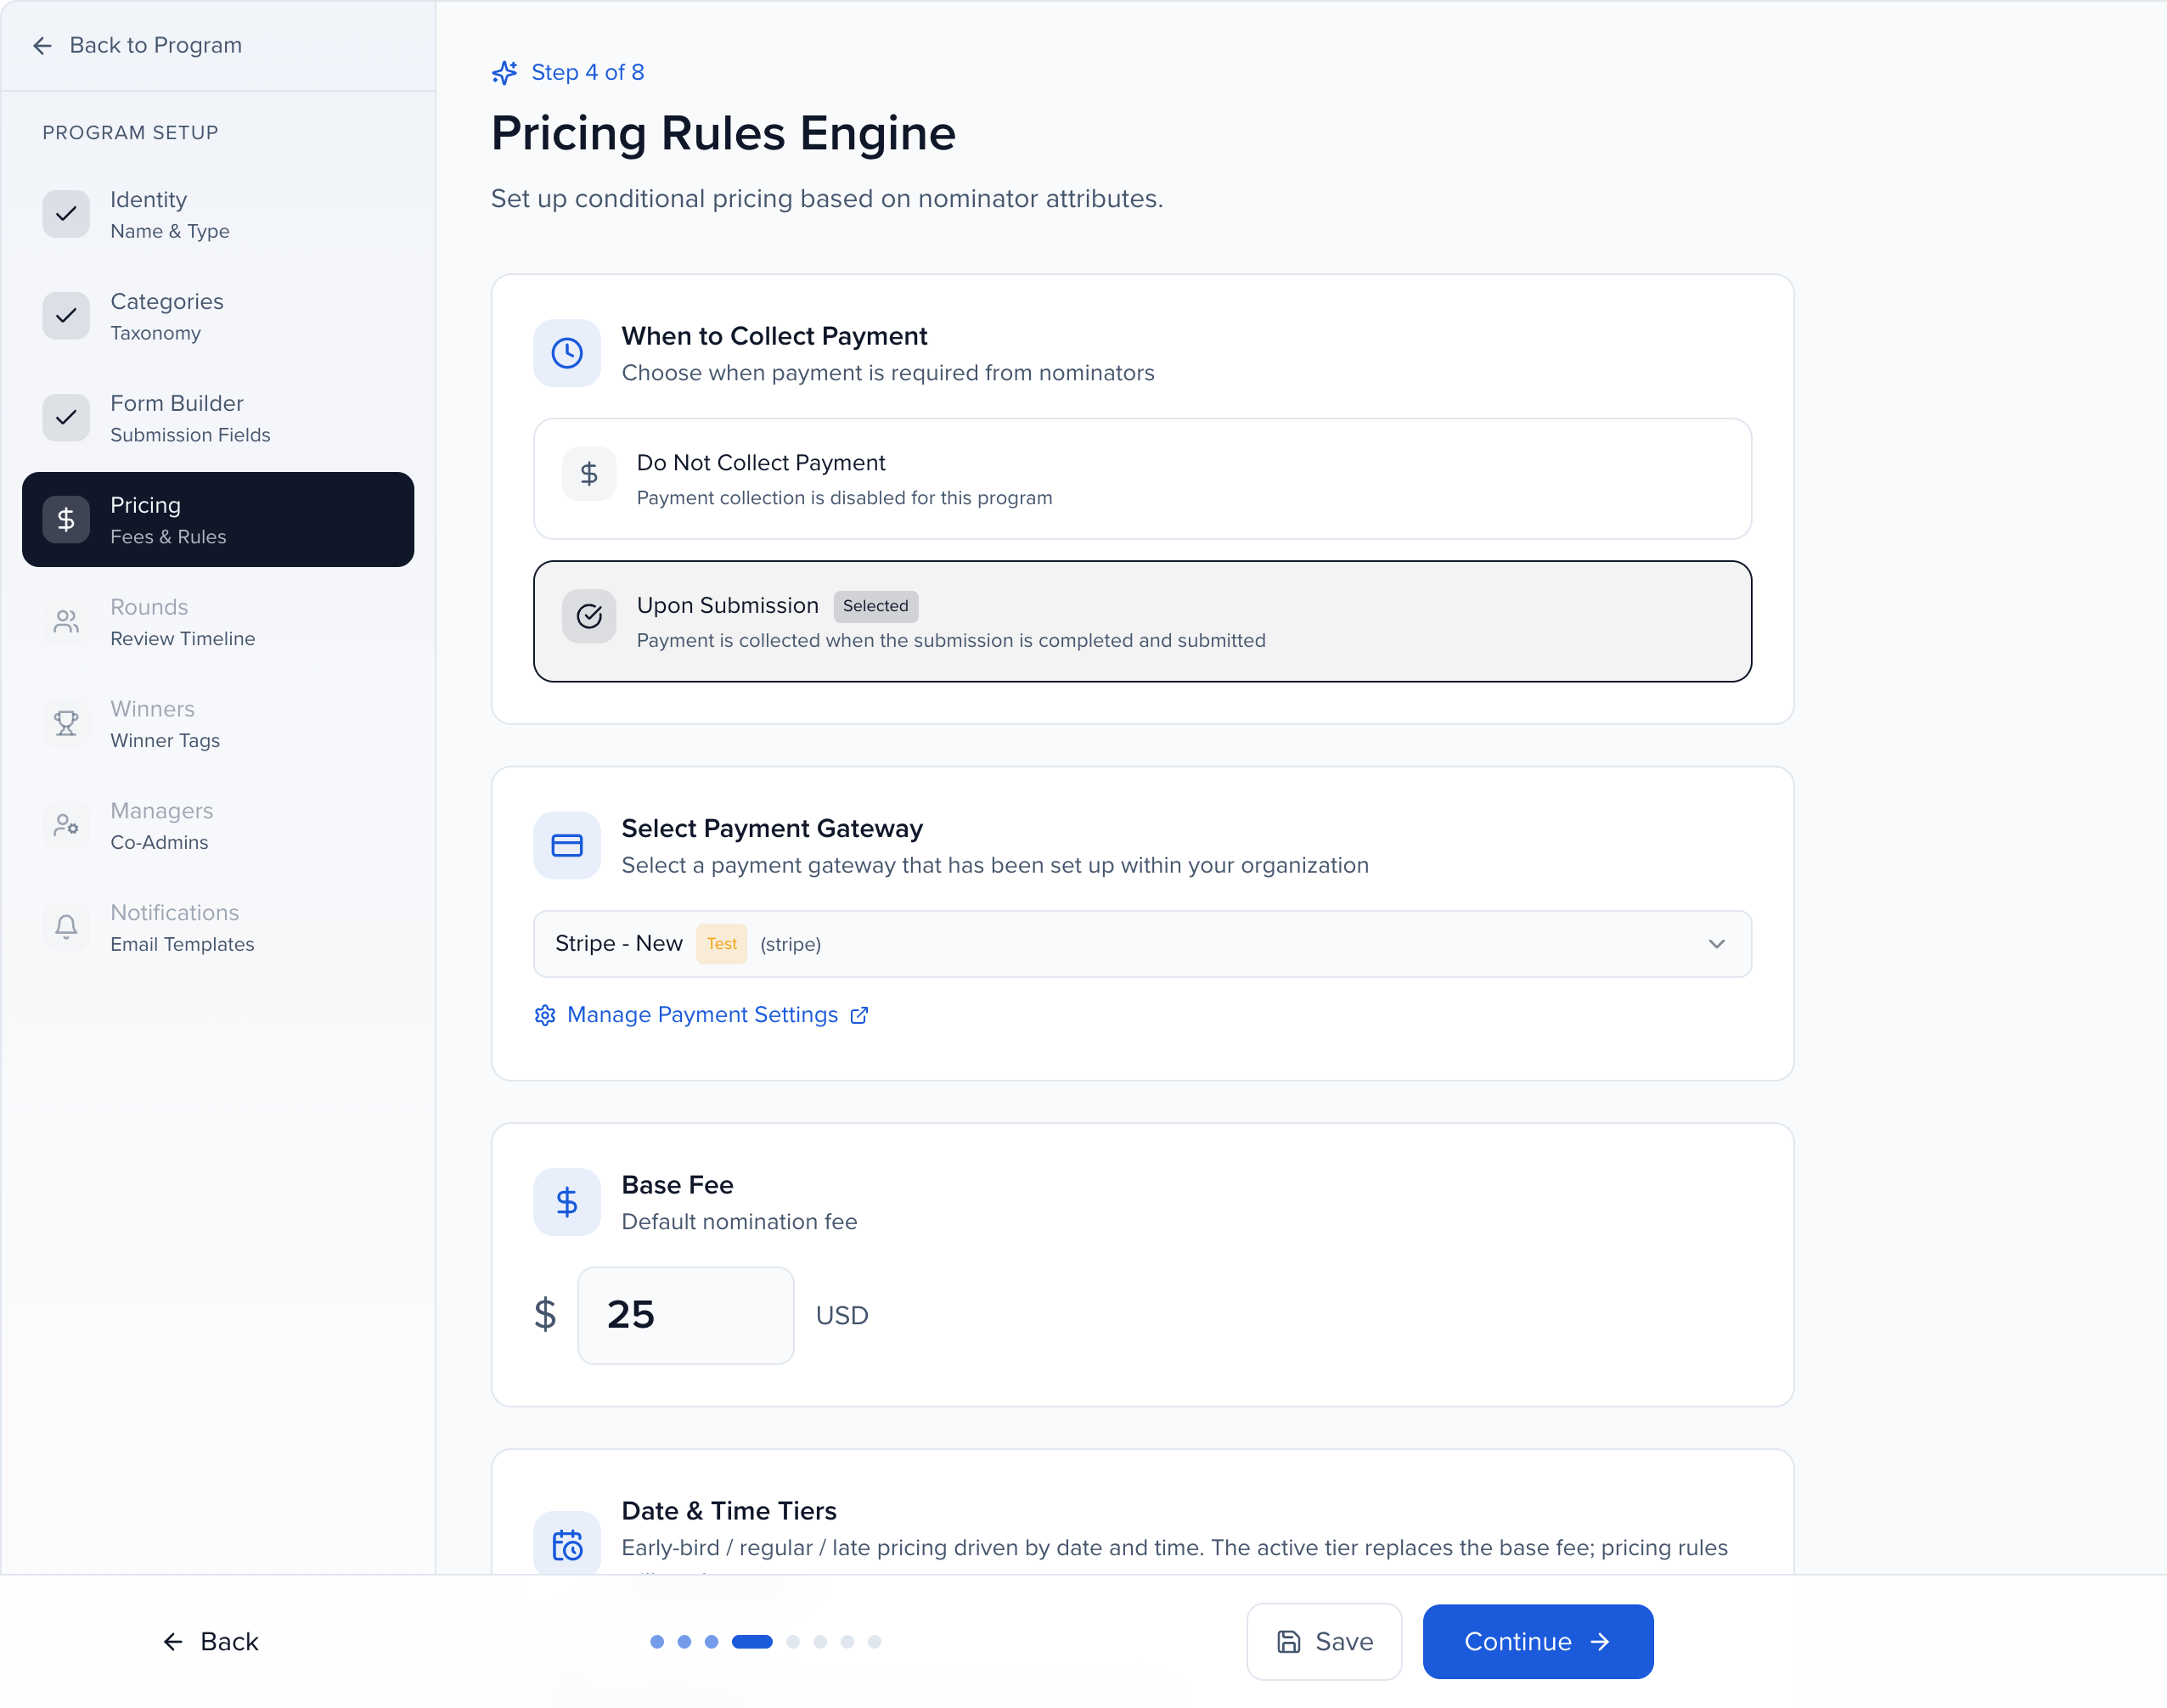
Pricing follows. Plenty of programs are free, and then this is one click. If you charge, choose when to collect payment, and the rest opens up. A base fee, early-bird tiers that step the price up on a date, rules that price by category, VAT, and promo codes for members or sponsors. Payments run through your own gateway, connected once in organization settings, and every payment lands in the invoices tab.
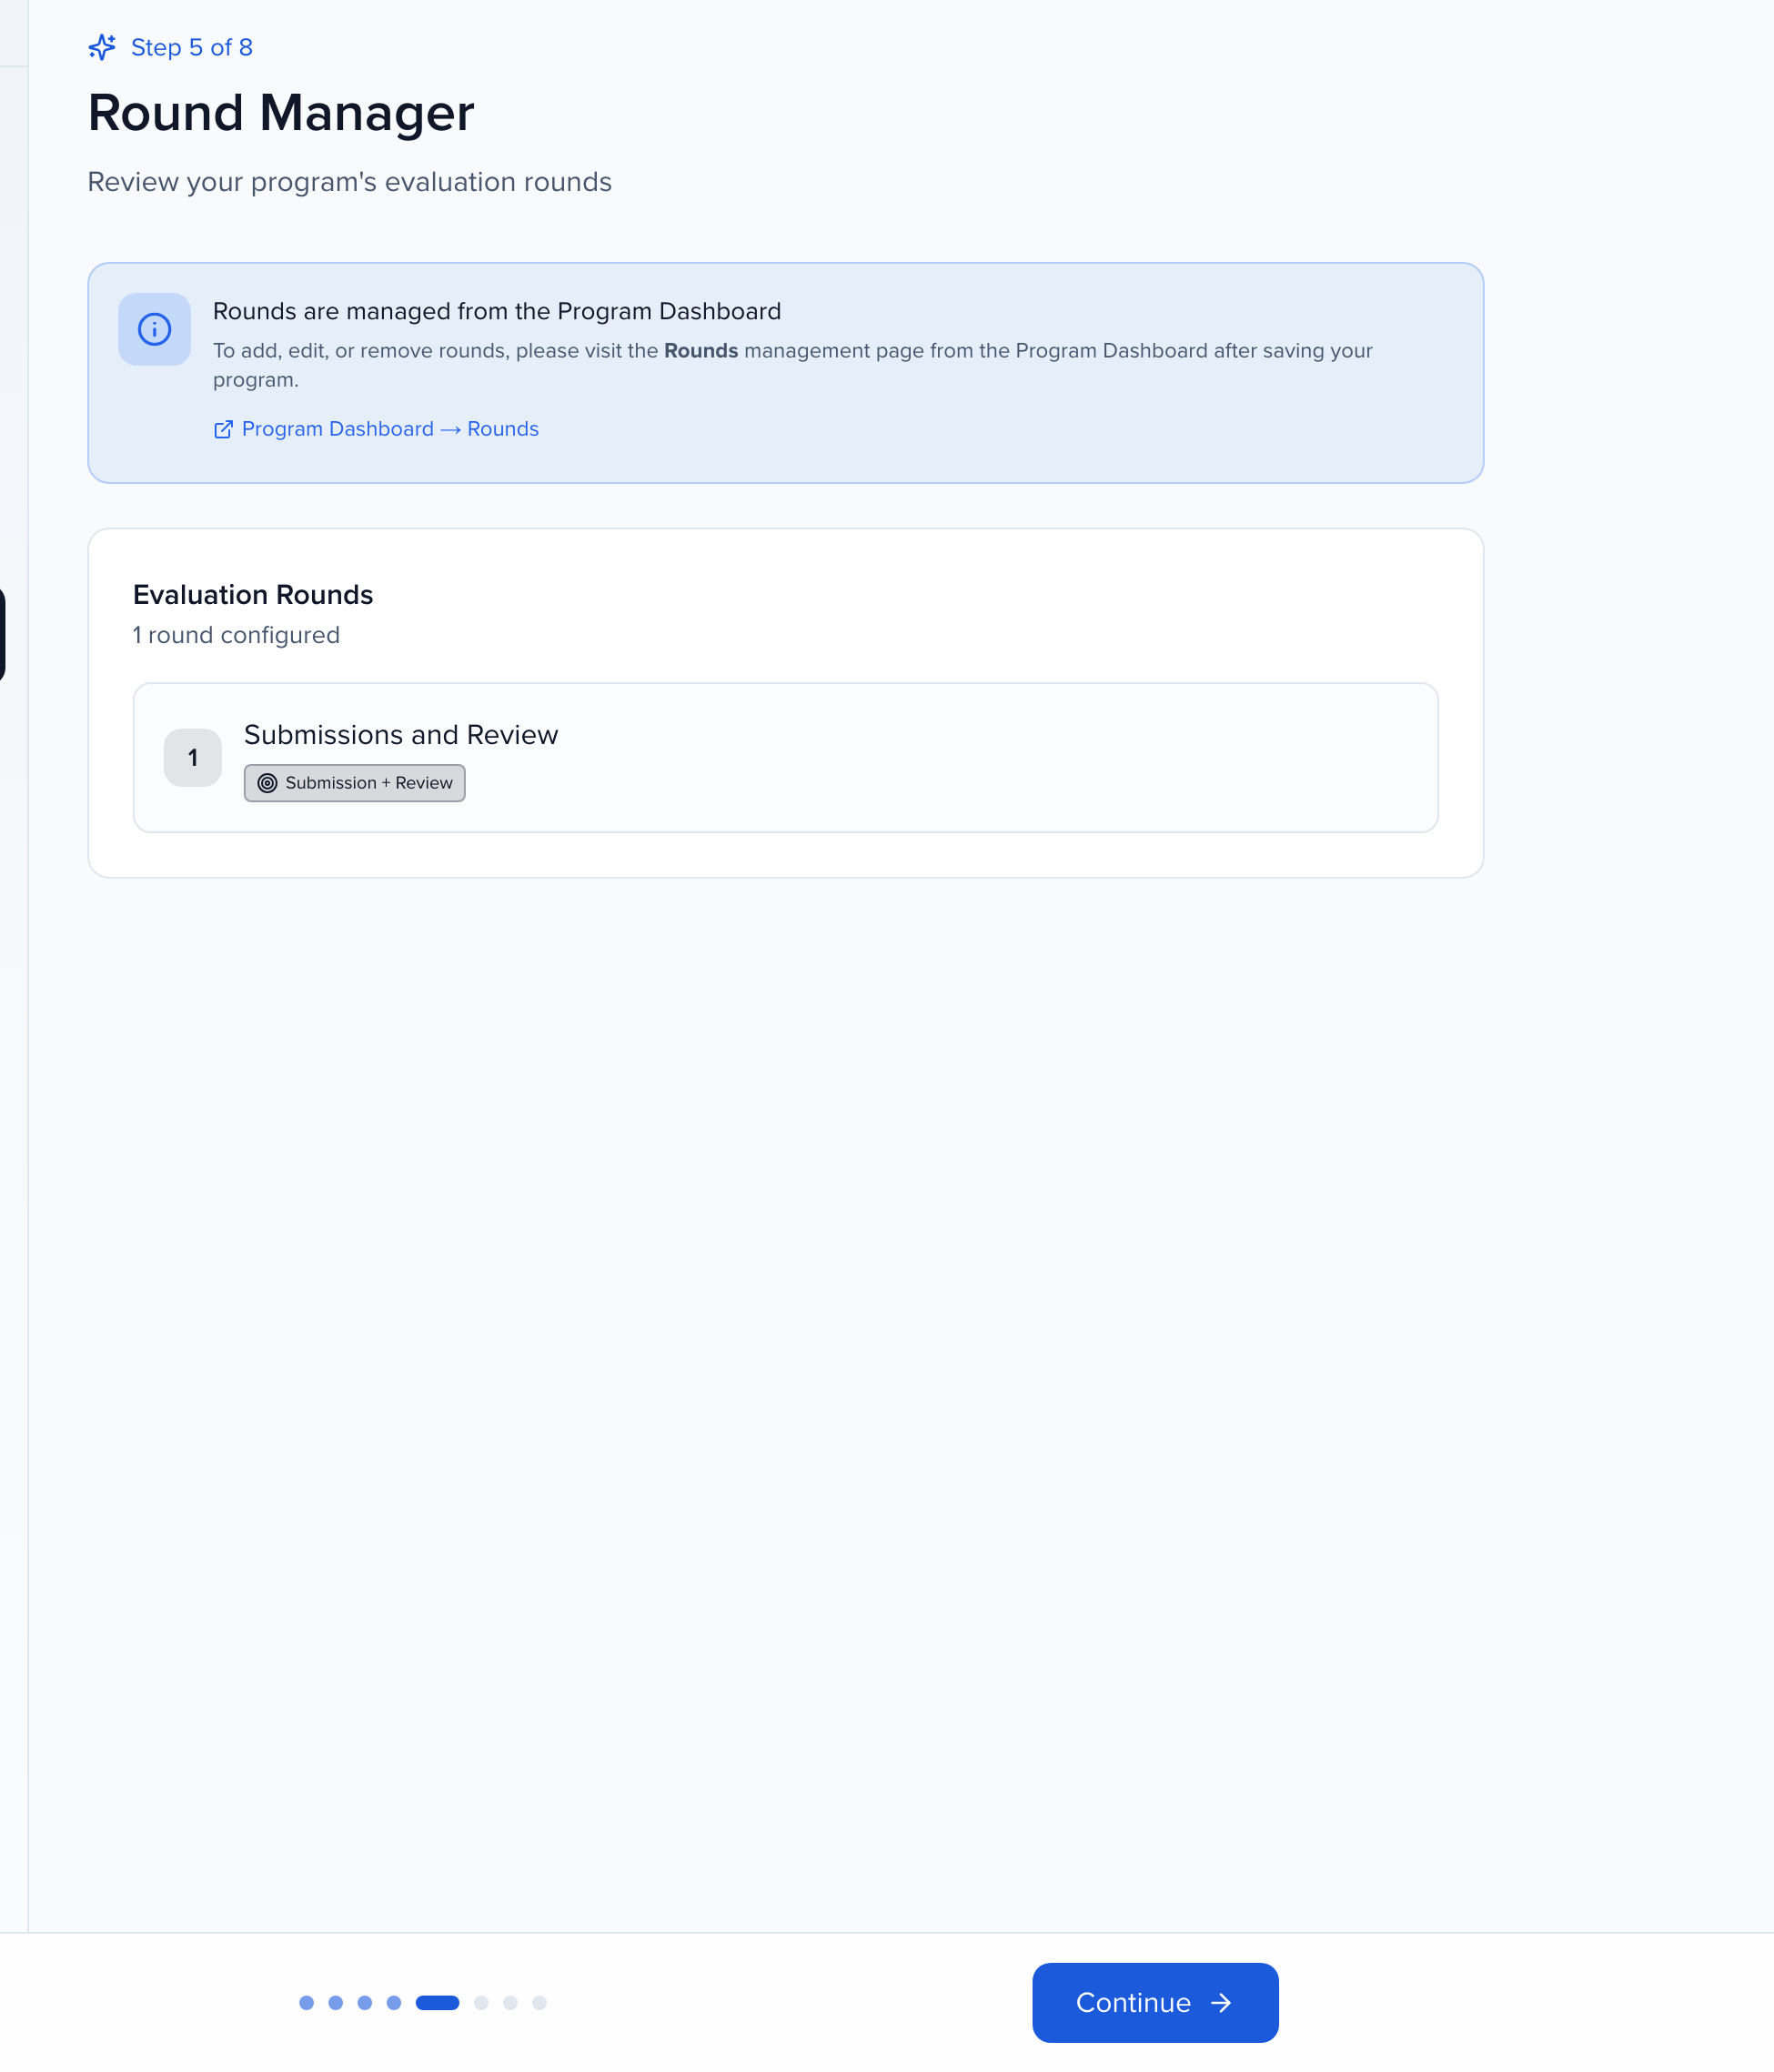
Then rounds. A round is a judging stage with its own dates, its own reviewers and its own scorecard. One round is fine for most programs, entries come in and judges score them. Bigger programs add a review-only round after it, a finalist stage for the top entries. The round manager lists them with their review dates, and each round’s scorecard and reviewer settings live on the round itself in the program dashboard. Below, the reviewers card adds judges, one at a time or from your reviewer pool, with invitations off until you’re ready.
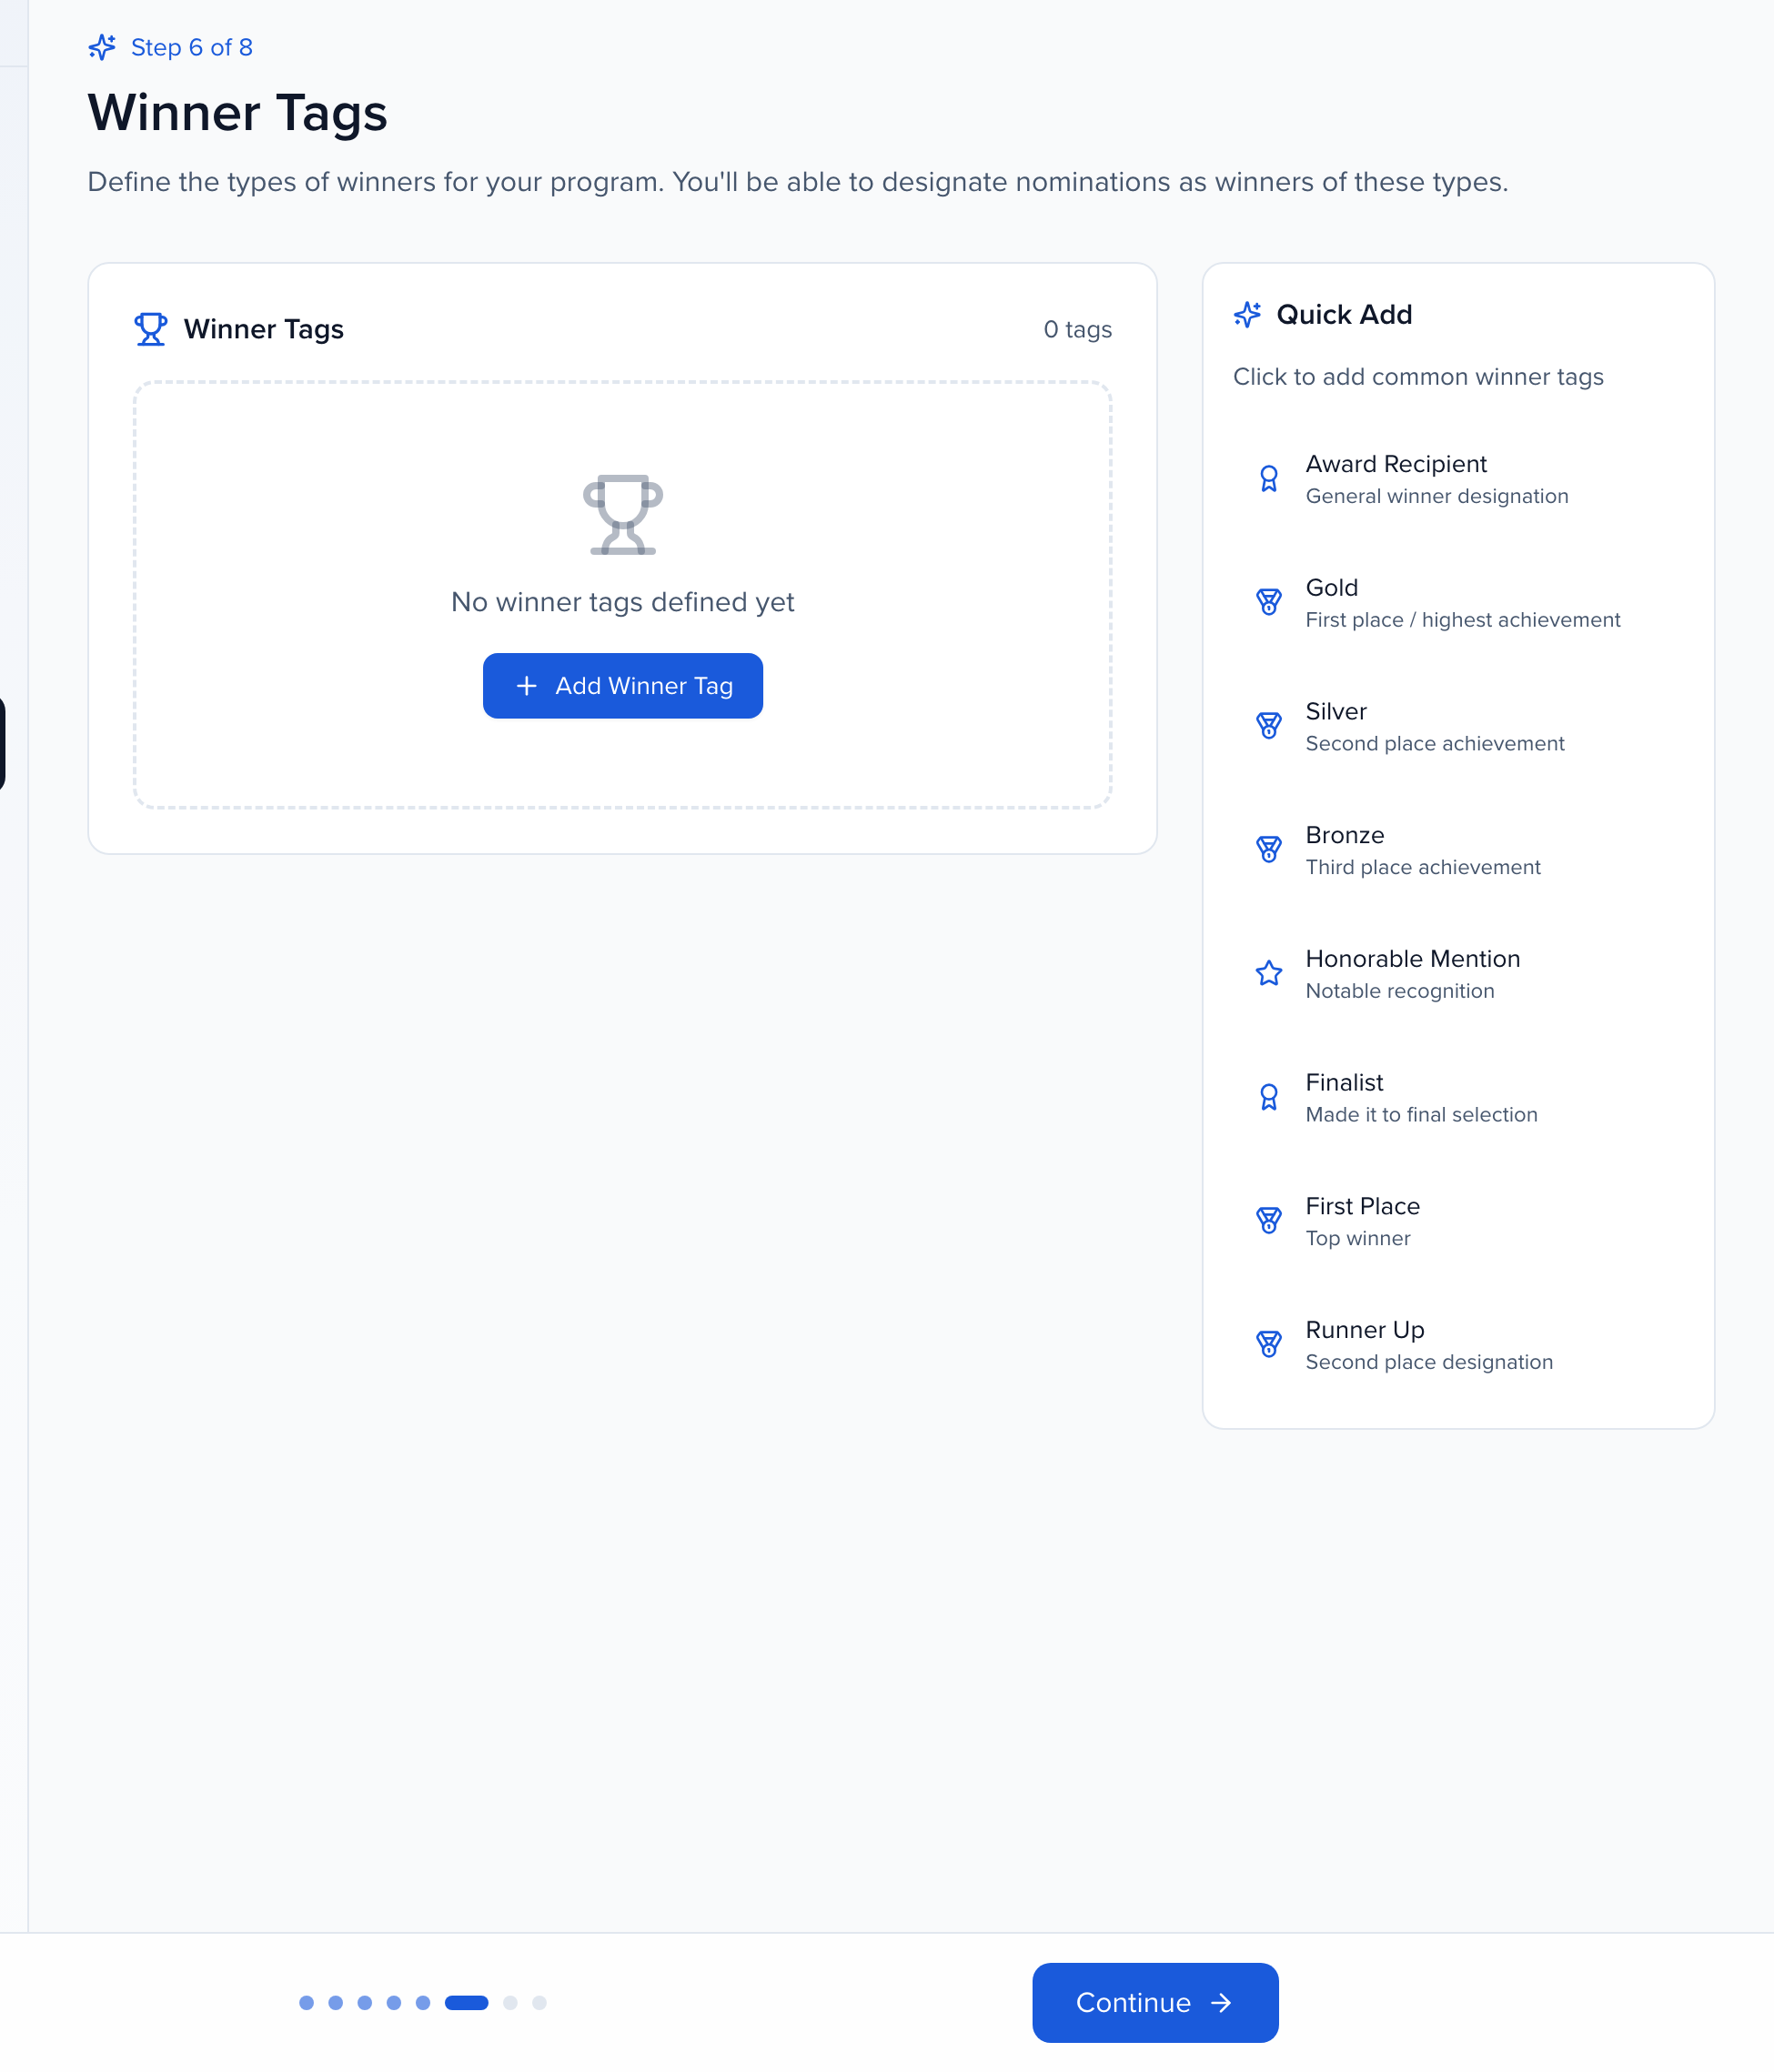
Winners is the tags you’ll hand out at the end. Quick add gives you the usual set, gold, silver, bronze, honorable mention, finalist, runner up, or add your own with a name and a description. Tags are how you mark an entry as a winner on the submissions list later, and you can add more after launch.
Managers adds colleagues who run this program with you with full access, either an existing admin or a new person by email invite. And the last part is notifications. Three groups of emails, to submitters when they submit, when a deadline’s close, and when a decision lands, to reviewers when they’re invited and when their deadline’s near, and to your team when entries arrive or a round completes. Each has a switch, and customize opens the template so the wording is yours. Launch program saves the setup and opens the dashboard.
Once it’s live, the program has its own dashboard. The tabs across the top are where the work happens, submissions, rounds, reviewers, reviewer tags, invoices. Quick views jump straight to a filter, like the submissions nobody’s been assigned to yet. The funnel shows where every entry sits, draft, submitted, under review, accepted, rejected, and reviewer progress tells you how far the judging’s got. Settings is where you duplicate a program for next year, and edit reopens the wizard.
The last piece is where nominees go, and it’s what opens the program. Sites, under program, is the public site your organization publishes, with its own address and branding. In the site builder, programs and CFP is where you tick an awards program to publish it, and the site does the rest, a landing page, a login, the category picker and your form, and my submissions, where people save a draft and come back. Until a program is on a site, it stays in draft. The site URL card has the link for your announcement.
So that’s setup, name it, define the categories, build the form, decide on pricing, rounds and winners, add your team, launch, and publish it on a site. The Awards nominate and review video follows a nomination all the way through, what the nominee sees on your site, what your team sees as entries come in, and what a reviewer does with a scorecard. The Help Center has all of this under Awards, starting with Getting started.
Why use it
Section titled “Why use it”An awards, grants or scholarships program needs a form, categories, fees, a review panel and a way to announce winners, and most teams stitch that together from a form tool, a spreadsheet and email. Here it is one setup: the wizard takes you from the program’s name and the words your community uses to rounds, reviewers and notifications, and the program publishes on your Site. For programs where people apply for themselves, Self-nomination only keeps the form to one person, so you only hold data about the person who submitted it.
Where to find Awards
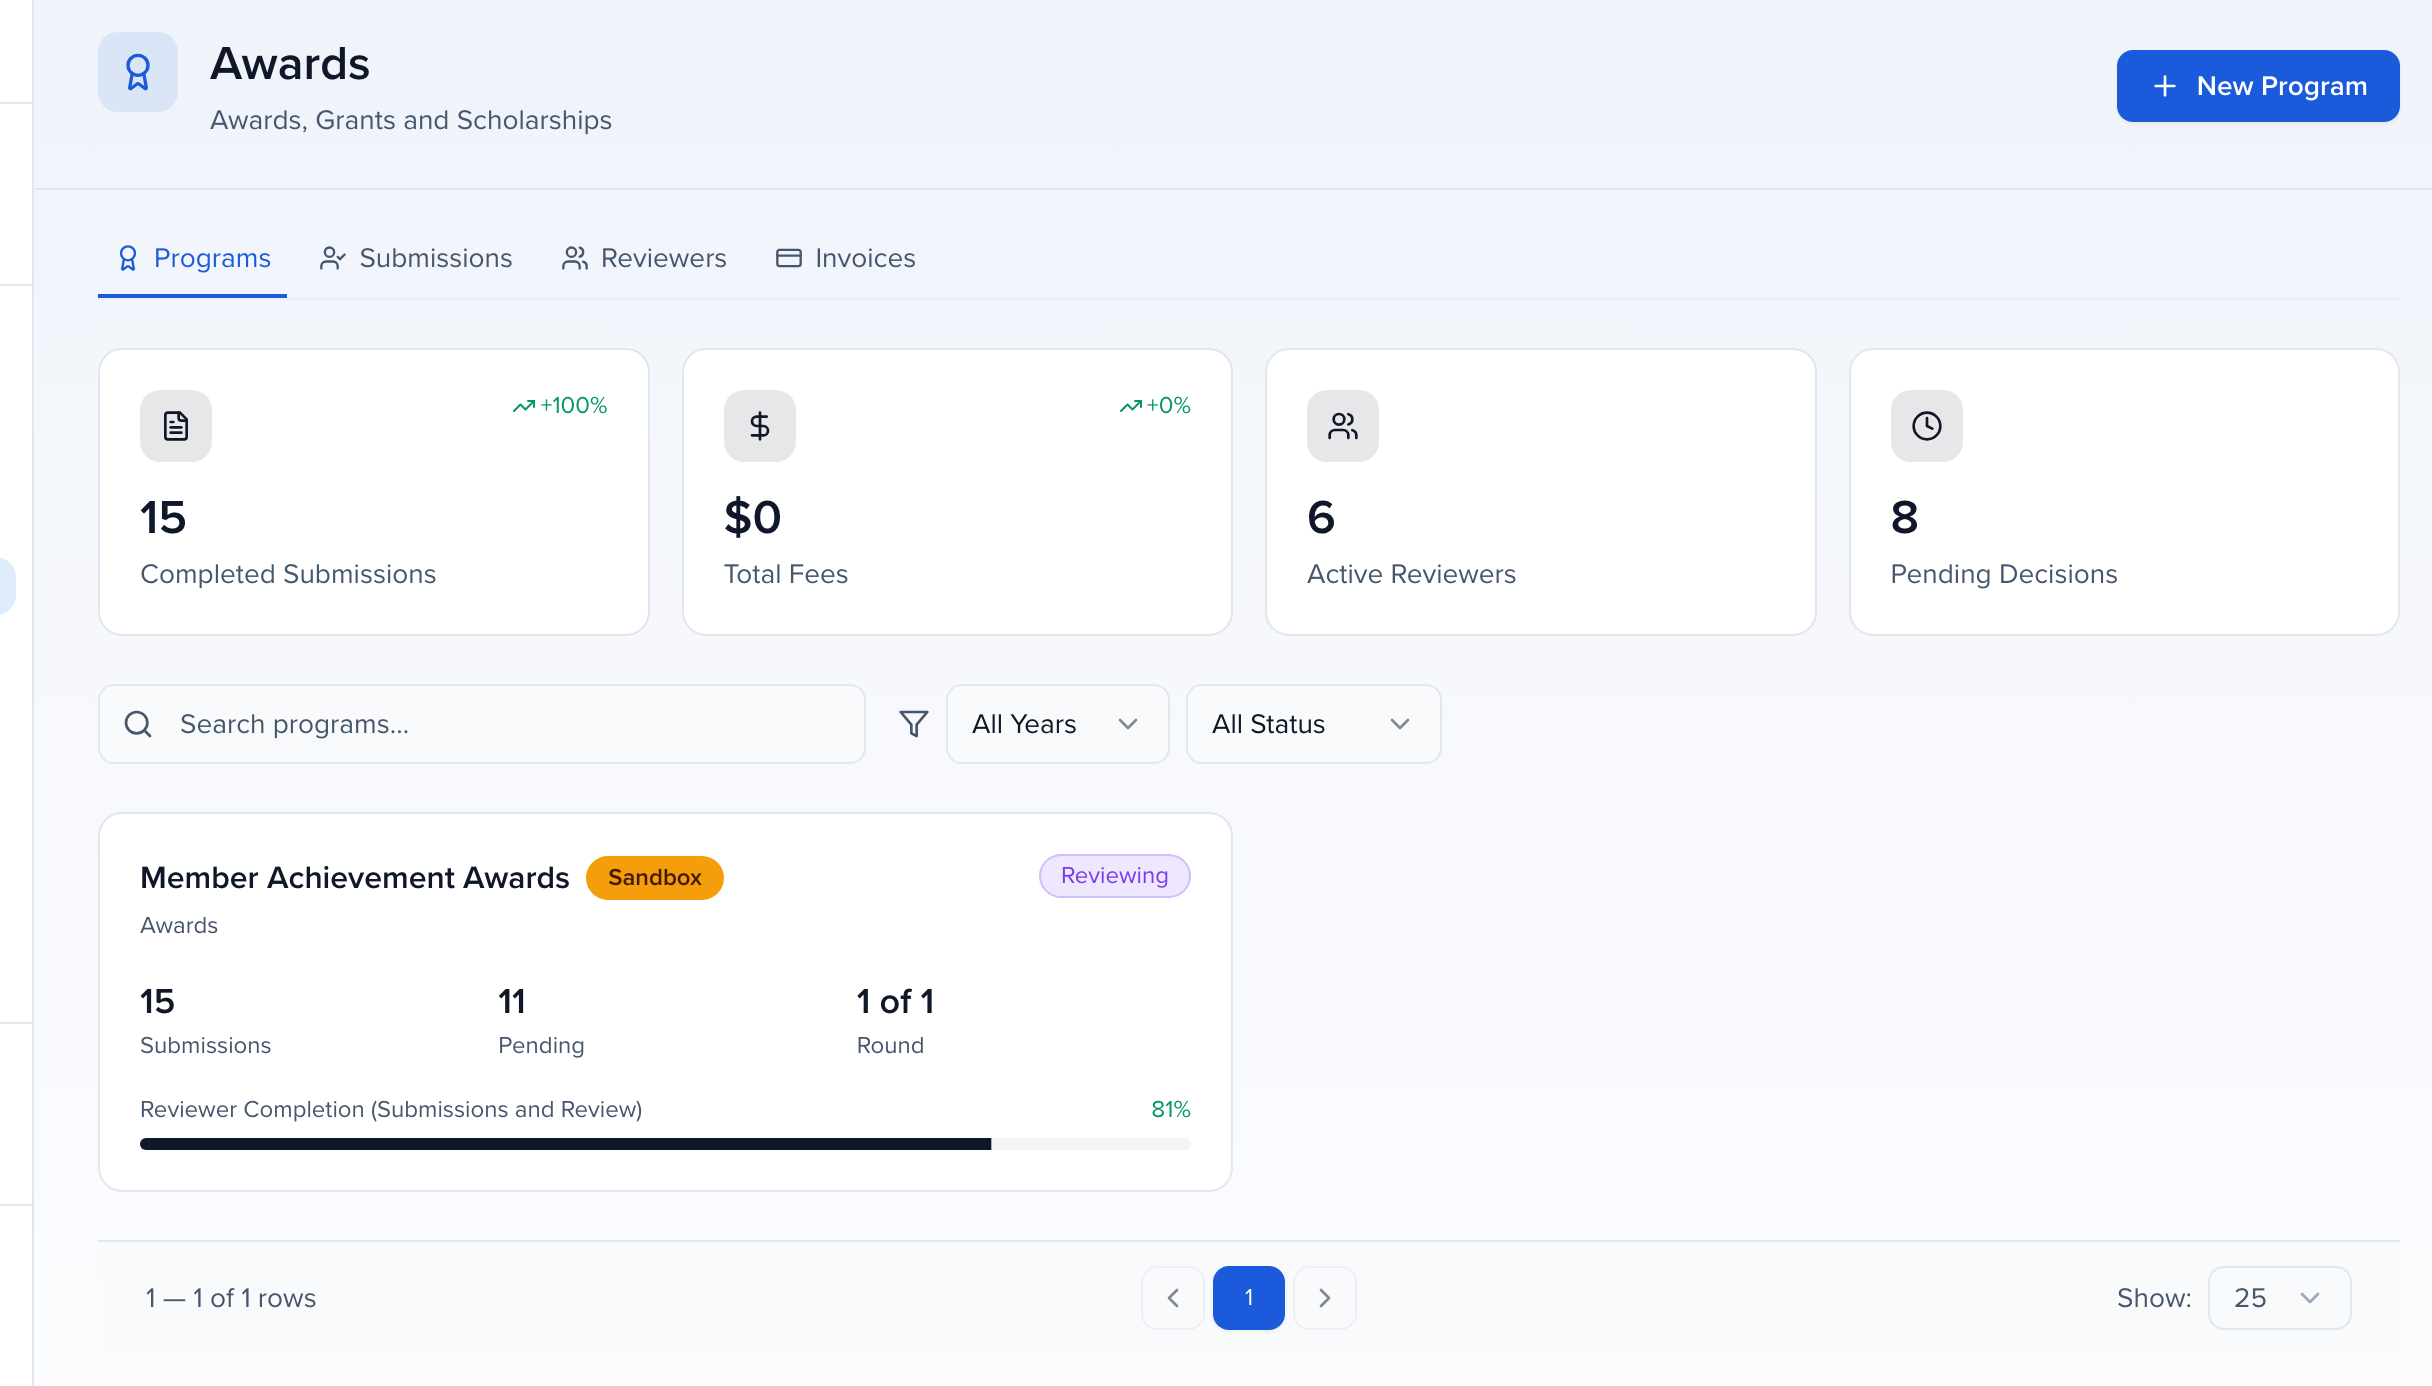
Section titled “Where to find Awards”In the left sidebar of your organization, click Program → Awards to open the Awards hub. It lists every program as a card, with high-level stats across all of them: Completed Submissions, Total Fees, Active Reviewers, and Pending Decisions.
The hub also has four views across the top — Programs, Submissions, Reviewers, and Invoices — so you can work across all programs without opening each one.
Creating a new program
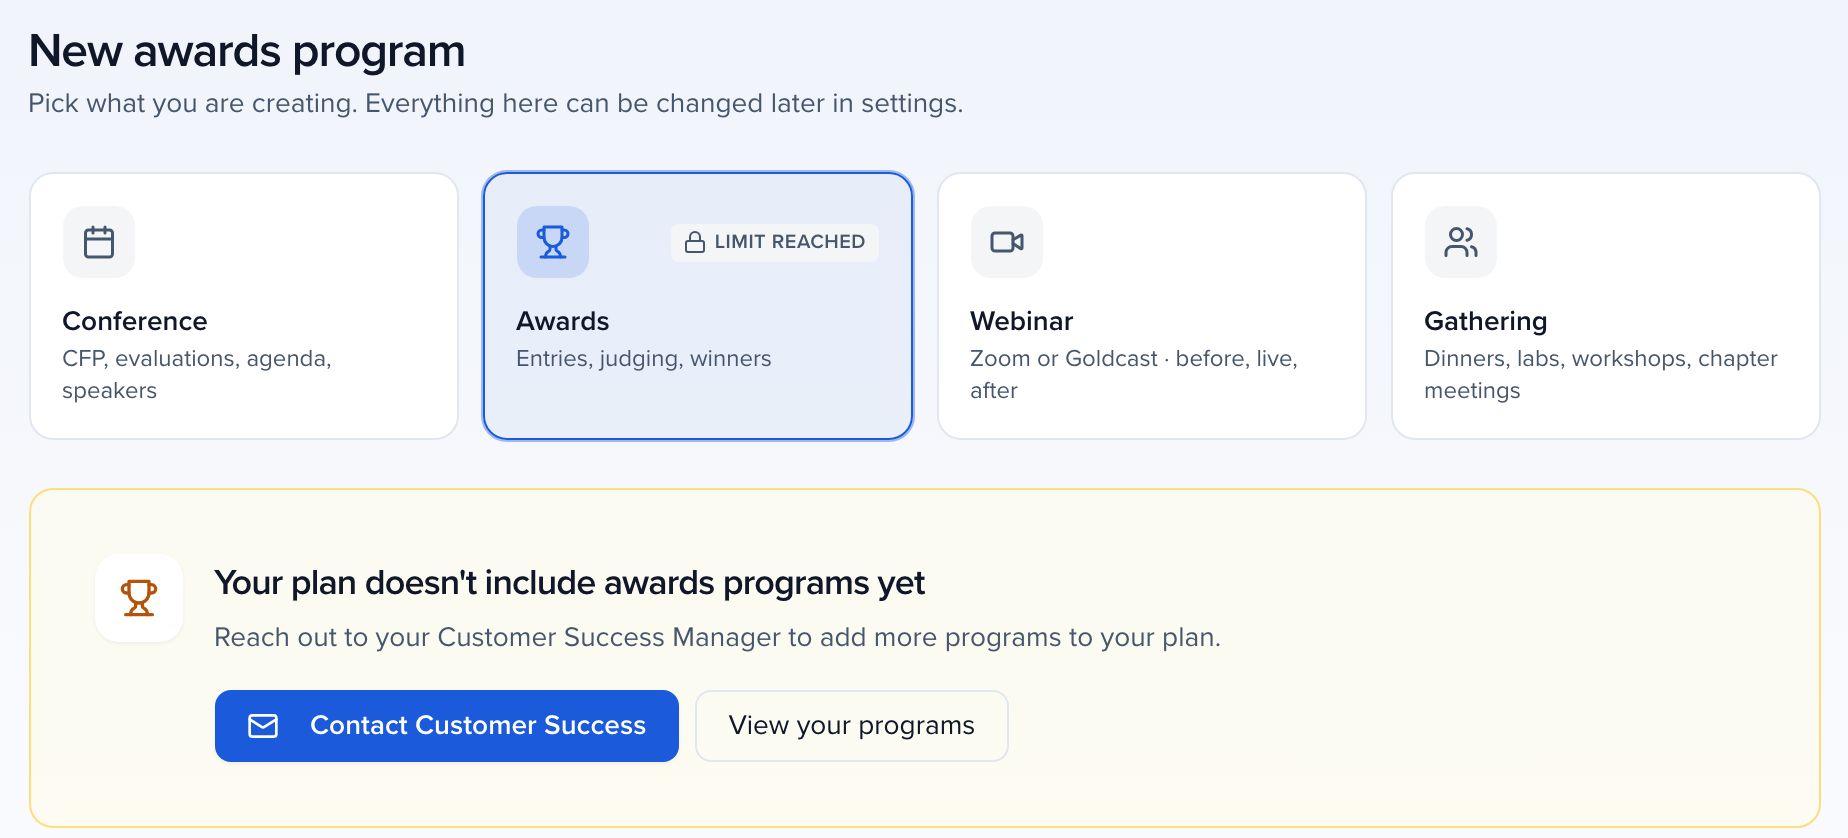
Section titled “Creating a new program”Click New Program in the top-right corner of the Awards hub. It opens Add Program with Awards chosen — the same page as Add Program on the organization’s Events page. The page shows how many awards programs your plan includes and how many you have used; click Start the awards wizard (this needs the Create Awards permission). If your plan has no programs left, or does not include any yet, the page says so and offers Contact Customer Success instead. Organizations without Awards see Talk to us about Awards.
The wizard walks you through your program configuration in eight steps. Each Continue saves the step you are on, so you can leave and come back — the program exists from the first step onward. To save without moving on, click Save beside Continue: it stores the step, keeps you on it, and confirms with Saved. It turns on as soon as you change something on the step.
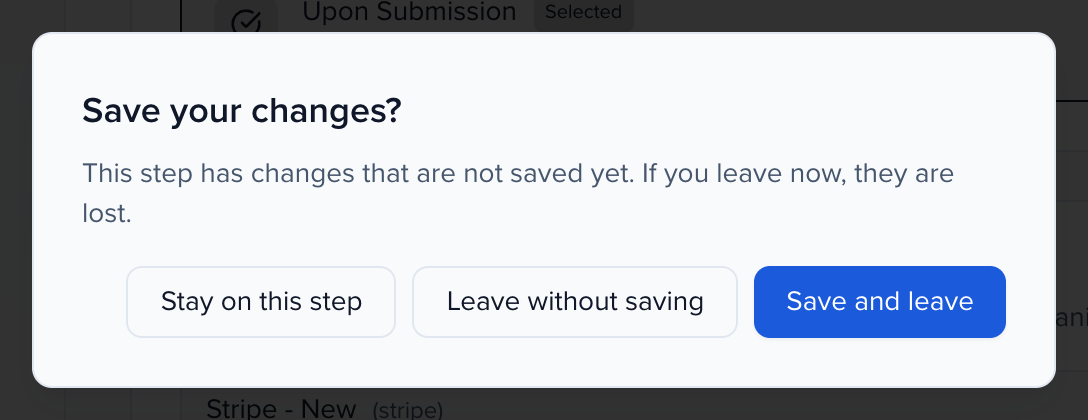
Changes on a step live in the wizard until you click Save or Continue — including a question’s Customize Question dialog, whose Save only updates the form you are building. If you click Back to program with unsaved changes, the wizard asks first: Save and leave, Leave without saving, or Stay on this step. Reloading or closing the tab with unsaved changes shows your browser’s leave warning.
The 8-step setup wizard
Section titled “The 8-step setup wizard”The Program Setup sidebar on the left lists the steps and shows where you are: Identity, Categories, Form Builder, Pricing, Rounds, Winners, Managers, and Notifications. Click a completed step in the sidebar to go back to it; Continue saves and moves forward, and Save saves the step without leaving it.
Step 1: Identity & Nomenclature
Section titled “Step 1: Identity & Nomenclature”Define what your program is and how it is labeled throughout the product.
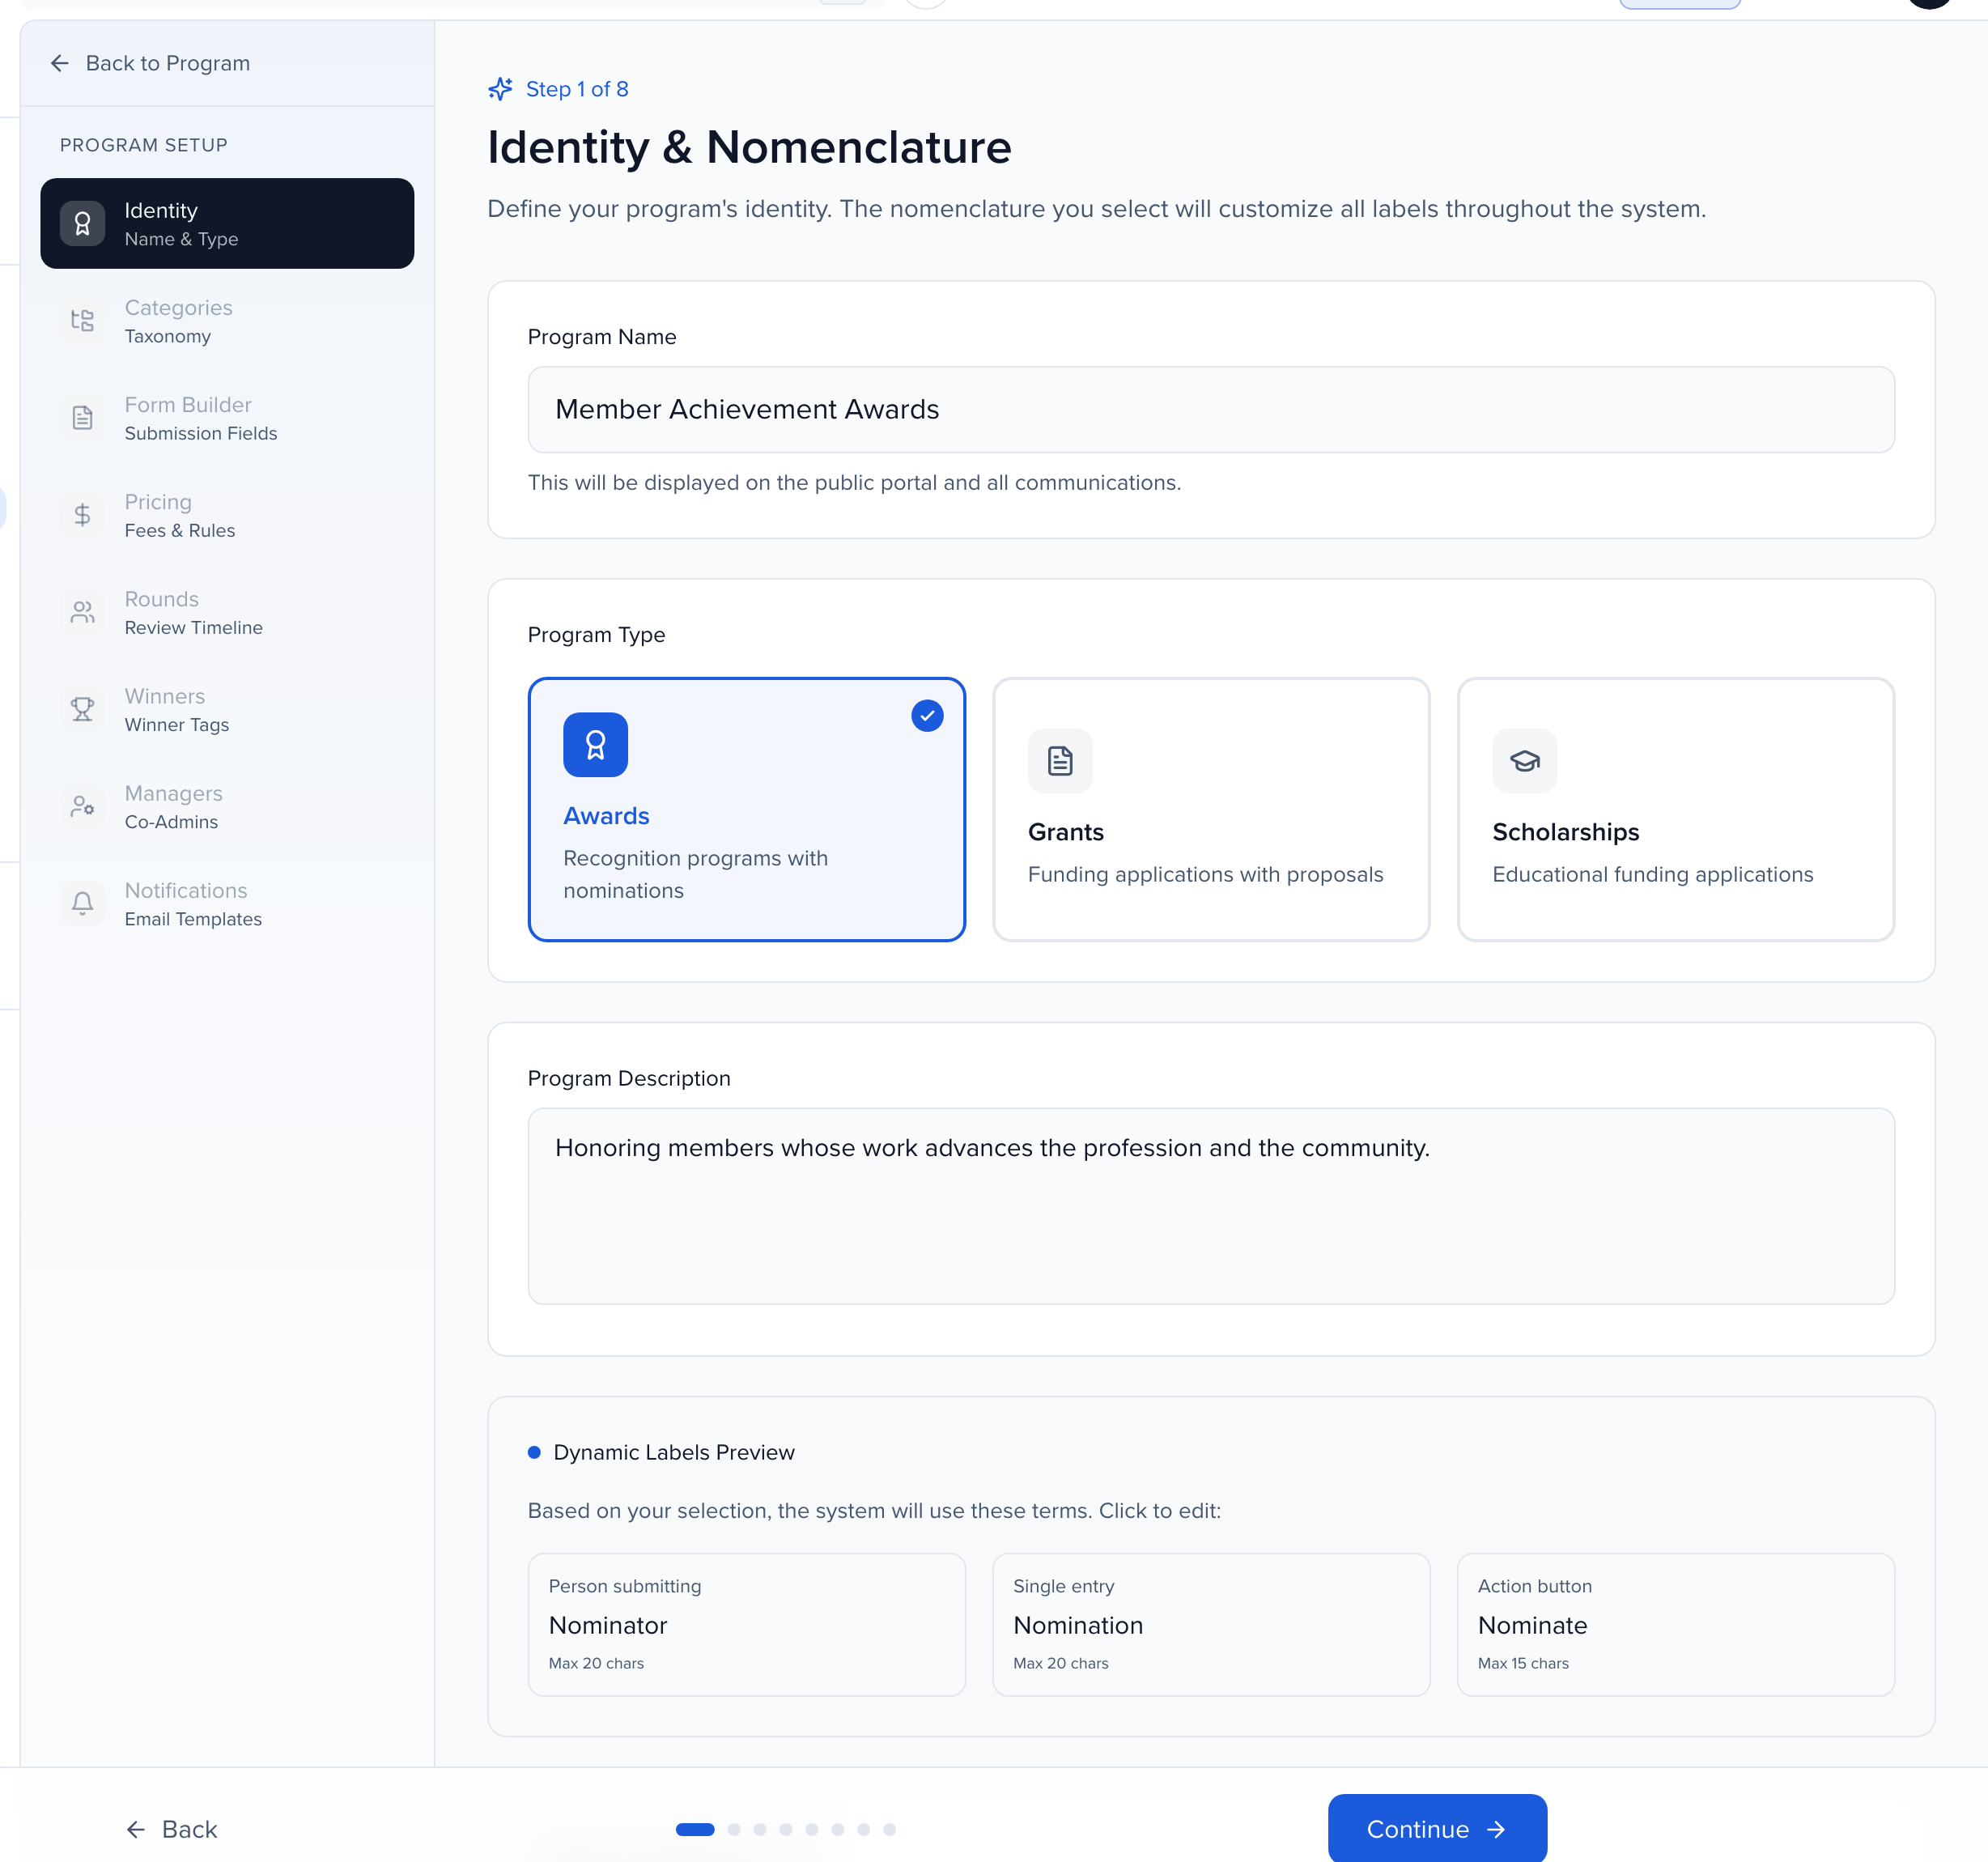
Program Name — Appears on the public portal and throughout the admin interface. Choose something descriptive, such as “2026 Excellence in Innovation Awards”.
Program Type — Pick the type that best matches your use case. It sets the default terminology used across the platform:
- Awards — Recognition programs with nominations. Uses “Nominator,” “Nomination,” and “Nominate.”
- Grants — Funding applications with proposals. Uses “Applicant,” “Application,” and “Apply.”
- Scholarships — Educational funding applications. Uses “Applicant,” “Application,” and “Apply.”
Program Description — Describe the purpose and eligibility criteria. This is internal-facing and helps your team keep track of what each program is for.
Dynamic Labels Preview — After you pick a type, this panel shows the three labels the type sets. Each one is editable:
- Person submitting — for example “Nominator” (up to 20 characters)
- Single entry — for example “Nomination” (up to 20 characters)
- Action button — for example “Nominate” (up to 15 characters)
Submitter editing after submit — The Editing policy decides whether a submitter can change an entry after sending it in. The default is Never allow edits after submit. Turn on Notify admins on submitter edit if you allow edits and want an email each time one happens. You can override the policy for a single entry later from its detail sheet.
Self-nomination only — Turn it on when every submitter nominates themselves. The form then has no nominee section: the nominee is the person submitting, filled in from their own answers, so you only collect data from one person (which keeps GDPR simple). Nominee questions with no submitter equivalent, such as a nominee headshot, stay on the form and the submitter answers them about themselves. Lists, reviews, exports and winners still show the nominee. The switch can’t change once the program has any submission, drafts included; to use the other setting, duplicate the program.
Default status for new submissions — The status every entry lands in once it is submitted, or once payment clears when fees are due on submit. Submitted is the default; choose Under review, Accepted, or Rejected to have entries arrive already in that state — for example Under review when every entry goes straight to your panel.
Step 2: Categories
Section titled “Step 2: Categories”Categories are the taxonomy for your program. They organize submissions and can be linked to pricing rules and reviewer assignments later.
Click Add Category to create your first category. Each one has a Category Name and a Description/Instructions field for category-specific guidance to submitters.
Categories support up to two levels of nesting: Parent → Child → Grandchild. Use the Sub button on a category to add a sub-category beneath it, and drag or use the arrows to reorder.
Step 3: Form Builder
Section titled “Step 3: Form Builder”The Form Builder is where you design the submission form that applicants or nominators fill out. It has its own guide — see Building your awards submission form — but in short you will configure:
- Sections — Category Selection, Submitter Information, Nomination Details, and Form Questions, each with its own fields and instructions.
- Standard fields — A Quick Add panel offers pre-built fields (nominee name, email, title, organization, nomination statement, supporting documents, and so on). Required fields are flagged if missing.
- Custom fields — Add fields using types such as text, long text, dropdown, checkbox, date, email, and file upload.
- Field options — Custom label, placeholder, help text, required or optional, and conditional question rules.
- Form Rules — Combined character or word limits across several text fields.
When Self-nomination only is on, the step shows a note: the nominee fields stay in the builder, because lists, reviews and exports read them, but submitters don’t see them and they are filled from the submitter’s answers.
Step 4: Pricing
Section titled “Step 4: Pricing”If your program charges a fee, this is where you configure it. Pricing has its own guide — Awards pricing, payments & invoices — and the wizard step covers:
- When to Collect Payment — Do Not Collect Payment (free submissions) or Upon Submission (payment is collected when the submitter completes the entry).
- Select Payment Gateway — Pick a gateway connected under your organization’s payment settings. If none is connected, click Manage Payment Settings to add one.
- Base Fee — The default fee for every submission, in USD.
- Date & Time Tiers — Early-bird, regular, and late prices that switch on a schedule.
- Pricing Rules — Change the fee when a condition is met, for example a specific category.
- VAT Rules — Tax applied to the total in the submitter’s cart.
- Promo Codes — Discount codes applicants enter at checkout.
Step 5: Rounds
Section titled “Step 5: Rounds”Rounds define the review timeline. A default round called Submissions and Review is created for you. This step shows your rounds and links to Program Dashboard → Rounds, which is where you add, edit, and schedule them.
Each round shows its review dates in your organization’s time zone, or a note that no review dates are set (reviewing then opens as soon as reviewers are assigned). Edit review dates opens the round’s settings. Below the rounds, the Reviewers card shows how many reviewers you have added, with Add reviewer and Add from reviewer pool. Invitations are off by default here, so nobody is emailed while you set up; send them from Reviewers when the program is ready.
There are two round types:
- Submission + Review — Accepts new submissions and lets reviewers review them in the same round.
- Review Only — No new submissions; reviewers review entries that are already in (a finalist round, for example).
Each round has a name, submission and review periods, reviewer instructions, voting settings, and a scorecard. See Managing submissions, reviewers & rounds.
Step 6: Winners
Section titled “Step 6: Winners”Winner Tags are the kinds of recognition your program hands out. After review, you apply them to winning submissions.
The Quick Add panel adds common presets in one click: Award Recipient, Gold, Silver, Bronze, Honorable Mention, Finalist, First Place, and Runner Up. Add Winner Tag creates a custom tag with a name and an optional description.
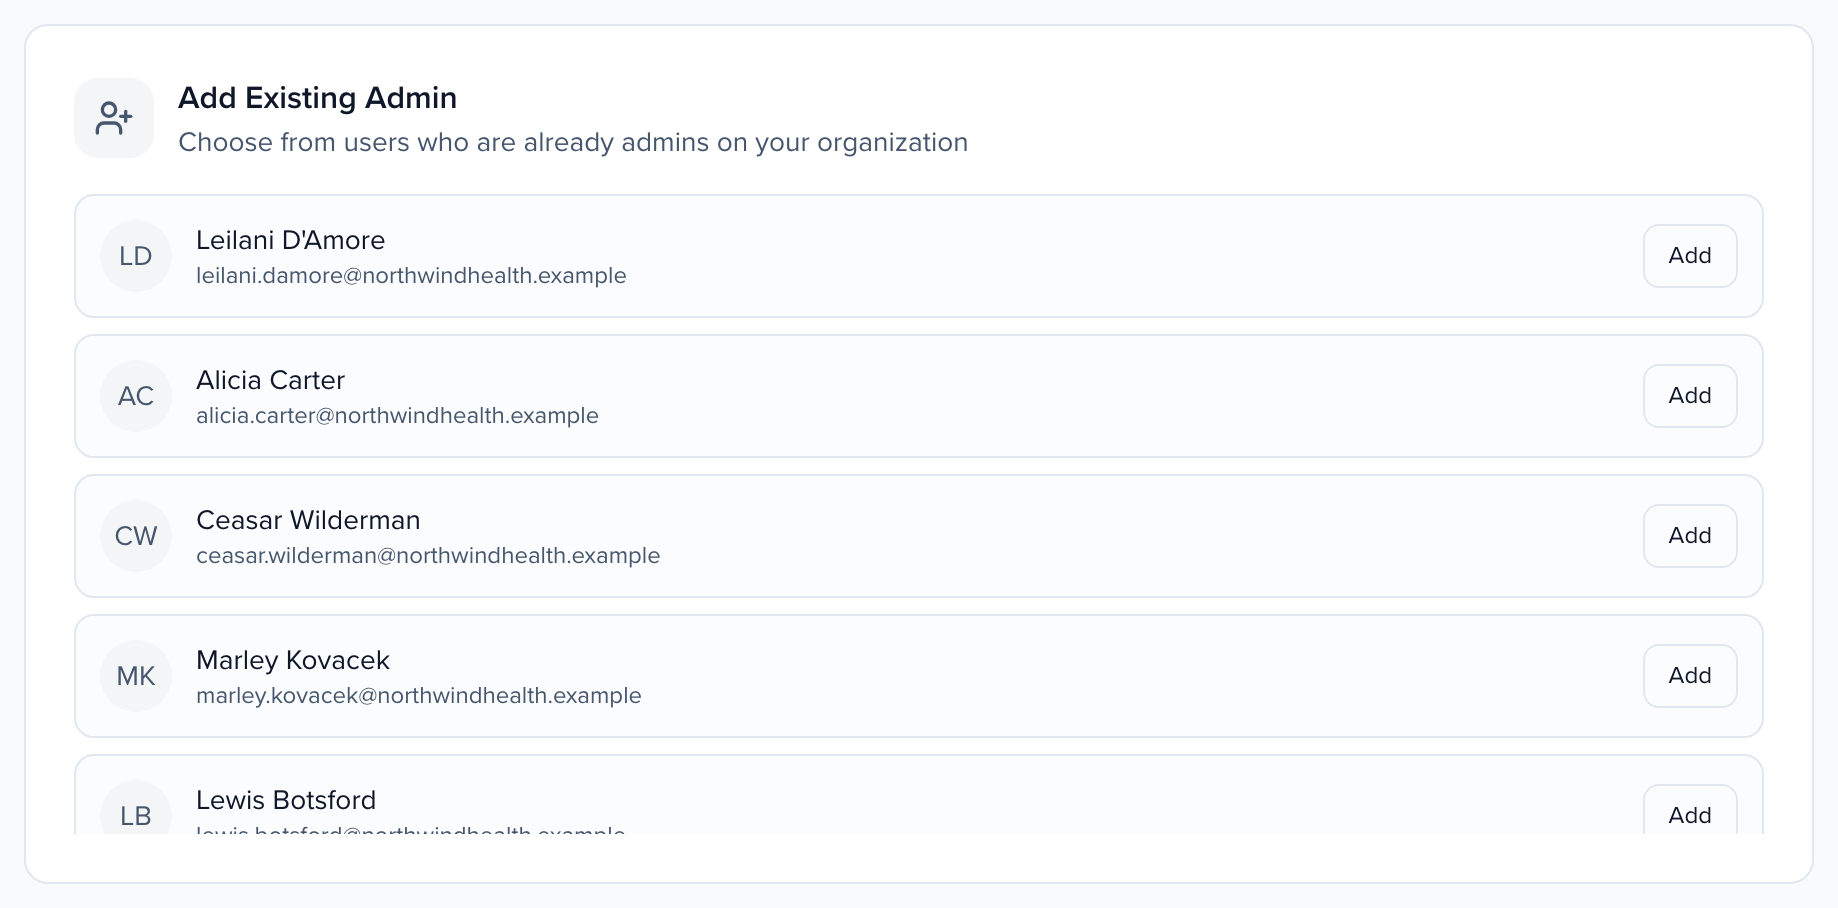
Step 7: Managers
Section titled “Step 7: Managers”Program Managers are co-administrators. Unlike reviewers, who review submissions, managers have full administrative access to the program — submissions, settings, and the review process.
- Add Existing Admin — Choose from people who are already admins in your organization and click Add.
- Invite New User — Send an invite to someone who is not an admin yet; they get access to this program when they accept.
Step 8: Notifications
Section titled “Step 8: Notifications”The last step lists the emails the program sends automatically, in three groups: Submitter Notifications, Reviewer Notifications, and Admin Notifications. Each has a switch to turn it on or off and a Customize button that opens the template. Most start on; Deadline Reminder, Non-Selection Notification, Submission Updated Alert, and New Submission Alert start off.
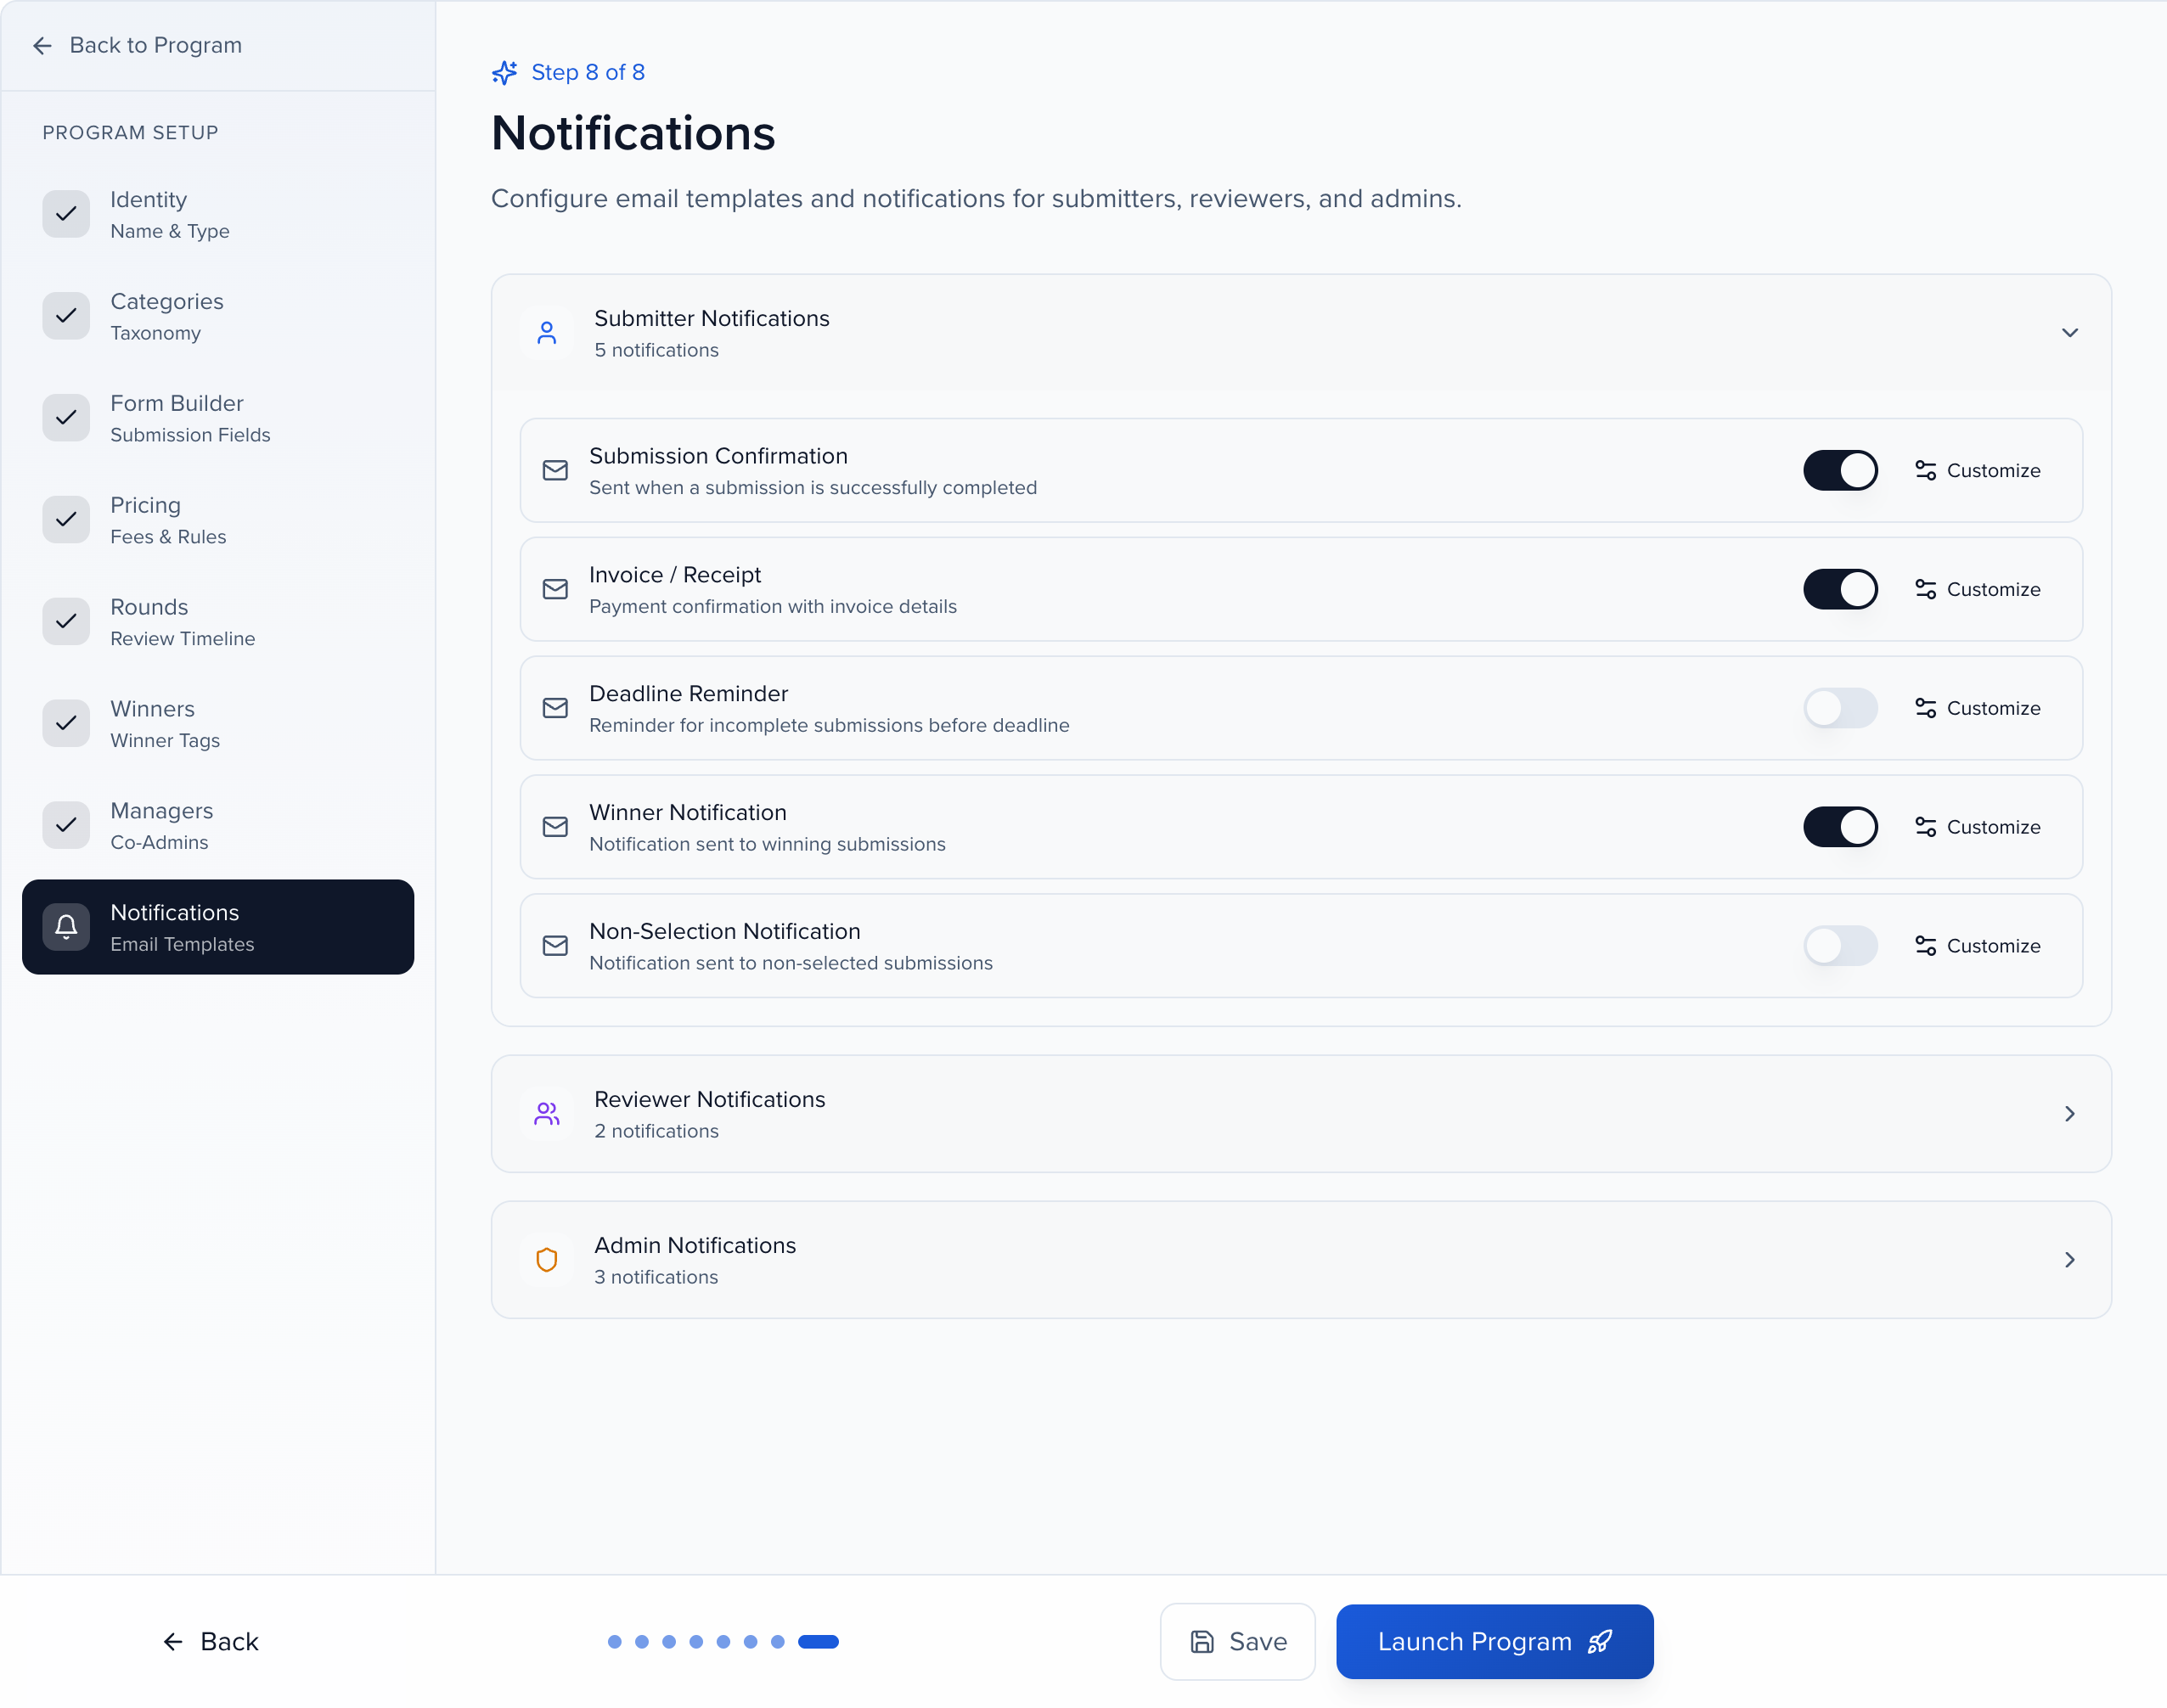
Notifications are covered in Awards notifications & email templates.
Click Launch Program to save the final step and go to your Program Dashboard. Launching does not open the program to submitters by itself — see Program statuses below.
Your program dashboard
Section titled “Your program dashboard”The Program Dashboard is the operational hub for one program. The header shows the program name, its current status with the completed submission count, and two buttons: Settings (Duplicate, Archive, Delete) and Edit, which reopens the wizard. Below the header, tabs switch between Dashboard, Submissions, Rounds, Reviewers, Reviewer Tags, and Invoices.
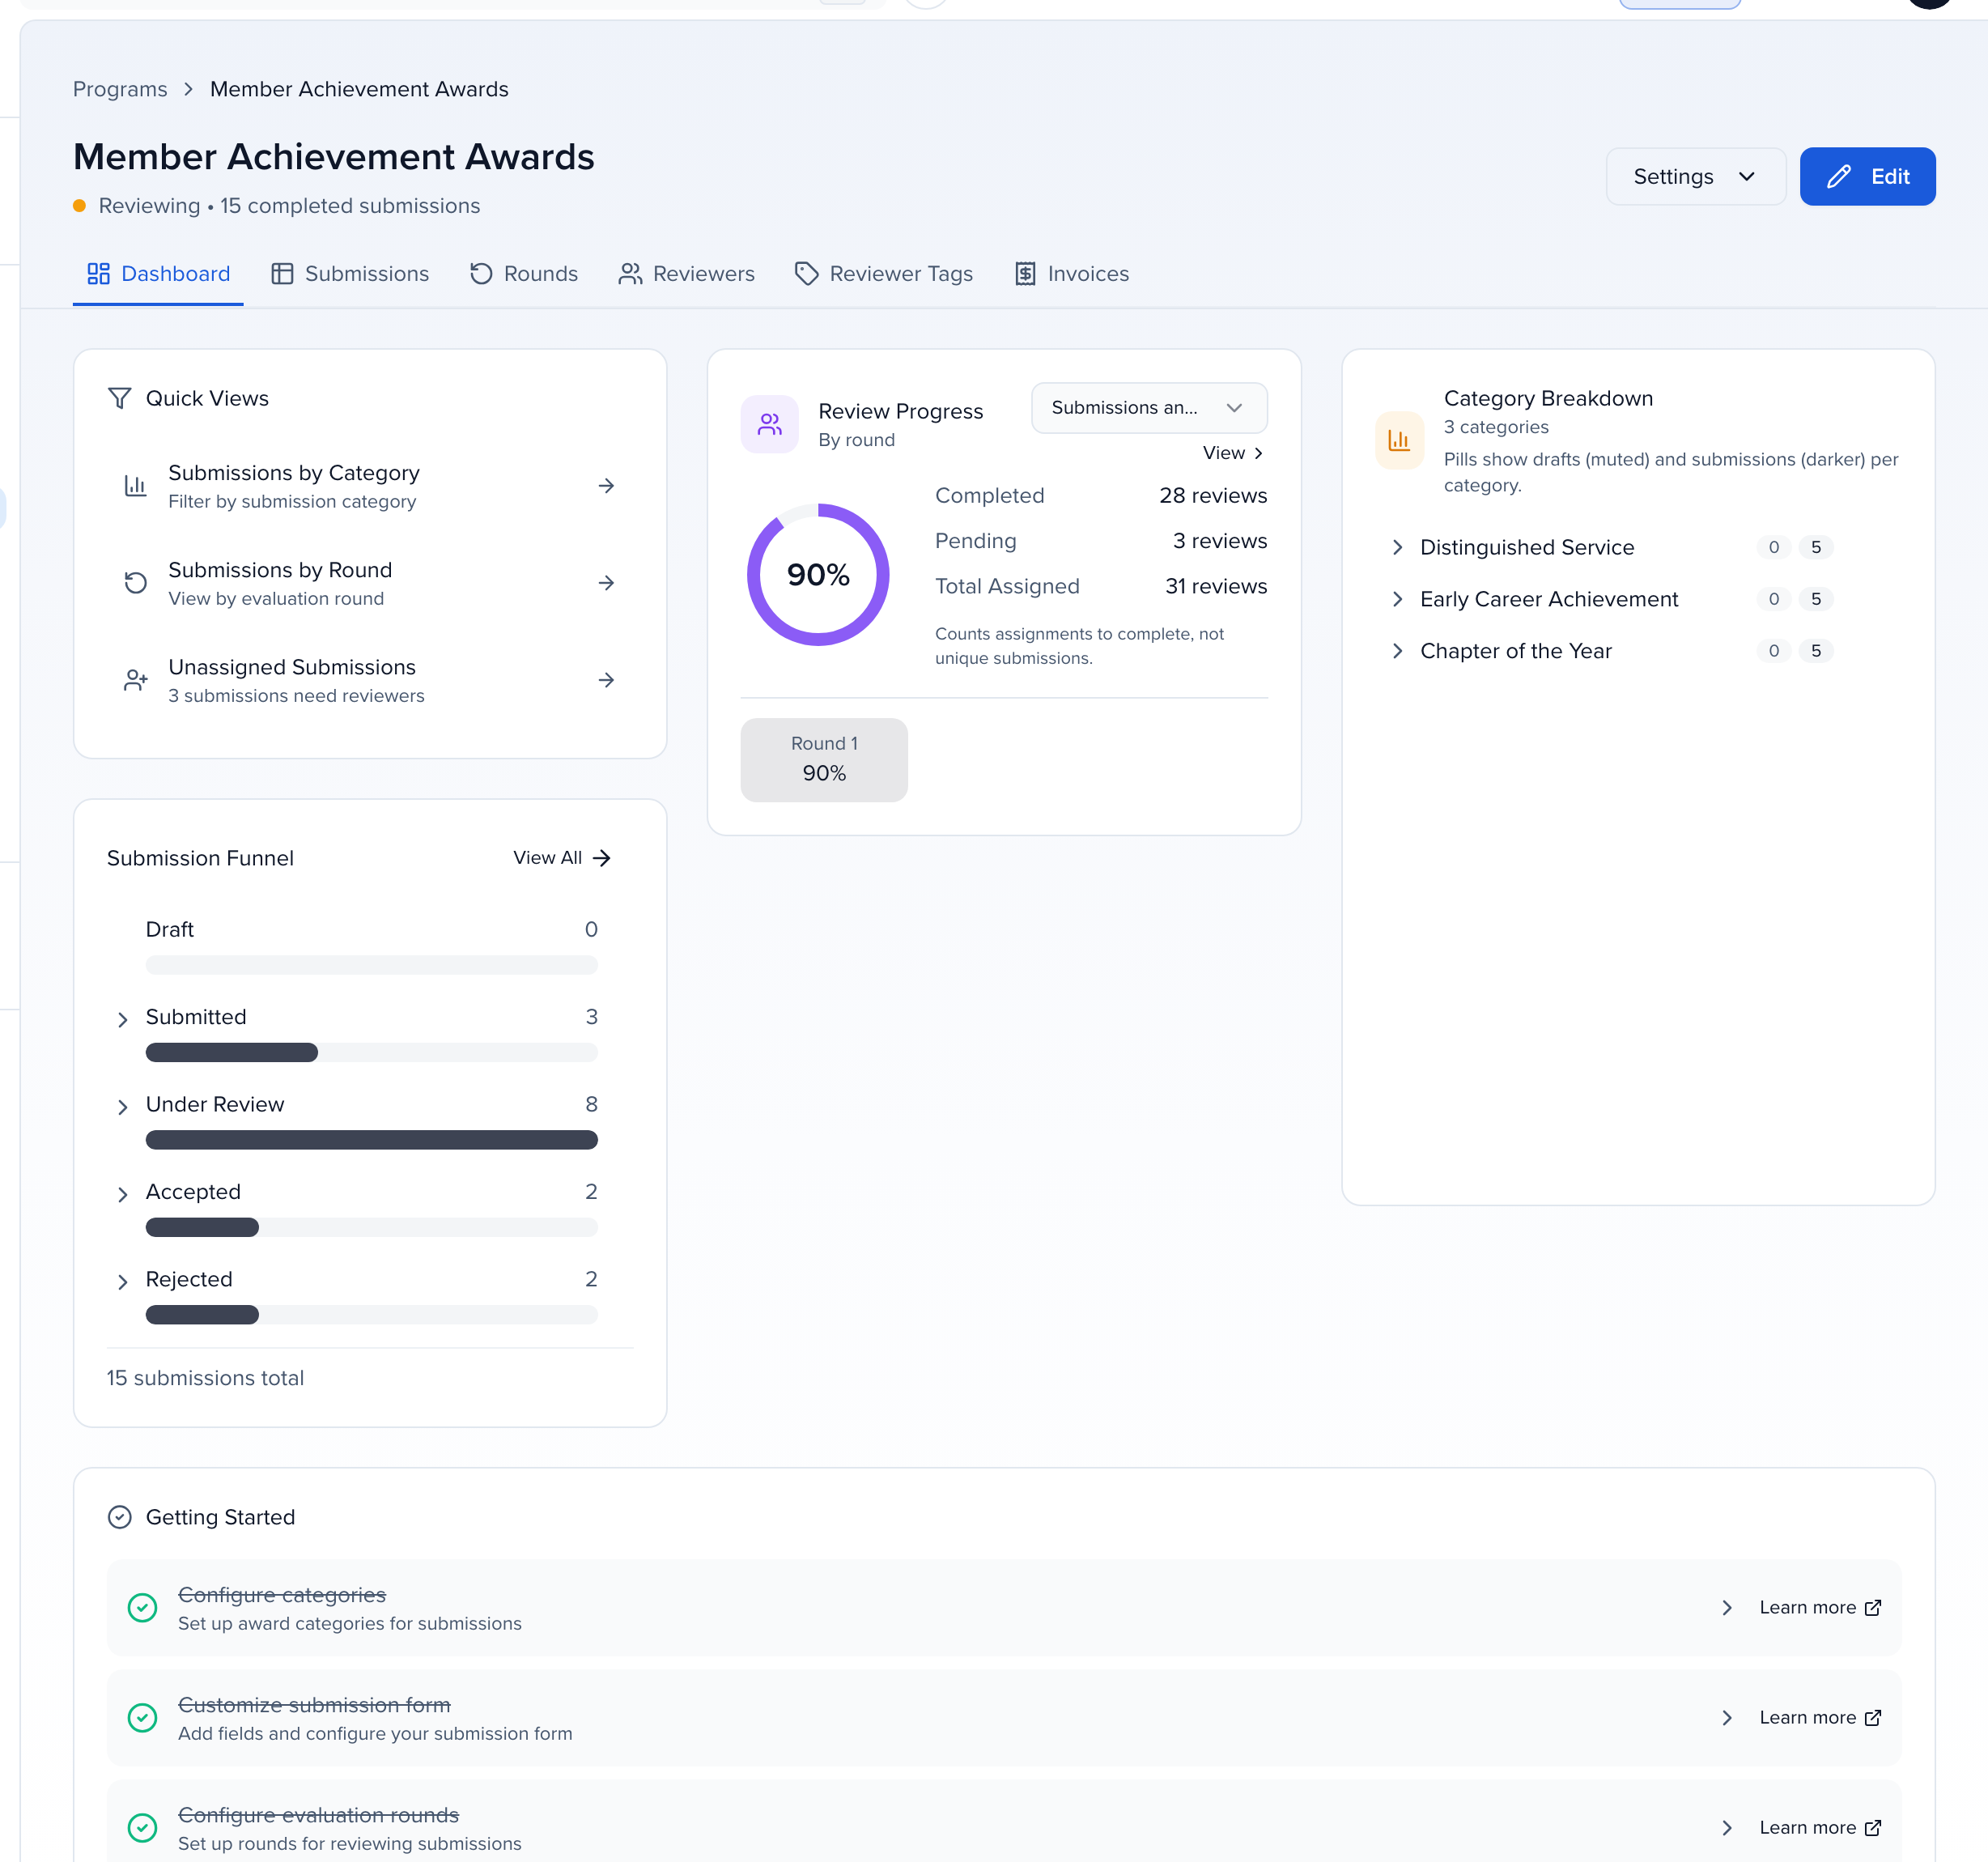
The Dashboard tab itself shows:
- Quick Views — Submissions by Category, Submissions by Round, and Unassigned Submissions.
- Submission Funnel — Draft, Submitted, Under Review, Accepted, and Rejected counts, with View All.
- Review Progress — Completion by round.
- Category Breakdown — Submissions per category.
Getting Started checklist
Section titled “Getting Started checklist”A Getting Started card tracks what is left to set up: configure categories, customize the submission form, configure review rounds, add reviewers, and add the form to a portal. Each item links to the right screen.
Program statuses & lifecycle
Section titled “Program statuses & lifecycle”A program’s status is worked out from its setup, rather than switched by hand:
- Draft — Not published on a Site yet, no active period, and no submissions. Use this time to finish the form, pricing, notifications, and Site.
- Open — Published on a Site, and a round’s submission period is running (or no submission dates are set). Submitters can reach the form through the Site.
- Reviewing — Submissions are in and a review period is running, or the program is between periods.
- Closed — Submissions are in and every configured submission and review period has ended.
- Archived — You archived it from Settings. Data is kept for reference; nothing new comes in.
Managing existing programs
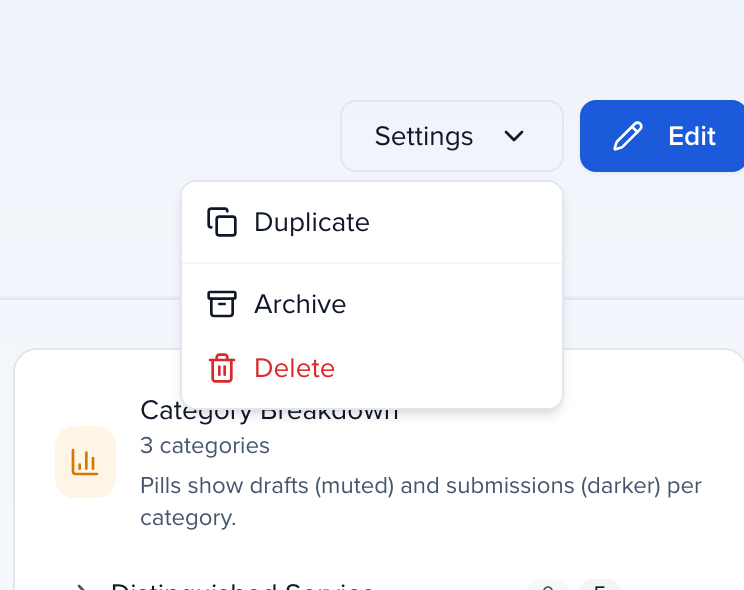
Section titled “Managing existing programs”From the Awards hub, search your programs or filter by year and status, then click a card to open its Program Dashboard. There, the Settings button offers:
- Duplicate — Copy the program. Useful for running the same awards annually: duplicate last year’s configuration and update the details.
- Archive — Keep the data but stop new submissions.
- Delete — Permanently remove the program and everything in it.
Edit, next to it, reopens the setup wizard so you can change any step.
Next steps
Section titled “Next steps”With your program created, here is the recommended order for getting fully set up:
- Building your awards submission form — Design the form your submitters fill out, including fields, sections, conditional logic, and validation rules.
- Awards pricing, payments & invoices — Configure submission fees, payment gateways, VAT rules, promo codes, and invoice tracking (skip if your program is free).
- Awards notifications & email templates — Customize the automated emails for confirmations, reviewer invites, winner announcements, and more.
- Managing submissions, reviewers & rounds — Set up review rounds, add reviewers, configure scorecards and assignments, and move submissions through review.
- Setting up your Sessionboard site — Publish a branded portal where submitters sign in, complete entries, and track their status.