

Create & assign speakers
Most speakers create themselves: when someone completes your submission form, Sessionboard creates their contact and attaches them to the session they submitted. This article covers the other case — a keynote you booked directly, a panelist added after acceptance, a co-presenter the submitter forgot — where an admin creates the speaker and assigns them to a session by hand.
Video transcript
Most of your speakers create themselves. Someone completes your submission form, and Sessionboard creates their contact and attaches them to the session they proposed. What I want to show you is the other case. The keynote you booked directly, the panelist you added after acceptance, the co-presenter the submitter forgot. A speaker is an ordinary contact attached to a session in the Speaker role, so this list, under CRM, Speakers, is a filtered view of your contacts. A person appears here once they’re on at least one session.
If the person is already in your event, you can skip straight to the session. If not, Add Contact, up here, is where they start. Search by name or email first. Add Contact checks your whole organization before it creates anyone, so a speaker from last year’s event is attached rather than duplicated. No match, Add new contact, first name, last name, email, and Create Contact. The Contacts chapter goes through that panel in full.
The assignment happens on the session. Program, Sessions, Edit on the row, and then the Participants tab. There’s a block for each role your program uses. Speakers, Chairpersons, Moderators, the Submitter, and Sponsors and Exhibitors where those are on. The same tab is on Add Session, so you can attach speakers while you’re creating a session too.
Click Add on the Speakers block and type at least two characters of a name or an email. Only contacts already in this event come back, so if the person is missing you have two ways in. Create new contact opens the Add Contact panel right here, without leaving the session, and links the new contact as a speaker when you save it. Browse full list opens the A to Z directory, where you can tick several people at once. Nothing is written to the session until you click Save Changes at the bottom.
Each speaker row has three small controls. The handle on the left, drag to set the order, and agendas, speaker pages and embeds list speakers in that order. The eye. Every speaker is public by default. Click it to Make private, and that speaker disappears from embeds, the event site and the public API, but nothing changes about their portal, their tasks or their emails. Click again to Make public. And the cross removes the speaker from this session. Their contact stays in the event. Save Changes after any of those.
Speakers on a session also carry a status, and it drives the acceptance flow. The chip on each row reads Pending, Accepted or Declined. A participant with no answer yet reads as Pending. Click the chip and choose, then Save Changes. You can set statuses for many people at once from the sessions grid and its bulk actions as well.
That flow is turned on under Settings, Record Settings, on the Participant portal tab, in the Participant Acceptance section. Enable Participant Acceptance lets people accept or decline each of their roles on a submission, and everything else here appears once it’s on. The Subsessions switch shows it on subsessions and stand-alone submissions, not on parents that have children. The Abstracts switch, off by default, asks authors on an accepted abstract to confirm too. Allow Submission Withdrawal lets a participant withdraw the whole submission, and turning it off hides the Withdraw button.
Two more switches decide who sees an invitation at all. Show Acceptance Invitations in Portals, off, and no portal user sees a Confirm button, while your team still sets Accepted, Pending or Declined from the Participants tab, the grids and bulk actions. Limit Invitations to Matching Submissions shows an invitation only on submissions that match the filters you add, say Track equals AI, with a live count of how many match. Subsessions inherit their parent’s match.
Once acceptance is saved on, Invitations and deadlines appears underneath, with its own Save invitation settings button. Ask participants to accept decides whether someone on a sub-session answers there, on the parent, or on both. Send reminders emails anyone who hasn’t answered, on the days before their deadline you choose, seven and two by default. Accept-by rules set that deadline, a fixed date or a number of days after the invitation, for the whole event or for one format or role. Nothing here changes anything until you use it.
Here’s what the speaker sees. View Portal, View portal as, and I’ll pick someone who hasn’t answered yet. Their home has one My Participation card. Anything waiting on them sits at the top, under Pending Participant Confirmation, with a Confirm button, and each row still shows the status your team set, here Accepted. Confirm opens the Confirm Acceptance dialog, which lists every participant on the submission and their role. They set their own row to Confirm or Decline and Save. If withdrawal is on, Withdraw Submission pulls the whole submission and asks for a reason.
Once they answer, the row leaves Pending Participant Confirmation for its status group, such as Accepted Sessions, and the button reads Participant Confirmation Completed, which reopens their answers, read-only. A submission whose speakers have all declined is withdrawn automatically, and withdrawn submissions appear under the Withdrawn view in Program, Sessions, where you can see who withdrew it and why, delete it, set it to Declined, or undo the withdrawal.
To see where everyone stands, the Speakers column on Program, Sessions lists each session’s participants, the Participants tab has the chip on every row, and in CRM, All Contacts you can filter on Session Status to list everyone who’s accepted, pending or declined. The Help Center has both articles under Speakers. The Speaker portal and tasks chapter picks up from here, with what your speakers do once they’re in.
A speaker is an ordinary contact attached to a session in the Speaker role. CRM → Speakers is a filtered view of your contacts, so a person only appears there once they are on at least one session.
Why use it
Section titled “Why use it”Keynotes, panelists added after acceptance, and co-presenters the submitter forgot should still live on the session as speakers. Assign them from the session Participants tab, or from the contact’s Program tab with Add to session, so they get the portal, tasks and emails for that role.
1. Create the contact
Section titled “1. Create the contact”If the person is already in your event, skip to step 2 — the session’s Add search finds them.
- Go to CRM → All Contacts and click Add Contact at the top right.
- Search by name or email first. Add Contact checks your organization before it creates anyone, so a speaker from last year’s event is attached rather than duplicated.
- If there is no match, click Add new contact and fill in First name, Last name and Email (required), plus phone and biography if you have them.
- Click Create Contact.
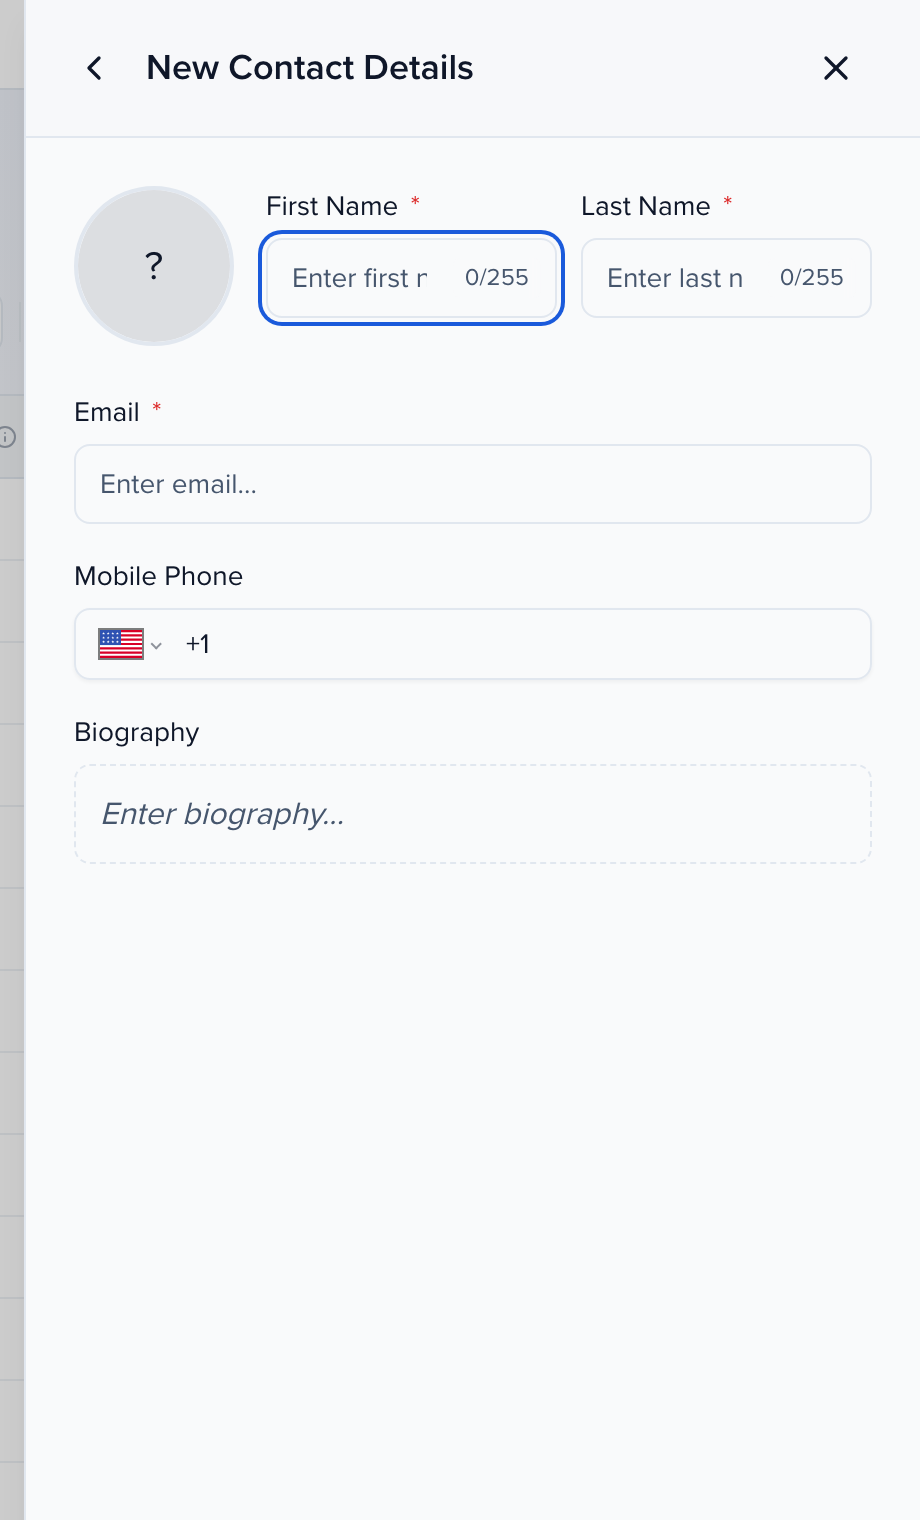
The full flow, including what happens when the search finds someone, is in Add or delete a contact.
2. Assign them to a session
Section titled “2. Assign them to a session”From the contact: open the person, go to the Program tab, and click Add to session. Pick the session and role. Use this when you are already on the contact.
From the session:
- Go to Program → Sessions and click Edit on the session.
- Open the Participants tab. There is a block for each role your program uses — Speakers, Chairpersons, Moderators, the Submitter, and Sponsors and Exhibitors where those are enabled.
- Click Add on the Speakers block and type at least two characters of the person’s name or email.
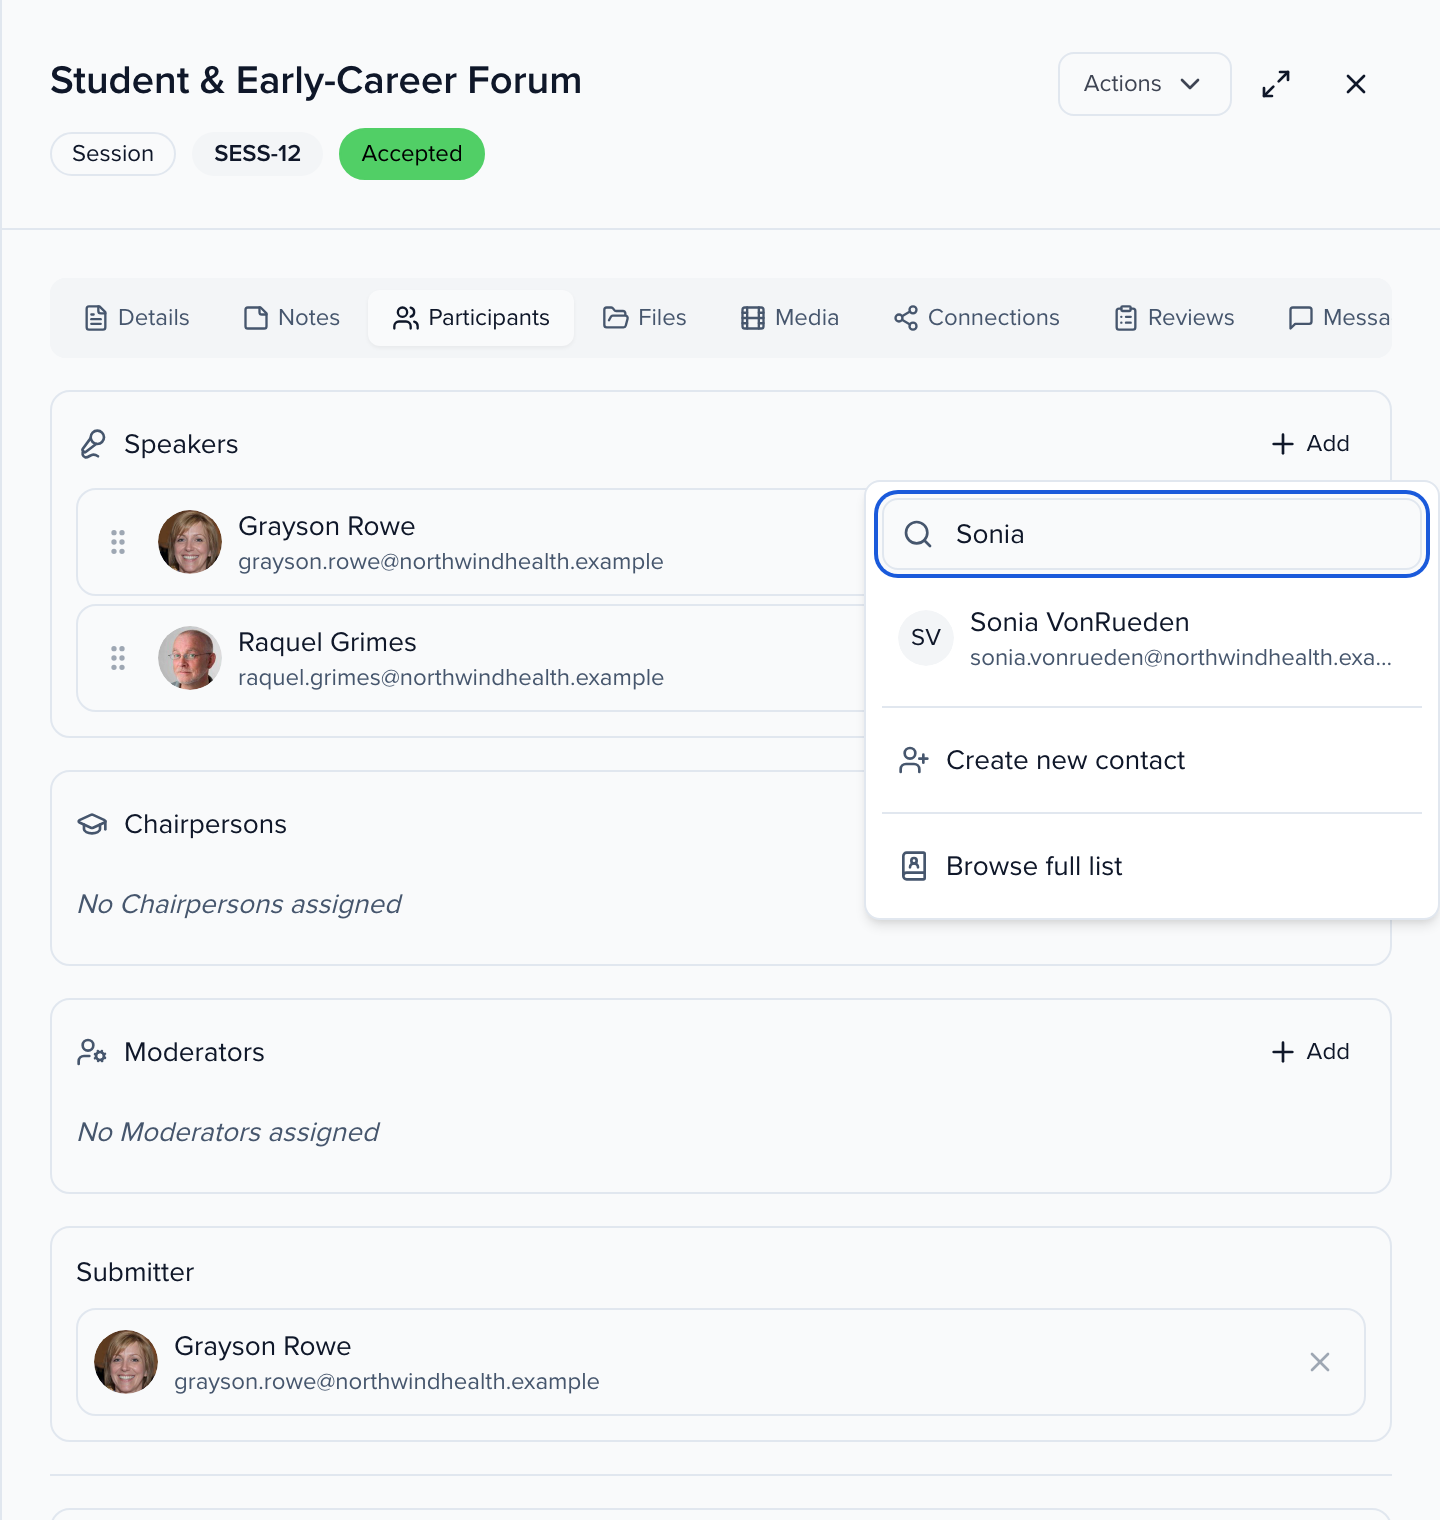
- Pick the contact from the results. Only contacts in this event appear, so if the person is missing:
- Create new contact opens the Add Contact panel without leaving the session and links the new contact as a speaker when you save it.
- Browse full list opens the A–Z directory, where you can tick several people at once.
- Click Save Changes at the bottom of the panel. Nothing is written to the session until you do.
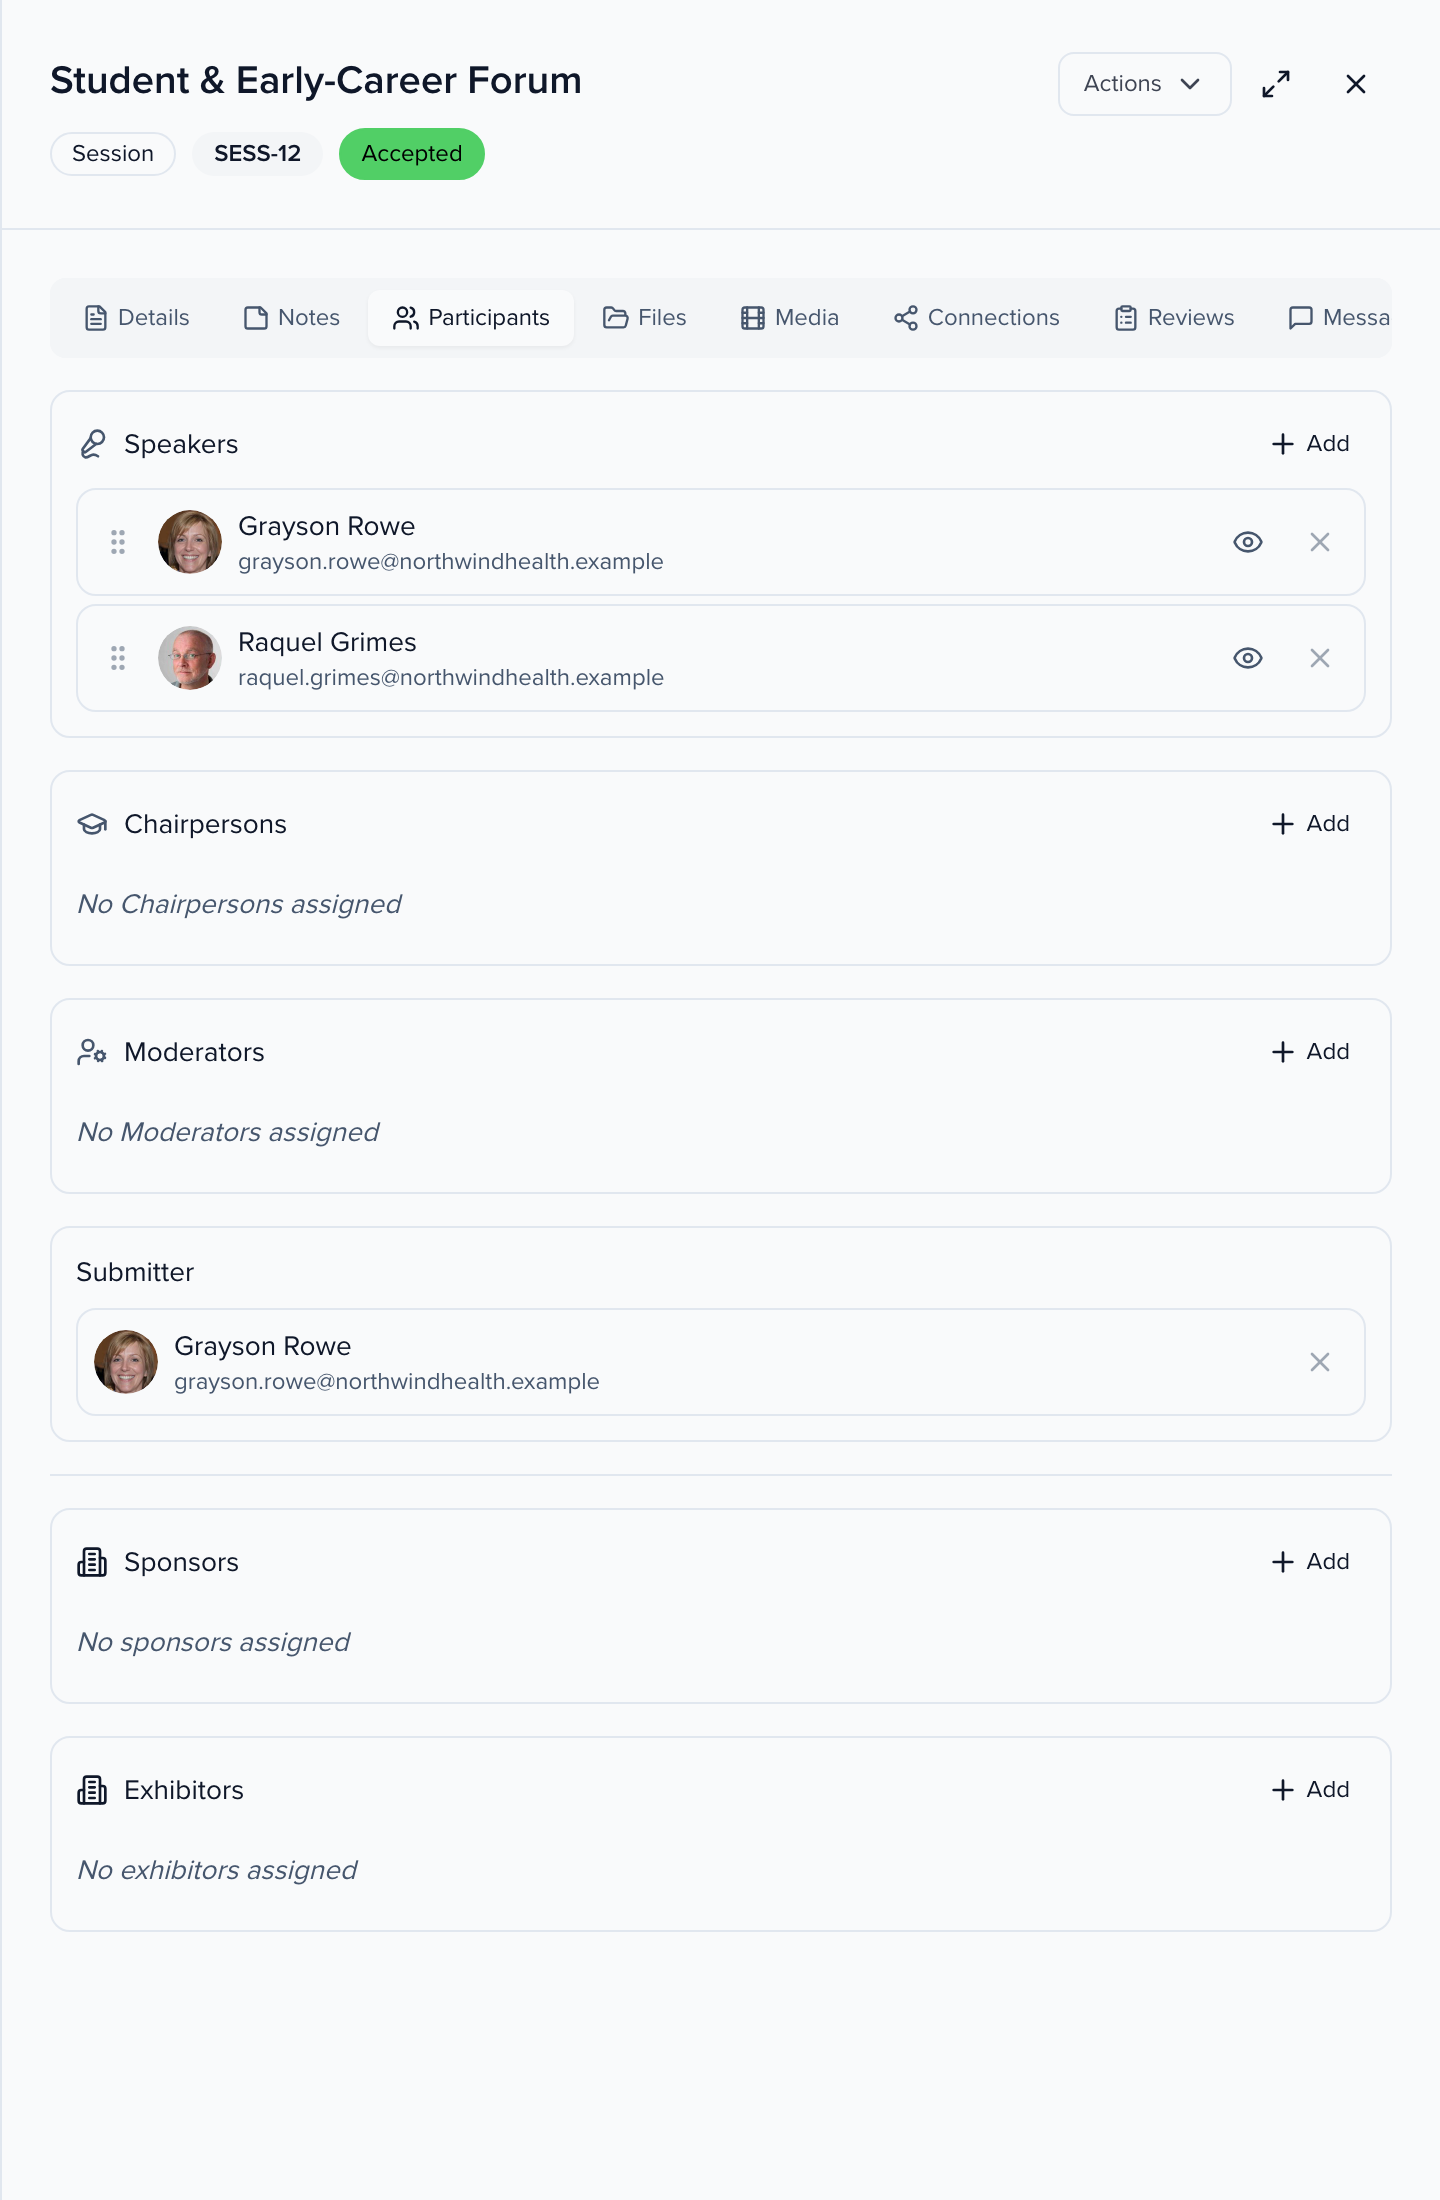
Any custom participant role you add under Program → Settings → Roles — a Co-authors block, say — appears on this tab as well, with the same Add search and row controls. A person’s role is simply the block they are in: to move someone from Co-author to Speaker, remove them from one block, add them in the other, and Save Changes. The same contact can hold more than one role on a session.
3. Order and visibility
Section titled “3. Order and visibility”Each row in the Speakers block has three controls:
- Drag handle — drag a speaker up or down to set the order. Agendas, speaker pages and embeds list speakers in this order.
- Eye icon — every speaker is public by default. Click it (Make private) to hide the speaker from embeds, the event site and the public API; click again (Make public) to show them. Hiding a speaker changes nothing about their portal, tasks or emails.
- Remove (×) — takes the speaker off this session. Their contact stays in the event.
Speakers on a session also carry a status — Pending, Accepted or Declined — which drives the acceptance flow. See Speaker acceptance.
Click Save Changes after reordering or toggling visibility.
Related
Section titled “Related”- Add a moderator or chairperson — the same Participants tab, different role blocks
- Participant roles — what each role means for portals, agendas and emails
- Add or delete a contact