

Create & share portal pages
A resource page lives inside the portal. Unlike a file, it is a page you write and edit here — hotel and travel details, brand guidelines, an FAQ for sponsors — and every portal it is assigned to shows the current version the next time someone opens it. Pages can pull in the reader’s own details with merge tags, so one “Your booth” page reads differently for every exhibitor.
Why use it
Section titled “Why use it”Speakers and sponsors ask the same logistics questions every year. A resource page answers them once, in the portal they already use, and stays current when the hotel or the deadline changes — no re-sending PDFs. Assign a page to a whole portal for shared details, or to individual people for the ones only they should see.
Create a page
Section titled “Create a page”Open Resources
Go to Program → Portals → Resources and click Add → Add Page.
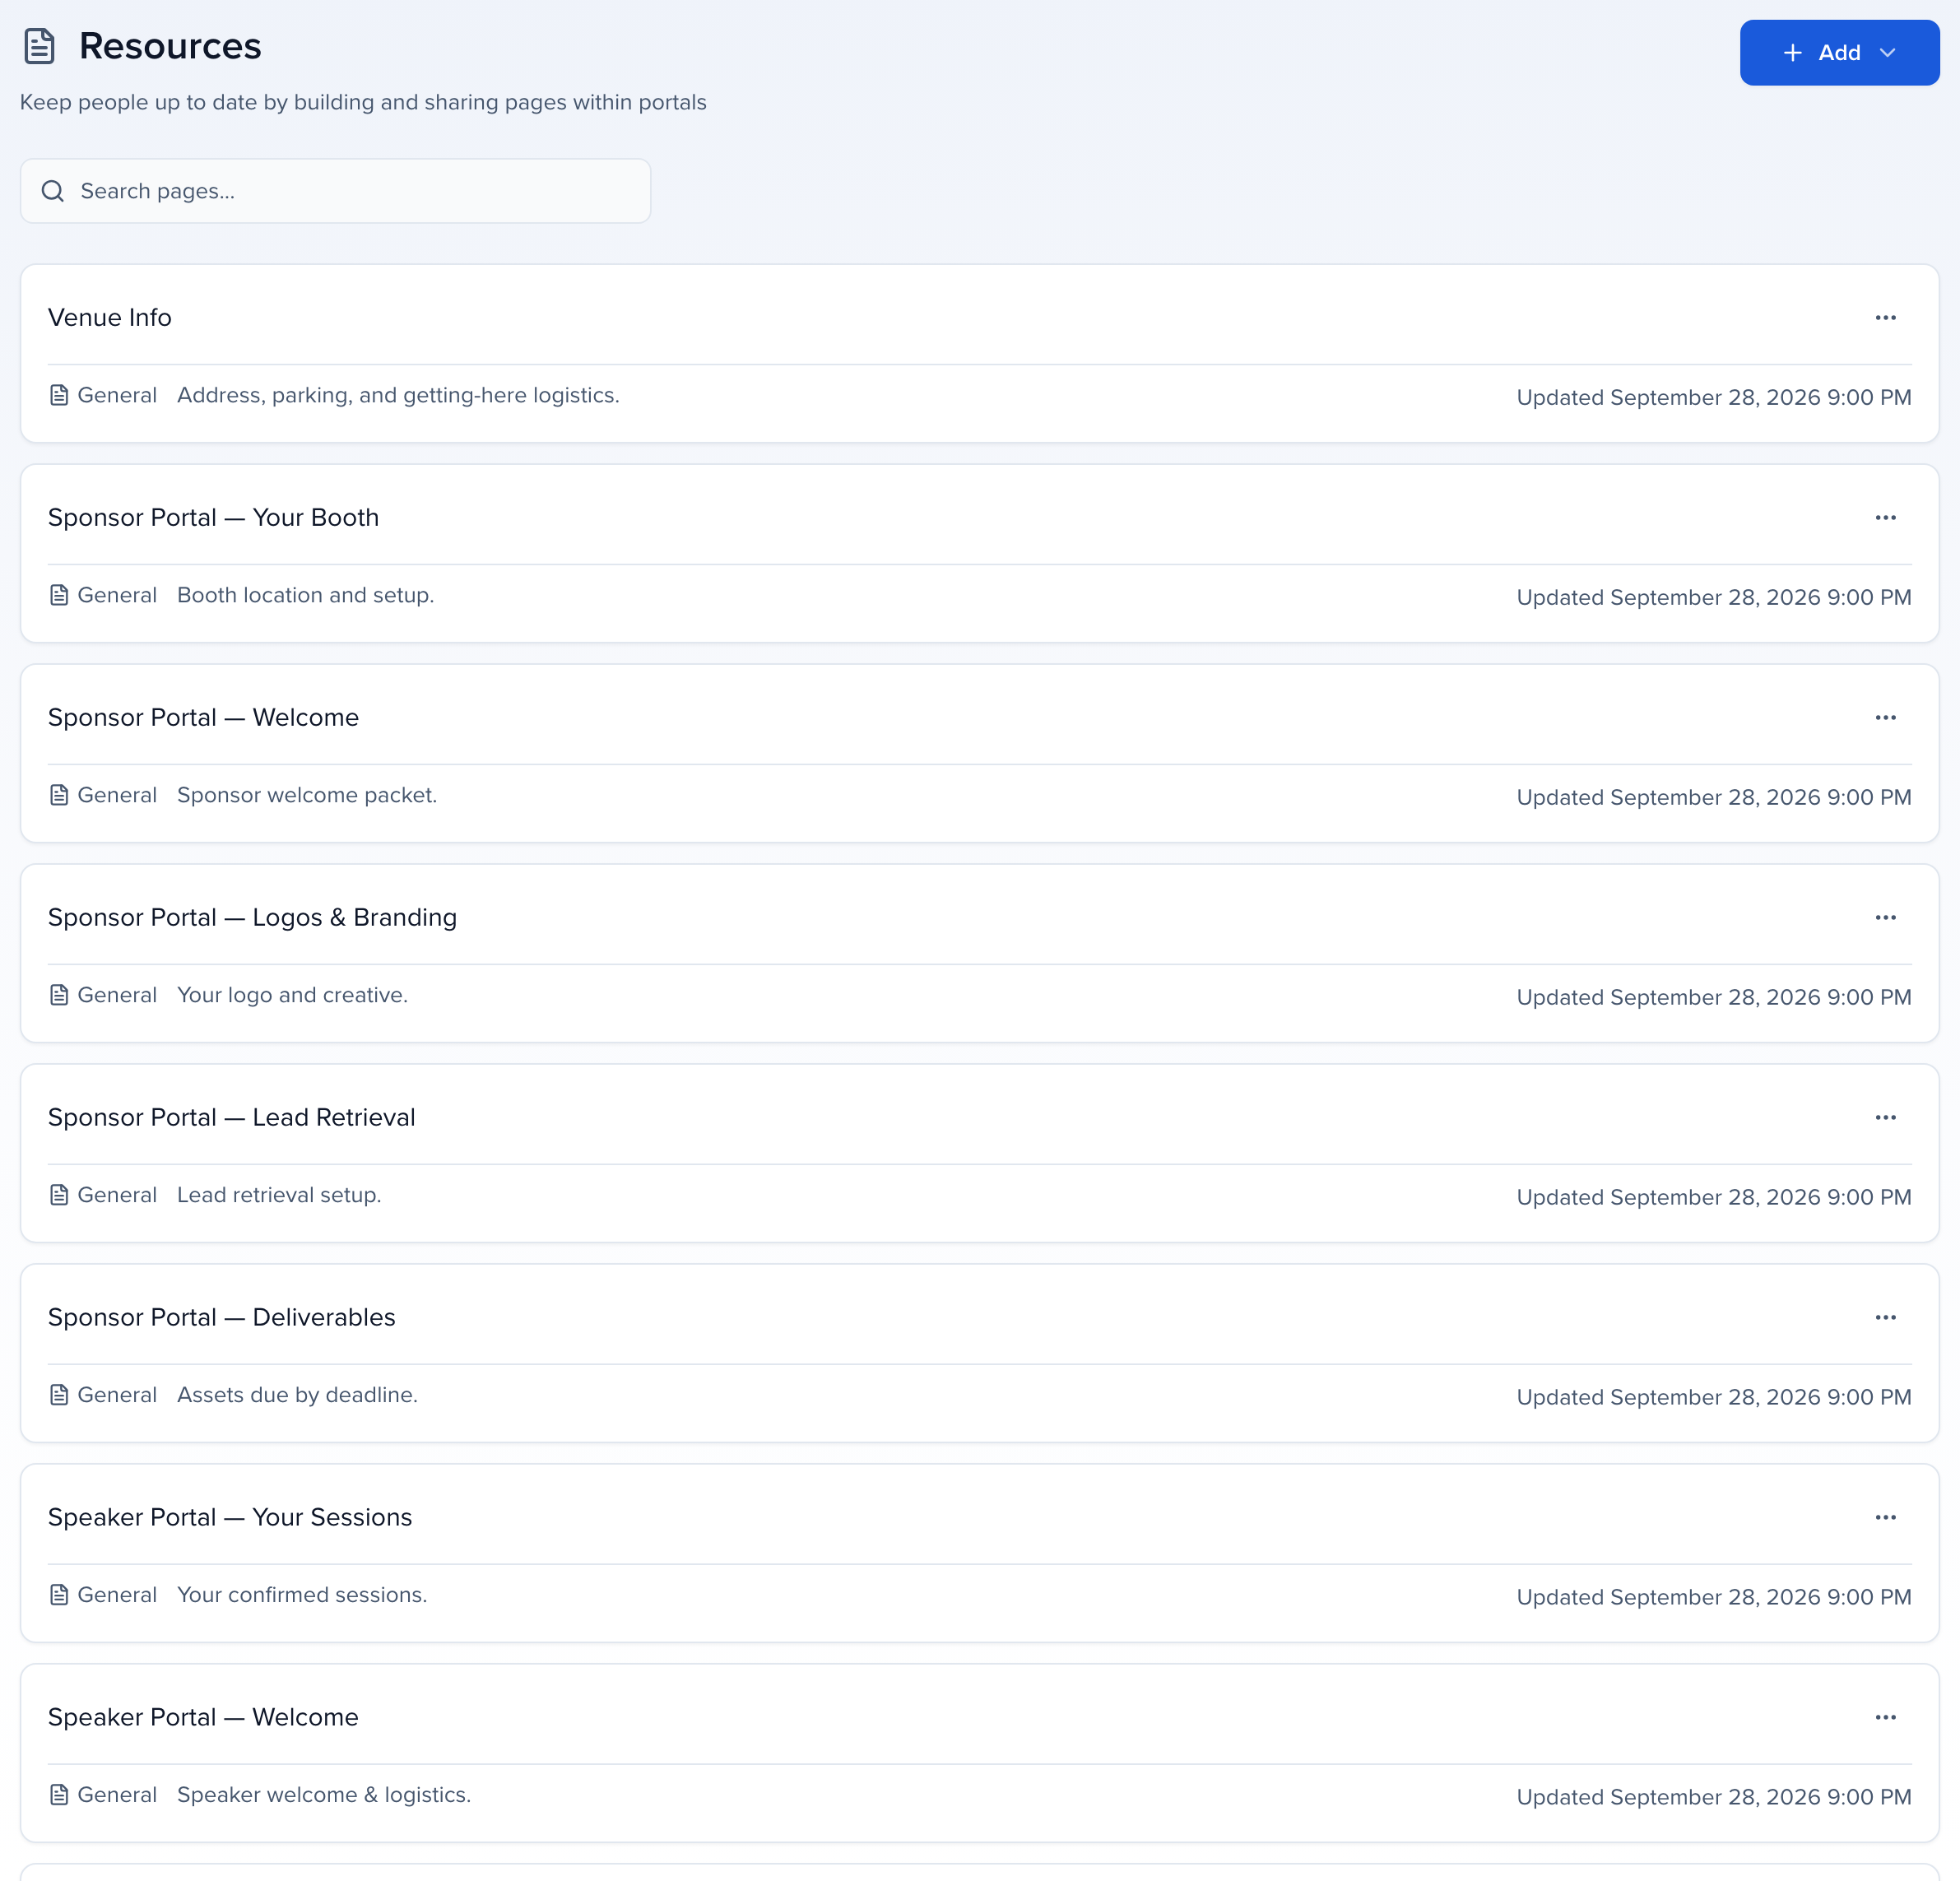
The library’s order is the order portal users see. Drag a page by its handle, or use Move up and Move down, and the new order saves at once and applies to every portal of the event — put the onboarding checklist first and the venue map last. Reordering pauses while a search filters the list.
Write it
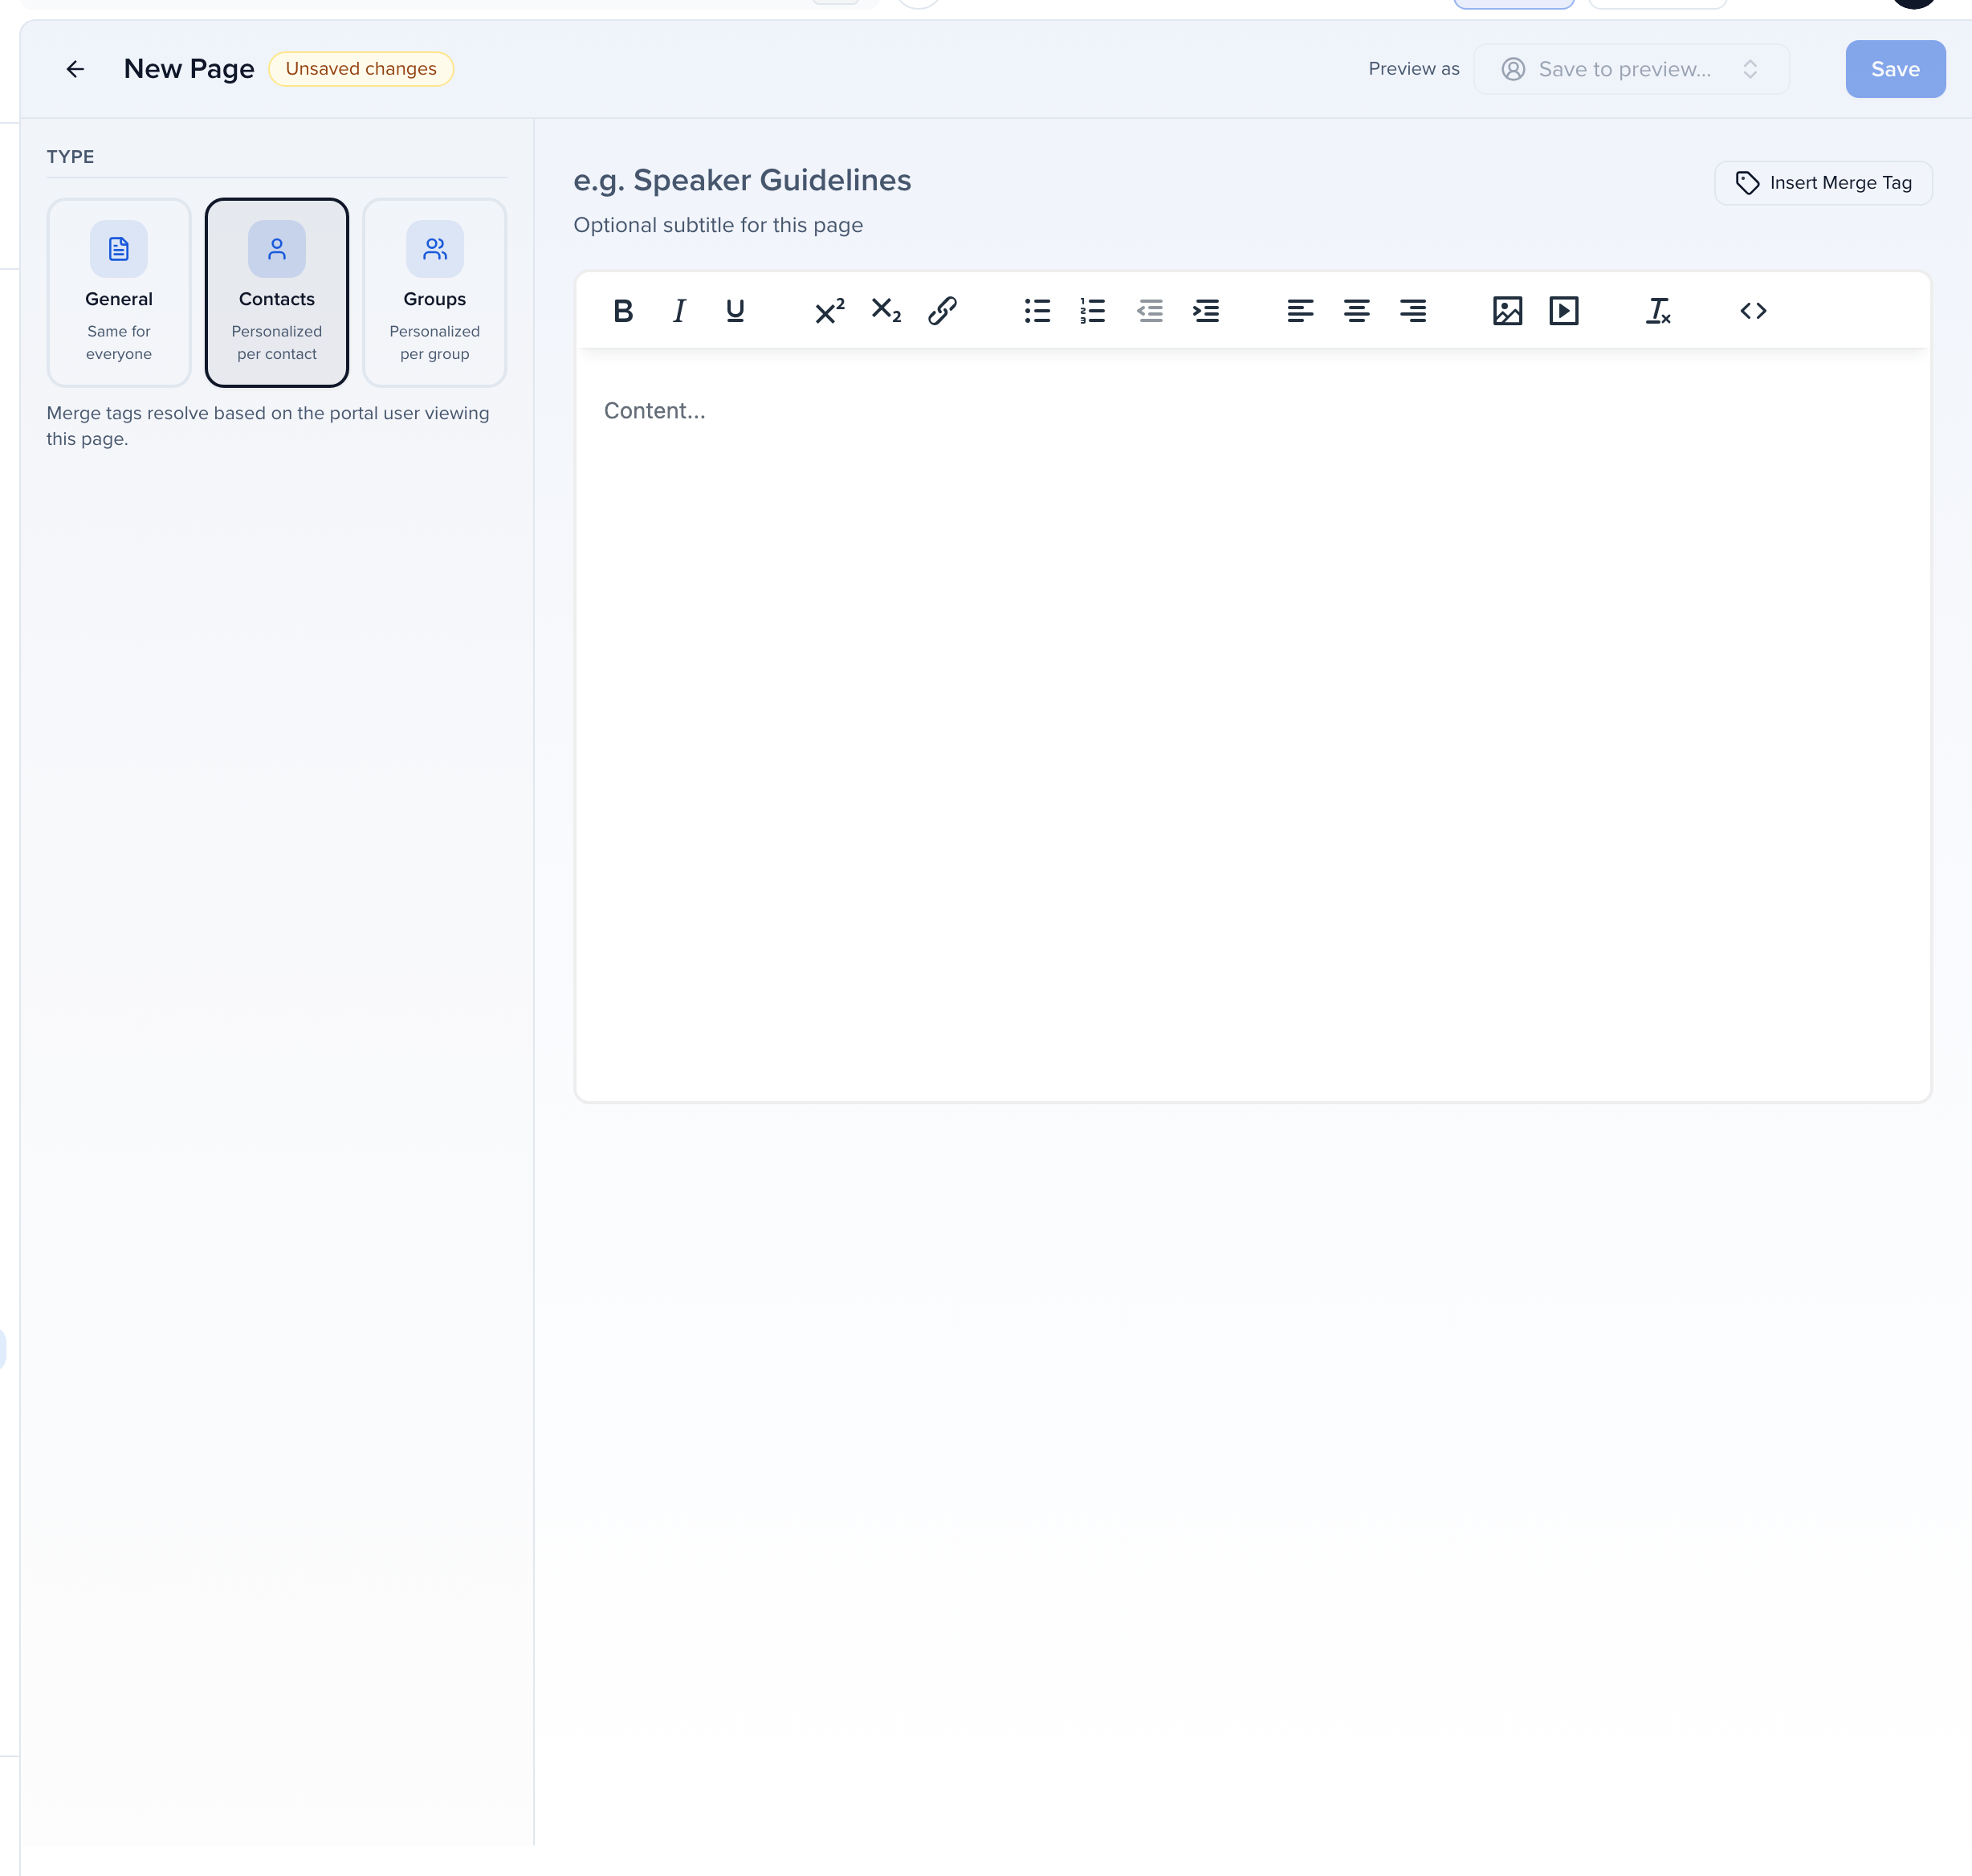
| Field | What it does |
|---|---|
| Title | Shown on the portal home. |
| Subtitle | One line under the title on the portal home. |
| Type | General for content that is the same for everyone. Contacts or Groups unlocks that record’s merge tags — the reader’s name, company, booth number — and limits the page to portals of that kind. |
| Content | Rich text: headings, lists, images, links. Insert Merge Tag drops in a field placeholder. |
Click Save. On a Contacts or Groups page, Preview as in the header then reads the saved page as a specific contact or group, with the merge tags filled in from their record. General pages do not support merge tags, so the preview is not offered there.
Assign the page to a portal
Section titled “Assign the page to a portal”Open the ⋯ menu on the portal card and choose Edit Tasks. In the Resources section of the Assign Items step click Add, tick the page, and click Add Selected. The pencil under Actions opens Edit Settings, where Assign By Filter shows the page only to portal users with at least one submission matching the Submission Filters, for example Format is Poster. The filter works only when Control Submission Visibility is on in the portal’s Configuration. Leave it off and everyone in the portal sees the page.
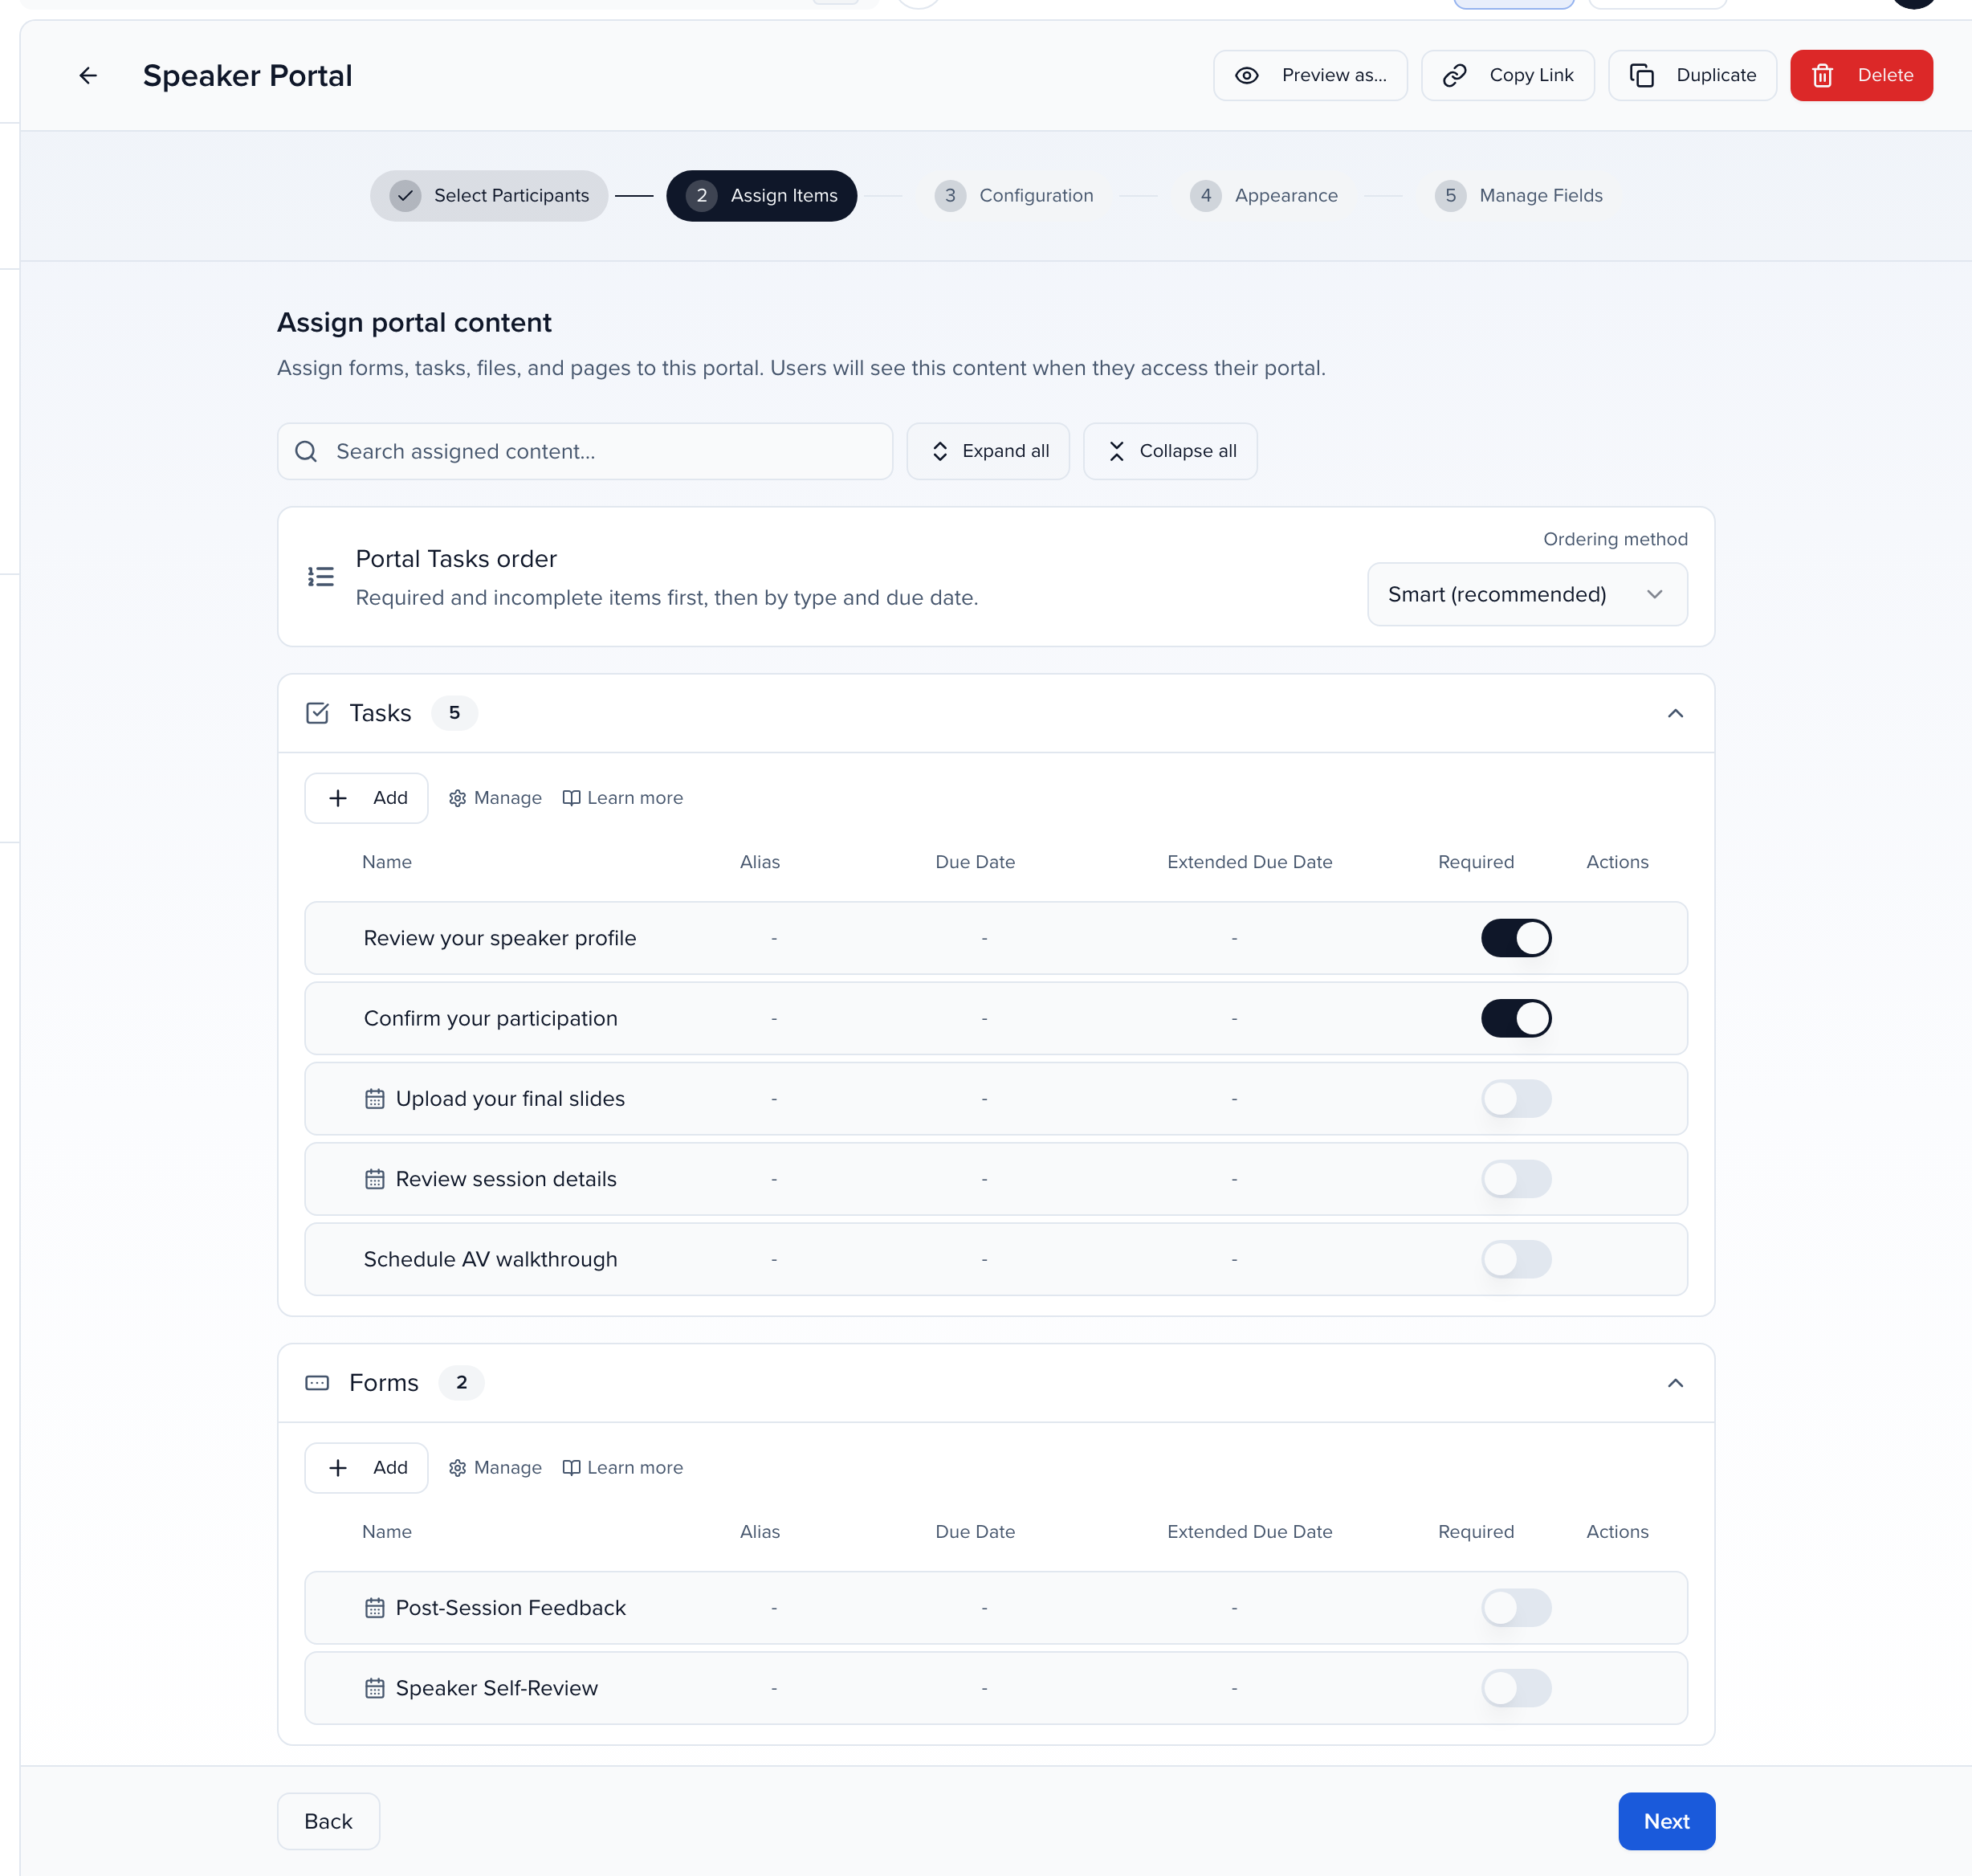
A page can sit on as many portals as you like. Readers find it under the portal’s resources; check with Preview as… on the portal editor (Portals 101).
Assign pages to contacts, sessions or groups
Section titled “Assign pages to contacts, sessions or groups”You can also assign straight from the library. Each page in Program → Portals → Resources carries a badge: Everyone when it is not assigned to anyone individually, so it shows to everyone in the portals it is on, or N assigned when it is.
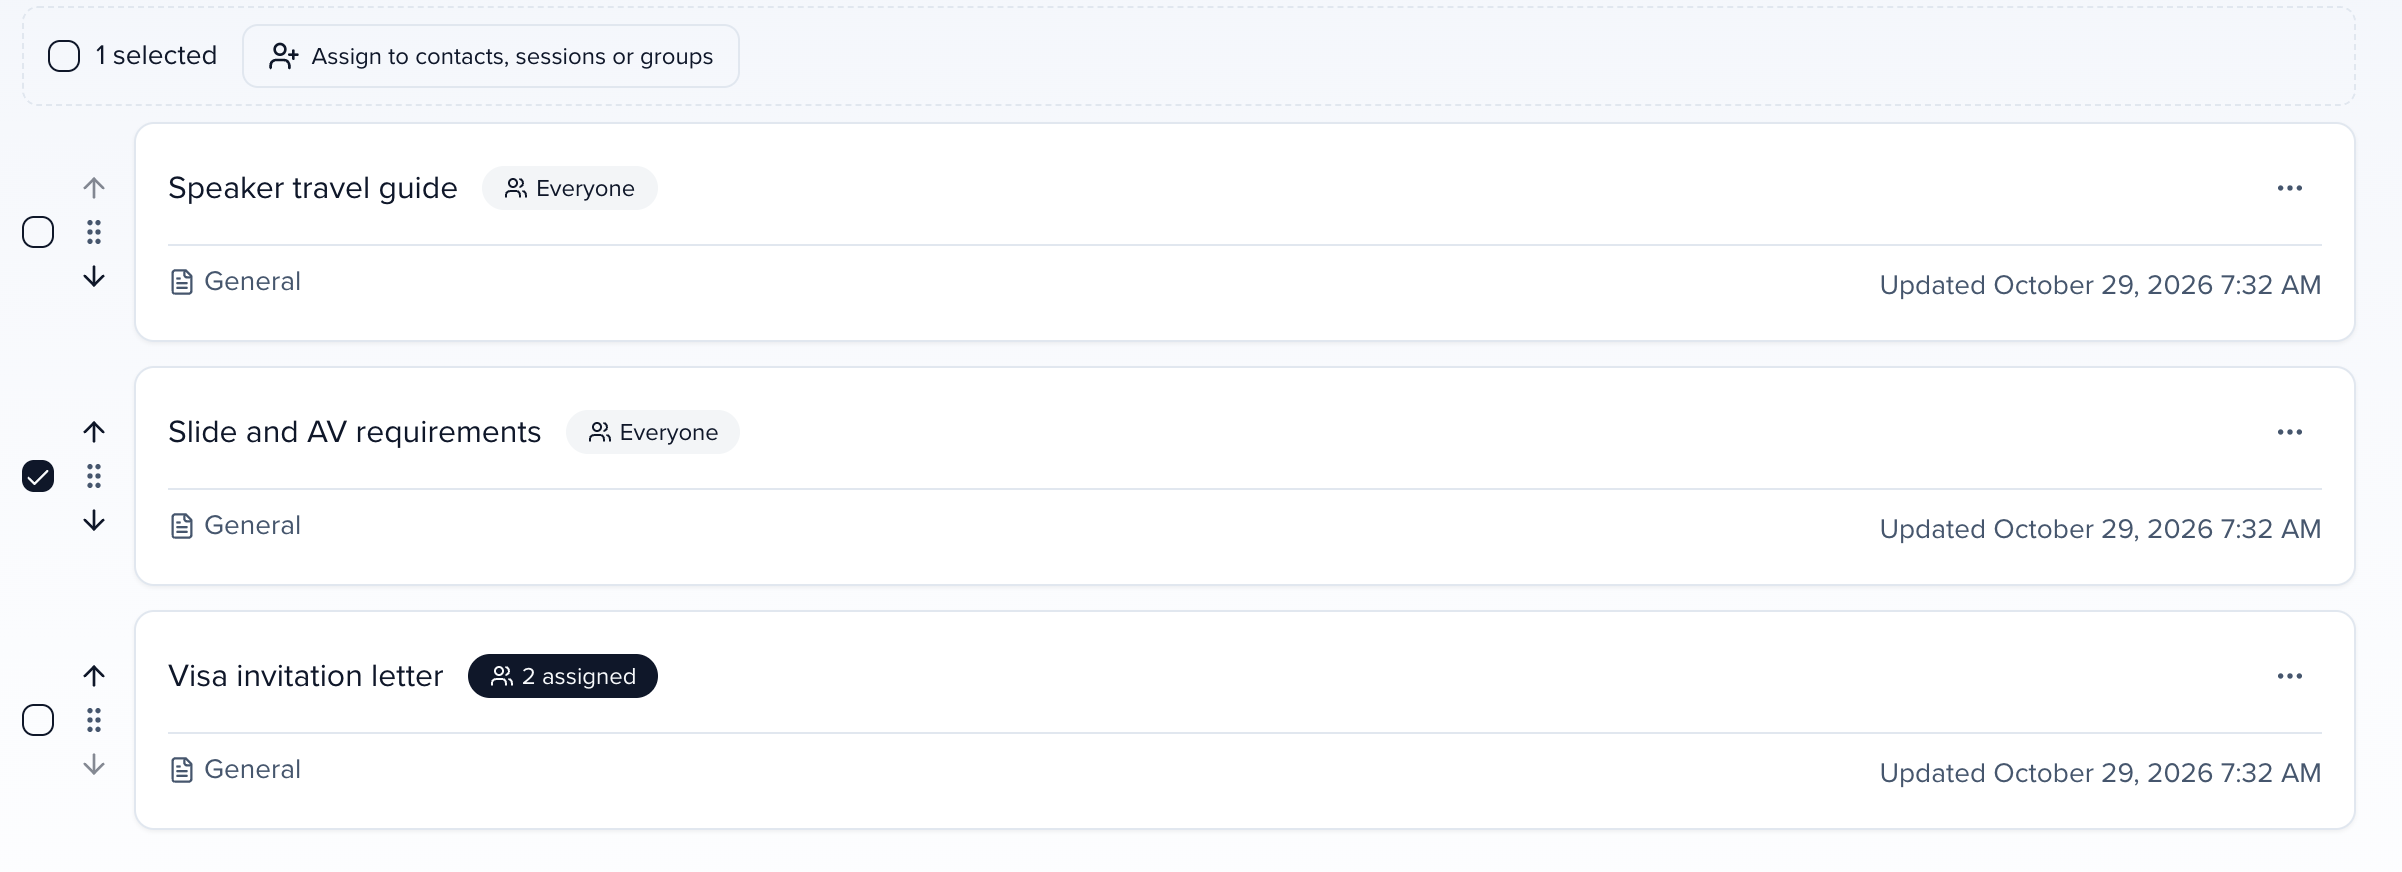
- Tick the pages in Resources, then click Assign to contacts, sessions or groups in the bar that appears.
- In the dialog, choose a tab: Contacts for specific people, Sessions for every participant of a session, or Groups for every member of a group. Search, tick the targets (you can tick on more than one tab), and click Assign.
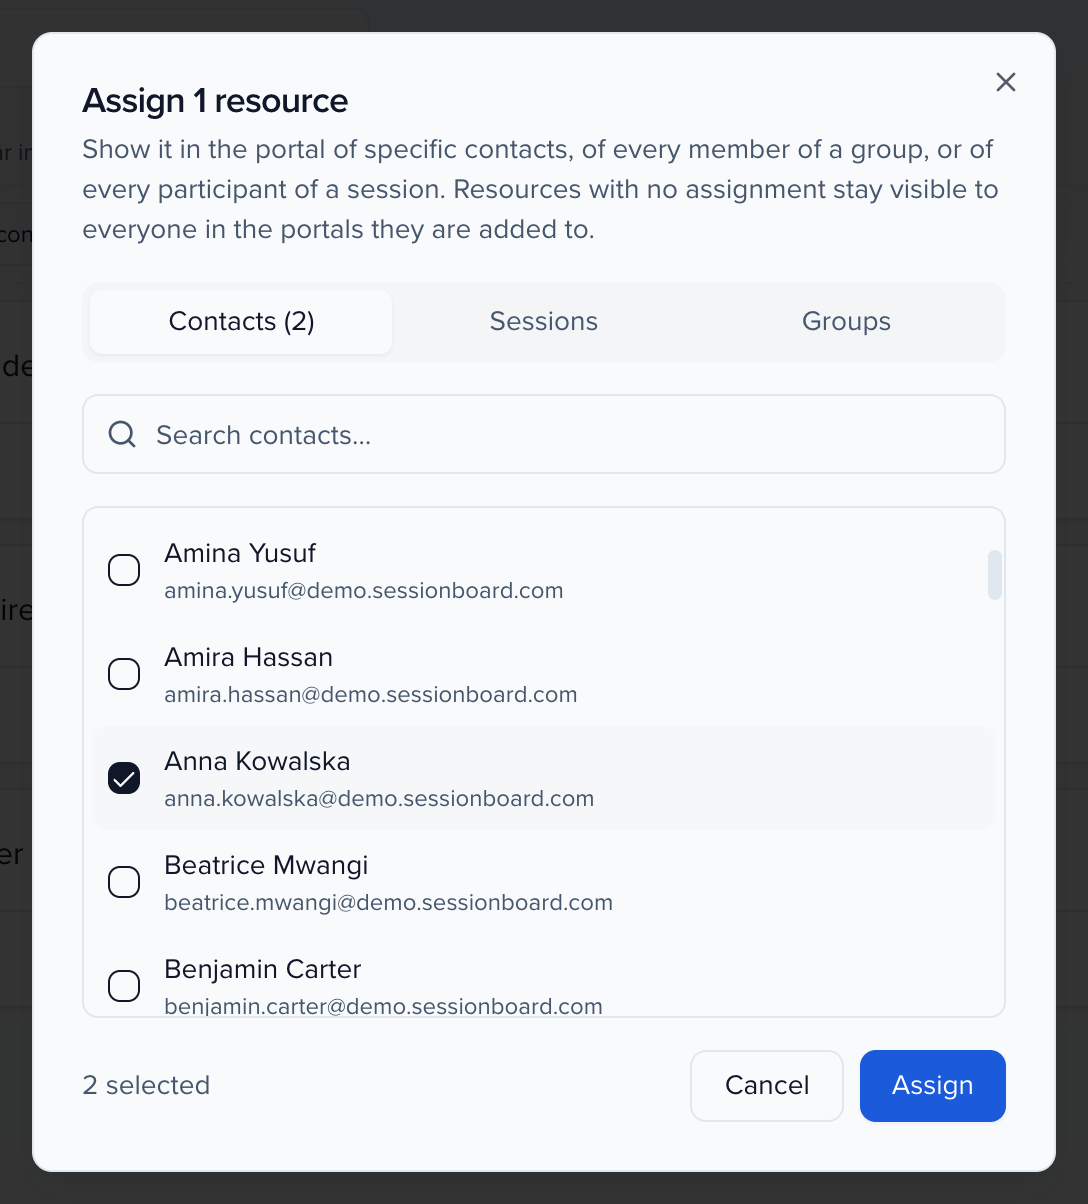
An assignment adds to what a portal shows: the people you pick see the page in their portal in addition to the resources the portal shows everyone, just as a manually assigned task does. Selecting and assigning needs permission to update portal tasks; everyone who can open Resources sees the badges. Files work the same way, see Upload & share portal files.
Assign a page to individual contacts
Section titled “Assign a page to individual contacts”When only a few people need a page — a visa letter, a personal itinerary — assign it to those records instead of to a whole portal.
Select the people
In Contacts (or Sponsors or Exhibitors), tick the records.
Assign → Resources
Click Assign in the bulk action bar and pick Resources. The list offers General pages and pages of that list’s type. Tick the pages and click Assign. Resources have no due date, so there is no second screen.
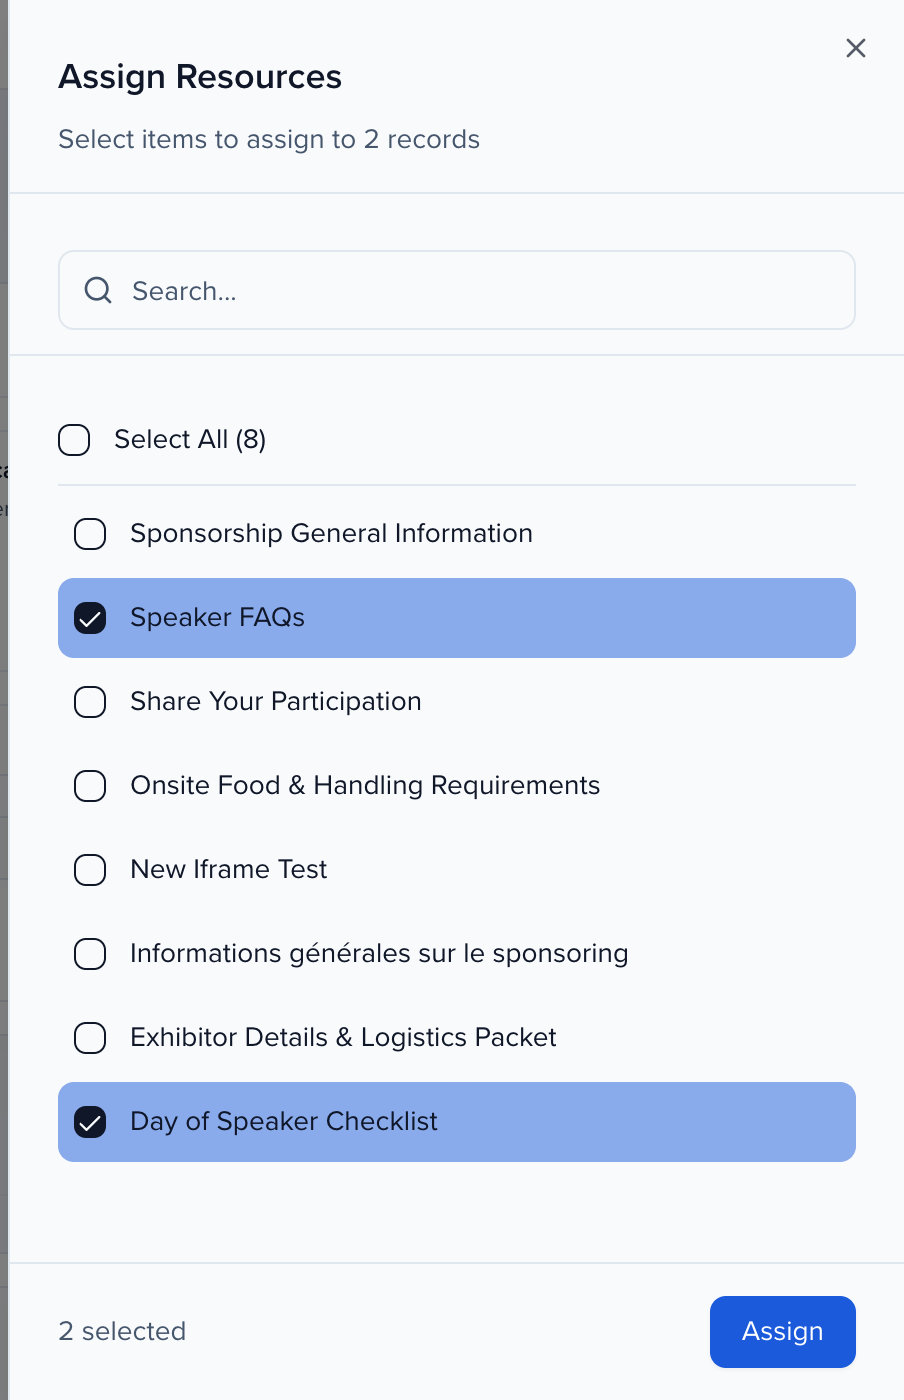
The page then appears in each person’s portal with the portal’s own resources. A page that is on their portal as well is listed once.
Once a page is assigned to anyone individually, only those people — and people whose portal already lists it — can open it; anyone else following the link gets “not found”. A page with no individual assignments works exactly as before.
To see or undo individual assignments, open the page’s ⋯ menu in Resources and choose Assigned to…. The Assigned to sheet lists each contact, session and group the page is assigned to; Remove takes one assignment away, or tick several and use Remove selected. Assigning the same page to the same person twice does nothing. Removing an individual assignment does not affect a portal the page is on.
Delete a page
Section titled “Delete a page”Open the page’s ⋯ menu in Resources and choose Delete. The page leaves the Resources library and every portal it was on at once, including pages assigned to individual people, so portal users no longer see a link to it.
A deleted page is not erased. It is listed under History → Deleted with who deleted it and when, and Sessionboard support can restore it. A restored page returns to the library and to the portals it was on, in its old place, even if the portal was edited and saved in the meantime.
Creating, editing, duplicating and deleting a page are recorded in History → Audit with the type Portal page (History).