

Module table views
Every module table — Sessions, Contacts, Speakers, Sponsors, Exhibitors and the rest — has Columns, Sort and Filter buttons on the right of its toolbar. All three open the same Preferences drawer, on the matching tab. Shape the table there, then save it as a view so you, or everyone on the event team, can come back to it.
The examples below use the Contacts module; the drawer works the same way everywhere.

Why use it
Section titled “Why use it”Saved views let your team store a named combination of filters, columns, and sort order so anyone on the team can jump straight to the slice of sessions they care about. Permission controls on the saved views menu mean you can designate who is allowed to create, rename, or delete shared views, keeping your curated views stable across a large team.
Columns
Section titled “Columns”Click Columns. The tab label shows how many columns are on, out of the maximum — 8/25 here.
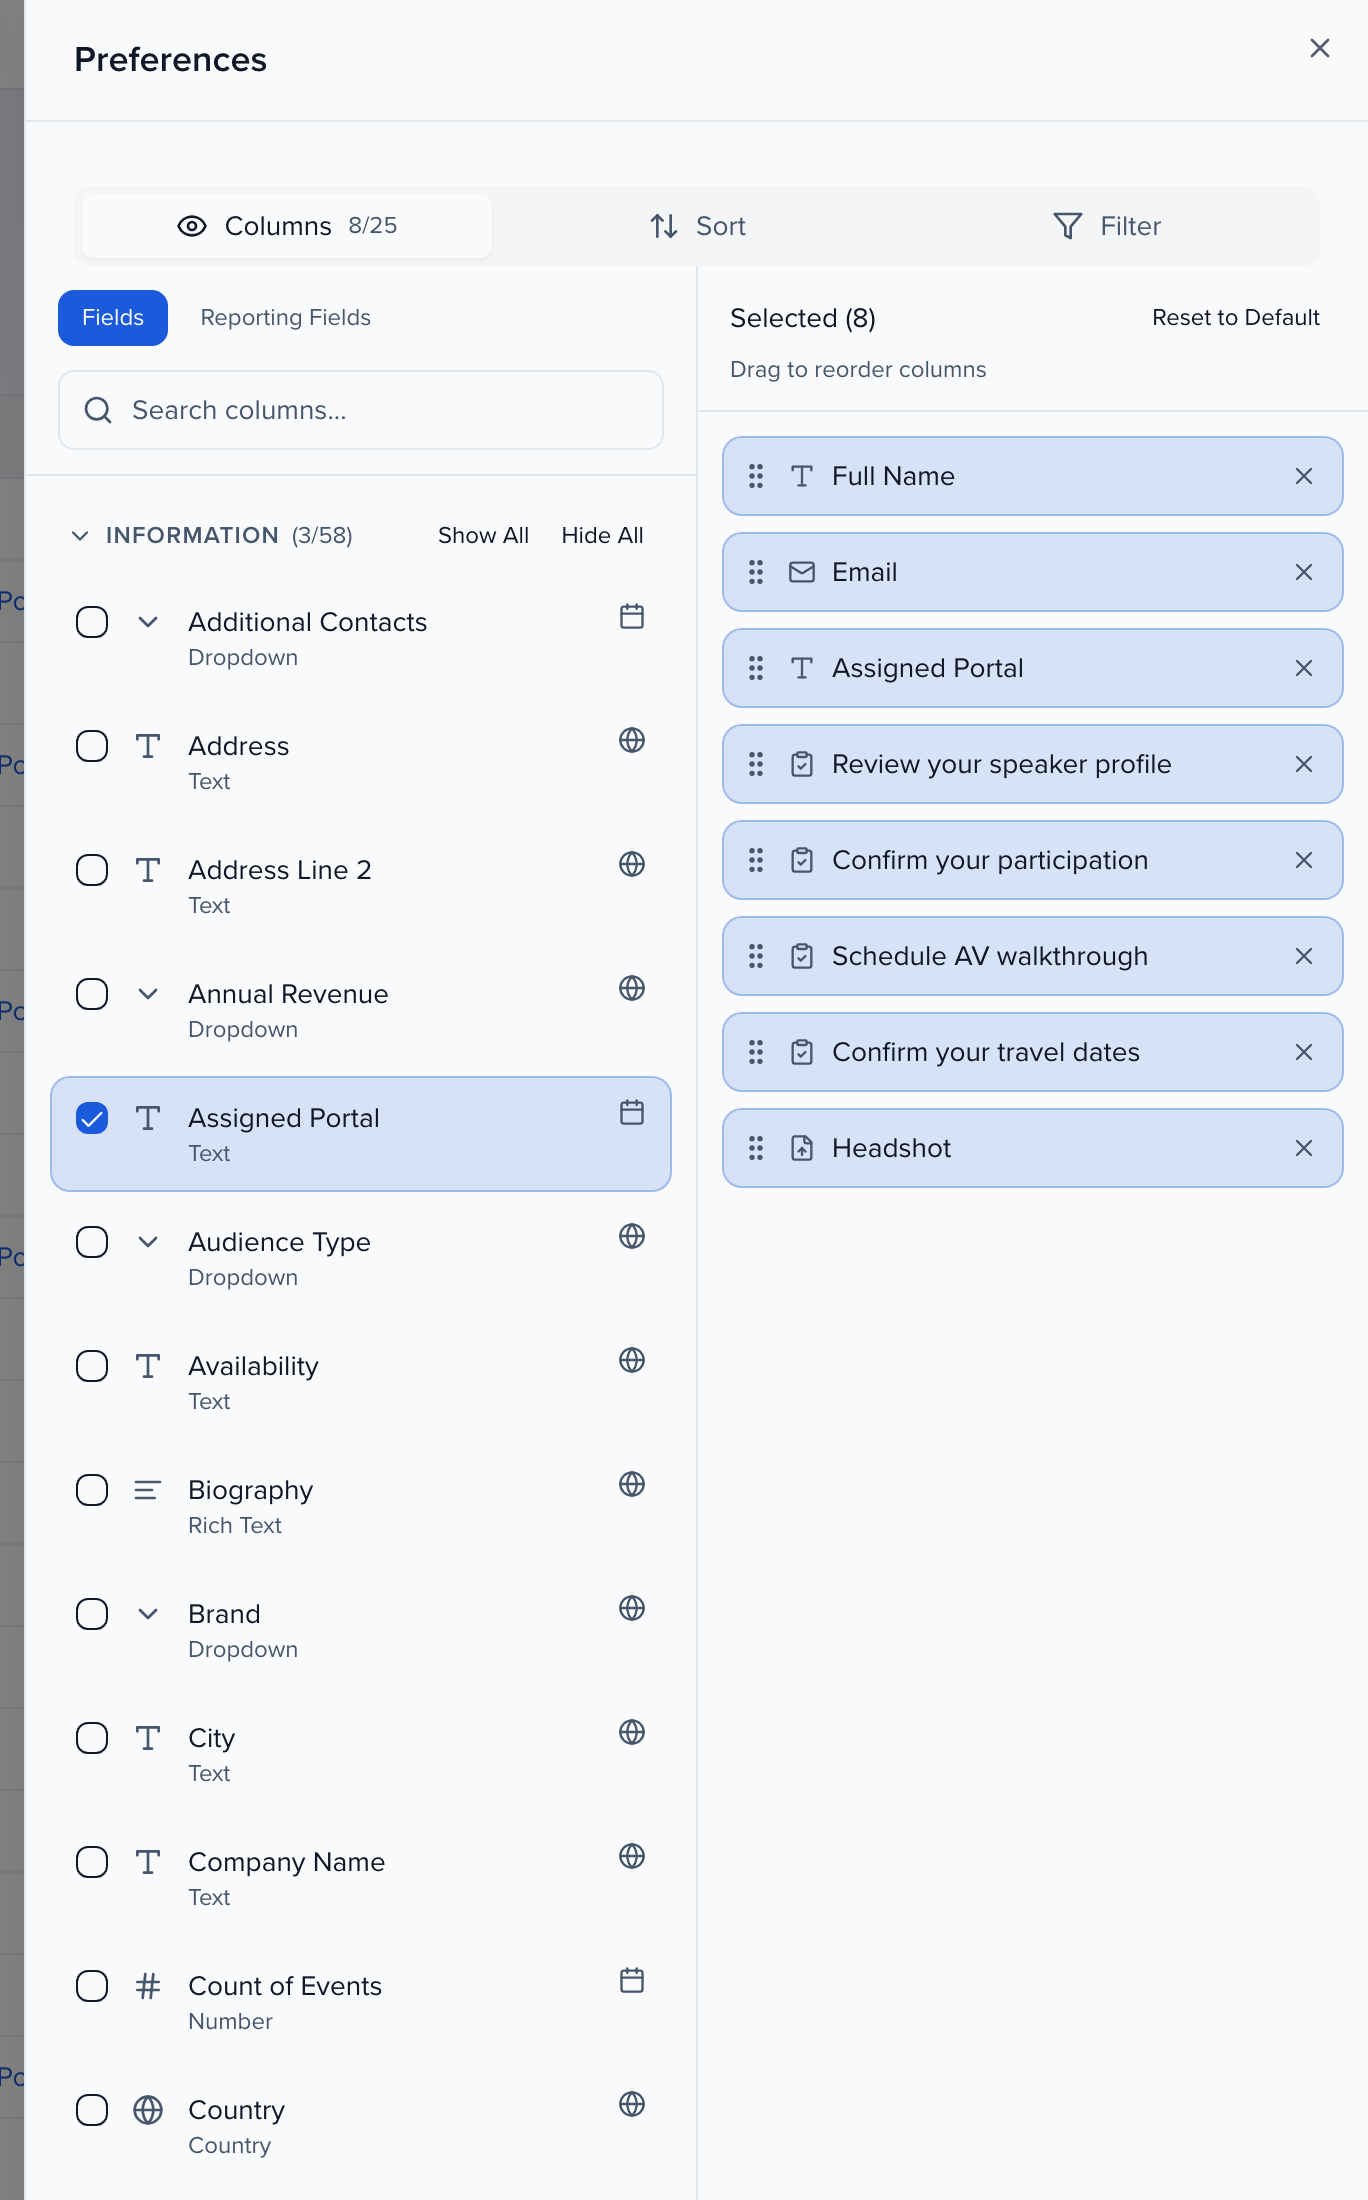
- Fields lists every field you can show, grouped by category, with a search box at the top. Tick a field to add it; Show All and Hide All work on the whole list.
- Reporting Fields switches the list to task, file request and form completion columns, so you can see at a glance who has finished which task, returned which file or submitted which form. Add the task to the table the same way as any other field. In Contacts, it also holds Source (under Session Fields) and Weekly Digest Emails Off (under Status Fields); see How a contact joined the event.
- Selected on the right is the table as it will appear. Drag the handle to reorder, click the × to remove a column, or Reset to Default to go back to the module’s standard set.
- Apply Changes puts the new columns on the table. In Contacts, when no saved view is selected, the columns you apply are remembered in your browser for that list; save a view to keep them on other devices or share them with your team.
How a contact joined the event
Section titled “How a contact joined the event”Source, a Contacts reporting field, says how each contact came into this event, worked out from the records rather than stored:
- The submission form’s name, when the contact was added to the event as the submitter or a participant of a session submitted through that form. It is the same name the Submissions page shows in its Source column.
- The integration, such as Cvent, Swoogo or ON24, when an integration created the contact.
- Manual otherwise, including contacts added by hand or by CSV import, and contacts who were already on the event before they submitted.
Filter on it like any dropdown: the options are the event’s submission forms, Manual, and any integration in use. Weekly Digest Emails Off, under Status Fields, is checked for contacts whose weekly digest is turned off.
Click Sort. Pick a field from the list to add it under Active Sorts, then choose Ascending or Descending. You can stack up to three sorts; the table sorts by the first, then breaks ties with the second and third. Clear All removes them.
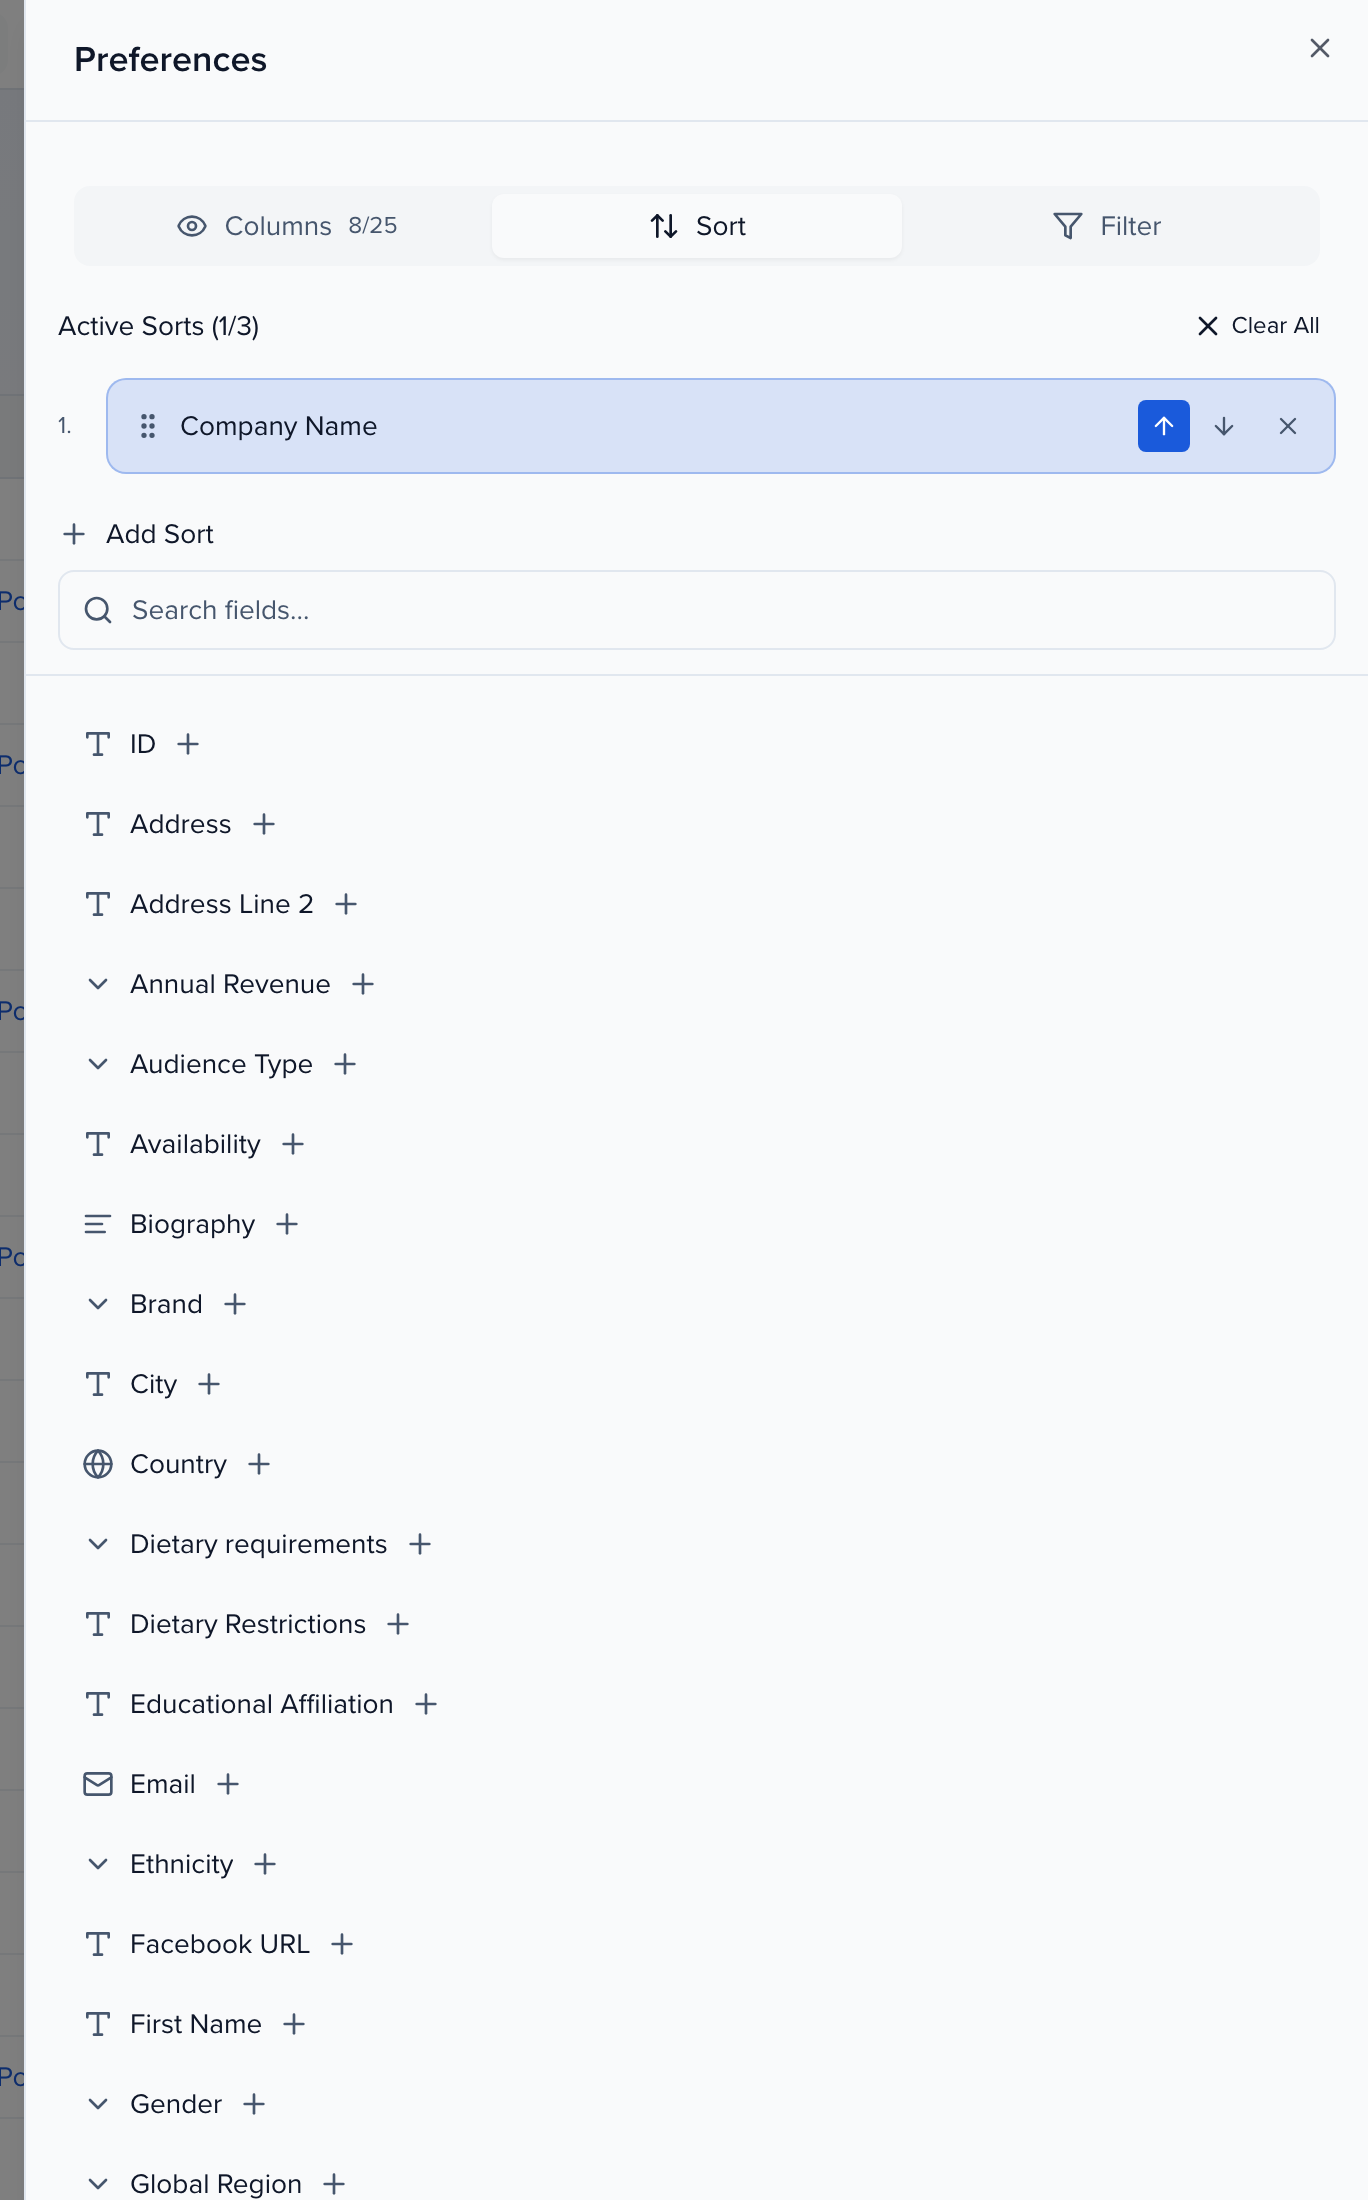
Sorts apply to the table as soon as you choose them — there is no Apply step on this tab.
Sort from a column header
Section titled “Sort from a column header”You can also sort without opening the drawer. Open a column header’s menu and choose Sort Ascending or Sort Descending to sort the table by that column alone, replacing any other sorts. Clear Sort removes that column’s sort and keeps the rest. The header shows an arrow on each sorted column.
A header sort is the same sort the Sort tab edits: it shows up under Active Sorts, and it marks the view as changed. Save Changes keeps it on the view; Reset Changes puts the saved sort back. See Saved views.
Header sorting is on Contacts, Sessions > Submissions, Agenda > List, Applications submissions, and the submissions tables for follow-up forms, file requests and organization portal forms.
Pin columns
Section titled “Pin columns”On a wide table, pin the columns that tell you which record you are on, such as a session title or a contact’s name, so they stay in place while you scroll the rest sideways. Open the column header’s menu and choose Pin column. The column moves to the left edge with the other pinned columns and stays there when you scroll horizontally. Unpin column in the same menu lets it scroll again.
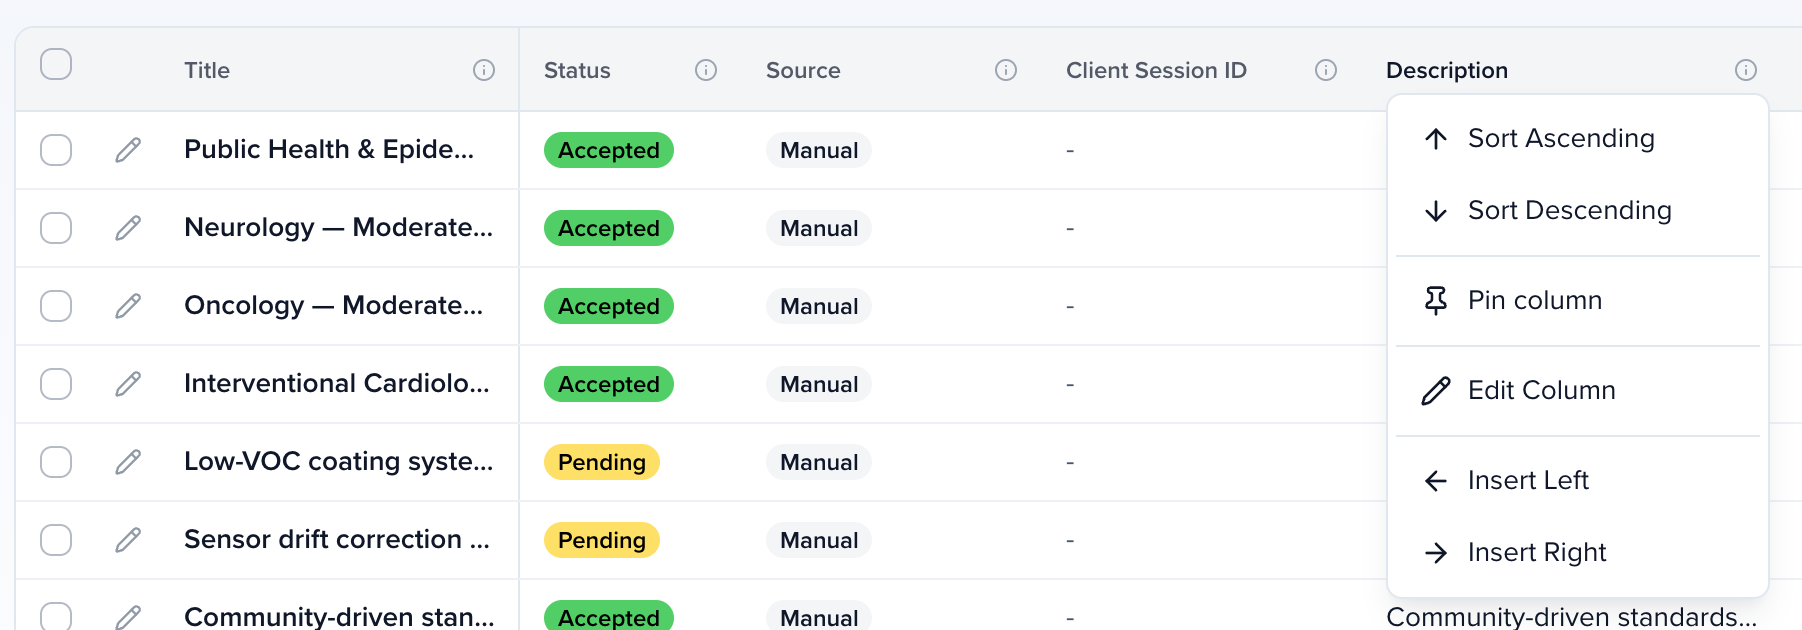
Pinned columns are part of the view, like columns and sort: pinning marks the view as changed, Save Changes keeps the pins on the view, and Reset Changes puts the saved pins back. See Saved views.
Pinning is on Program → Sessions (Submissions), the Agenda list, and the event’s Contacts table. It needs no special permission.
Filter
Section titled “Filter”Click Filter, then Add Filter. Each filter row is a field, an operator and a value; add as many rows as you need — records must match all of them.
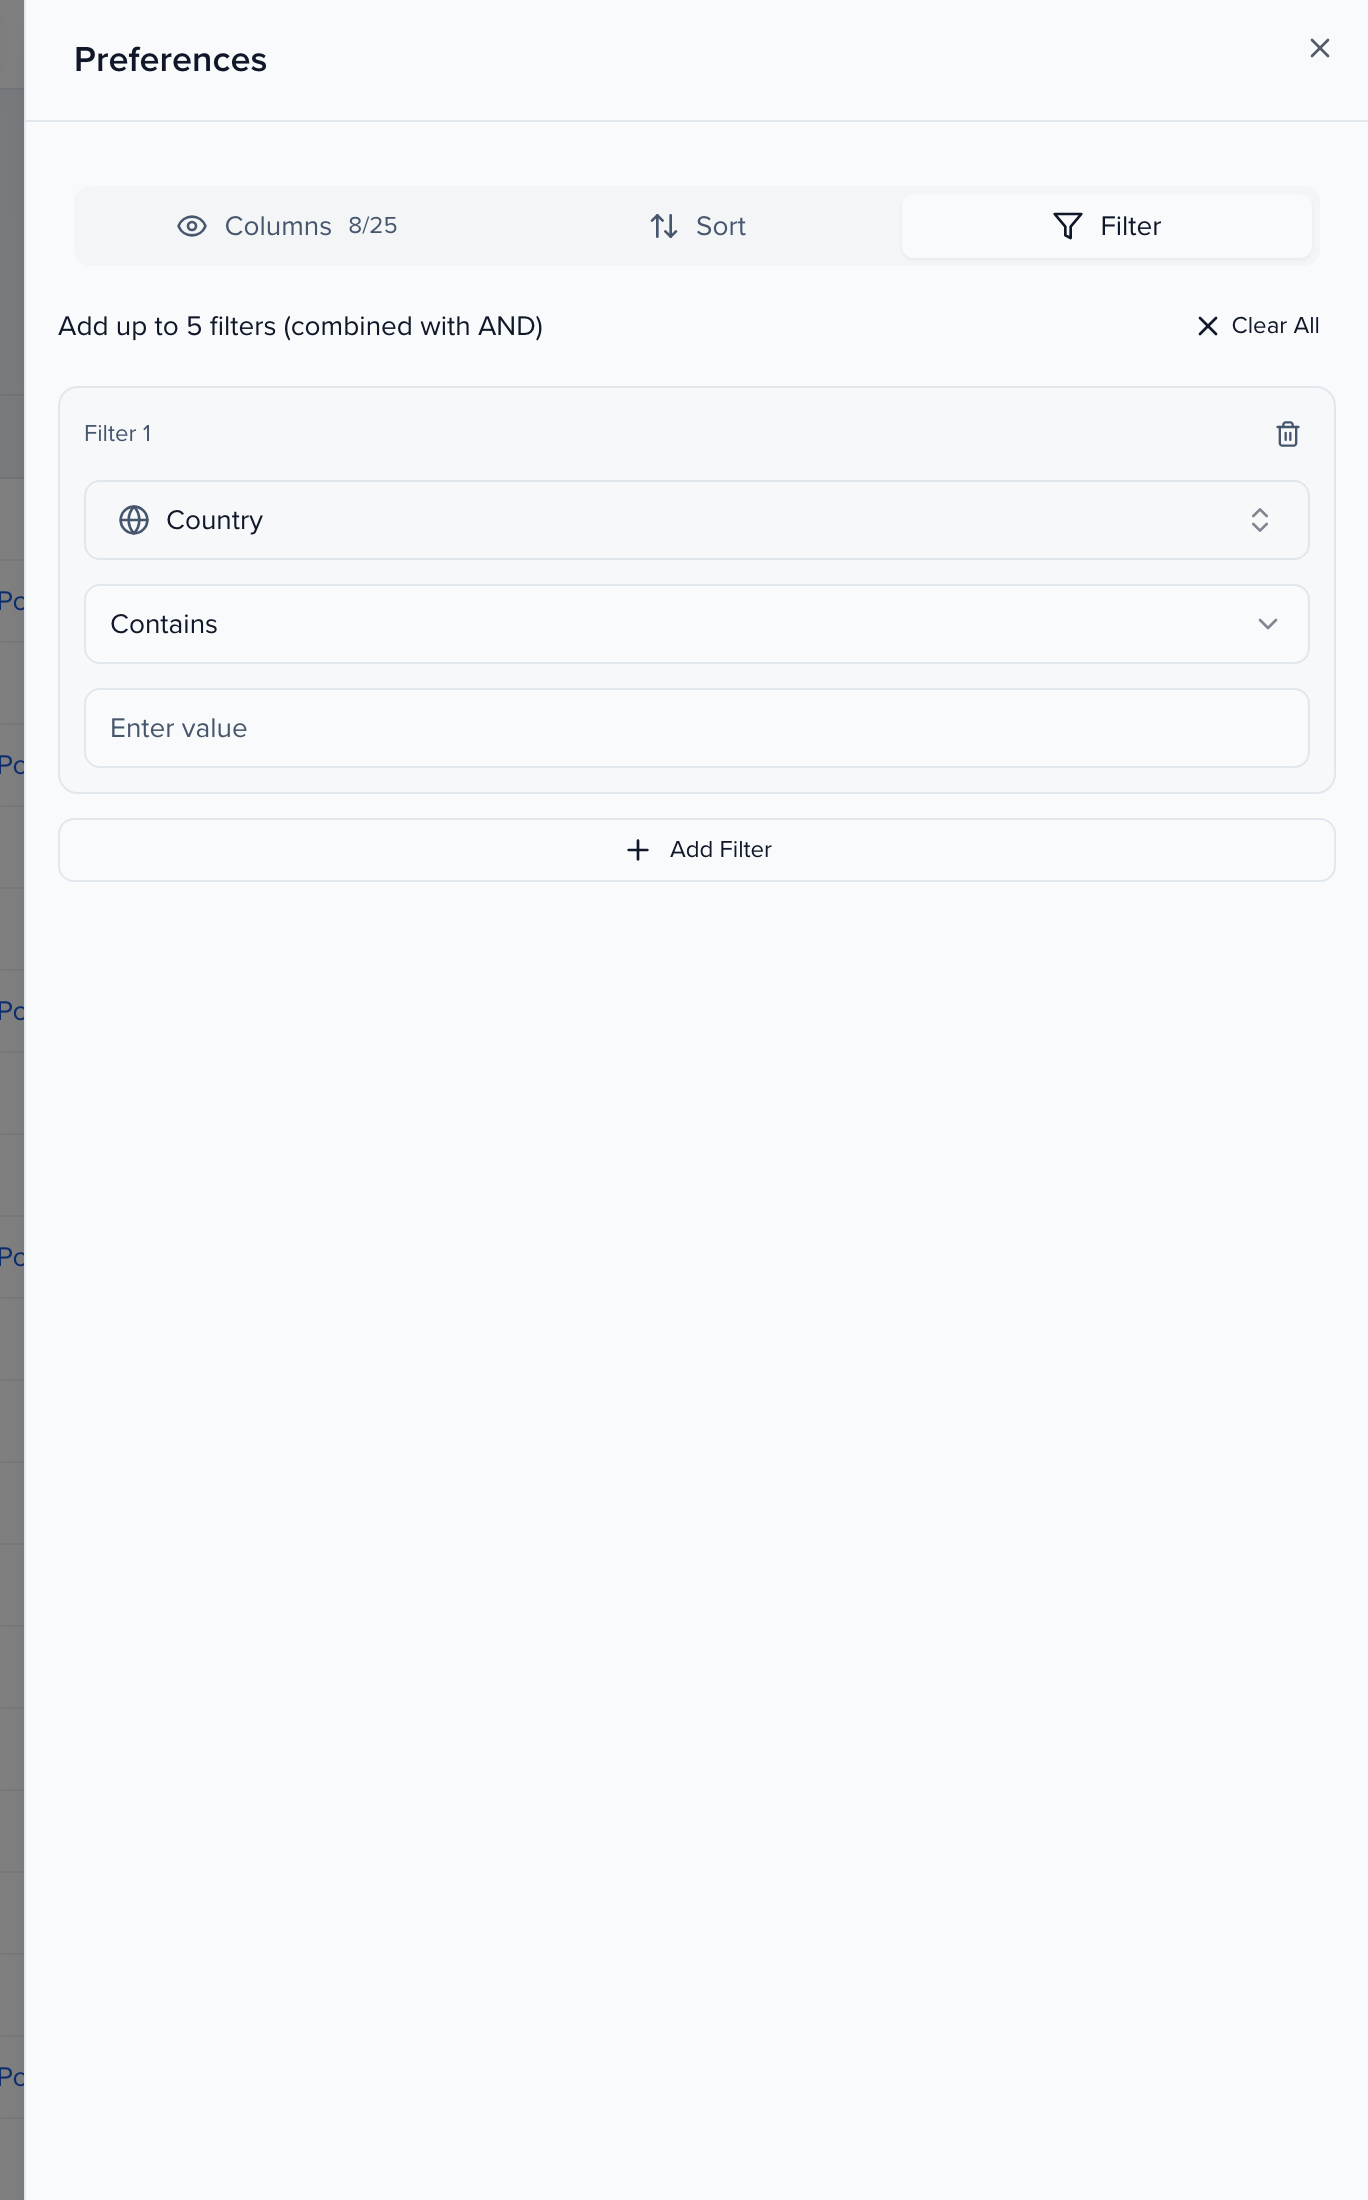
The operators fit the field type:
| Field type | Operators |
|---|---|
| Text, email, URL | Contains, Does not contain, Is, Is not, Is empty, Is not empty |
| Dropdown, tree, country, language | Contains, Does not contain, Is, Is not, Is empty, Is not empty |
| Number, currency, formula | Is, Is not, Is less than, Is greater than, Is less than or equal to, Is greater than or equal to, Is empty, Is not empty |
| Date | Is within, Is before, Is after, Is on or before, Is on or after, Is empty, Is not empty |
| Checkbox | Is checked, Is not checked |
| File | Filename contains, Has file type, Is empty, Is not empty |
Click Apply Changes to filter the table. The Filter button in the toolbar shows how many filters are active.
Filter sessions by date
Section titled “Filter sessions by date”To see the sessions on a given day or date range, open Program → Sessions, click Filter, and add a filter on Starts At with Is on or after and your first date. Add a second row on Starts At with Is on or before and your last date. (Is before leaves out the date you pick, so with it choose the day after your last day.) Because records must match every row, the two rows together give you the range. Save it as a view to reuse it — see Saved views.
Related records
Section titled “Related records”Click Columns, then the Related tab, to see each row’s related records without leaving the table — for example the sessions a contact takes part in. Pick a Related type (the choices depend on the module: Sessions (as participant), Submissions and Groups under Contacts), then the Nested columns, the sort order and any filters for the nested rows, and click Apply.
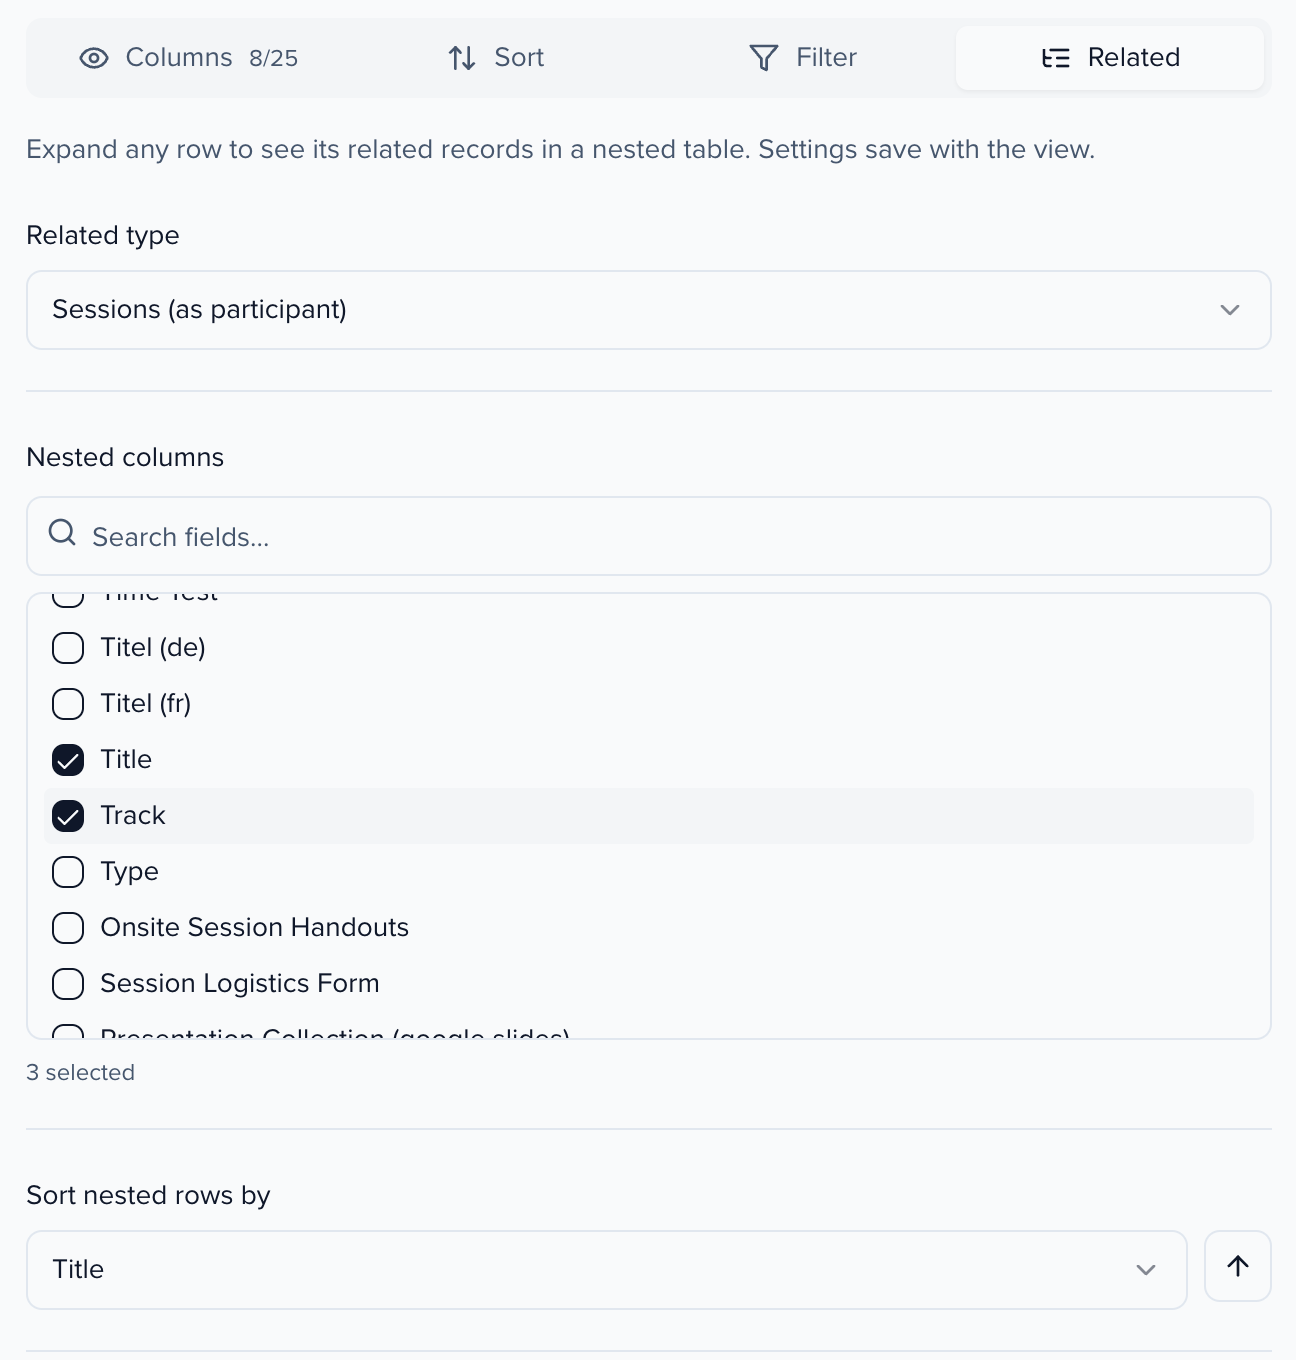
Rows that have related records now show a chevron and a count. Click the chevron to open a nested table under the row, with its own pagination:
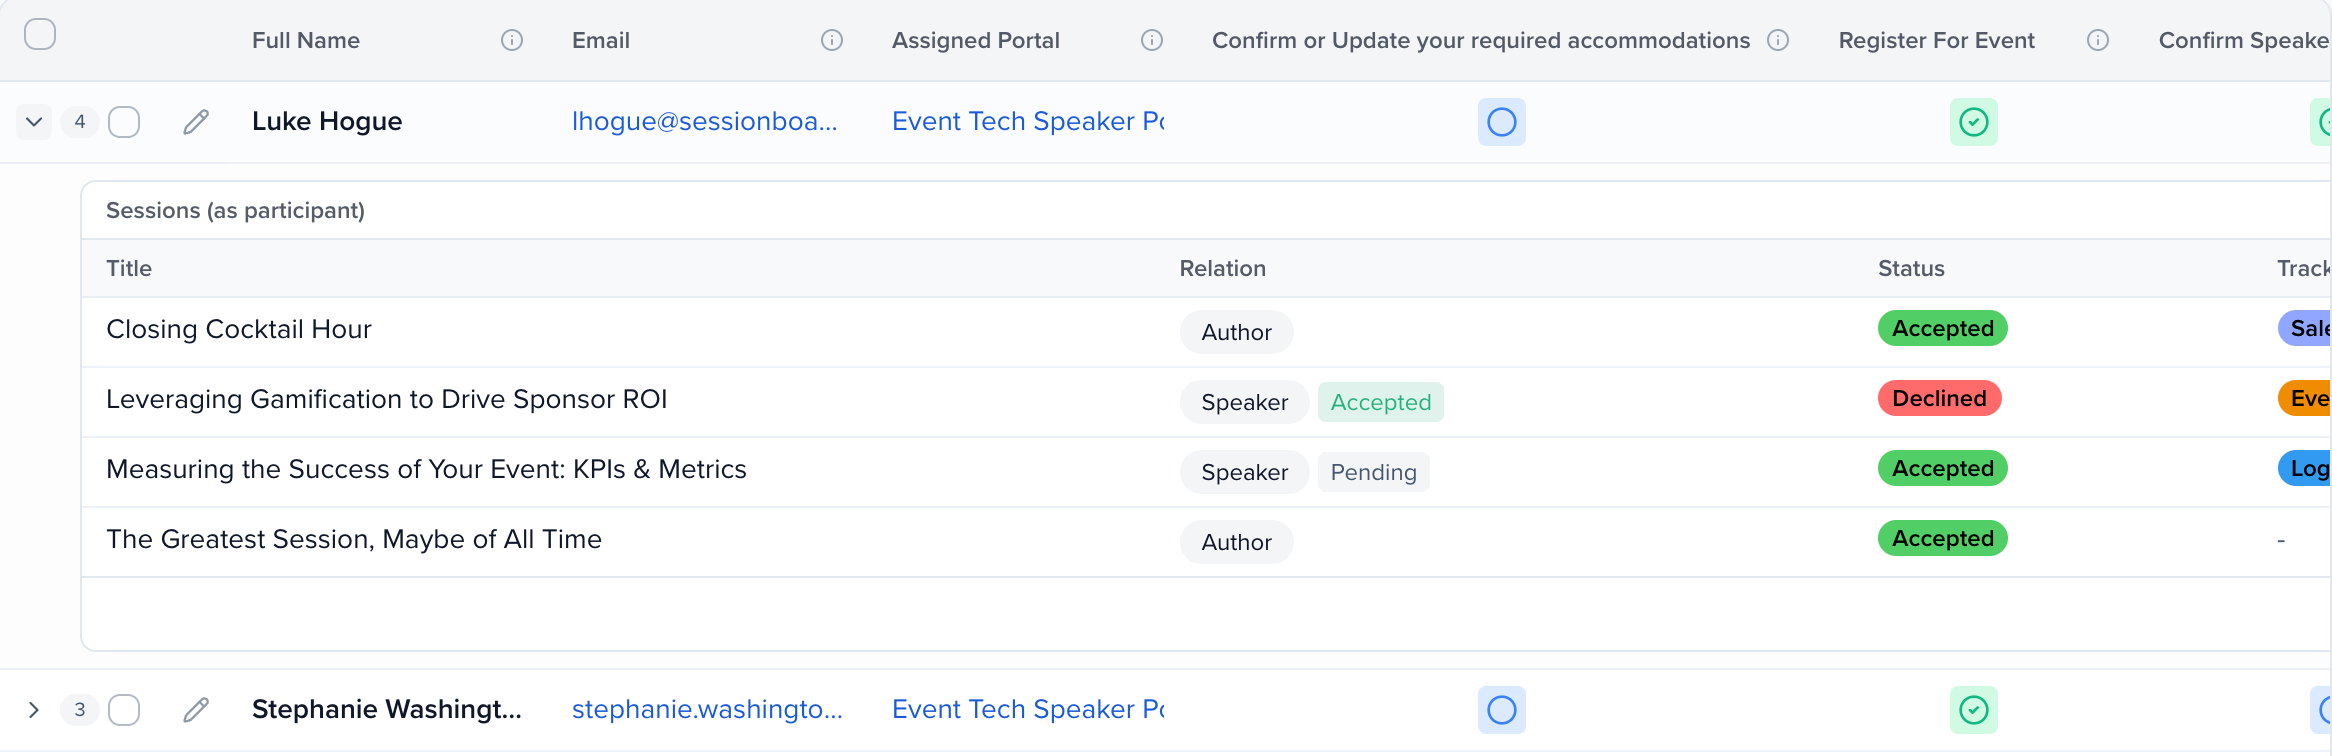
The related settings are part of the view, so save the view to keep them. When you export the table, Include related records? adds the nested rows to the file.
Saved views
Section titled “Saved views”Applying a change is not the same as saving it. Once the table differs from the view you started from, the view button in the toolbar offers to keep it:
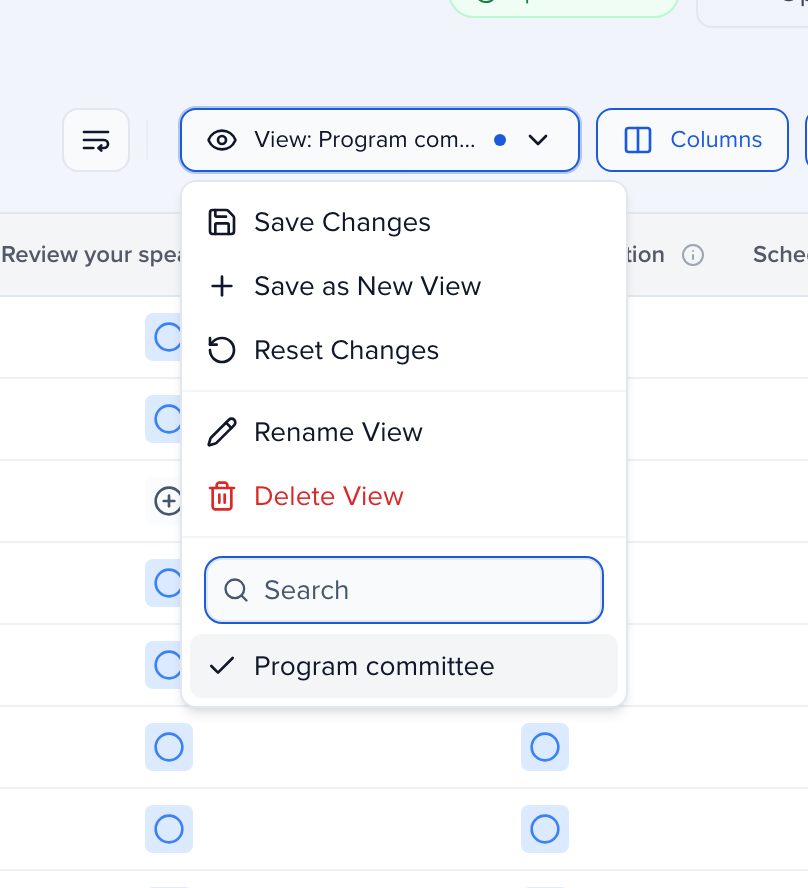
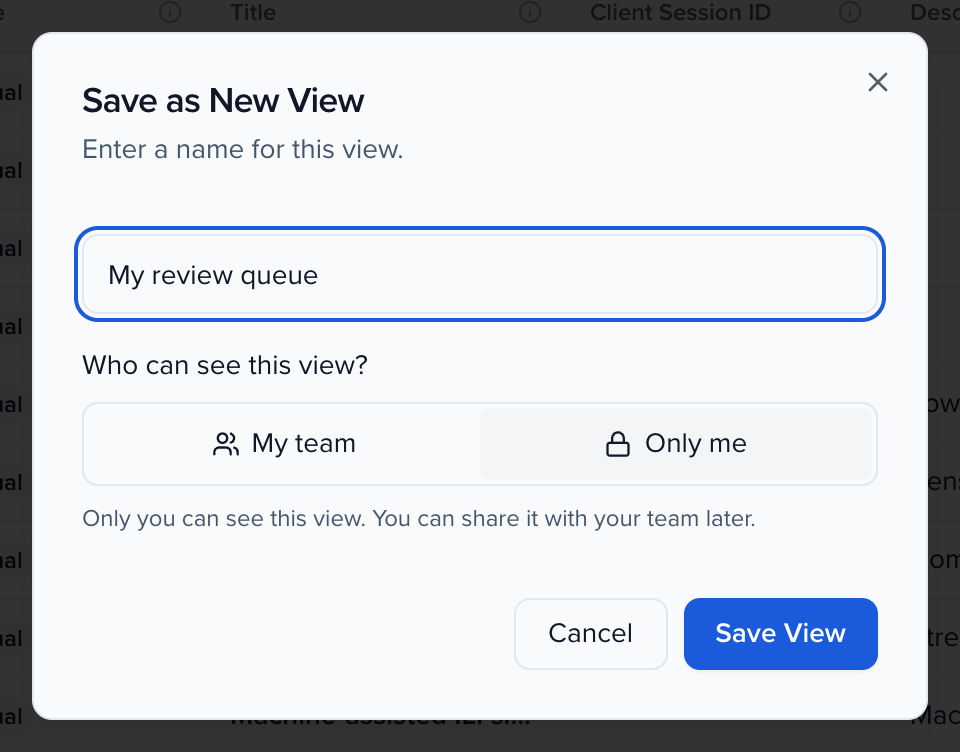
- Save as View (or Save as New View when you are already on a view) asks for a name and who can see the view, then creates it.
- Save Changes updates the view you are on.
- Reset Changes puts the table back to the saved view.
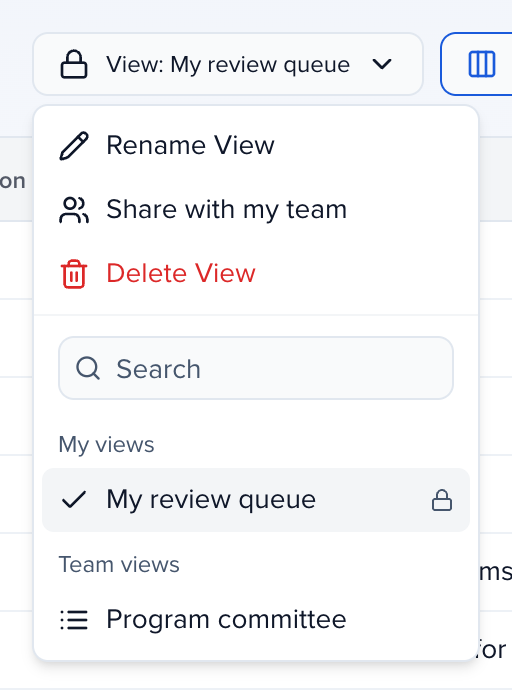
- Rename View and Delete View act on the current view.
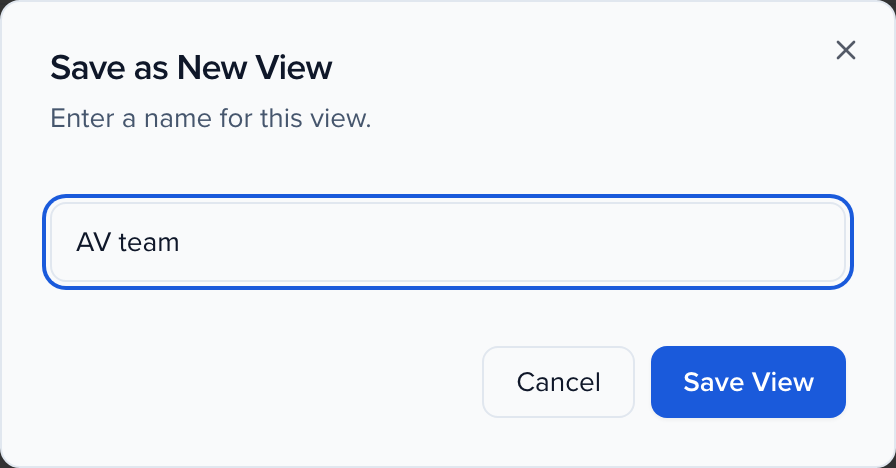
To switch views, open the same menu and pick one from the list at the bottom. The button label shows which view you are on — “View: Program committee” in the screenshots above.
Who can see a view
Section titled “Who can see a view”The save dialog asks Who can see this view?:
- Only me (the default) — a private view. Only you see it in the menu; nobody else on the team can open it.
- My team — a team view. Everyone on the event team (or, on organization tables, the organization team) can see and use it.
The view list in the menu is grouped into My views, your private views, each marked with a lock, and Team views. On a view you created, the menu offers Share with my team to turn a private view into a team view, or Make private (only me) to take a team view back. Only the person who created a view can change who sees it. On Sessions tables, saving views and changing their visibility also needs the Can edit views permission.
Views saved before private views existed are team views, so nothing disappeared from anyone’s menu. Creating, renaming, changing, sharing, making private and deleting a view are each recorded in the event’s or organization’s History under the View type.