

Set up credit types, questions and certificates
A credit type is a credential attendees can claim in Credit Claiming, such as AMA PRA Category 1 Credit, ANCC contact hours or a state board’s CE hours. Each type sets its unit, the certificate it issues, and the questions an attendee answers before the claim is saved. Credit types are shared across your organization, so every event uses the same list and the same questions.
Open Program → Configure → Settings → Credit types, or click Credit types at the top of the Credit Claiming page.
Why use it
Section titled “Why use it”Accrediting bodies each ask for something different: one wants an attestation, another wants to know how the attendee will apply what they learned, a third wants its own wording and signature on the certificate. Credit types put those rules on the credential itself. An attendee who claims ANCC hours answers the nursing questions and gets a certificate with your nursing accreditation statement; an attendee who claims only a certificate of attendance answers nothing extra.
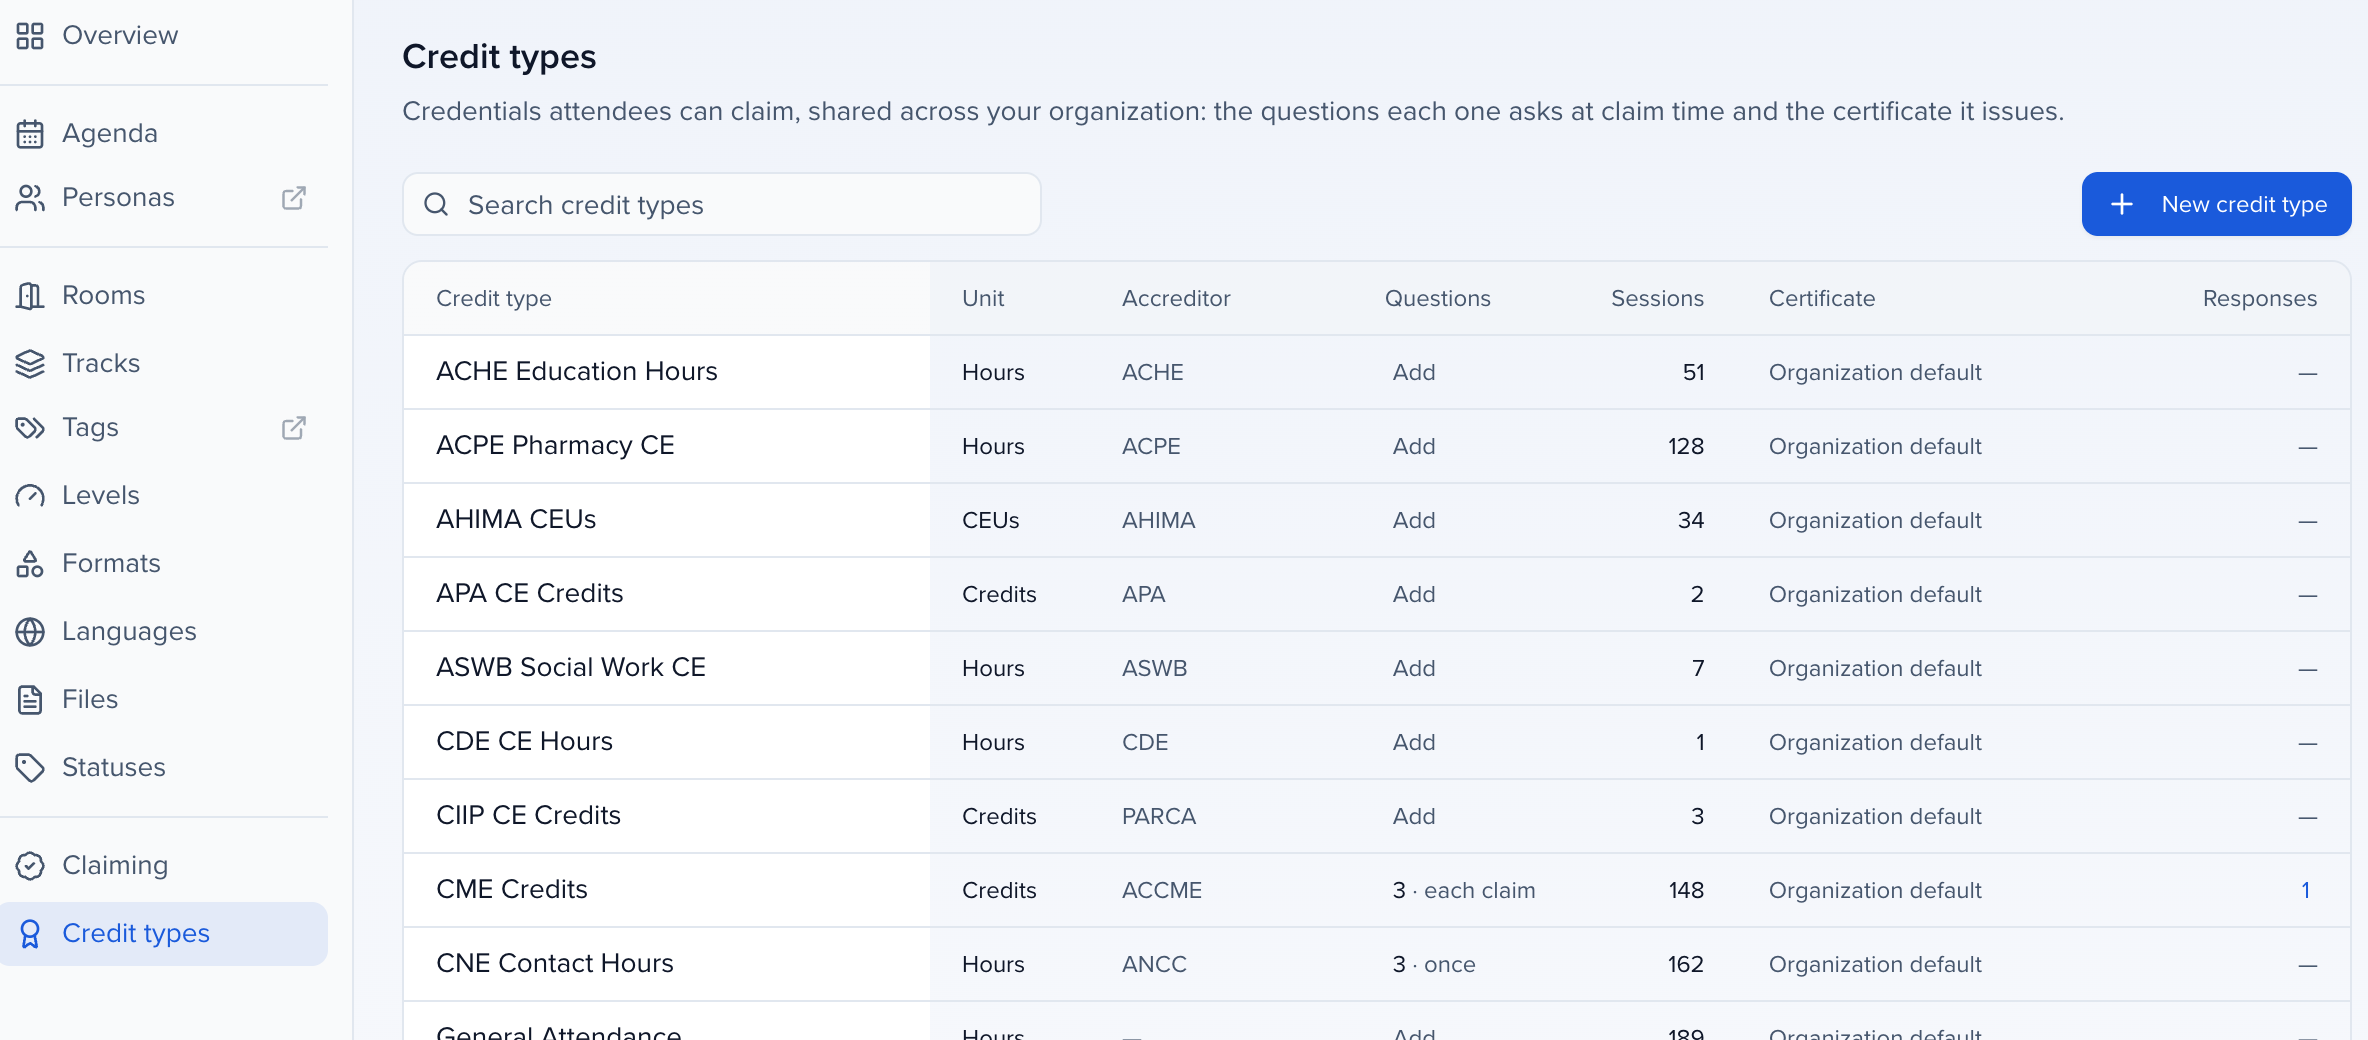
The credit types table
Section titled “The credit types table”Each row is one credit type:
| Column | What it shows |
|---|---|
| Credit type | The name attendees see on the claim site, certificates and transcript. |
| Unit | Hours, CEUs, points or credits. |
| Accreditor | The accrediting body or jurisdiction, for example ANCC or a state board. |
| Questions | How many questions the type asks and whether they are asked on each claim or once. Add when it asks none. |
| Sessions | How many sessions offer this type. |
| Certificate | Organization default, or Custom template when the type issues its own. |
| Responses | How many attendees have answered the type’s questions at this event. Click the number to read the answers. |
Search by name or accreditor. Archived types are hidden until you click Show archived.
Common types such as AMA PRA Category 1 Credit, ANCC Contact Hours and ACPE Credit are already there. To award something that isn’t listed, click New credit type, enter a Name and, optionally, the Accreditor / jurisdiction, and click Create.
Click any row to open its editor. It has four tabs: Details, Certificate, Questions and Subtypes.
Details
Section titled “Details”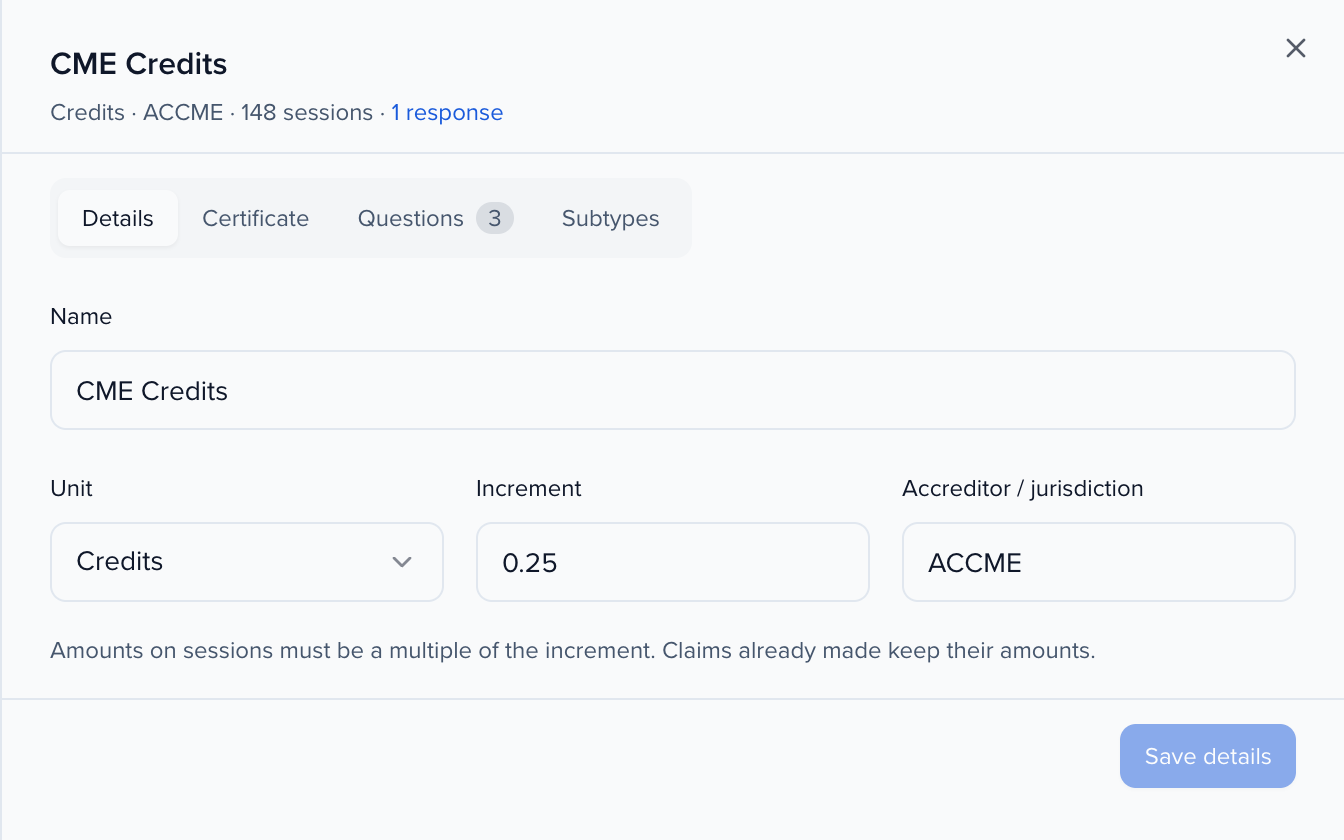
- Name: what attendees see.
- Unit: hours, CEUs, points or credits. A standard type’s unit is set by its accreditor and can’t be changed.
- Increment: amounts on sessions must be a multiple of it, for example
0.25. Claims already made keep their amounts if you change it. - Accreditor / jurisdiction: for example ANCC or a state board.
Click Save details.
Certificate
Section titled “Certificate”Every claimed credit issues its own certificate. The Certificate tab chooses what it looks like.
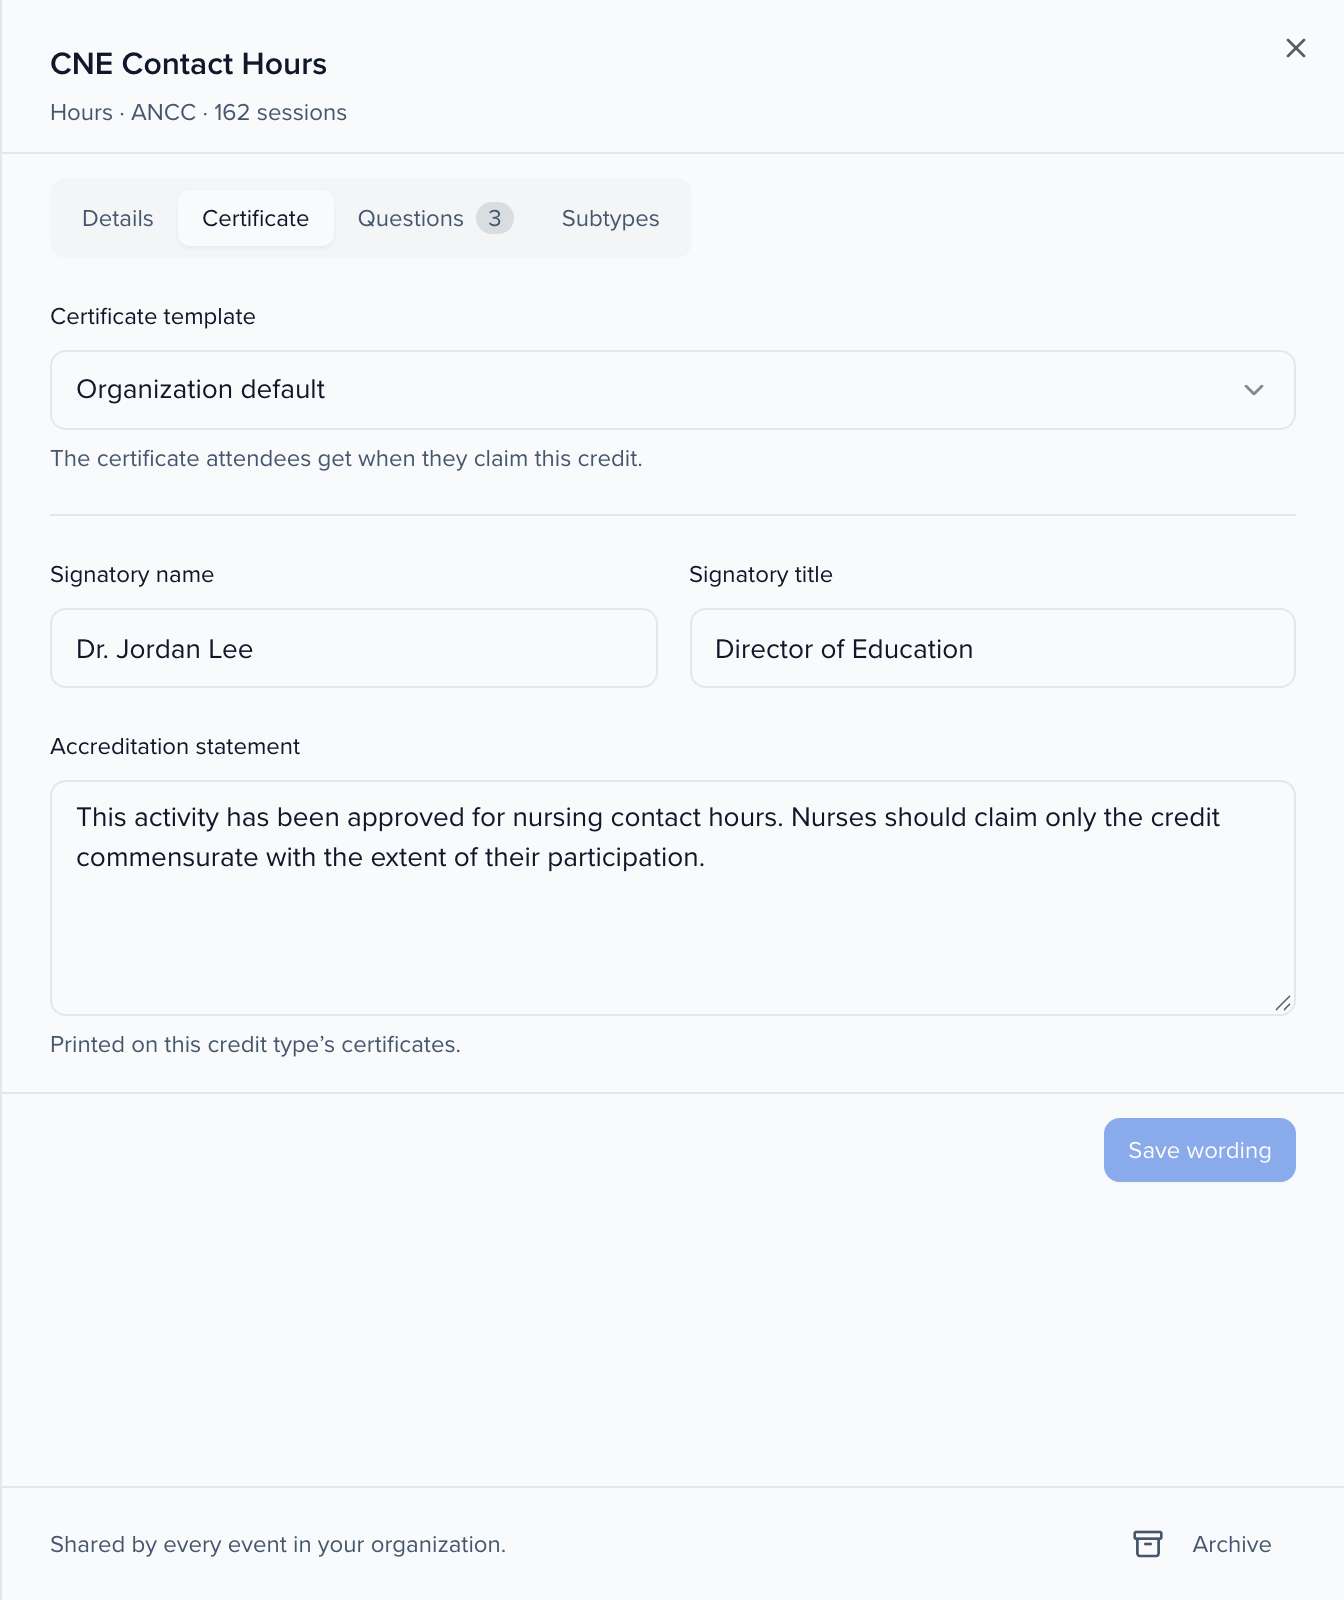
- Certificate template: Organization default, or any certificate template your organization has built under Program → Collect & Review → Print. Use a CE certificate for credit and a certificate of attendance for General Attendance.
- Signatory name and Signatory title: printed under a signature line, for example Director of Education.
- Accreditation statement: the wording your accreditor requires, printed at the foot of every certificate of this type.
Click Save wording. Certificates are drawn from the current settings each time they are opened, so attendees who already claimed see the new wording too.
The built-in certificate shows the event’s logo, name and dates in its brand colour, the attendee’s name, the amount and credit type, the session title, code and date, the certificate number and issue date, and the signatory and statement when you set them.

Questions
Section titled “Questions”Questions are what an accreditor asks the attendee about the credit, such as whether the activity met its objectives, or an attestation that the hours claimed are accurate. The claim site asks them before it saves the claim.
Choose when to ask
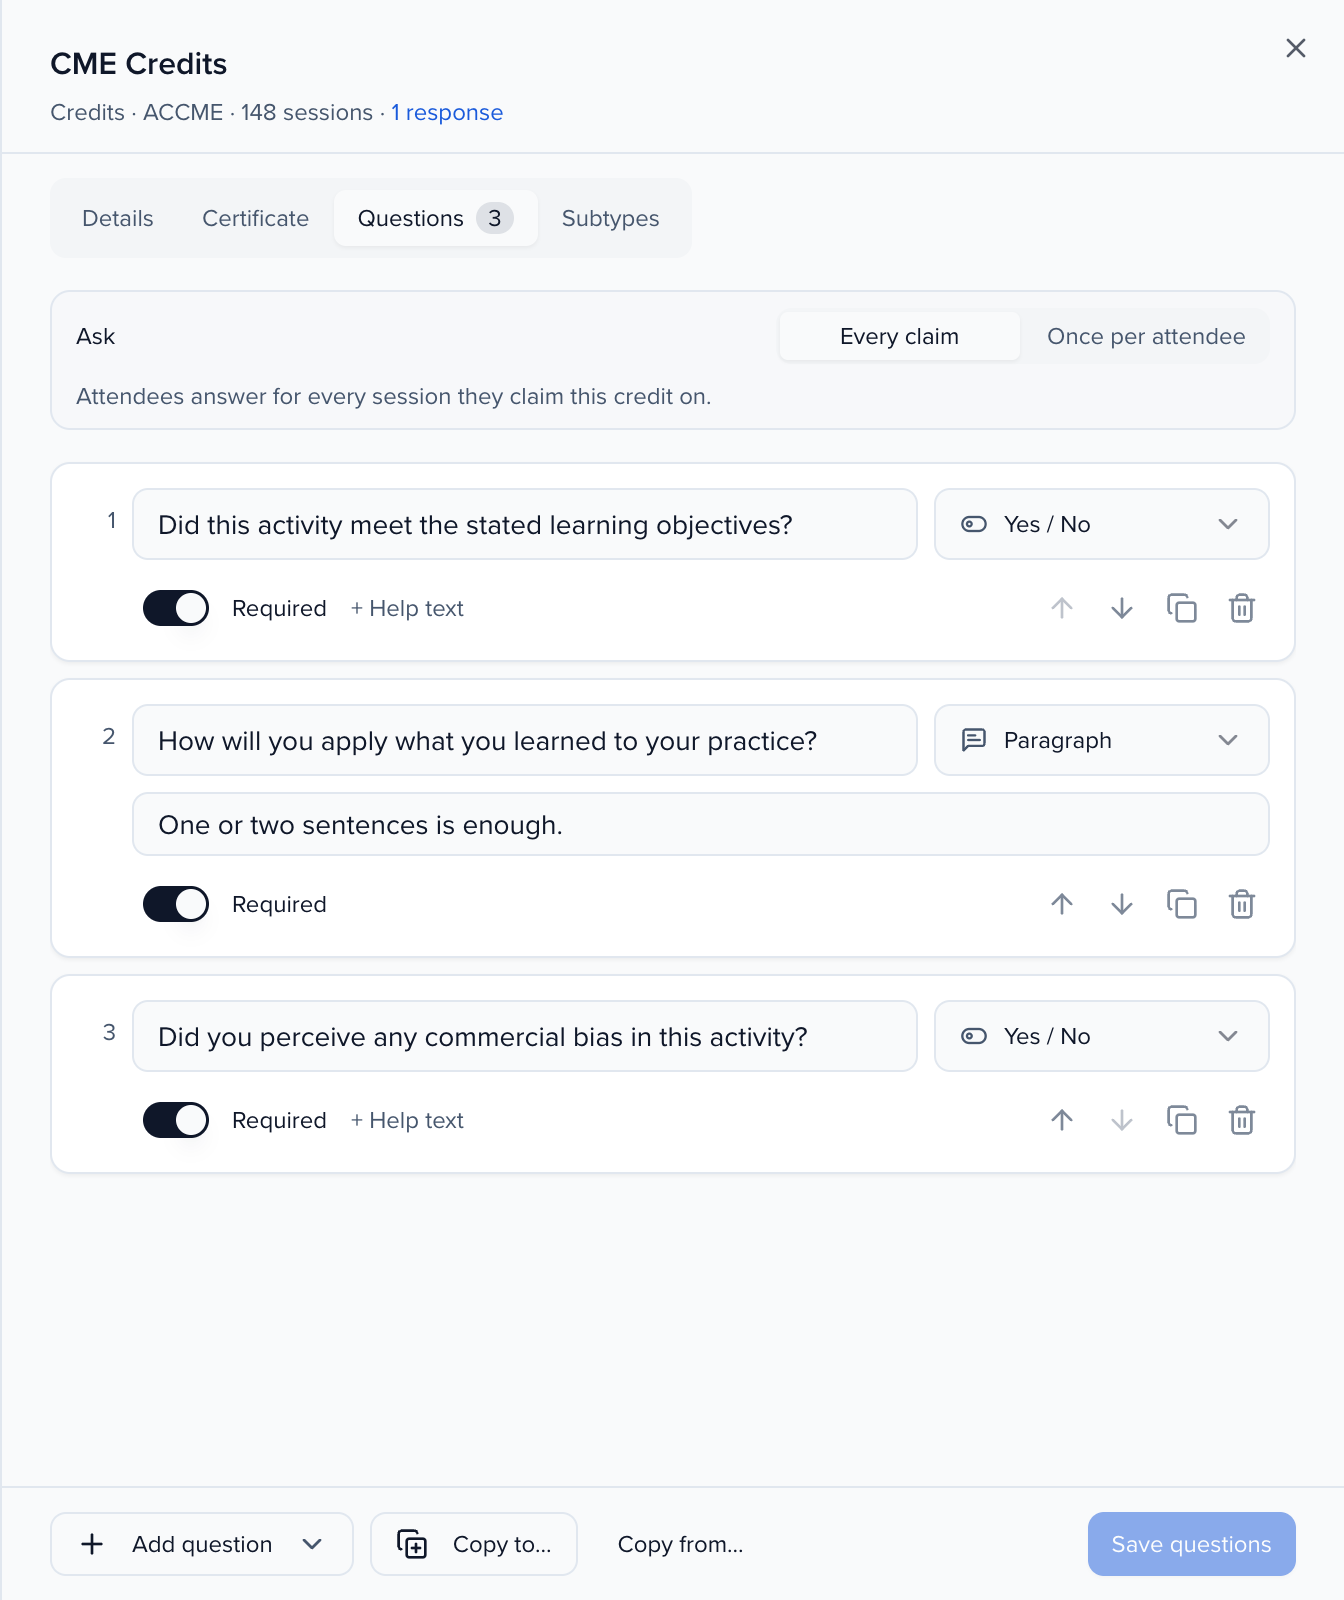
Under Ask, choose Every claim (attendees answer for every session they claim this credit on) or Once per attendee (attendees answer once per event, and later claims of this credit reuse their answers).
Add questions
Click Add question and pick the answer type:
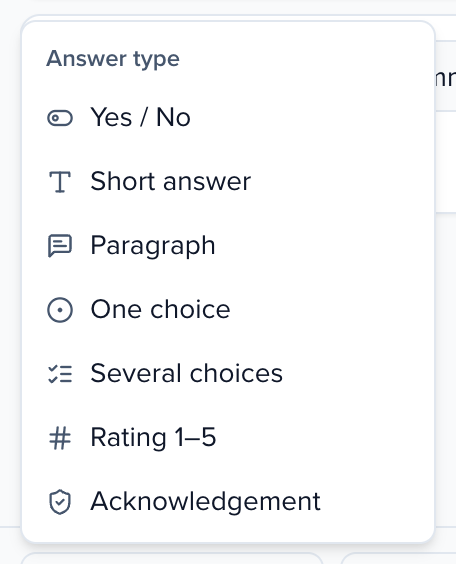
| Answer type | What the attendee does |
|---|---|
| Yes / No | Picks Yes or No. |
| Short answer | Types a line of text. |
| Paragraph | Types a longer answer. |
| One choice | Picks one of the choices you add. |
| Several choices | Picks any of the choices you add. |
| Rating 1–5 | Picks 1 (low) to 5 (high). |
| Acknowledgement | Ticks a statement, for example I attest that the credit I am claiming is accurate. |
Write and arrange them
Type the question, add Help text if attendees need guidance, and switch Required on or off. Use the arrows (or Alt+↑ / Alt+↓) to reorder, the copy icon to duplicate a question, and the bin to delete it.
Save
Click Save questions. If you close the editor with unsaved changes, it asks before discarding them.
To reuse questions, click Copy to… and pick the other credit types, then choose Add to theirs or Replace theirs. Copy from… pulls another type’s questions into this one. Save your changes first; copying works from saved questions.
Deleting a question that attendees have already answered keeps their answers: it is archived, and its answers stay in Responses and in exports.
What attendees see
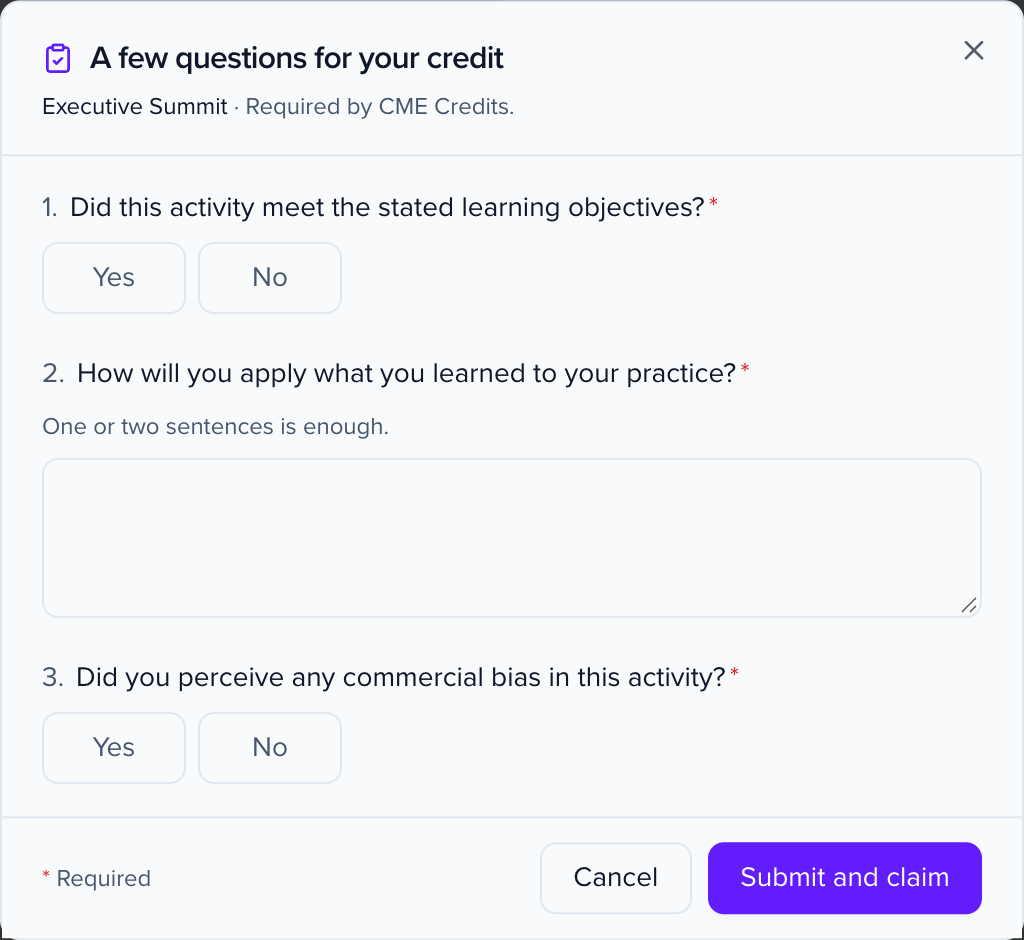
Section titled “What attendees see”When an attendee submits a claim for a credit with unanswered questions, the claim site opens A few questions for your credit. It lists the questions of every credit type in the claim, says which credit type requires them, and won’t save the claim until every required question is answered. For a type asked Once per attendee, it tells the attendee they answer those questions once for the event.
Read the answers
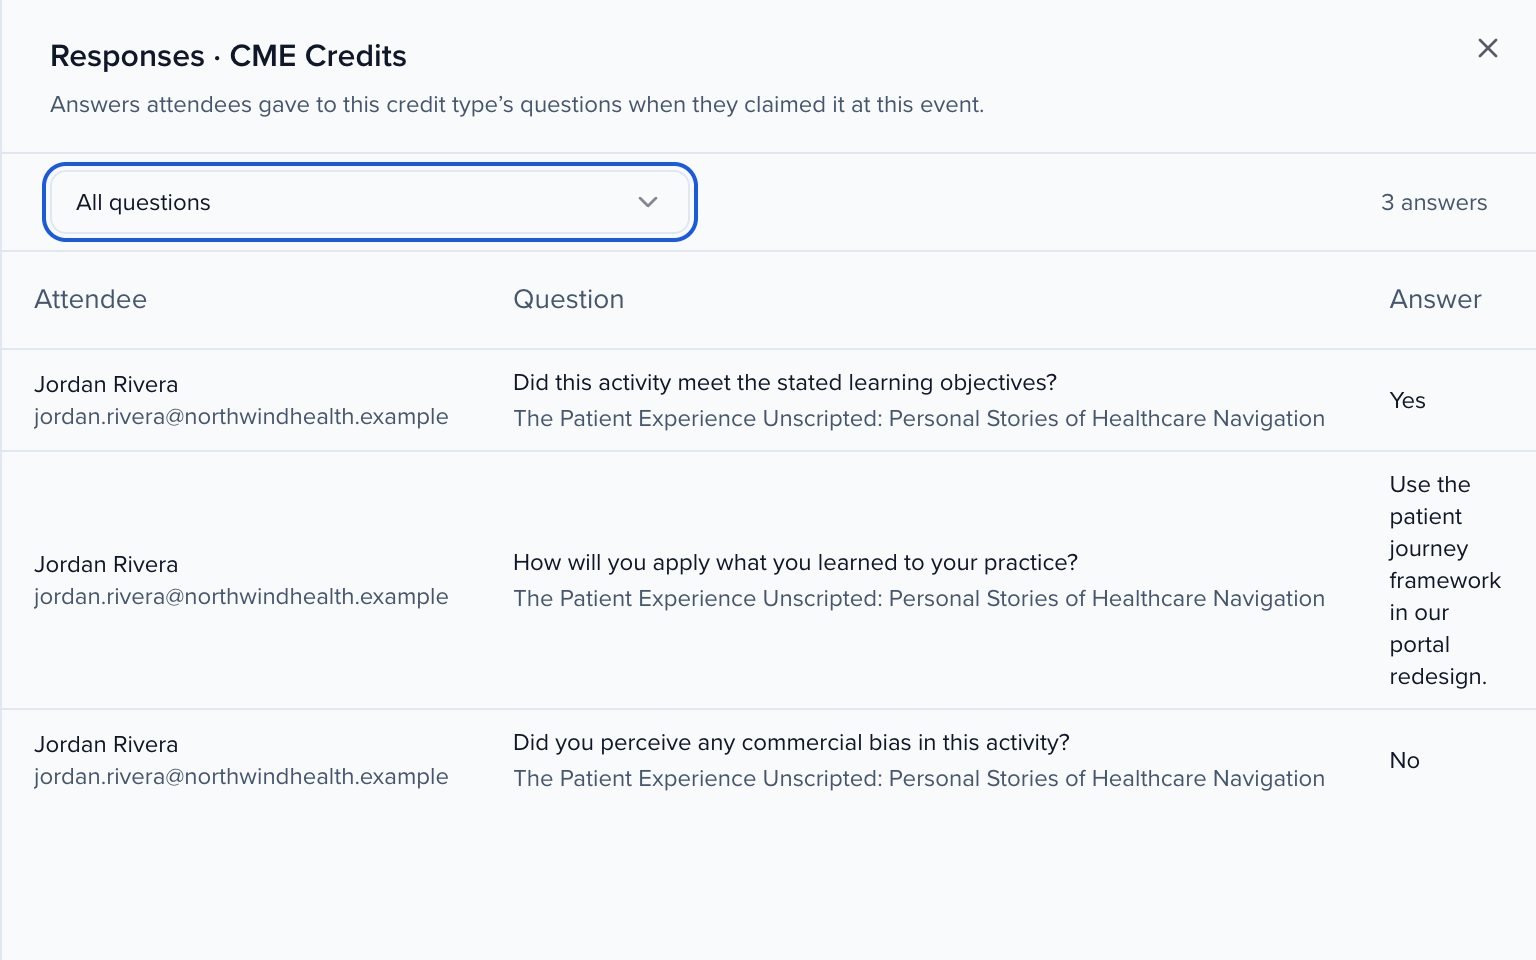
Section titled “Read the answers”Click the number in the Responses column, or the response link at the top of the editor, to open Responses. It lists every answer attendees gave at this event, with the attendee, the question, the session and the answer. Pick one question to narrow the list. To download the answers, use Export → Question answers on the Audit tab of the Credit Claiming page (exports).
Subtypes
Section titled “Subtypes”Subtypes split one credit type on sessions and transcripts, for example ethics or live hours. On the Subtypes tab, type a name under New subtype and click Add. Subtypes then appear next to the credit type on Credits per session.
Archive a credit type
Section titled “Archive a credit type”Click Archive at the bottom of the editor. Archived types are hidden from the session credit picker, and existing claims keep them. Turn on Show archived in the table and click Restore to bring one back.