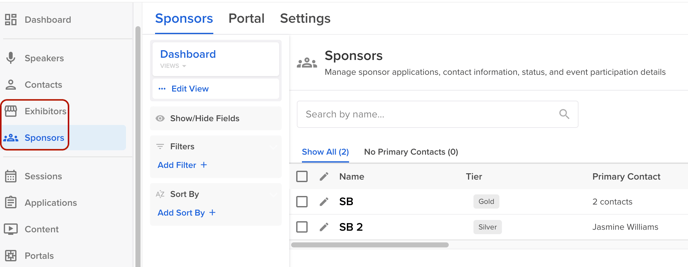
When collecting information for the attributes within sponsor/exhibitor profiles in Webex Events (formerly Socio), you can either use a:
-
For more information on how the sponsor/exhibitor profiles are set up within Webex Events (formerly Socio), visit HERE.
Sponsor/Exhibitor Intake Form
Create your Sponsor Intake Form or Exhibitor Intake Form to collect information from each organization.
The event admins are responsible for sharing the intake form with sponsors/exhibitors via email. Once the intake form is completed, the sponsor/exhibitor will have access to the portal, and further communications can be sent to them through Sessionboard.
Within the form, submitters are required to provide a company's point of contact (POC). If your team already knows this information and does not wish to request this from the submitting group, consider creating a portal form instead.
If you will be requesting assets (videos & images), do not include this request within the intake form. You will request these items through a file request task. This allows you to be able to message the submitter within the task if you may need them to upload a new file.
Viewing Intake Form Results
Once you have created the form and submissions are received, you can review these results within the respective sponsor/exhibitor modules.

TIP: Create a dashboard view within your sponsor/exhibitor module that only includes Webex Events (formerly Socio) profile information. Additionally, you can create a field within your view titled "Ready For Webex" that allows you to designate each sponsor/exhibitor as approved or not ("Yes" or "No") to be uploaded into Webex Events (formerly Socio) once you have reviewed the information provided.
-2.gif?width=688&height=387&name=Forms%2B(2)-2.gif)
Portal Form
Portal forms are great to use if you already have a confirmed list of sponsors/exhibitors and their respective contacts. When creating a form, be sure to create the form for Groups and not People. These forms are used to collect additional information about your sponsors/exhibitors.
-
Navigate the Portals module and select "Forms" at the top of the page.
-
Select the blue "Create Form" button and add the form's title, as well as select whether the form will be assigned to individuals or groups. Once complete, select the orange "Save & Build form" button.
-
People = Speakers
-
Groups = Sponsors & Exhibitors

3. Edit the portal form's three sections: Form Set Up, Form Questions, and Form Settings.
-
Form Setup:
-
Name: Visible to Event Admins
-
Title: Visible to Portal Users
-
-
-
Form Questions - Collect information about the individual or group by adding a section title, description/instructions, and form questions.
-
To add a question, use the button "+ Add Question" at the bottom of the page.
-
You can search for existing questions or create a custom question.
- All fields created using + Add Question will be Group fields.
-
-
.gif?width=688&height=387&name=Get%20started%20in%20Canva%20(3).gif)
If you will be requesting assets (videos & images), do not include this request within the intake form. You will request these items through a file request task. This allows you to be able to message the submitter within the task if you may need them to upload a new file.
Viewing Portal Form Results
Once you have created the form and submissions are received, you can review these results in two separate places:
-
Within the respective sponsor/exhibitor modules
-
Within "Show/Hide Fields" on the left-hand side of the sponsor/exhibitor module, toggle to "Reporting Fields" (by default you are seeing Group Fields"), and under the form header select the form to add it to your view. For more information on dashboard views, visit HERE. Don't forget to save the view when you are done😊
-1.gif)
-
-
Navigate to Portal > Forms > View Results
-
.gif?width=688&height=387&name=Get%20started%20in%20Canva%20(2).gif)
TIP: Create a dashboard view within your sponsor/exhibitor module that includes the information you're requesting through the group portal to see who is missing information quickly.


