
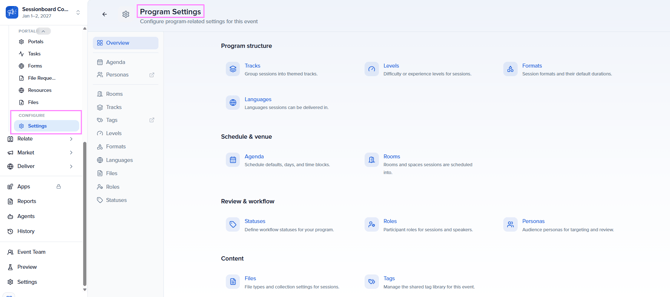
Program Settings can be accessed from the Program module. Customizing your session settings helps streamline session management, whether you are evaluating submissions or building your agenda.
Agenda
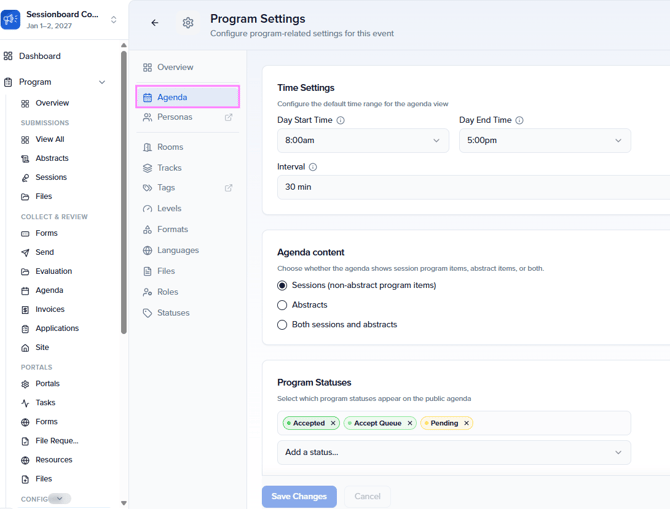
Agenda Settings are used to customize key parameters for organizing and structuring the various agenda views. Here’s a breakdown of the settings:
- Day Start Time and Day End Time: Defines the overall start and end times for the event agenda. These settings establish the earliest and latest times that sessions can be scheduled during each event day.
- Session Statuses: Allows event teams to manage and schedule sessions with a variety of statuses, not just those that are accepted. In the example above, only sessions with the statuses “Accepted” and “Accept Queue” are included in the agenda view.
- Session Format and Default Duration: Enable organizers to set a default duration for a specific session format. These default durations provide a preset duration for each session type, streamlining the scheduling process.
- Room Visibility: Identify what rooms are visible when scheduling sessions for your Agenda (Rooms View).
Personas
Personas are AI-powered virtual evaluators designed to review your sessions from a variety of perspectives. Each persona is tailored to reflect a specific role, audience type, or area of expertise—such as a technical expert, first-time attendee, or executive decision-maker.
By using these personas, you can gather comparative feedback that reflects diverse viewpoints, helping you assess content quality, relevance, and impact more thoroughly. This feature streamlines your evaluation process while providing deeper insights into how your sessions resonate across different audiences.
Create A Persona
You can create as many Personas as you'd like. Personas can not be imported/bulk-created at this time.
Feel free to use the 3 default personas available to you (NOTE: These can not be edited).

In the top right corner of the Personas section, click the orange “Add Persona” button.


Sessionboard Tip💡Use TIERS to create an effective persona:
T - Task: Explicitly define the desired output (format, length, action).I - Instructions: Define the success criteria and decision logic. What makes a "good" vs "bad" output?E - Examples: Add relevant background details (customer plan, tone). Provide examples of inputs with expected outputs.R - References: Provide documents or links for company alignment. Add your event link in your Event DetailsS - Sharpen & Iterate: Adjust the prompt based on the AI’s response to refine results.
Once complete, click the 'Create' button at the bottom to add it to your custom personas list.
These custom personas can now be assigned to evaluate sessions, providing AI-generated feedback aligned with the traits you defined.
When building an event agenda, the fields rooms, tracks, tags, format, level, languages, and status help categorize and organize sessions for better navigation and filtering.
IMPORTANT NOTE❗️: Rooms, Track, Level, Format, and Language are single-select dropdown fields. Tags is a multi-select field.
Rooms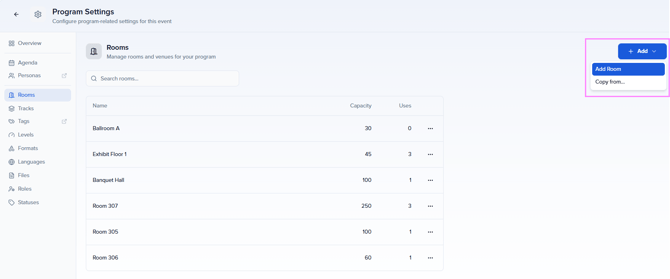
Specify the physical rooms or virtual locations where sessions can be hosted
-
Example: “Ballroom A,” “Exhibit Floor 1,” “Banquet Hall”
-
Order: Use room order to organize how the agenda embed is displayed. Rooms will be ordered horizontally from left to right, from lowest to highest ascending order. If rooms are all in the same order level (e.g. 0) or the room value cannot be found, rooms will be displayed alphabetically.
-
Capacity: Indicates the maximum number of people that can fit within this room. The capacity for rooms will be visible within your agenda view, but not within embeds.
-
Limit: 100,000
-
Tracks
These are broad thematic categories that group sessions under a specific topic or focus area. Tracks are typically used by attendees to filter the event agenda.
-
Example: “Cybersecurity,” “Marketing Strategies,” “Healthcare Innovations”
NOTE: The color associated with each track will also be reflected in the admin agenda view as well as the embeds.
Tags
More flexible, granular keywords to enhance session organization, filtering, and searchability.
- When managing multiple sessions, admins can quickly locate specific ones by searching for assigned tags rather than relying on session titles or descriptions.
- Admins may use tags to track specific attributes like “Sponsored Session,” “Live-Streamed,” or “On-Demand” to manage how sessions are presented and categorized within the platform.
- Tags can help with reporting by allowing admins to pull reports on sessions grouped by specific themes, making it easier to analyze trends and engagement.
Levels
Indicates the expertise required or the expected knowledge level of attendees.
-
Example: “Beginner,” “Intermediate,” “Advanced”
Formats
Defines the session style or structure.
-
Example: “Panel Discussion,” “Workshop,” “Keynote,” “Roundtable”
Languages
Specifies the language in which the session will be conducted.
- Example: “English,” “Spanish,” “French”
Files
Sessionboard offers an intuitive experience for speakers to upload files associated with their session and communicate with the event team. With a generous file size limit of 1.95 GB per file and built-in tools to manage versions and comments, our solution lets you regain control of the content management process.
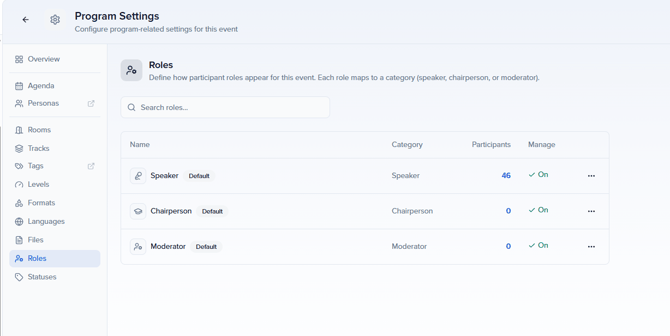
Roles
Define how participant roles appear for this event. Each role maps to a category (speaker, chairperson, or moderator).
Statuses
Customize your event by creating custom session statuses tailored to your event-specific workflows, ensuring efficient session tracking and management.
How to Create A Custom Status
-
Select the orange Add Status button

-
Edit the following fields for your new status:
-
Name: The status name will be visible to users in the portal.
-
Category: All statuses must be assigned a category. When a category is assigned, the new status created will operate as the category assigned does.
For Example: If a session is assigned an Accepted category, the session will sync to one of our integration partners if you are using an integration. -
Color
-
Display Order: The order will determine how the status appears within the dropdown list.
- Show custom status name: When enabled, the custom status name will be visible to portal user
-
-
Once complete, click Create button in the pop-up model.

Moving forward, custom statuses can be assigned to sessions using the Status field.
