Once an event has been created, it's important to configure the event details before you start onboarding event contacts.
Within your event, navigate to the Settings module.
Event Details
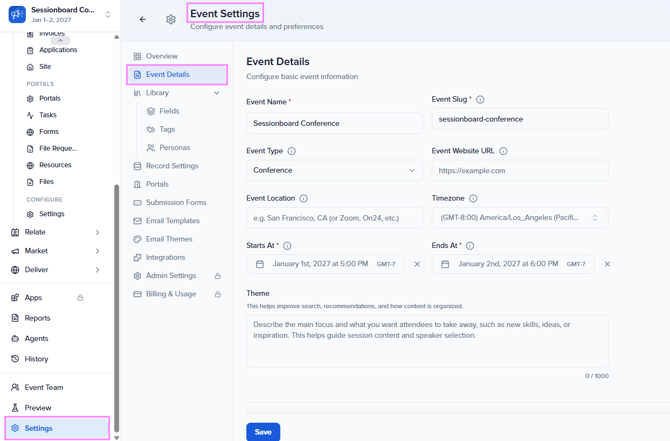
| Field | Example |
| Event Name: This is your event name that will be featured within your portal, forms (i.e. session submission form), and emails. | ACME Conference 2025 |
| Event Slug: This is used within the URL that people will visit to access your forms (i.e. session submission form) and portal. | app.sessionboard.com/acme-conference-2025 |
| Event Type: Select the type of event that best describes this event. |
Conference Note: Sessionboard's AI features will use this field to better understand the nature, audience, and goals of your event. |
| Event Website URL: If available, enter the URL of the website associated with your event. |
https://www.sessionboard.com/ Note: Sessionboard's AI features will use this field to better understand the nature, audience, and goals of your event. |
| Event Location: Specify the location of the event |
San Francisco, CA Note: Sessionboard's AI features will use this field to better understand the nature, audience, and goals of your event. |
| Timezone: Select the timezone that your event is located in. Dates and times displayed across your event will reflect what you choose here. | (GMT-5:00) America/New_York (Eastern Standard Time) |
| Starts At / Ends At: Date and time that your event starts and ends. |
Starts At: 12/02/2025 8:00 am Ends At: 12/05/2025 5:00 pm |
| Theme: This helps improve search, recommendations, and how content is organized. |
Note: Sessionboard's AI features will use this field to better understand the nature, audience, and goals of your event. |
| Logo image: Upload a logo to represent your event across the platform. This logo will be featured in email communications as well as forms (i.e. session submission form & intake form). | 300 w x 300 h |
|
Background image: Upload a background image to represent your event. This image will be used on your forms (i.e. session submission form & intake form). |
1500 w x 500 h Recommendation: Use an image with no words. |
Record Settings
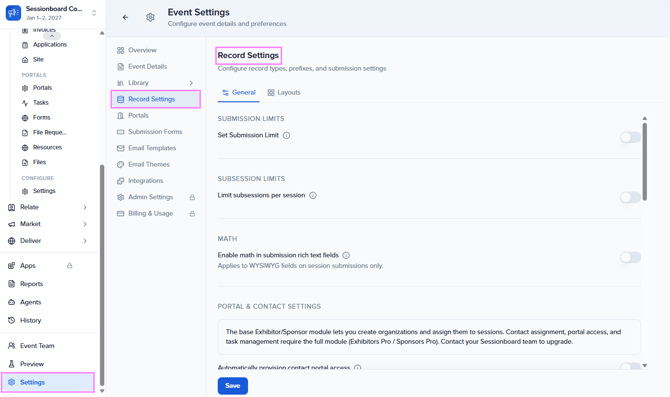
- Set Submission Limit: Set the maximum number of sessions a user can submit to your event. This limit applies to the total number of submissions across all completed forms.
- Automatically provision contact portal access: When enabled, contacts will automatically be given portal access when you add or import them.
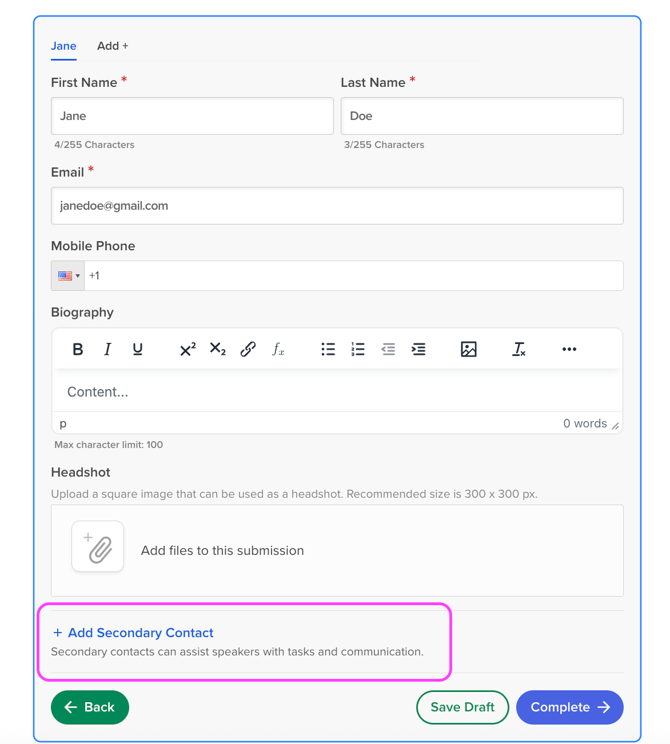
- Collect Additional Contacts: Enables the collection of Additional Contacts for your speakers through the session submission form (see example image of the submission form below).
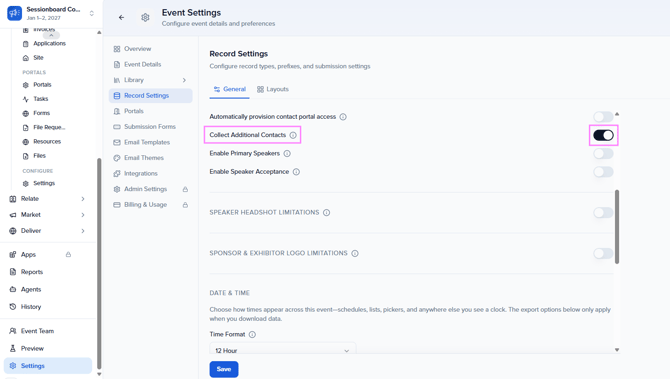
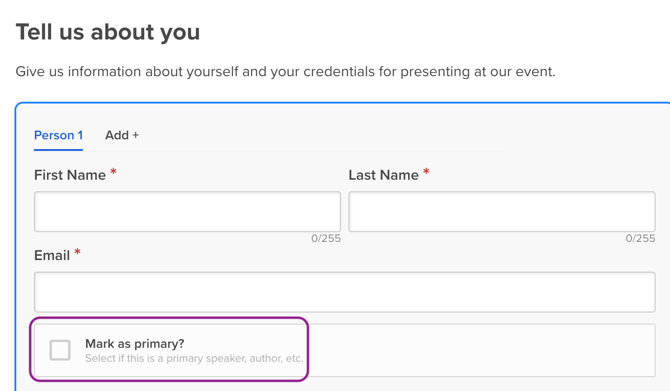
- Enable Primary Speakers: Turn on the ability to denote specific speakers (or authors) as 'Primary' across your sessions. This will help you understand who the primary point of contact is and who to feature for a given session or abstract.
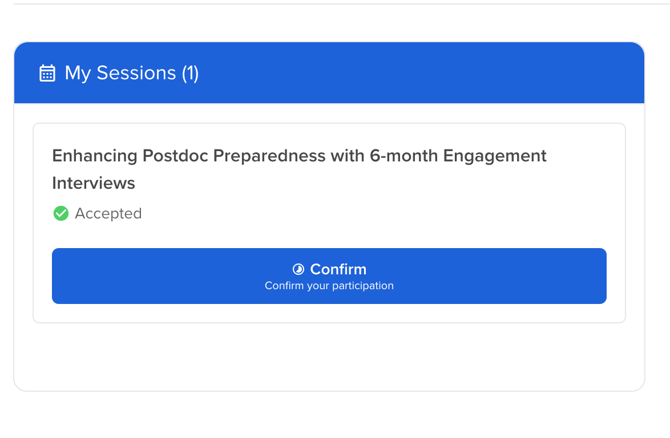
- Enable Session Speaker Acceptance: Allow speakers to accept or decline their participation in each accepted session through their portal.
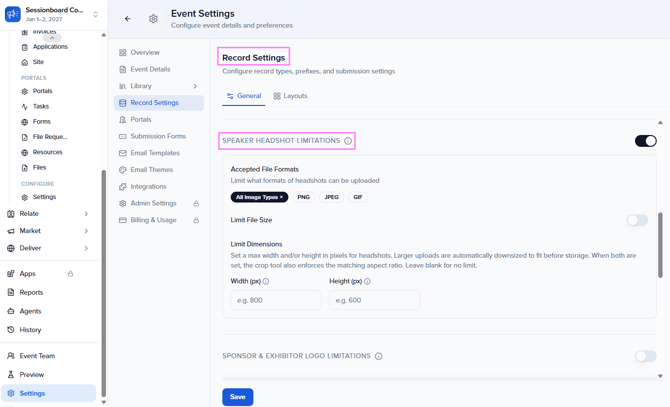
- Enable Speaker Headshot Limitations: Control what type of files and maximum file size for headshots being uploaded to your event. This will not auto-downsize the images; it will only prevent headshots from being uploaded, providing portal users with instructions on why the image wasn't allowed.
- When enabled, this will apply restrictions to Submission Forms, Portal Forms, Application Forms, and Edit Profile functionality for admin and portal users.
- You can now also specify allowed headshot dimensions — Height × Width, Height only, or Width only (for example, 300 × 300). These values set default crop max/min restrictions for headshots uploaded across the event, helping keep speaker headshots visually consistent.
- Headshot Limitations are configured event-wide under Record Settings and apply to all places a headshot can be uploaded (submission forms, portal forms, application forms, and Edit Profile). There is no perform override.
- Enable Sponsor & Exhibitor Logo Limitations: Control what file formats, file sizes, and dimensions are accepted for sponsor and exhibitor logos uploaded to your event.
Accepted File Formats: Restrict uploads to All Image Types, PNG, JPEG, or GIF.
Limit File Size: Optionally cap the maximum file size for uploaded logos.
Limit Dimensions: Set a max width and/or height (in pixels). Unlike Speaker Headshot Limitations, larger logo uploads are automatically downsized to fit rather than rejected. When both width and height are set, the crop tool also enforces the matching aspect ratio. Leave blank for no limit.
Sponsor & Exhibitor Logo Limitations are configured event-wide under Record Settings and apply everywhere a sponsor/exhibitor logo can be uploaded.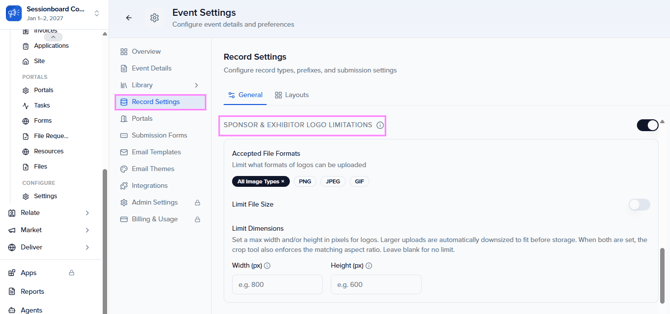
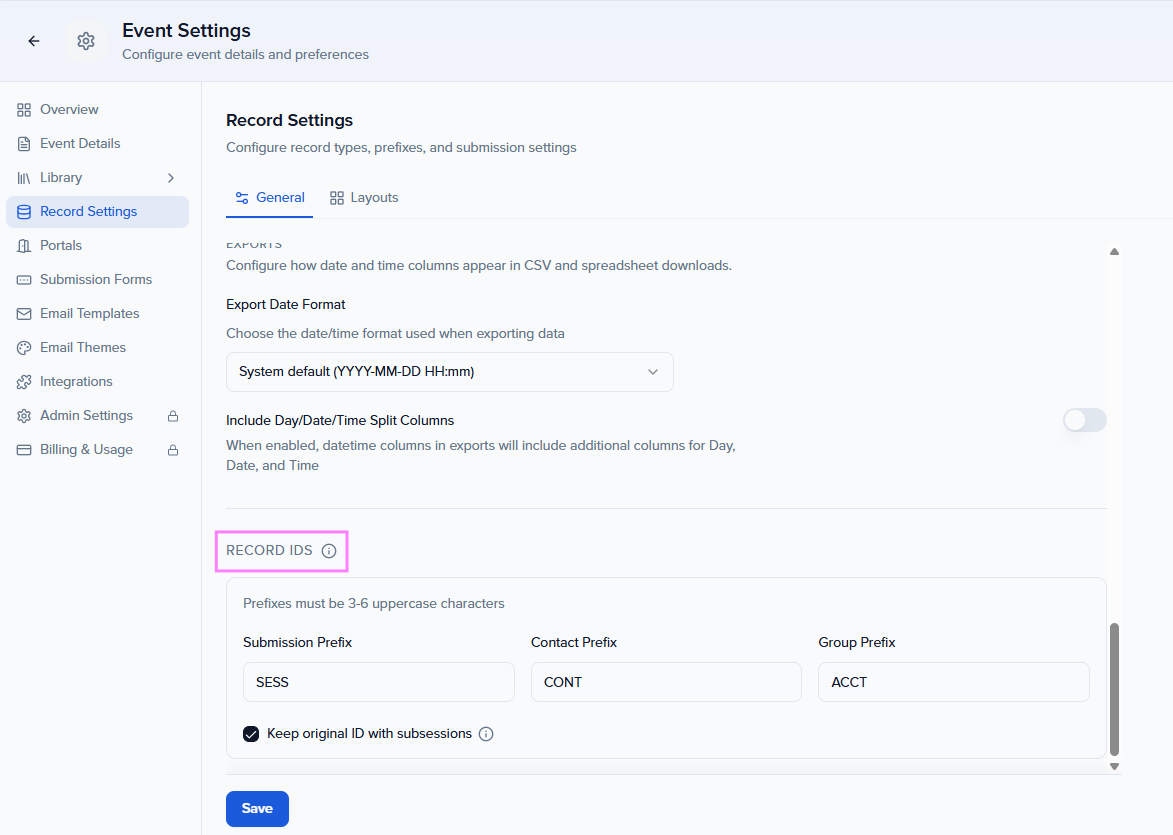
- Record IDs: Configure the prefixes used to generate unique record IDs across your event.
Submission Prefix / Contact Prefix / Group Prefix: Set a 3–6 uppercase character prefix used when generating IDs for submissions, contacts, and groups (e.g., sponsors/exhibitors) respectively.
Keep original ID with subsessions: When enabled, subsessions retain the same record ID as their parent session instead of generating a new one.