
There are 4 steps to accomplish before you can share your portal with your event contacts & groups:
- Create Portals/Assign Filters
- Create & Assign Tasks & Resources
- Configure Settings
- Customize Appearance
SHARE YOUR PORTAL!
Now that your portal is created and configured, it is time to share it with your portal users.

Step One: Create Portals/Assign Filters
REMINDER: Portals are not only for Speakers. All event contacts and groups are assigned to a portal. As an admin user, you can control which portal they get assigned to by using filters.
By default, there will be a Default Portal (i.e. Default People Portal, Default Exhibitor Portal, Default Sponsor Portal) within every event. This is a 'catch-all' portal for users/groups who do not match the filters set for any custom portals you create.

- Default People Portal > ALL users in the Contacts module
- Default Exhibitor Portal > ALL groups in the Exhibitor module
- NOTE: Only visible if you have access to the Exhibitors module
- Default Sponsor Portal > ALL groups in the Sponsor module
- NOTE: Only visible if you have access to the Sponsors module
TIP: Event admins are welcome to use the default portals if all their event contacts/groups have the same tasks to complete and resources to view.
To filter this portal so that tasks are only showing to accepted speakers, toggle off the Always Show Tasks setting - see Step Two for Portals (Legacy) or Step Three for Portals (Pro).
Custom Portals
What are custom portals?
Custom Portals are tailored portals created to streamline the experience for specific users and groups. Admins can create custom portals using filters to control who is assigned allowing you to dynamically tailor the portal experience based on specific criteria such as contact role (Speaker vs Moderator), session type (Breakout Session vs. Keynote), or sponsor tier (Gold vs. Silver) to name a few. This ensures users are only seeing information relevant to them
👉🏾 Learn how to create custom portals.
Step Two: Create & Assign Tasks & Resources
Next, it is time to create and assign tasks and resources for contacts/groups to view in their portal.
Assign Tasks & Resources
There are three types of tasks and two ways to share resources with your contacts/groups.
Task Types
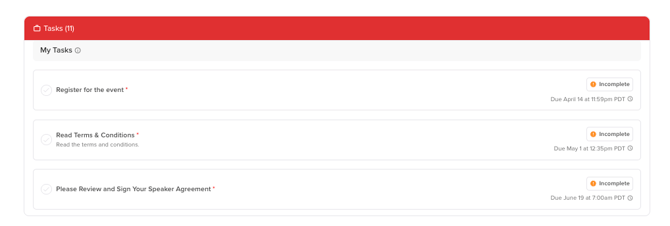
-
Task: a general action item assigned to a user within the portal that they need to complete by a specified deadline.
- Example: Register for the event
-
File Request: a specific type of task that requires the user to upload a document, image, or other files directly within the portal.
- Example: Upload contract
-
Form: a structured way to collect detailed responses from users through fields like text inputs, dropdowns, checkboxes, and file uploads.
- Example: Provide a headshot & biography
Share Resources

- Files: a static document that users can download and view
- Example: PowerPoint Template
- Wiki Pages: a dynamic, editable page hosted within the portal that allows for real-time updates and is viewed in the platform by contacts/groups.
- Example: Know Before You Go (everything you need to know before event day)!
TIP: You can edit the portal settings by selecting the ellipses on the right of the portal you want to customize and clicking 'Edit Tasks '.

Step Three: Configure Settings
Portal Settings allows you to manage session, task, and contact visibility, as well as reminder emails.


- Control Session Visibility: Display sessions to portal users. If unchecked, portal users will not see the sessions they are associated with.

- View Session Submission Form from Portal: Let users access their submission via the submission form
IMPORTANT❗️: If you are not using the session submission form to collect session proposals for your event, you may want to consider disabling this setting.
-
Always Show Tasks: Display portal tasks to all users. If unchecked, tasks will only be visible to speakers with approved sessions.
IMPORTANT❗️: When this setting is disabled, tasks and resources will ONLY show to accepted speakers. Contacts/Groups that do not match this criteria (i.e. moderators or gold-level sponsors) will not see any tasks or resources within their portal. - Extend Task Deadline: Allow contacts/groups to complete past-due tasks for a specified time. When enabled, contacts/groups can complete ALL assigned tasks up to 31 days past the tasks assigned due date. The original task due date will still be visible to the portal user in the portal, but tasks will remain with a status of OPEN.
NOTE: The Extend Task Deadline settings can not be applied to individual task items. Admins can edit the due dates assigned to each task individually. - Manage Profile: Allow portal users to view and edit their profile information (i.e. name, headshot, biography, address, social media links).

- Manage Related Sessions and Participants: Allow portal users to edit related sessions and participant information.
- Send Weekly Digest Email: Send a weekly email summary of portal actions and upcoming tasks by their due date.
- View Automated Emails to see an example of this email.
- Email Notifications: Send an email to primary contacts when tasks are assigned to this portal.
- View Automated Emails to see an example of this email.
TIP: You can edit the portal settings by selecting the ellipses to the right of the portal you want to customize and clicking 'Edit Settings '.

Step Four: Customize Appearance
Portal Appearance allows you to customize the portal’s look and choose which session and contact fields are visible.
TIP: You can edit the appearance settings by selecting the ellipses to the right of the portal you want to customize and clicking 'Edit Appearance '.

General
- Set a welcome message that all users assigned to this portal will see.
- Use an accent color to customize the widget header color.
- Add a logo and background image specific to the portal you are configuring.
- Make the background image full-width from the Settings Module.

IMPORTANT NOTE❗️: Don't forget to click the Save button once you have finalized your portal's general appearance settings.

Manage Fields
For each portal, admins may manage which fields portal users may edit and see for both their contact and session information.
- Contact Fields
- As an admin, decide which information you would like your portal users to be able to see and/or edit from their profile by using the button Show/Hide Fields on the right side of your screen.
- Select the ellipses to the right of a field to either:
- Lock: The field will be view-only and not editable.
- Show/Hide Fields: This field will not be accessible to the portal user if not displayed in this list

- Session Fields
- As an admin, decide which information you would like your portal users to be able to see and/or edit for each session by using the button Show/Hide Fields on the right side of your screen.
- Select the ellipses to the right of a field to either:
- Lock: The field will be view-only and not editable.
- Show/Hide Fields: This field will not be accessible to the portal user if not displayed in this list
