Speaker CRM: Communications
This guide applies only to organizations that have the Speaker CRM enabled.
Have questions or want to receive pricing for the Speaker CRM? Contact support@sessionboard.com.
Email templates and email sending from the CRM transform how organizations communicate, making it faster, more targeted, and more impactful. By combining the efficiency of templates with the CRM’s data-driven capabilities, you can scale your outreach efforts while maintaining a personal and professional touch.
Email Templates
To create a template, navigate to Settings > Email Templates and click the orange "+ Add" button at the top right-hand corner of your screen.
There is no limit to how many templates you can create. Templates will be ordered alphabetically (A-Z) by the template name.

NOTE: Email templates created within an event are not accessible from the CRM and vice versa.
Within the pop-up window, customize your email to include:
-
Template Name: Internal Name
-
Reply To: The email address that should receive replies to the email sent. We recommend using a shared inbox or an event-specific email address. This field only supports one email address.
-
Subject Line: The subject line of the email
-
Message Body: Customize the body of the email with the use of merge tags to pull in dynamic contact details, as well as links. This will allow you to send emails in bulk with a personalized touch.

Edit, Delete, and Duplicate Templates
To manage the actions for an email template, select the three dots to the right of the template name.

Example Email Template
- Speaker Invitation
- Purpose: Invite potential speakers and outline the next steps for how to submit a session proposal.
Creating & Sending Emails
By default, all emails will be sent from "no-reply@sessionboard.com". If you would like to have a customized email domain, please contact support@sessionboard.com.
- Within the Contacts module, select the checkbox to the left of the contact(s) to email and select either the Communicate or Invite to event button at the top of the page.

- Communicate: Create a custom email to tailor communications for specific contacts
- Invite to event: Send an email inviting contacts to submit a session idea for an upcoming event.
- Within the pop-up modal, indicate your email recipient (Send to), a reply to email (email responses should be sent to), and build your email subject line and message body (or insert a message template).

- Once you have built your email, select either the orange 'Review' button to preview what your email will look like before it is sent or the 'Skip Review and Send' button to skip reviewing the email and proceed with sending.
- NOTE: Additional contacts will receive their own email and will not be copied on the email received by the main event contact (i.e. Speaker).
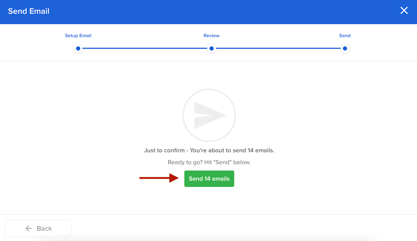
- When you are ready to send your email, select the green 'Send email' button.

History
The Emails page within the History module provides a comprehensive log of all email communications created and sent through the platform by event team members.
NOTE: The history log will not include system-generated emails.
Tabs (Campaigns & Sent Emails)

- CAMPAIGNS
An email campaign is a coordinated series of emails sent to a targeted group of recipients with a specific purpose. Email campaigns might be used to notify speakers of important deadlines, share acceptance updates, or guide them through the submission process. Campaign performance is tracked using metrics such as open rates, click-through rates, and delivery status.
Each row represents an individual email campaign with the following columns:
-
Subject Line: Title of the email (click to view campaign details).
-
Module: What module the campaign was sent from (i.e. Sessions, Contacts, Sponsors).
-
Total Recipients: Number of people the email was sent to.
-
Unique Opens: Number of recipients who opened the email.
-
Sent By: Sender’s name
-
Sent At: Date and time the email was sent.
Clicking a campaign subject opens a popup model with campaign details:

-
Sent By: Sender's name.
-
Sent At: Date and time sent.
-
Recipients List: Link to view recipient(s).
-
Selecting “view recipients” displays:
-
Recipient Name
-
Email Address
-
Status: (e.g., Delivered)
-
Reason: If undelivered, shows reason.
-
-
-
Total Recipients / Unique Opens / Unique Clicks: Key engagement metrics.
-
Preview Panel: Visual of the email content for reference.
-
- SENT EMAILS
Displays individual sent email logs. Each entry on this page includes the following details:
-
Recipient: The name of the individual the email was sent to.
-
Email: The recipient’s email address.
-
Subject: The subject line of the email, with clickable links to preview the message.

-
Status: Indicates the current delivery status of the email (e.g., Delivered, Opened).
Email Status Definitions:
- Open - Successful delivery, the email has been opened by the recipient.
- Clicked - Successful delivery, a link in the email has been clicked
- Bounced - Not successful delivery, the incoming server rejected the email.
- Spam - The email was delivered, but is in the recipient's SPAM.
-
Sent By: The name of the user who sent the email.
-
Sent At: The date and time the email was sent.
The Emails page allows teams to track communication history, verify delivery, and troubleshoot email-related issues more efficiently. You can also search emails by recipient name or address using the search bar at the top of the page.
-
