A task is a general action item within the portal that a user or group must complete by a specified deadline.
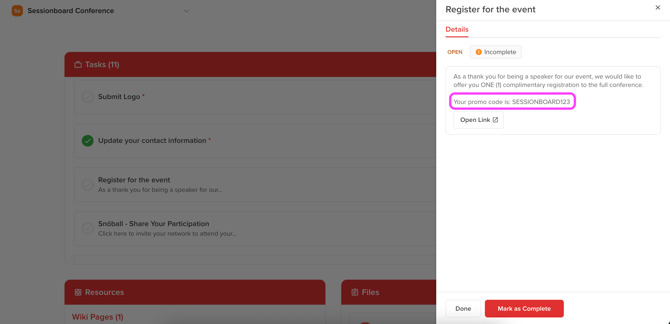
When creating a task, you can choose to display a shared description and task link that will be visible to all portal users, or you can use a field that displays a unique description and task link for each user. This allows the content of the task to be personalized per user.

Use the instructions below to learn how to share a unique description/task link for each user:
Create Custom Field (optional)
Before you create your task, it's important to ensure you know what field you want for the task description and task link. This field will display the unique description and/or link to your portal users.
You can either utilize a standard field provided by Sessionboard or create a custom field using the steps outlined below:
-
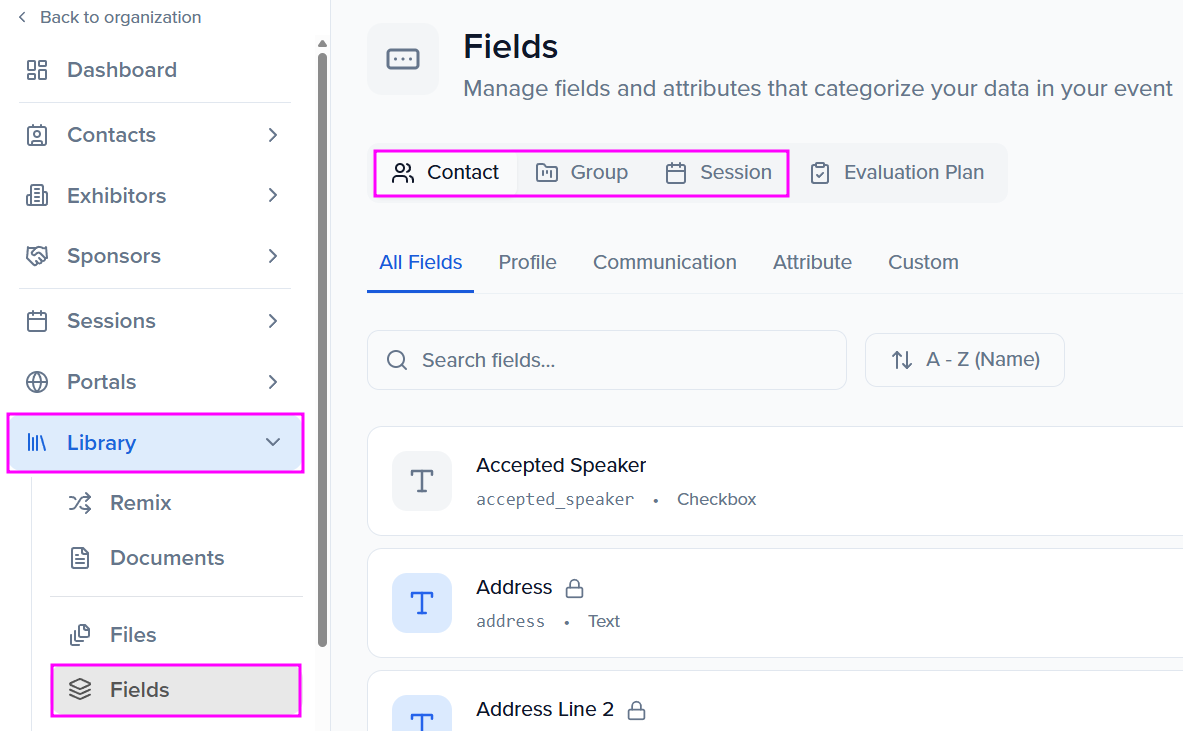
Within the Library > Fields module, select the appropriate field type at the top of the page based on the type of field you want to create: Contact, Group, or Session.
Contact Task - utilize a contact field
Group Task - utilize a group field
Session Task - utilize a session field
-
Click the + Add Field button in the top-right corner.

-
Within the pop-up modal, define the details of your new field by adding a field name and selecting the field type (i.e., dropdown, file, text, checkbox) from the dropdown menu.
NOTE: If you are creating a field for the task link, we recommend utilizing a text area field type. Links should be formatted with the http:// or https:// prefix (ex: https://www.sessionboard.com/).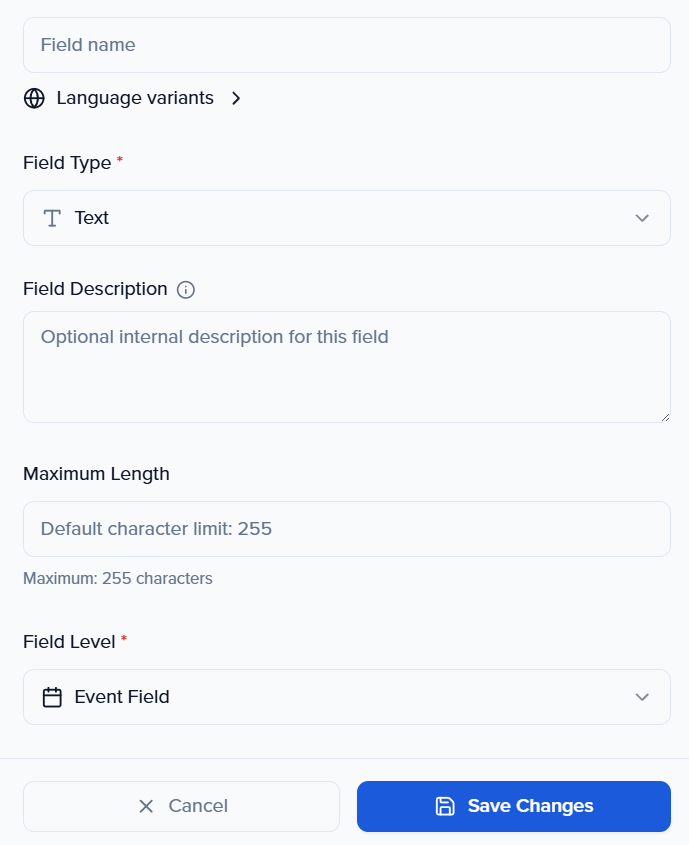
-
Once you’ve completed all the details, click Save Changes to add your new field. The custom field will now appear in the list of fields under the selected category and is ready to use.
Import Data to Custom/Standard Field
After creating a custom field or identifying the standard field you’d like to use, be sure to update all relevant records (e.g., contacts, sessions, or groups) with the information you want to display in the task description or as the task link using that field. You can do this manually or via import.
Follow the steps below to import data into the field(s) you plan to use.
- Navigate to the module that corresponds to the field you will be utilizing.
- Contacts Module > Contact Field
- Sponsors/Exhibitors Module > Group Field
- Sessions Module > Session Field
- Adjust your table view to include the following fields:
- Contacts Module
- First Name
- Last Name
- Custom/standard field(s) you will be using for the task
- Sponsors/Exhibitors Module
- Name
- Custom/standard field(s) you will be using for the task
- Sessions Module
- Session ID
- Title
- Status
- Custom/standard field(s) you will be using for the task
- Contacts Module
- Select Options > Export .CSV or Export .XLSX - This will serve as your import template.
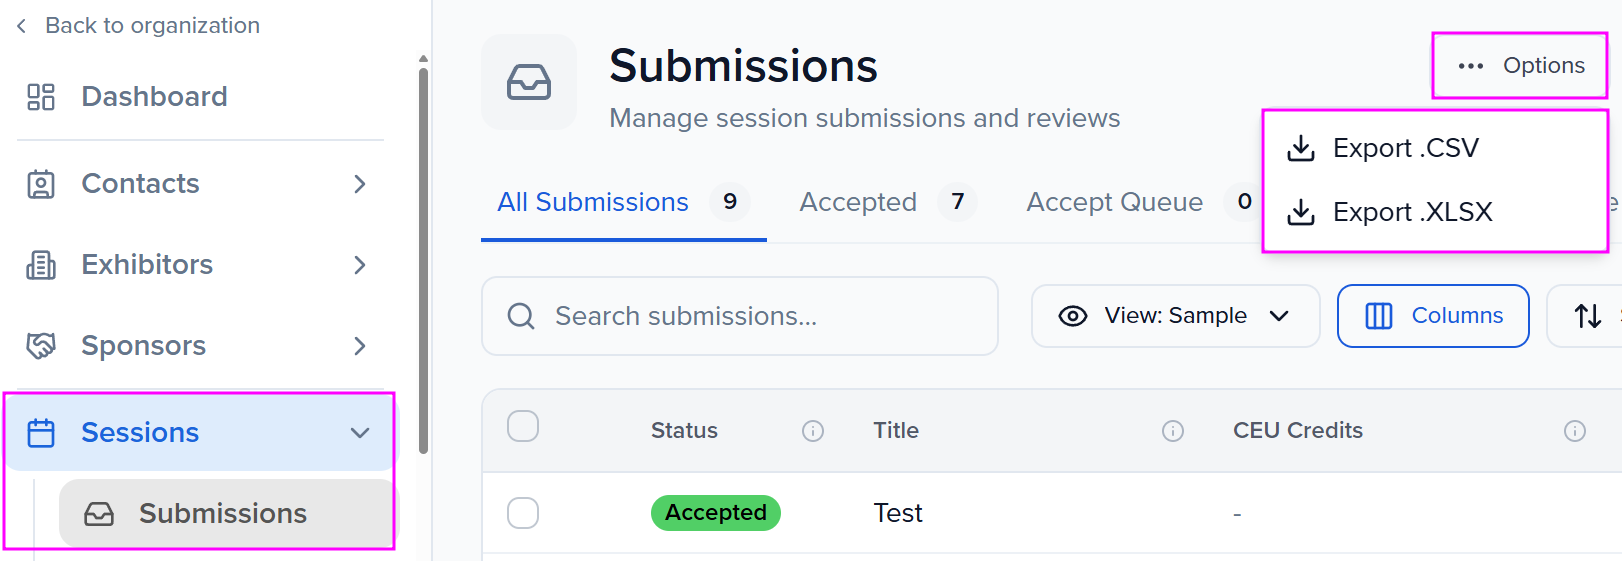
- Within your exported file, add a column with the title Update record if already exists associated with the word TRUE for each row.

- Add the missing data to the column you’ll use for your task description or link. This can be either a custom field you’ve created or a standard field available to you.
-
Once your file is complete, reimport it into your event.
NOTE: Use Ignore this column when mapping your fields to prevent overwriting existing data in fields you're not modifying.

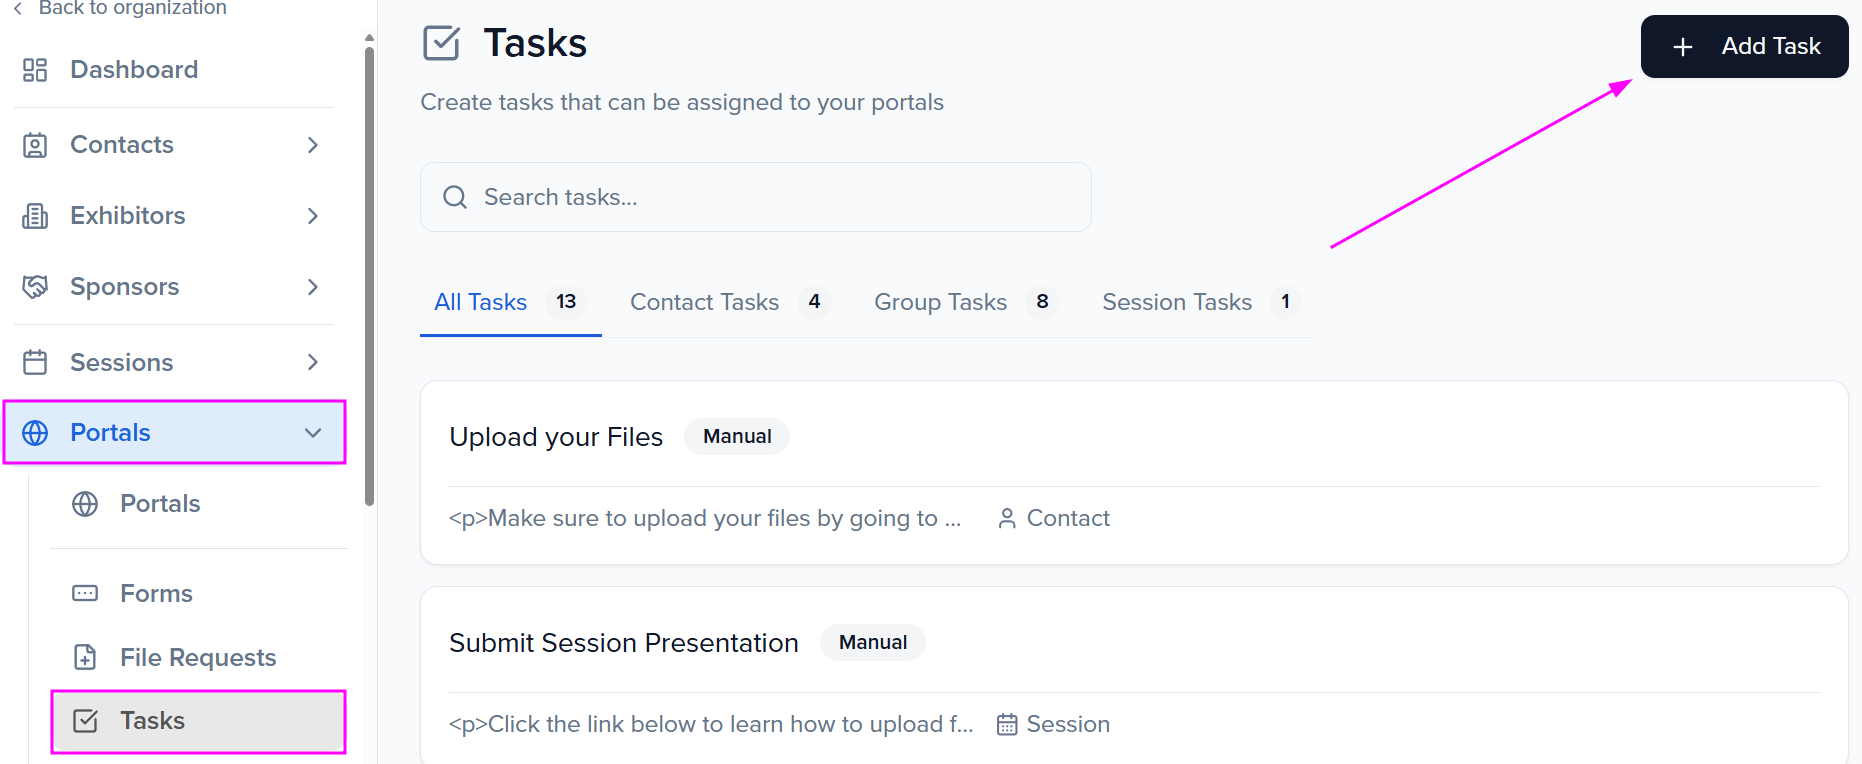
Now that you have created and added data to your fields, it is time to create the task to which you will connect the fields.
-
Navigate to Portals > Tasks and select the +Add Task button on the right-hand side of your page.
-
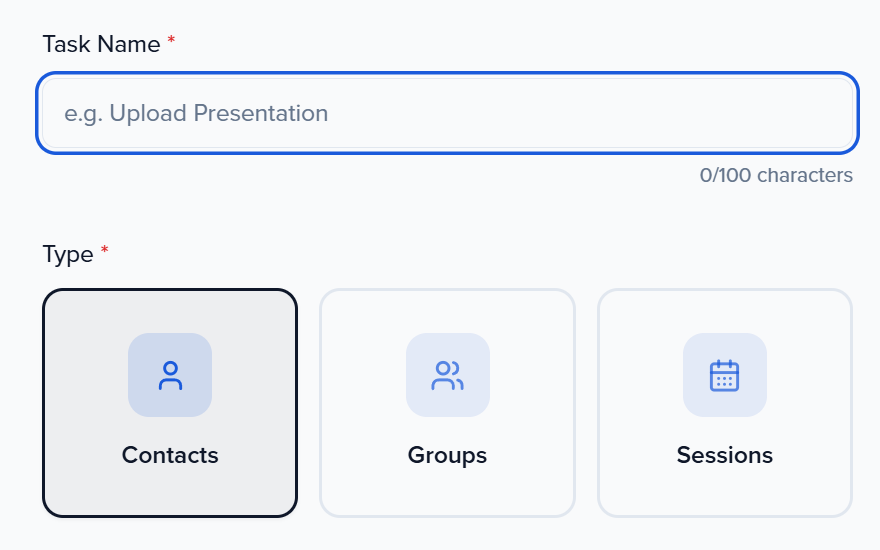
Within the pop-up, add a task name and select the type of task you are creating.
-
For the field Description, select the option Use Field.
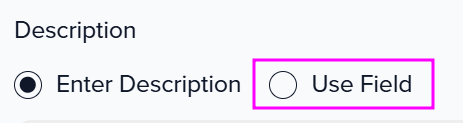
- Within the pop-up, select the field you would like to use as the task description

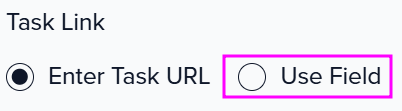
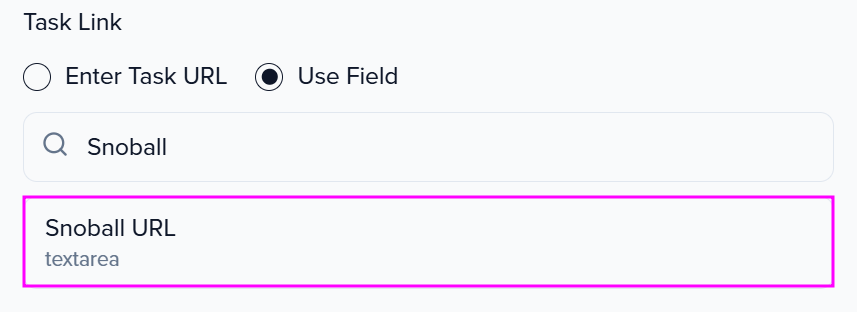
- For the field Task Link, select the option Use Field.
- Within the pop-up, select the field you would like to use as the task link
- Once complete, don't forget to click Create Task.