
The Additional Contacts feature allows anyone on your contact’s team—such as executive assistants and administrative professionals—to stay connected throughout the event. Additional contacts can be linked to a primary contact to be cc’d on all event-related emails, and they can also access the primary contact’s portal to view session details and complete tasks on their behalf.
- Additional Contacts Module View
- Creating Additional Contacts
- Sending Emails to Additional Contacts
- Access the Event Portal as an Additional Contact
Additional Contacts Module View
- From the Contacts module, access the 'Additional Contacts' module.

Creating Additional Contacts
💡Tip: You can import up to three additional contacts when importing primary contacts (e.g., speakers). When using the system-generated import template, the following fields are available to create additional contacts during import:
- Addtl. Contact First Name
- Addtl. Contact Last Name
- Addtl. Contact Email
- Addtl. Contact Role

-
Within the Contacts module, select the pencil icon to the left of the contact's name.

-
Within the contact's profile, navigate to the bottom of the page to locate the Additional Contacts widget.

-
Select the button + Add to the right of the widget to provide the details for the additional contact that should be associated with the event contact.

Do not forget to click the Save button once you are done!
Sending Emails to Additional Contacts
To email an additional contact, you must first start the email process by selecting the primary contact (or the session associated with that primary contact) to which the additional contact is linked.
Example: If John is an additional contact for Arabella and you want to email John, you must first select Arabella to initiate the email process.


Following these steps ensures that emails are correctly routed to additional contacts according to your intended workflow.
Additional Contact Portal Access
Once an Additional Contact has been added to a Contact's record, they can now access the portal of their assigned contact.
Within the Portals module, select the ellipses to the right of a portal and select Copy Link.
💡Did You Know....all portals use the same link?

Once the link has been copied, share it with the additional contact by emailing them outside of Sessionboard.
When they access the portal, they will be asked to create a password if this is their first time using Sessionboard.

Once logged in, the Additional Contact will be able to select the portal they would like to view and manage tasks for.
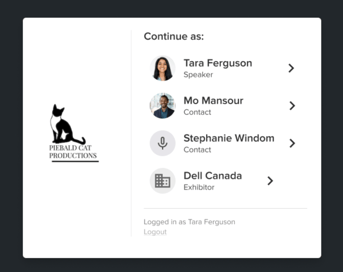
An Additional Contact assigned to more than one contact can access all contact portals using the same login credentials.
They will be able to select the account/portal they would like to access and view tasks and complete tasks on their behalf.
