
Sessions can be added to Sessionboard in one of two ways:
Below, you will learn how to add a session as an event admin without a speaker filling out the session submission form.
How to create a session manually
-
Navigate to the Sessions Module within your event and click on Submissions.
-
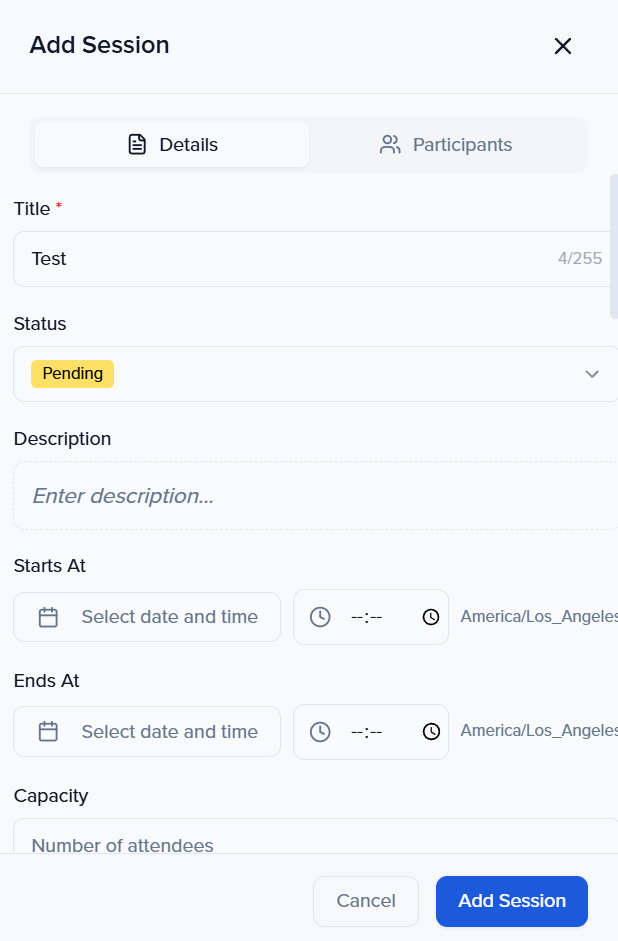
Click the Add Session button at the top right-hand corner of the screen.

-
Within the pop-up window, fill in all of the fields with the confirmed session information.
-
Details: Session details
-
Participants: Session speakers, moderators, sponsors, exhibitors or chairpersons
-
If a speaker, sponsor/exhibitor, or chairperson/moderator does not appear when you search their name, you will need to first create them as a contact within the “Contacts” Module.
For step-by-step instructions, see how to Add & Delete a Contact here.
-
-
-
-
-
Click Add Session at the bottom of the pop-up window once completed.
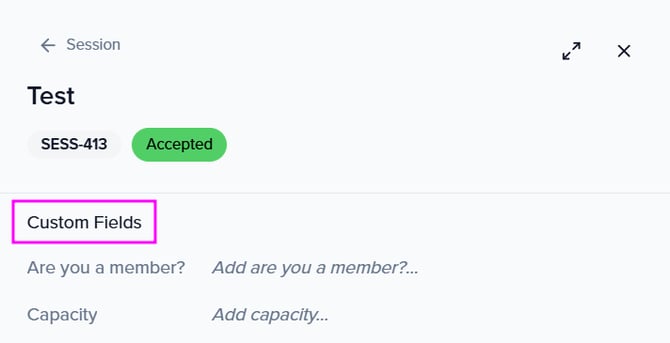
Custom Fields
If you need to add data to a custom field for your new session...
- Create the session (Title & Status are two required fields when creating new sessions).
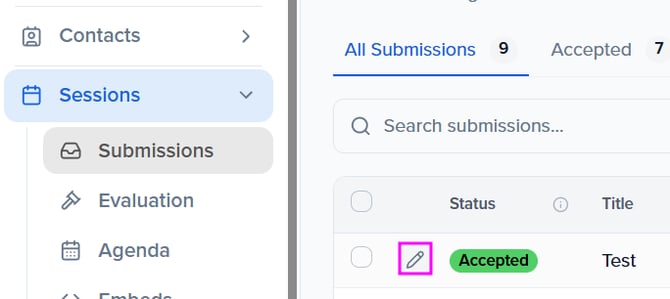
- Once your session is created, select the pencil icon to the left of the session to open the session profile.
- At the bottom of the page, locate your custom fields to add data.
- Make sure to save the session once completed.
TIP: You can also add data to custom fields by adding the field to your dashboard view and clicking on the field to make the appropriate edit.