
📝 Form Examples:
-
Submit Event Audio/Visual Needs
- Accept/Decline Speaker Invitations
-
Agree to Event Terms & Conditions
-
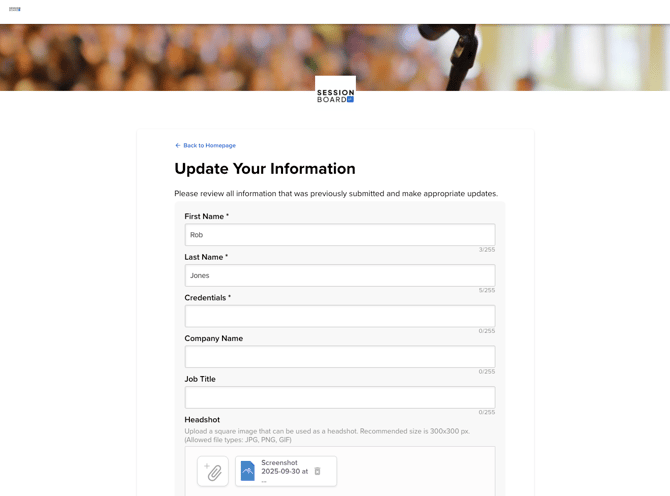
Confirm Speaker Details (i.e. Name, Job Title, Company Name, Headshot, Bio)
-
Collect Sponsor/Exhibitor Logos
- Create a Form
- Assign a Form to a Portal
- View Form Completion Status Per Contact/Group
- View, Filter & Export Form Results
- Frequently Asked Questions
Create A Form
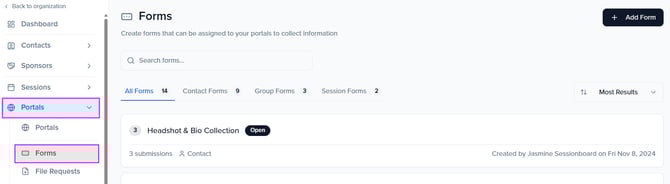
Navigate the Portals module and select Forms.
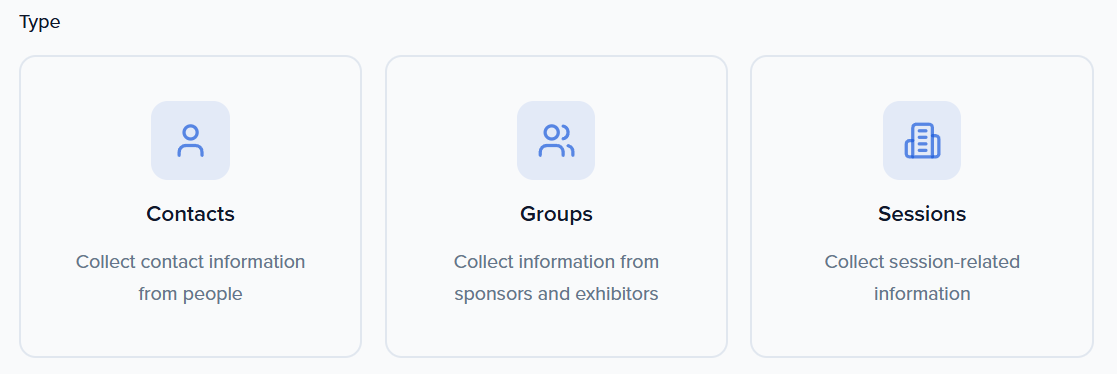
Select the Add Form button and add the form's title, as well as select whether the form will be assigned to individuals, groups, or sessions. Once complete, select the Create button.
-
Contacts = Speakers, Moderators, Chairpersons, Session Submitters, Exhibitor & Sponsor Contacts
-
Groups = Sponsors & Exhibitors Groups
-
Sessions = Sessions
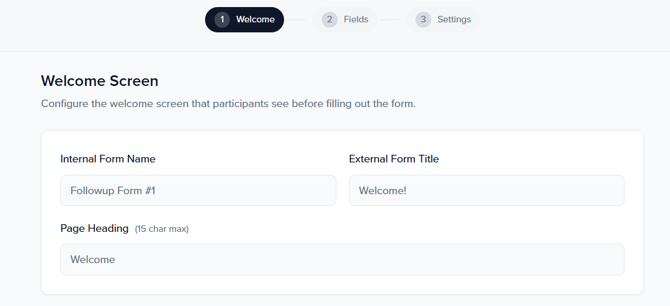
Edit the portal form's three pages: Form Set Up, Form Questions, and Form Settings.
Form Setup
- Internal Form Name: Internal name only visible to back-end users
- External Form Title: External Title that will be visible to contacts/groups within the portal
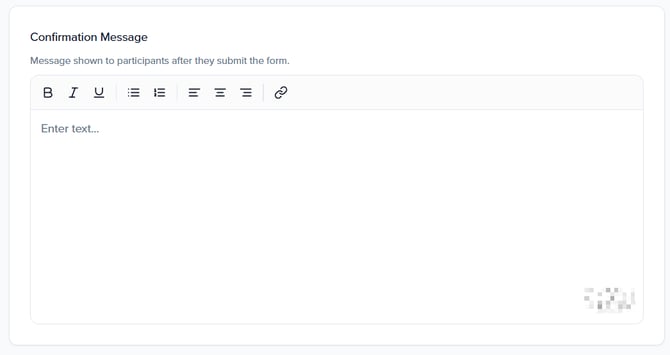
- Page Heading: Form header displayed at the top
Form Questions
Collect information about the individual or group by adding a section title, description/instructions, and form questions.
To add a question, use the + Add Field button. You can search for existing questions or create a custom question.

🤔 Did You Know...
If pre-existing contact, group, or session data is available for questions/fields added to a form (e.g., First Name, Last Name, Company Name, Session Title), the portal user will be able to review and update that data when they open the form.
Form Settings
A confirmation email can be sent to form submitters once the form has been submitted. In addition, a PDF of their form results will be attached to the email.
|
Confirmation Email Example:
|

Assign Forms To A Portal
Now that you have created your form, it is time to assign it to the respective portal.
Note: Forms can be assigned to more than one portal.
-
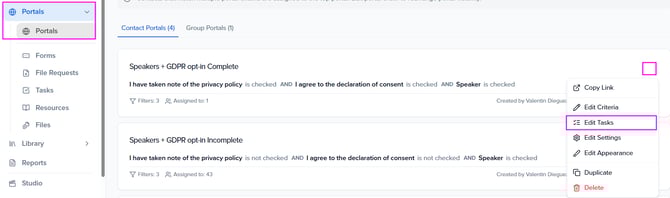
Within the Portals module, select the ellipses to the right of the portal you would like to assign the form to and select Edit Tasks.
-
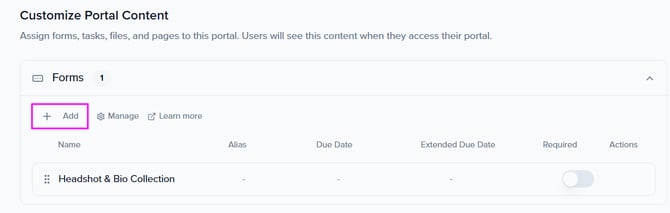
Within the Forms widget, select the Add button to open a pop-up window. This will show any forms you have created to select and assign to your portal.
-
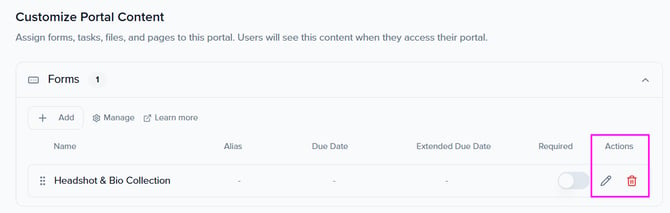
Once the form has been assigned, you can edit additional settings by selecting the pencil under Actions.
-
Form Title Alias: Adjust the name of what the form will be listed as in the portal
-
Due Date: Assign a due date to each form that the portal user can track.
- Extended Due Date: Allow form completion beyond the regular due date.
-
Allow edits: Allow for edits after a form has been submitted.
-
Mark this form as required: Forms can be marked as required by toggling ON this button.
-
Make Completed Tasks View-Only: Forms will be set as closed after they are completed.
-
g. Assign By Filter (Session Tasks Only): Apply a filter to a session task so that the task is only visible for sessions that match the filter(s) applied.
Note: A maximum of three (3) filters can be applied to a session task.
- EXAMPLE: Track is Leadership > contacts/groups associated with a session, and the session track is Leadership; will see this task.
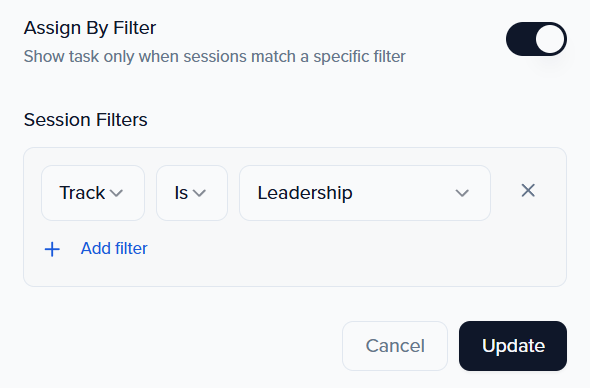
Once complete, ensure to click the Update button in the bottom right-hand corner.
View Form Completion Status Per Contact/Group
Within your module (speaker, session sponsor, or exhibitor), edit your view by adding the form reporting field(s). This will inform you of who has completed the form and who hasn't. Don't forget to save the view when you are done😊

| Task Icons | |
| Green Check Mark
|
Task is complete |
|
Yellow Clock |
File Request pending approval (new submissions AND declined submissions) |
|
Orange Checklist |
Task assigned manually (not completed) |
|
Blue Circle |
Task assigned via portal (not completed) |
|
Grey Plus Sign |
Task not assigned |
View, Filter & Export Form Results
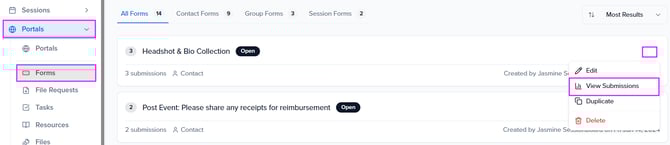
Navigate to Portals > Forms and click the ellipses to the right of the form to select View Submissions.
To export form results, select Options to download results on a file.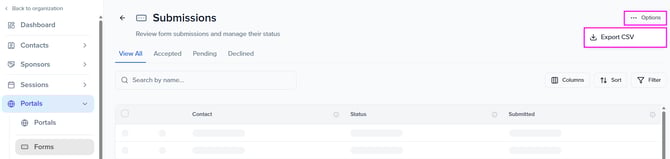
💡TIP: You can also customize your form results page or exported reports by using Columns to select which fields are visible, and apply Filters or Sorting options to keep your view organized.
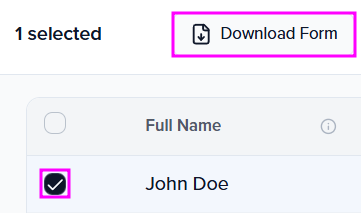
To download a PDF version of your form(s), use the check box next to the submission and click Download Forms.
IMPORTANT NOTE❗️: You must have Send Confirmation Email enabled within the form settings to download the form results as a PDF.
Bulk Download Files from File Fields
If your form includes a file field (e.g., to collect logos, signed agreements, or other uploaded documents), you can download all submitted files in bulk as a single zip file. Sessionboard will bundle the files and email you a download link when the bundle is ready.
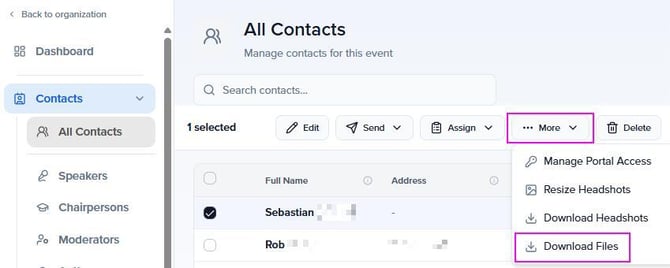
- Within the Contacts (or Speakers, Sessions, Sponsors, or Exhibitors) module, select the contacts/records whose files you want to download using the checkbox next to their name.
- At the top of the page, select More > Download Files.
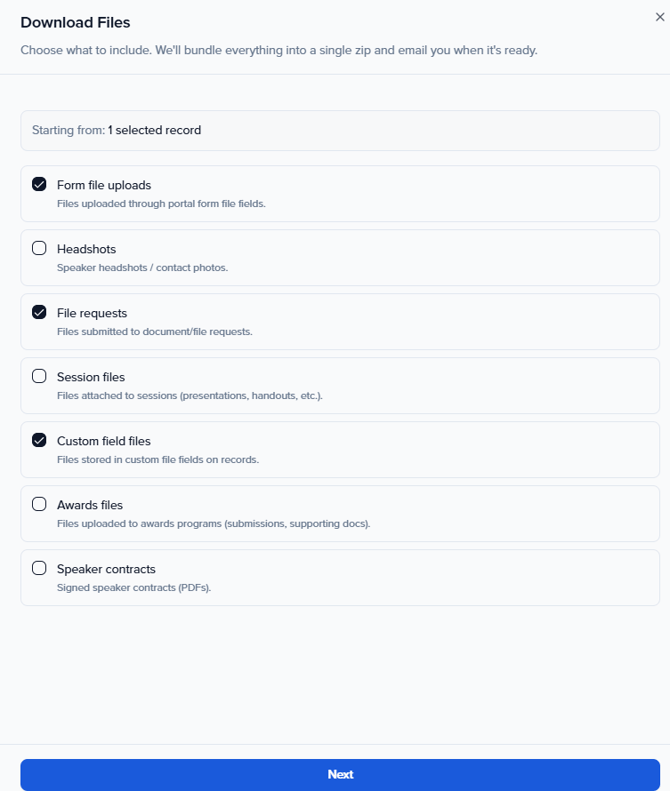
- In the Download Files modal, check Form file uploads — Files uploaded through portal form file fields.
You can also select any other file types you want to include in the same bundle:- Headshots — Speaker headshots/contact photos
- File requests — Files submitted to document/file requests
- Session files — Files attached to sessions (presentations, handouts, etc.)
- Custom field files — Files stored in custom file fields on records
- Awards files — Files uploaded to awards programs (submissions, supporting docs)
- Speaker contracts — Signed speaker contracts (PDFs)
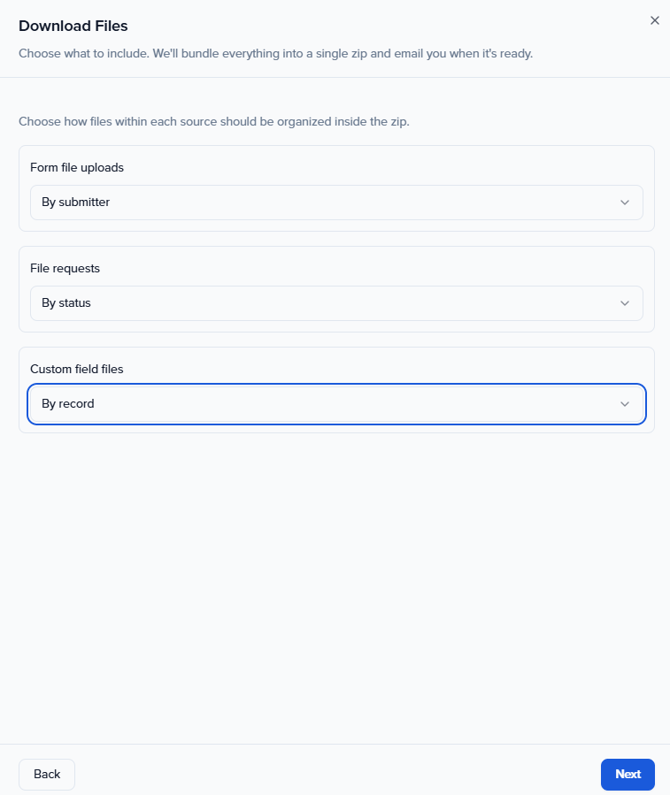
- Click Next. Choose how to organize the files within the zip. The options available will vary depending on the file types you selected in the previous step:
- By submitter — files grouped into folders by each contact's name
- By field — files grouped into folders by form field name
- By record — files grouped by individual record
💡 TIP: The modal shows an estimated file count and size before you generate the download; use this to confirm you've selected the right records and file types.
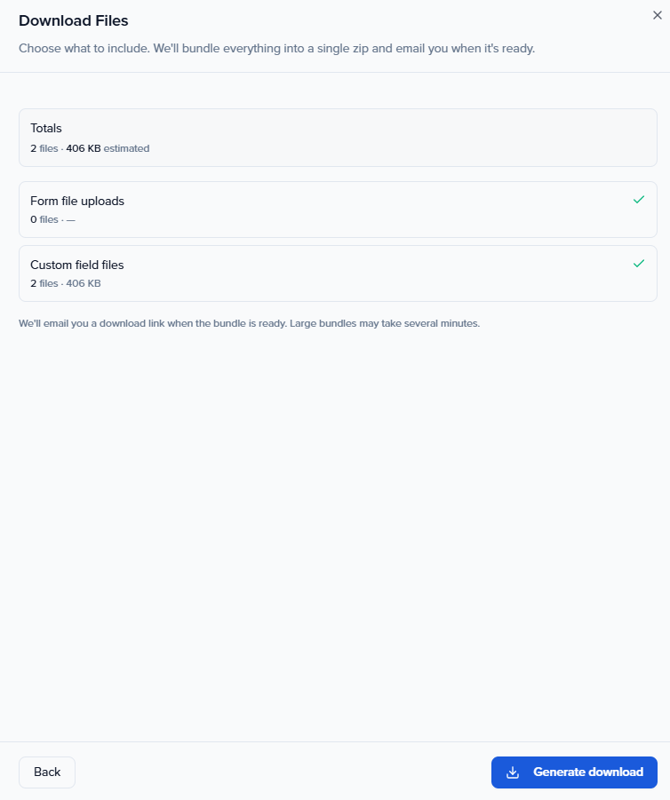
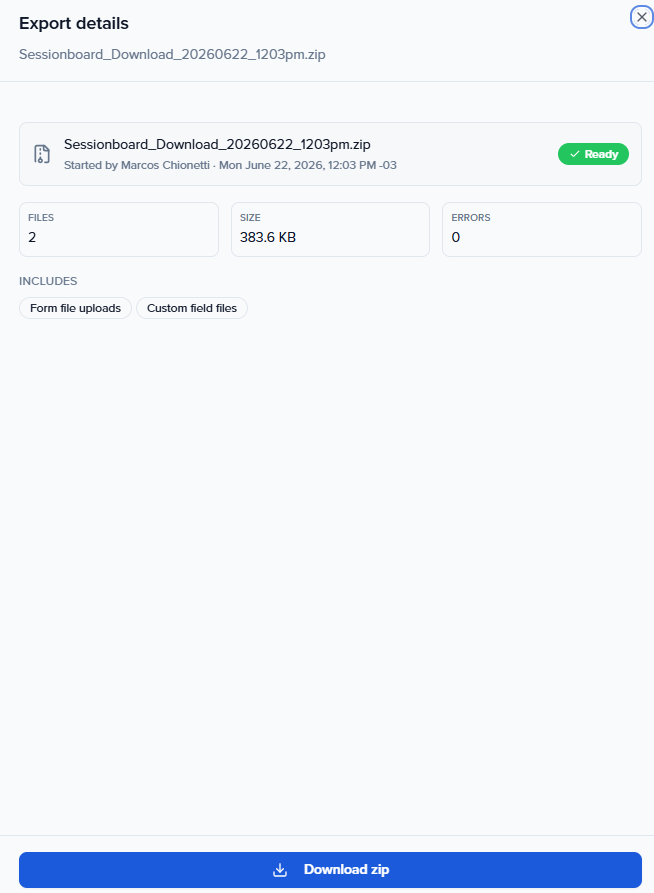
6. Click Generate Download. Once the bundle is ready, an Export details screen will appear showing the file name, size, and number of files included. Click Download zip to save it to your device.
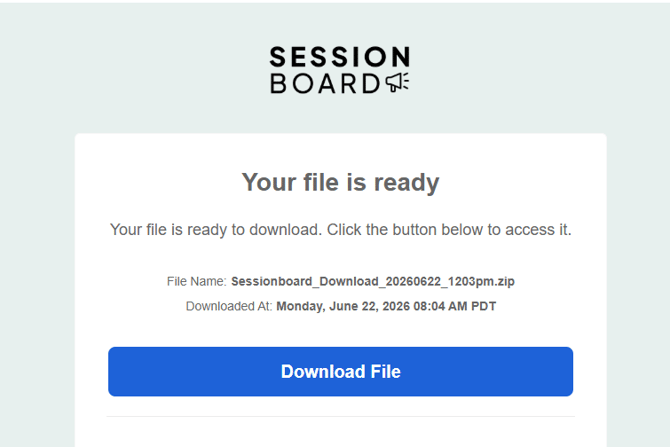
7. You will also receive an email from Sessionboard with the subject "Your file is ready" containing a Download File link, handy if you close the modal before downloading.
Note: Only files submitted through file-type fields within the form are included in this download. Text, dropdown, and other field types are not included — use Export as CSV/XLSX for those.
Frequently Asked Questions
Q: Will an event admin receive a notification when a form has been submitted?
-
Event admins will not receive an email; however, they can view the results of forms by navigating to Portal > Forms > Click on the ellipses on the form you are working on and clicking the button "View Submissions."
Q: Is there a limit to the number of forms you can create?
- No, create as many forms as you need!