
A task is a general action item within the portal that a user or group must complete by a specified deadline.

✅ Task Examples
-
Register for the event
-
Reserve your hotel room
-
Attend a pre-event call
-
Access the event mobile app
IMPORTANT NOTE❗️: If a task requires contacts or groups to visit a third-party site to complete an action (e.g., registering for an event), completing the action will not automatically mark the task as complete. Users must return to their portal and manually mark the task as complete to ensure it is properly tracked.
Create A Task
-
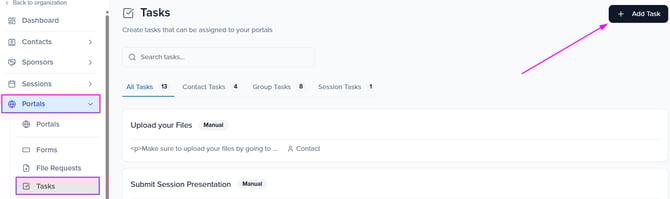
Navigate to Portals > Tasks.
-
After clicking the Add Task button, complete the following fields:
-
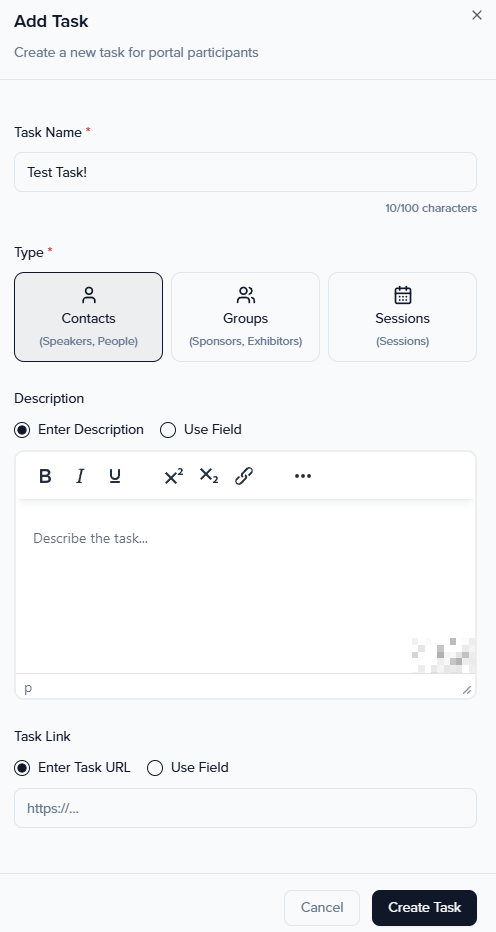
Task Name: Label the task so the portal user will know what action to complete.
-
Task Type:
-
Contacts = Speakers, Moderators, Chairpersons, Session Submitters, Exhibitor & Sponsor Contacts
-
Groups = Sponsors & Exhibitors Groups
-
Sessions = Sessions
-
-
Description: By adding a description, you can provide additional information that the portal user may need to complete the task.
-
Enter Description: With this option, the same task description will be visible to all contacts.
-
Use Field: With this option, the admin can select a pre-created contact or session field to show as the task description. The task description will be unique for each contact, showcasing the data for the field selected.
-
-
Task Link: Include a link to associate with the task (i.e. link to register for the event)
-
Enter Task URL: With this option, the same URL will be associated with this task for all contacts.
-
Use Field: With this option, the admin can select a pre-created field to use as the task URL. The task URL will be unique for each contact, redirecting the contact to their specific link when selected.
-
Note: Links should be formatted with the http:// or https:// prefix (Ex: https://www.sessionboard.com/)
-
-
-
Assign Task To A Portal
Now that you have created your task, it is time to assign it to the respective portal.
Note: Tasks can be assigned to more than one portal.
-
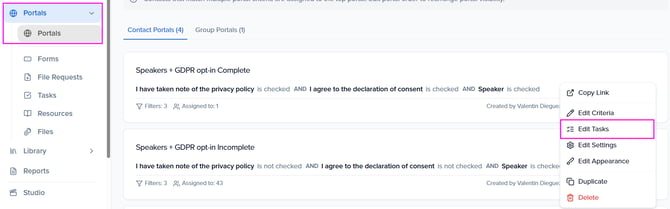
Within the Portals module, select the ellipses (...) to the right of the portal you would like to assign the task to and select Edit Tasks.
-
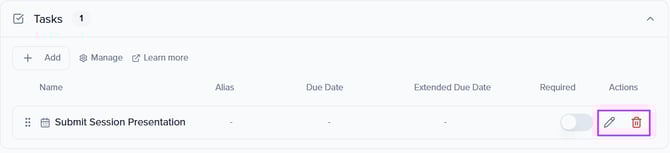
Within the Tasks widget, select the Add button to open a pop-up window. This will show any tasks you have created to select and assign to your portal.

-
Once the tasks have been assigned, you can edit additional settings by selecting the pencil under Actions.
-
-
Alias: Adjust the name of what the task will be listed as in the portal
-
Required: Tasks can be marked as required by toggling ON this button. This action can also be done from the portal's main menu.
-
Due Date: Assign a due date to each task that the portal user can track and receive notifications on.
- Extended Due Date: Allow task completion beyond the regular due date.
-
Make Completed Tasks View-Only: Tasks will be set as closed after they are completed. This will not allow contacts/groups to change their task to "Incomplete" after it is completed.
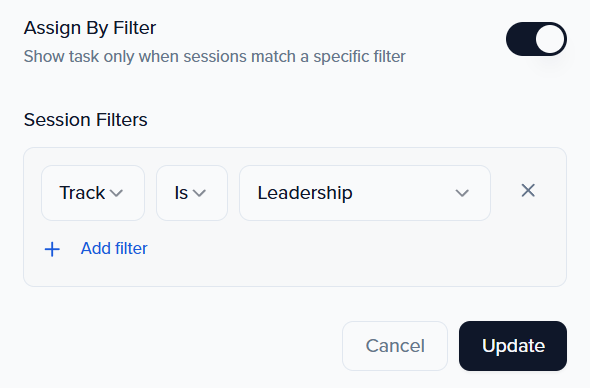
- Assign By Filter (Session Tasks Only): Apply a filter to a session task so that that task is only visible for sessions that match the filter(s) applied.
Note: A maximum of three (3) filters can be applied to a session task.
- EXAMPLE: Track is Leadership > contacts/groups who are associated with a session, and the session track is Leadership, will see this task.
- EXAMPLE: Track is Leadership > contacts/groups who are associated with a session, and the session track is Leadership, will see this task.
-
View who has completed the task(s)
Within your module (speaker, session sponsor, or exhibitor), edit your view by adding the task reporting field(s). This will inform you of who has completed the task and who hasn't. Don't forget to save the view when you are done😊

| Task Icons | |
| Green Check Mark
|
Task is complete |
|
Yellow Clock |
File Request pending approval (new submissions AND declined submissions) |
|
Orange Checklist |
Task assigned manually (not completed) |
|
Blue Circle |
Task assigned via portal (not completed) |
|
Grey Plus Sign |
Task not assigned |