
Sessionboard allows event organizers to collaborate with teammates through customizable roles and permissions. This guide will walk you through:
- How to invite team members to your event
- How to view and manage permissions for default roles
- How to create custom role
-
How to control field permission (who sees/edits which fields)
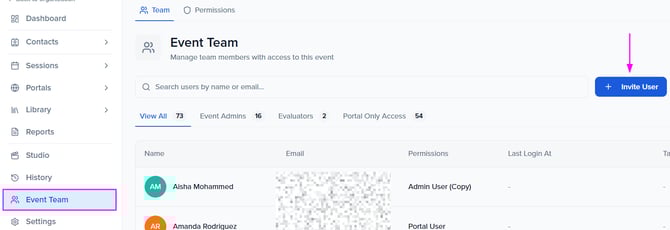
Inviting Team Members
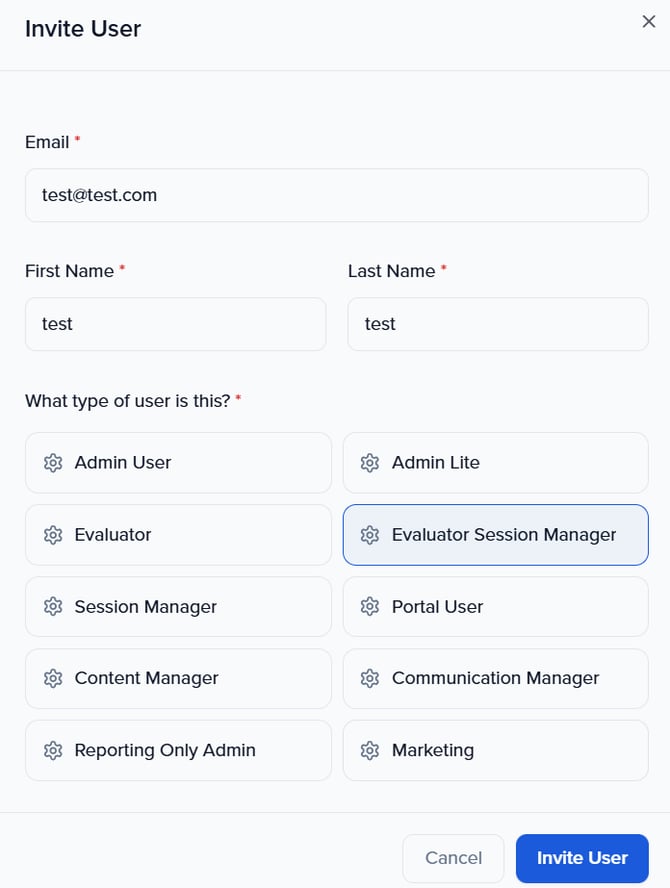
Within your event, select the Event Team module in the bottom left-hand navigation panel and select the orange Invite User button.
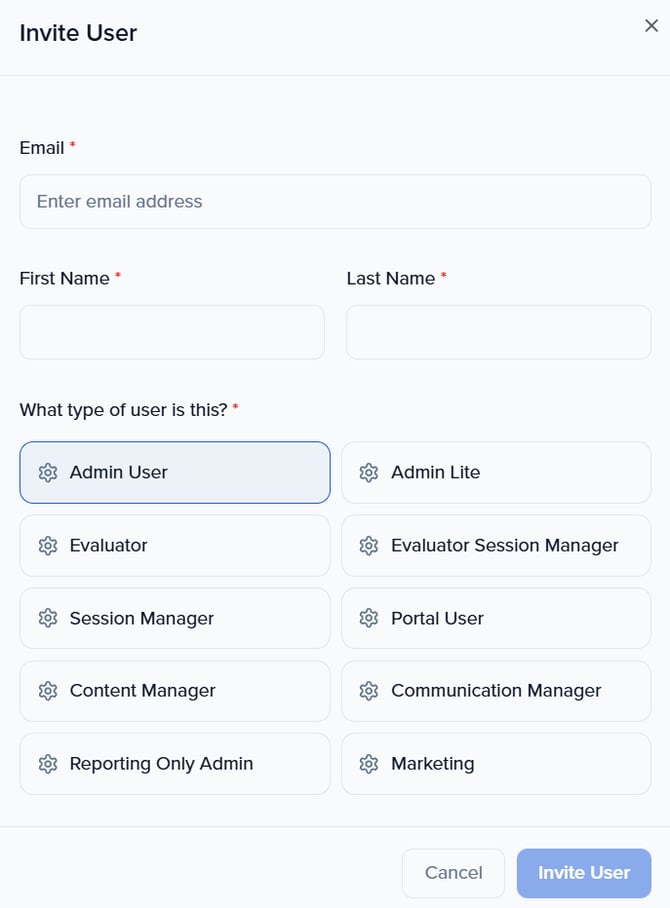
💡NOTE: Tags can be assigned to specific users and leveraged when creating and assigning users to evaluation plans. Learn more on how to create an Evaluation Plan.

💡NOTE: If the user is a Session Manager or Evaluator Session Manager, you will be instructed to select the Next button to assign them a filter.
Assigning a filter will restrict the sessions and speakers the team members will be able to see and manage. 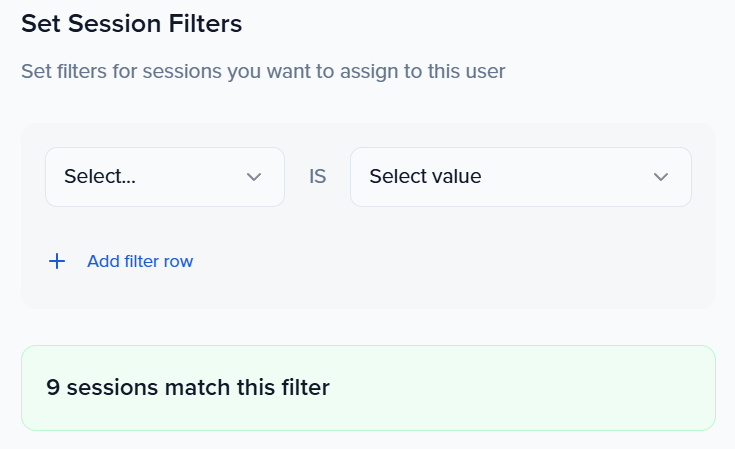
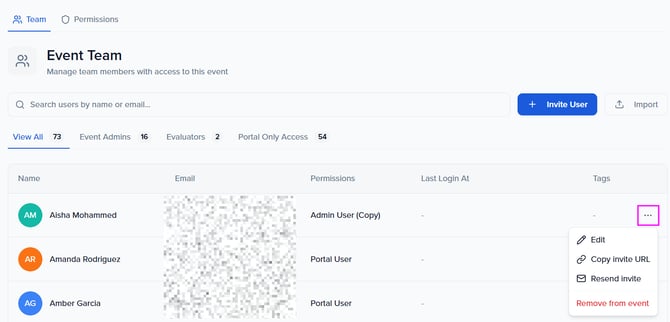
Manage Existing Users
For an individual team member, you can complete the following actions:
-
Edit: Change a user's name or permission type.
-
Copy Invite URL: If a user still needs to create an account in Sessionbaord, copy the invite URL to share with them. This is unique per invited user.
-
Resend Invite: If a user still needs to create an account in Sessionbaord, resend the invite email. This is a unique email invited user.
-
Remove: Remove a user from the associated event.
- Unlock Account: Once an incorrect password is entered five times, a user's account will be locked. Using actions, admins may unlock an account and prompt an automatic email to be sent with a link to the user where they may reset their password.
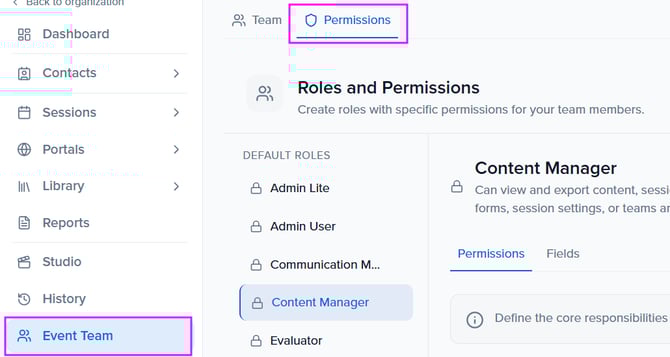
Default Roles
To view what each permission level has access to, navigate to the Permissions page and select the role type on the left-hand side of your screen.
💡Note:
- Default roles can not be deleted
- The role Portal User is assigned to all of your event contacts when they are created as a contact.
Custom Roles
Create Custom Roles
If none of the default roles suit your needs, Admins may create custom user roles.
💡Note:
- When creating a custom role, users must have at least VIEW privileges on Sessions to be able to access the below Evaluation Plan functions EXCEPT "View Assigned Evaluations".
- When Portal Tasks are enabled, users will receive automated emails when new file request messages are sent.

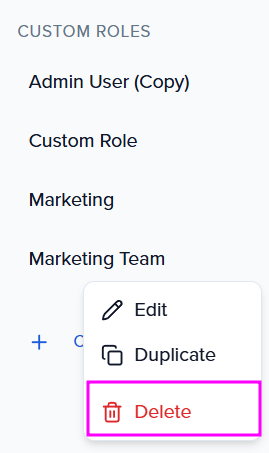
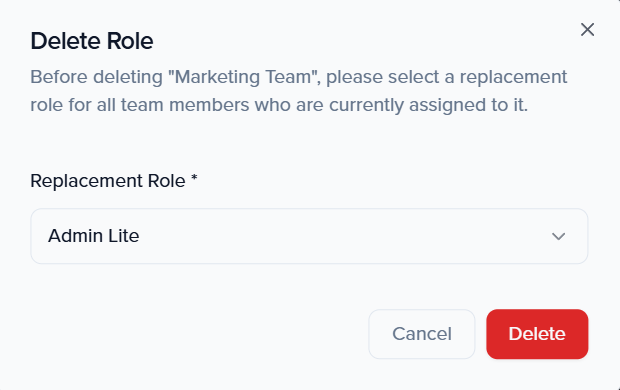
Delete Custom Roles
💡NOTE: ONLY custom profiles can be deleted.
-
Hover over the custom profile you would like to delete and select the three vertical dots to the right of the profile name to display the Delete option.
-
Within the pop-up window, select an existing profile (either custom or default) to assign to users who have the user type that you are deleting.
-
Once complete, select the Delete button.
Duplicate Roles
💡Note: Default & custom profiles can be duplicated
Hover over the profile you would like to delete and select the three vertical dots to the right of the profile name to display the Duplicate option.

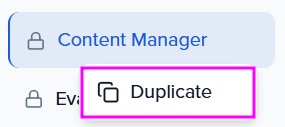
Any profiles that you duplicate will appear as a new custom profile.
When duplicating the default roles "Session Manager" or "Evaluator Session Manager", admin users can now leverage filters to control what sessions and contacts these users have access to.
Edit Custom Roles
💡NOTE: ONLY custom profiles can be edited
Hover over the custom profile you would like to delete and select the three vertical dots to the right of the profile name to display the Edit option.

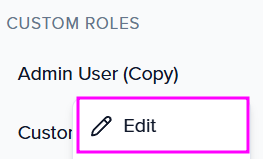
Within the pop-up window, users will be able to edit the profile name as well as add a permission description.

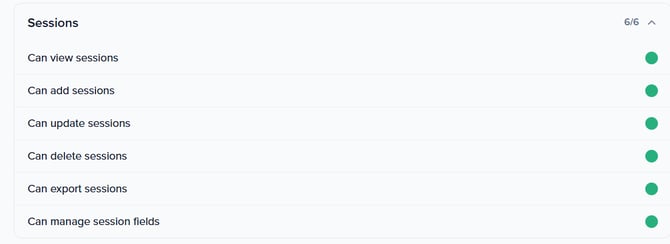
Field permissions (who can see or edit each field)
Use field-level permissions to limit sensitive data and keep teammates focused only on what they need.
Where: Event Team → Permissions → Role → Fields

How to configure
-
Use the search bar to find a field, or scroll the list.
-
Set access per field:
-
View (Default) – user can see the field, but cannot change it.
-
Lock – user can see, but cannot update the field.
-
Hide – field is hidden for this role in UI.
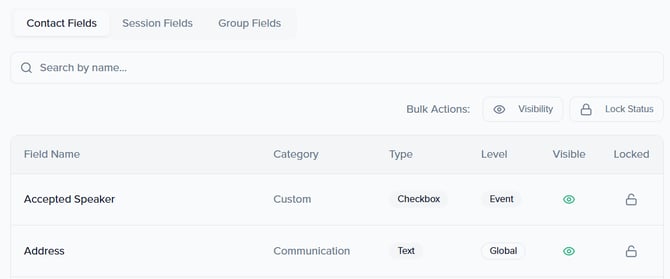
-
-
Repeat for both Session and/or Group Fields as needed.
-
Changes are saved automatically.
Tips & best practices
-
Start from a copy of a similar role or custom roles, then adjust field access to fine-tune access for vendors, volunteers, or reviewers.
-
Hide Personal Identifiable Information (e.g., phone, compensation) from roles that don’t need it.
-
Admin roles automatically retain full visibility and edit rights.